Summary
To style Contact Form 7 forms in WordPress without CSS start by installing Contact Form 7. Create a new form with Contact Form 7. To style the form open the Responsive Block’s Contact Form 7 Styler, make changes and Publish.
The article also covers adjusting colors, spacing, and layout so users can improve form appearance without writing any code.
Do you want to enhance the appearance of your Contact Form 7 forms on WordPress?
The Contact Form 7 plugin simplifies creating contact forms on your WordPress website.
However, building a contact form from scratch can be a daunting task. Luckily, WordPress Contact Form 7 plugin is here to help.
As one of the most user-friendly tools in the WordPress toolkit, it was designed to boost effortless communication between you and your visitors.
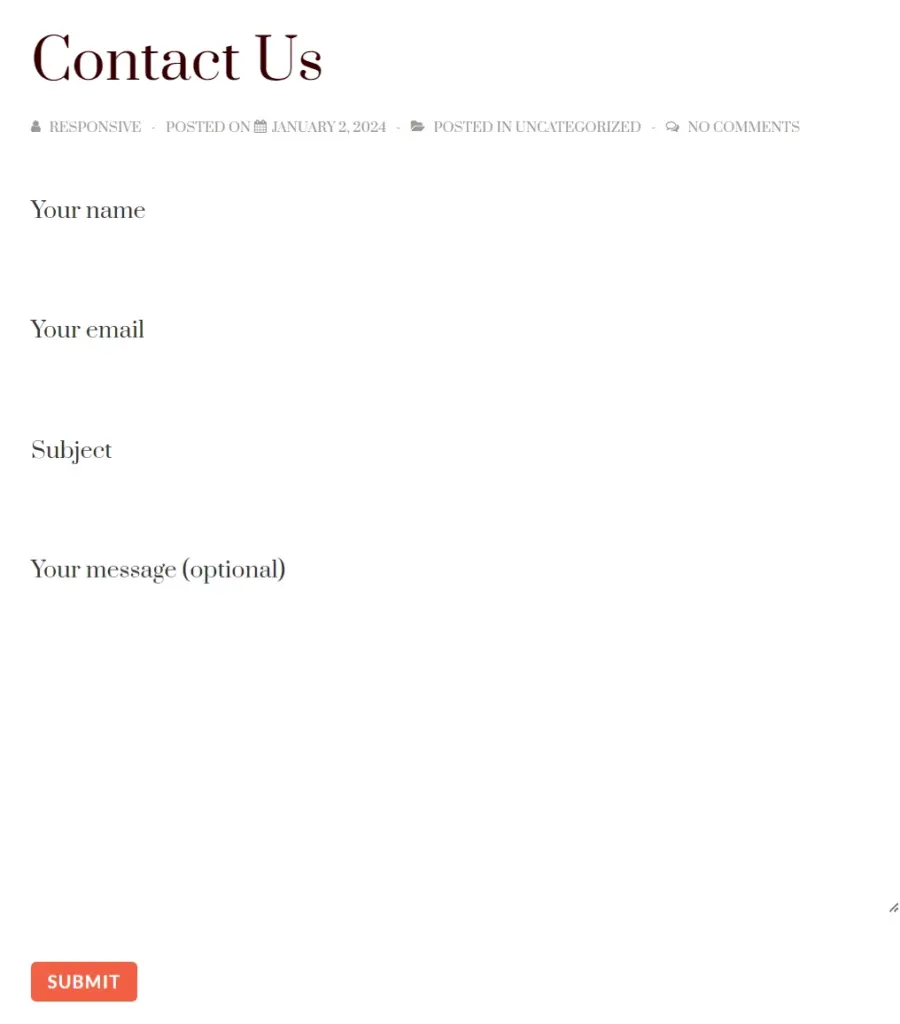
Despite being a popular plugin for creating contact forms in WordPress, the default form appears plain.
So in this article, we will guide you through installing and configuring WordPress Contact Form 7, from creating a contact form and styling it without any technical knowledge required.
Let’s get started!
Responsive Blocks is the Best WordPress Blocks Plugin – Get it for free!
What is Contact Form 7?
Contact Form 7 is a free WordPress form plugin that allows you to create different types of contact forms for your website.
With this plugin, you can easily create and manage multiple contact forms and customize them according to your preferences using simple markup.
Contact Form 7 is known for its simplicity and is one of the best contact form plugins available.
Why Should We Use WordPress Contact Form 7?
A contact form is an excellent way for visitors to connect with you in a clear, convenient, and organized manner. It ensures that your communication remains professional and secure.
Here are a few reasons why you should consider using Contact Form 7:
1. Free of Cost: The plugin has no premium version, meaning you won’t face distractions or upsells to clutter your experience.
2. Customizable: Personalize your forms by adjusting available parameters, through plugins or applying CSS.
3. Theme Compatibility: Contact Form 7 is compatible with free and premium themes, so your contact forms will continue to function even if you change your website’s theme.
Why CF7 is Hard to Style
Contact Form 7 is a powerful and widely used plugin. However making alterations to it can be difficult for those who are just starting out with web design.
Contact Form 7 does not give you the ability to change how your forms look by providing drag-and-drop style options. Because of this, most of the changes that you want to make will require custom CSS. This can be overwhelming for someone who does not know coding.
CF7 has a basic HTML structure and a limited number of pre-defined CSS classes so the appearance of the forms relies heavily on the style of the theme being used. This can lead to inconsistent appearances, hence you must go back and manually change the styles of each form so they look like the other forms on your website.
When you want to make small changes such as spacing, colour, or button style you will need to inspect the element and then write a custom CSS rule for that change. Many people will find this to be time-consuming and frustrating and it can take a lot of time if you are managing several forms.
Many users will find that they prefer to use a tool that helps to simplify this process. For example when working with a block-based site, you can design and style the form visually using Responsive Blocks which will reduce the amount of custom CSS that is necessary to create beautiful forms.
📢 My Real-World Test Results:
- Powered by Flexbox Container technology
- Number of blocks: 50+
- GTmetrix Performance Score: 98%
- Extensions like Animation, Display Condition, Responsive Condition and more
- Save design time with 100+ Premium-grade Starter templates
Installing And Configuring Contact Form 7
Contact Form 7 can be installed directly from the WordPress plugin repository.
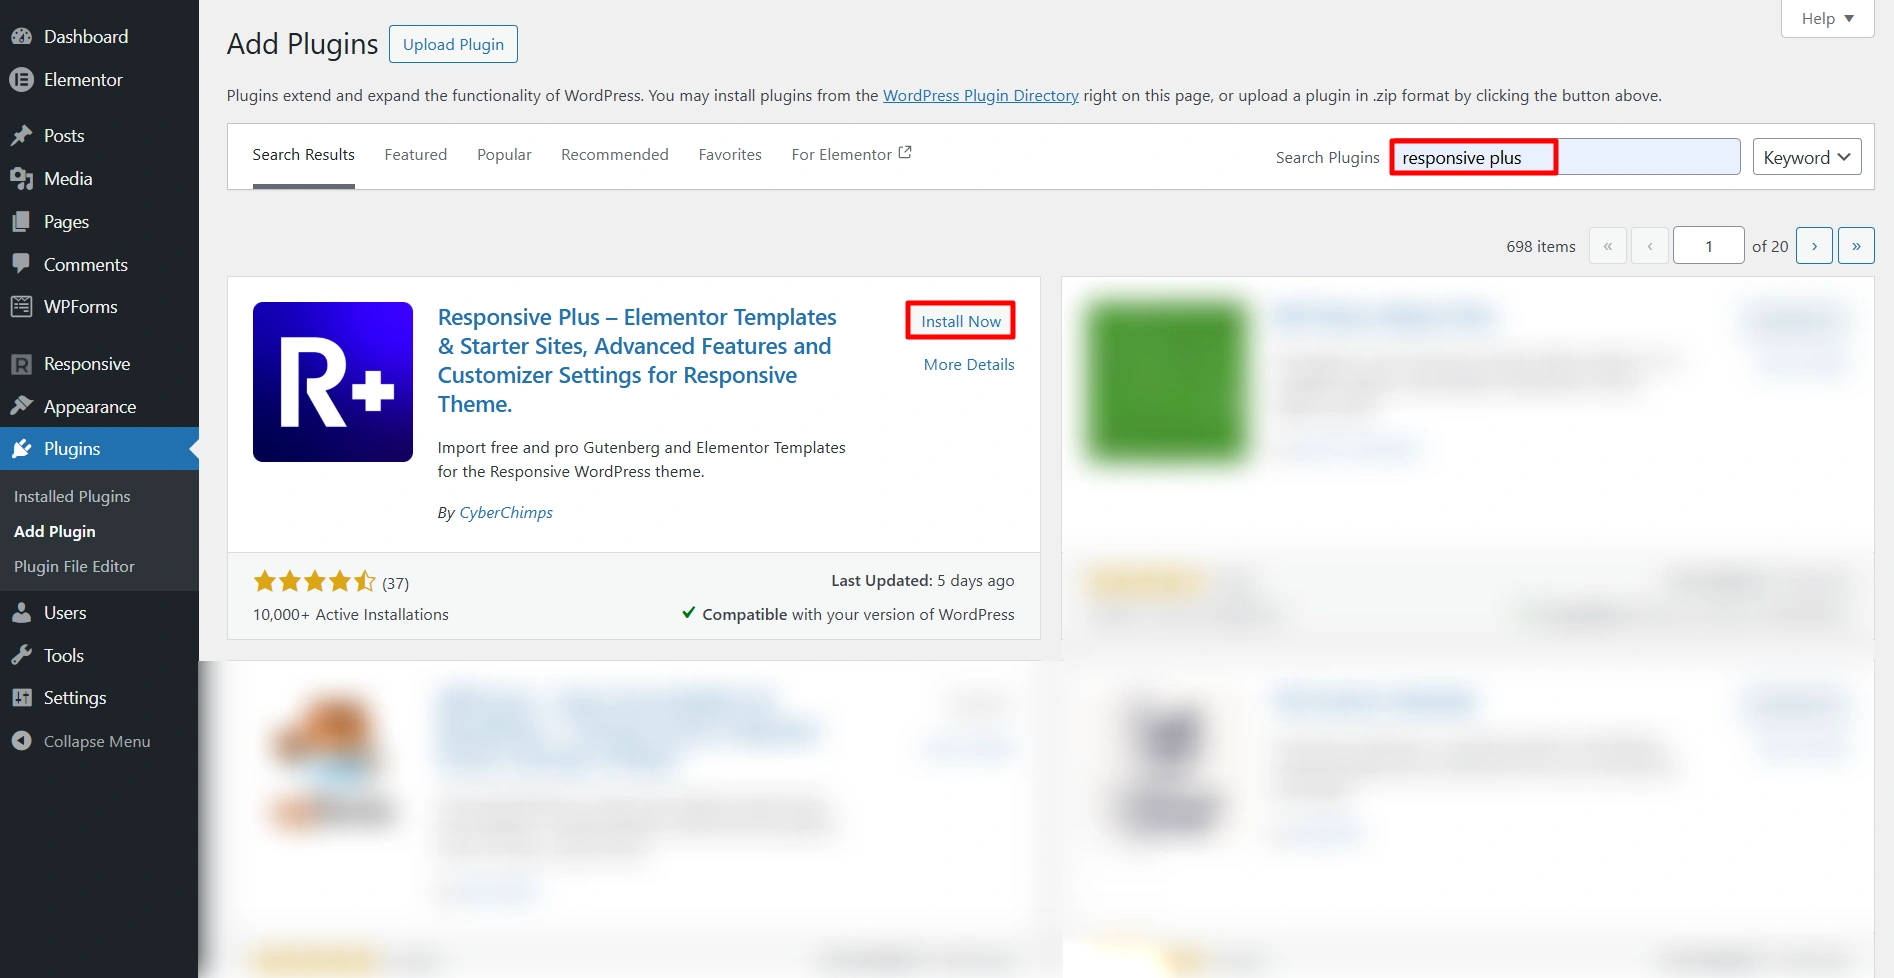
From your WordPress admin dashboard,navigate to Plugins > Add New Plugin.
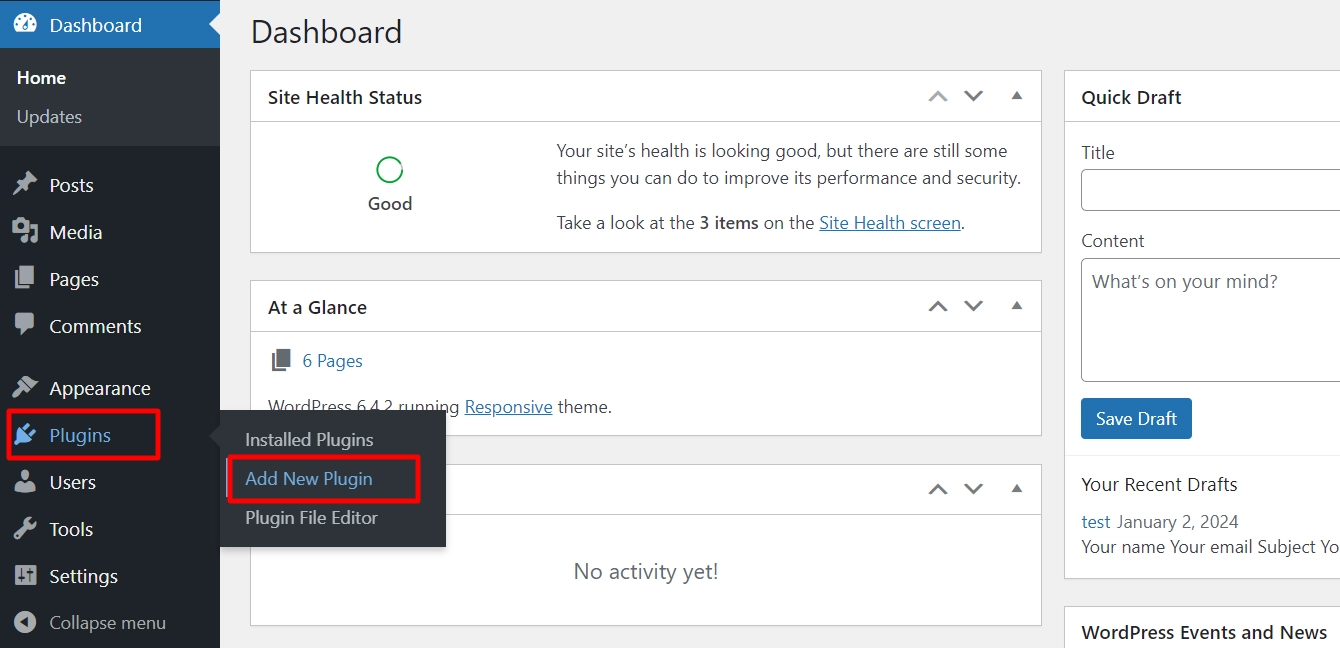
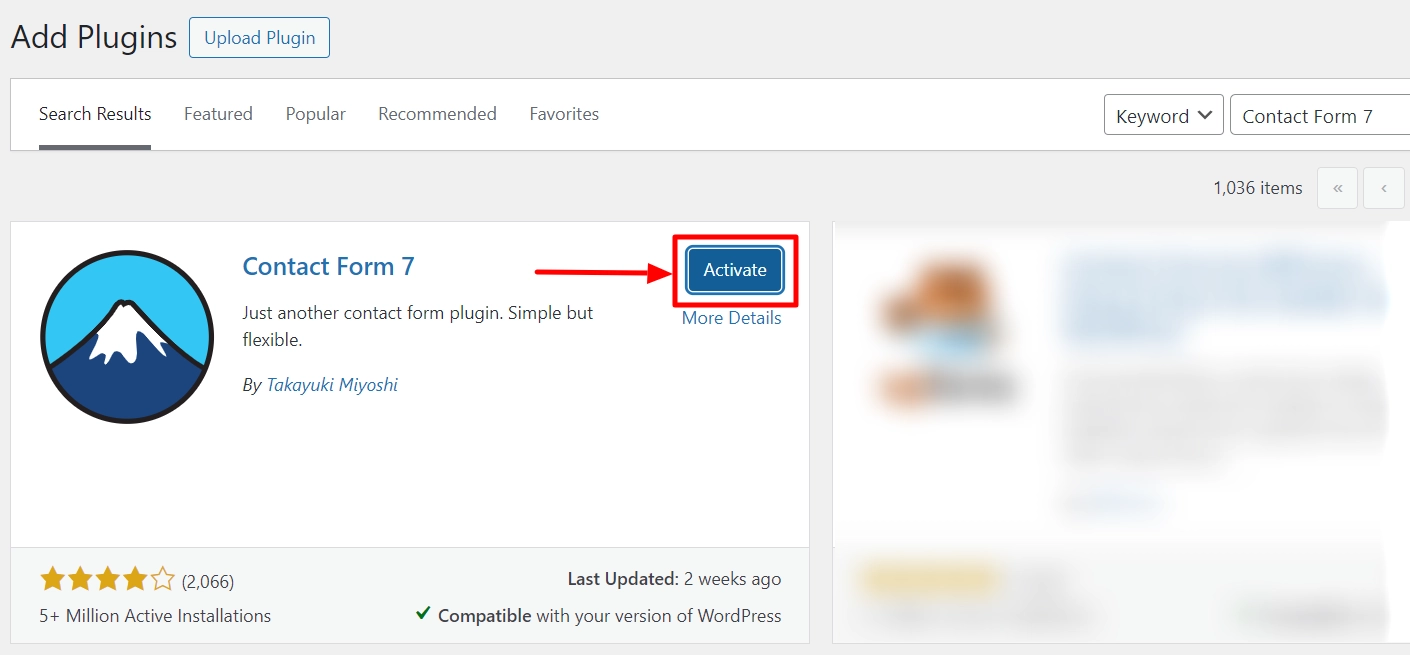
Search for Contact Form 7 and click on Install Now.
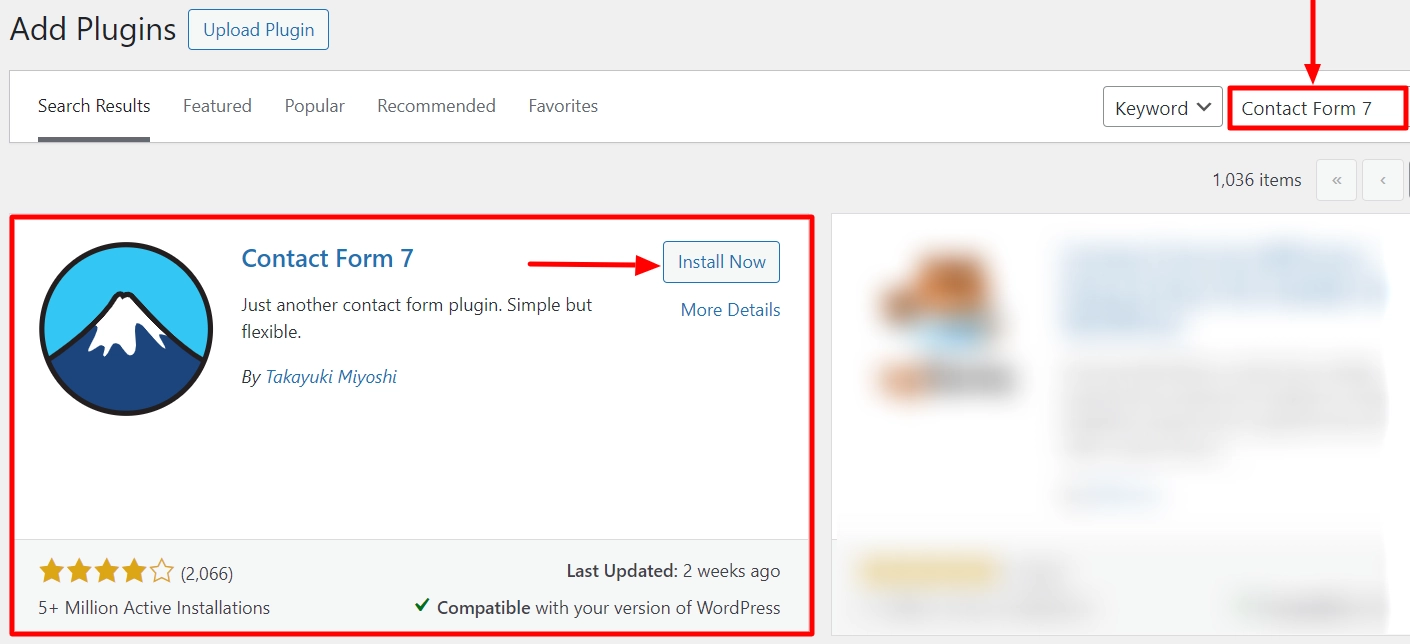
After the plugin is installed, click on Activate.
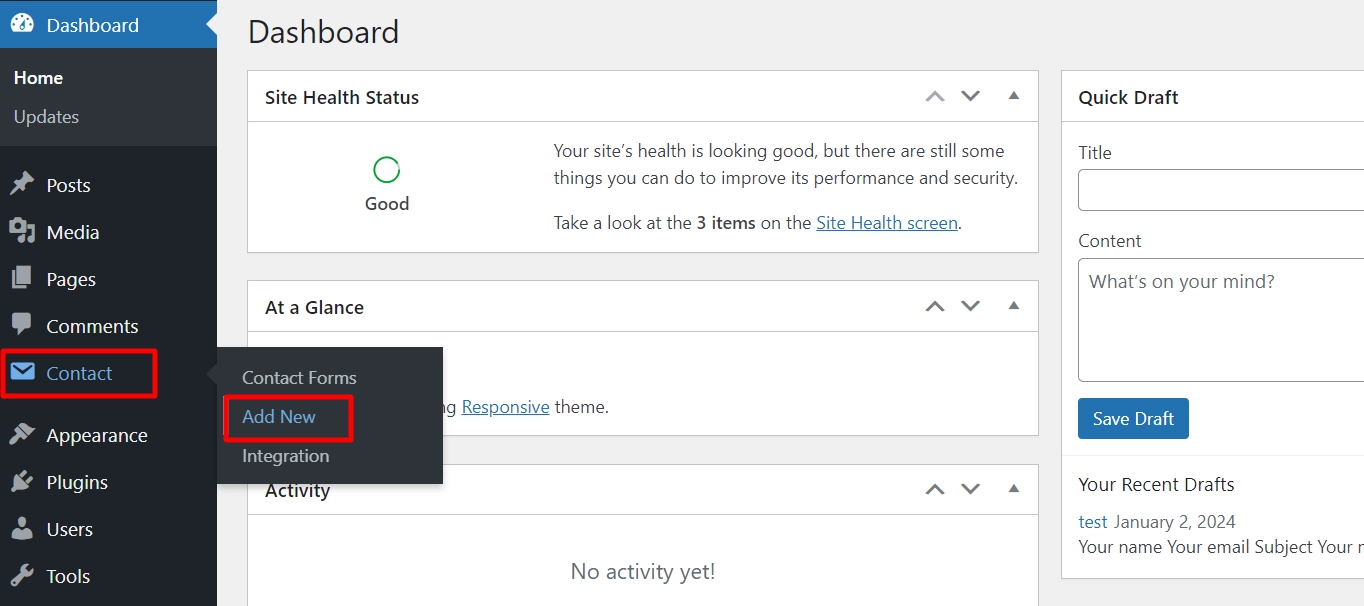
Once the plugin is installed, you will find a Contact menu item in the sidebar of your WordPress dashboard. This is where you can configure all of the settings for Contact Form 7.
Navigate to Contact > Add New from your WordPress dashboard.
Features of Contact Form 7
Here are the main features of WordPress Contact Form 7:
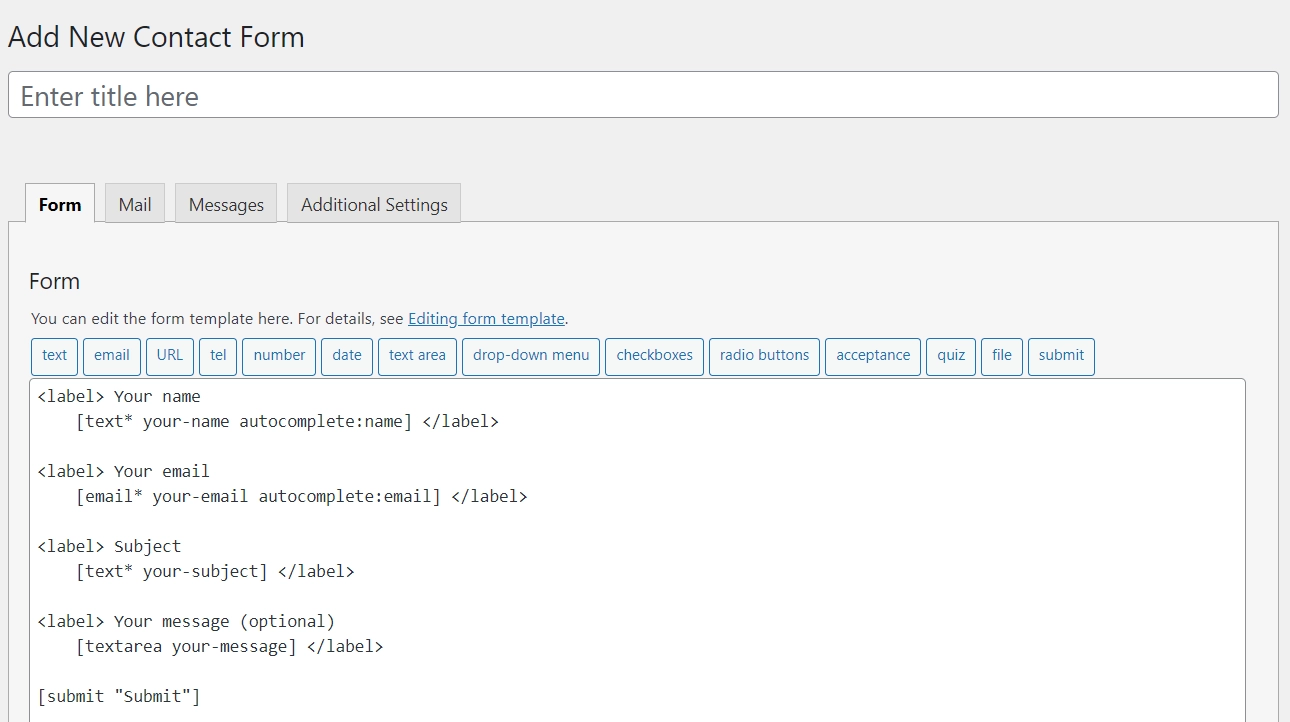
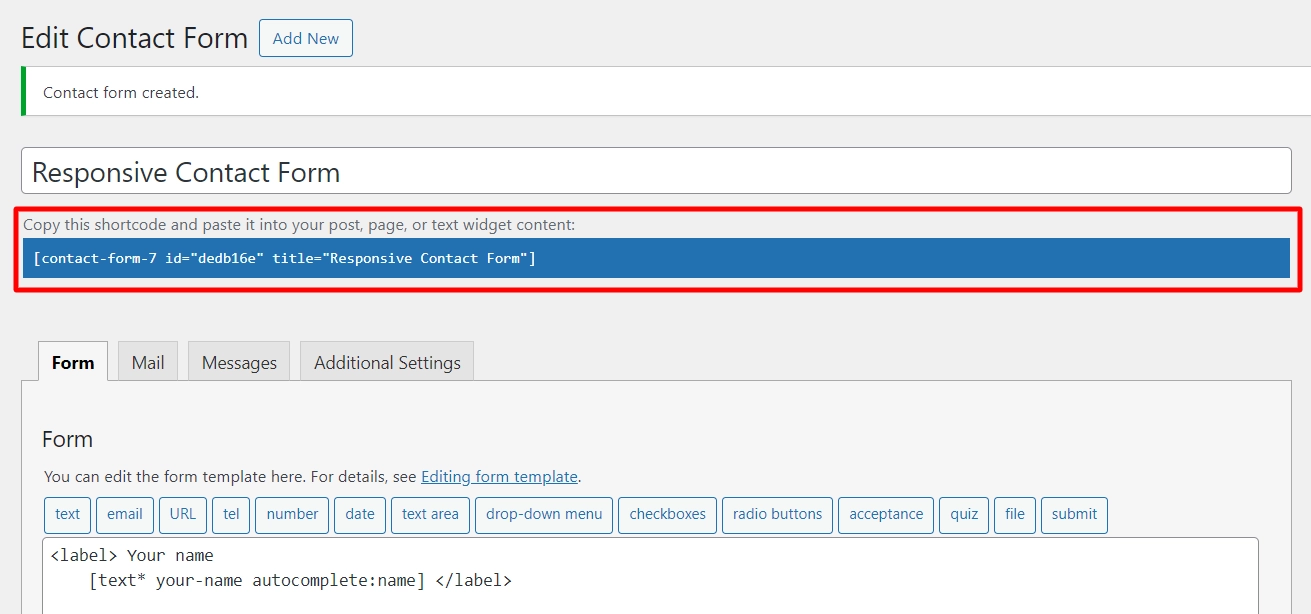
1. Form: The Form tab has a built-in template you can use or customize per your needs.
2. Mail: It allows you to set up email notifications for when the form is submitted so you never miss a message.
3. Messages: It lets you customize the auto-responses and validation messages your visitors receive.
4. Additional Settings: With advanced settings, you can combat spam using the ‘Quiz’ feature or integrate CAPTCHA for added security.
Contact Form 7 Tags
Before you start customizing the form, learn about these different form tags you will come across in Contact Form 7.
Contact Form 7’s form tags are important to the plugin’s functionality. These form tags work as shortcodes, generating specific form elements for your contact form when placed in the form editor.
Here’s a brief overview of each form tag:
- Text Fields: Generates a basic text input field.
- Email Fields: Creates an input field specifically for email addresses, including validation for proper email format.
- URL Fields: An input field designed for website URLs.
- Telephone Number Fields: An input for phone numbers.
- Number: Creates a form tag for a number.
- Date Fields: Provides an input field with a date picker.
- Textarea: Generates a larger text field suitable for longer messages or comments.
- Dropdown Menu: Creates a dropdown list for user selection.
- Checkboxes: Provides checkboxes for multiple selections.
- Radio Buttons: Generates radio buttons for single-choice selection.
- Acceptance: Typically used for agreeing to terms and conditions, it’s a checkbox that users must check to proceed.
- Quiz Field: Useful for basic spam prevention; users answer a quiz.
- reCAPTCHA: An advanced form tag that enhances spam prevention. Integrates Contact Form 7 with reCAPTCHA to deter spam bots.
- File Upload Field: Allows users to attach and upload files.
- Submit Button: Adds a submission button to your form.
How to Create a Form using Contact Form 7 Plugin?
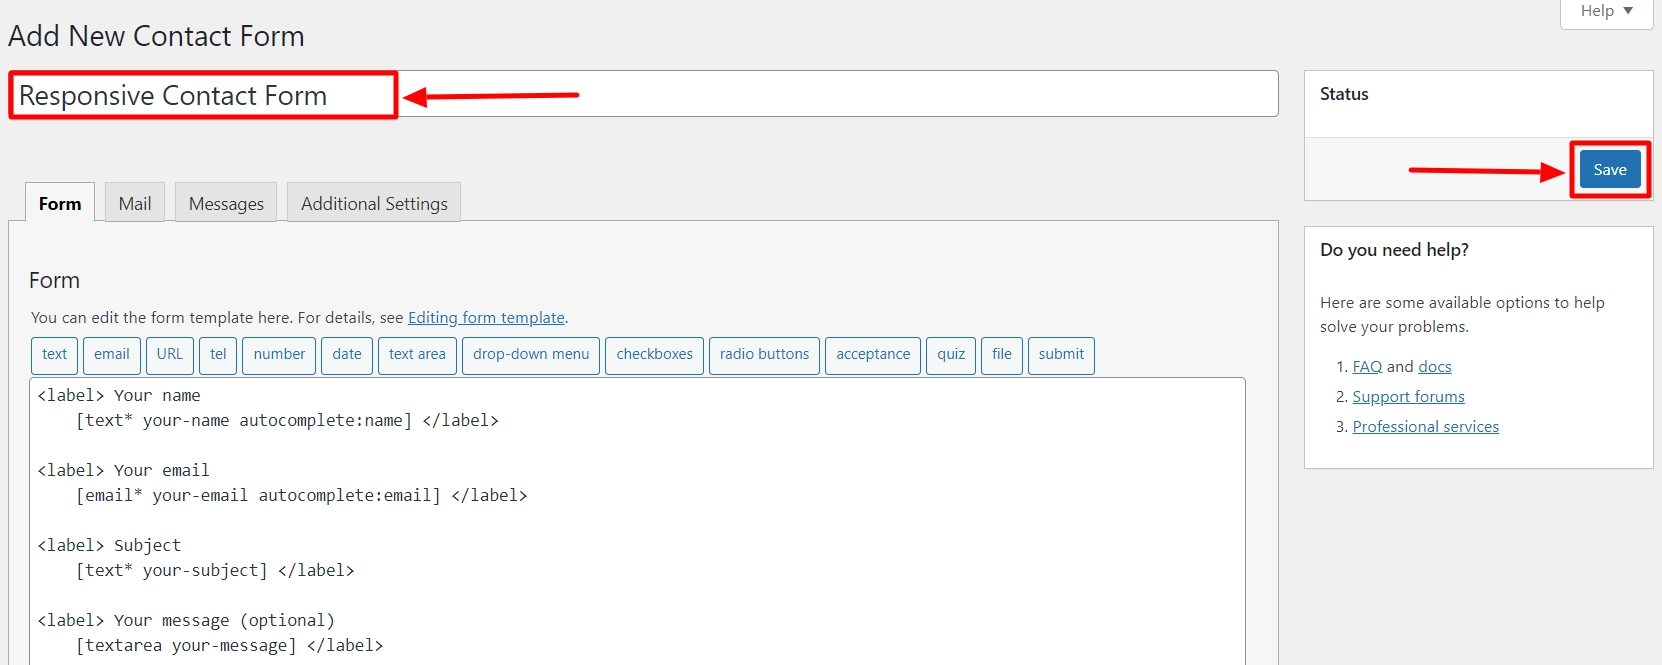
Now, name your contact form. We are naming it as the Responsive Contact Form.
Once you are done, click on Save.
Then, you will see a short code generated. Copy the code.
The next step is to add the shortcode to your blog post or page. To do this, follow the steps below:
1. Edit an existing post/page or create a new one.
2. In the WordPress editor, click the ‘+‘ sign at the top and select the Shortcode block.
3. Enter the shortcode for your Contact Form 7 form in the shortcode block.
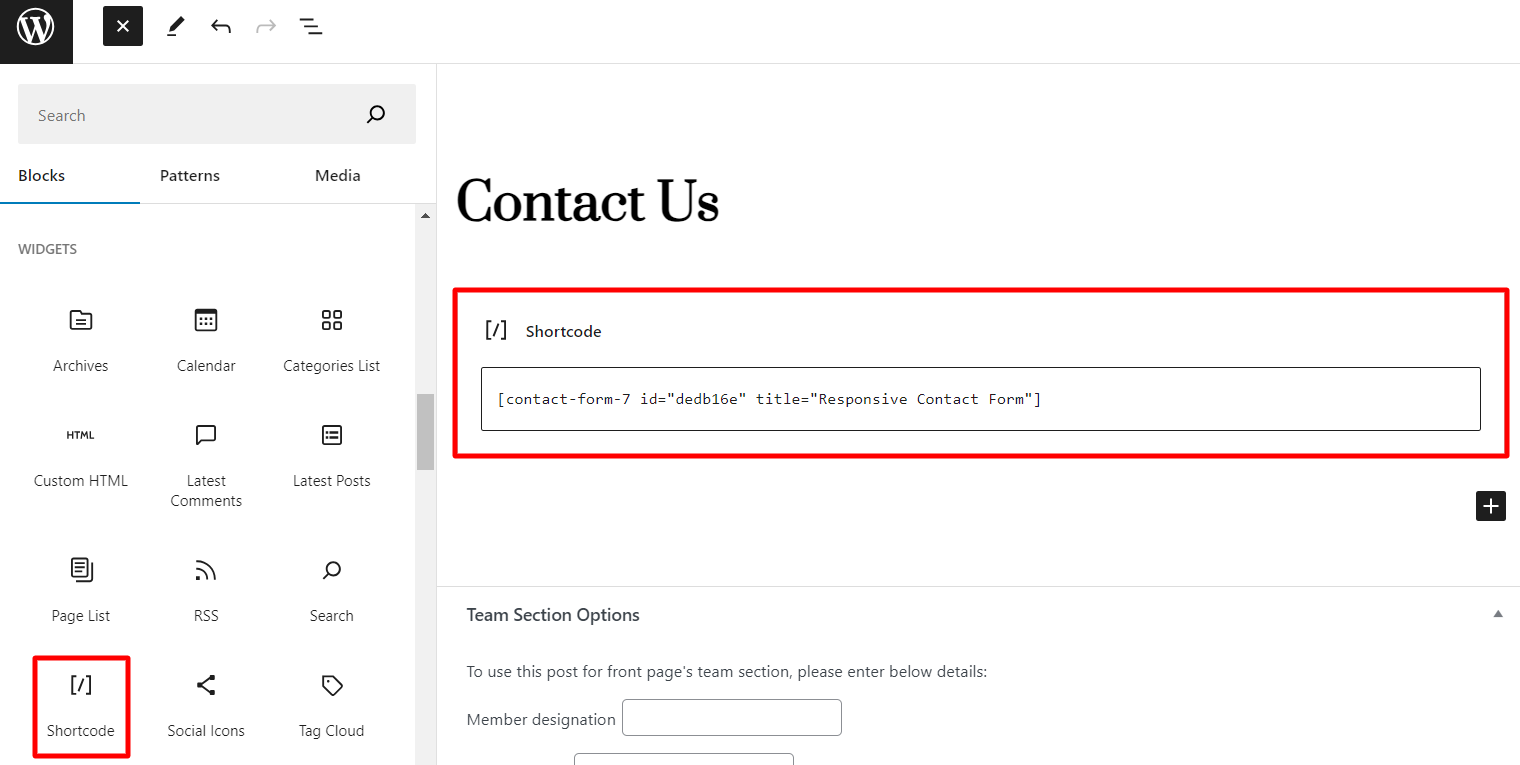
4. Update or publish your WordPress blog post to see the contact form in action.
How to Style Contact Form 7 Forms Using Responsive Blocks
After creating and structuring your form, you need to style it.
One way to do that is using custom CSS. If you lack the technical skills, there’s a simple solution for you.
Introducing Responsive Blocks plugin.
It has a wide range of professionally designed Gutenberg blocks, including a Contact Form 7 Styler block , available for free.
With more than 50+ creative Gutenberg blocks, you can design beautiful pages without writing a single line of code, and the settings are easy to customize to create your unique look.
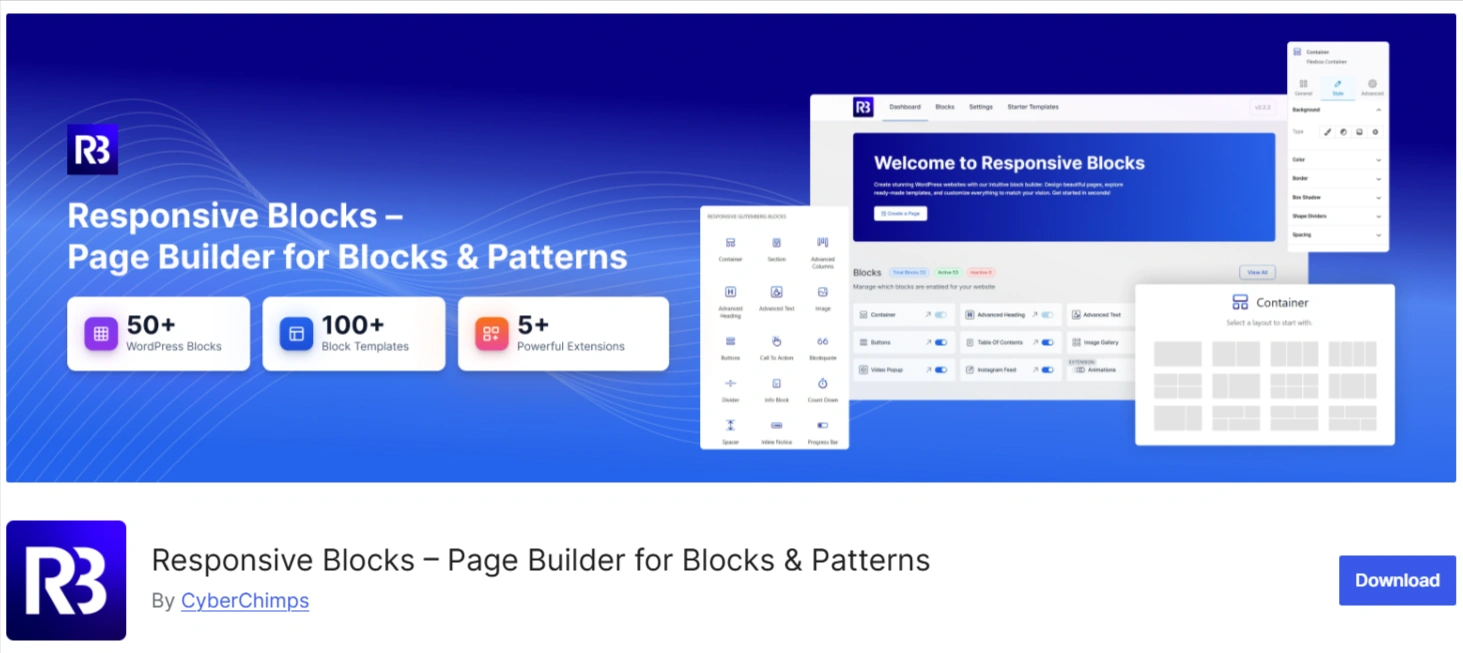
Install the latest version of Responsive Gutenberg Blocks plugin to start using the widget.
Features of Responsive Blocks – WordPress Gutenberg Blocks Plugin
- Simple User Interface: Each block has a user-friendly interface that is easy to navigate. You can create stunning landing pages without any coding knowledge.
- Pattern Importer: Using the Pattern Importer feature, you can import beautifully designed Gutenberg sections and pages to your site.
- Responsive Layout: The blocks are AMP optimized, as AMP is an essential factor for search engine rankings.
- Easy Customization: The blocks are highly customizable, allowing you to create complex layouts quickly and easily.
Installing Responsive Gutenberg Blocks Plugin
Follow these steps to install the plugin:
Go to your WordPress dashboard and navigate to Plugins > Add New.
Search for Responsive Gutenberg Blocks and click Install Now. Once you have installed the plugin, click the Activate button to enable it.
Then, navigate to the post or page where you have placed the contact form.
Using Responsive Blocks’ Contact Form 7 Styler Block
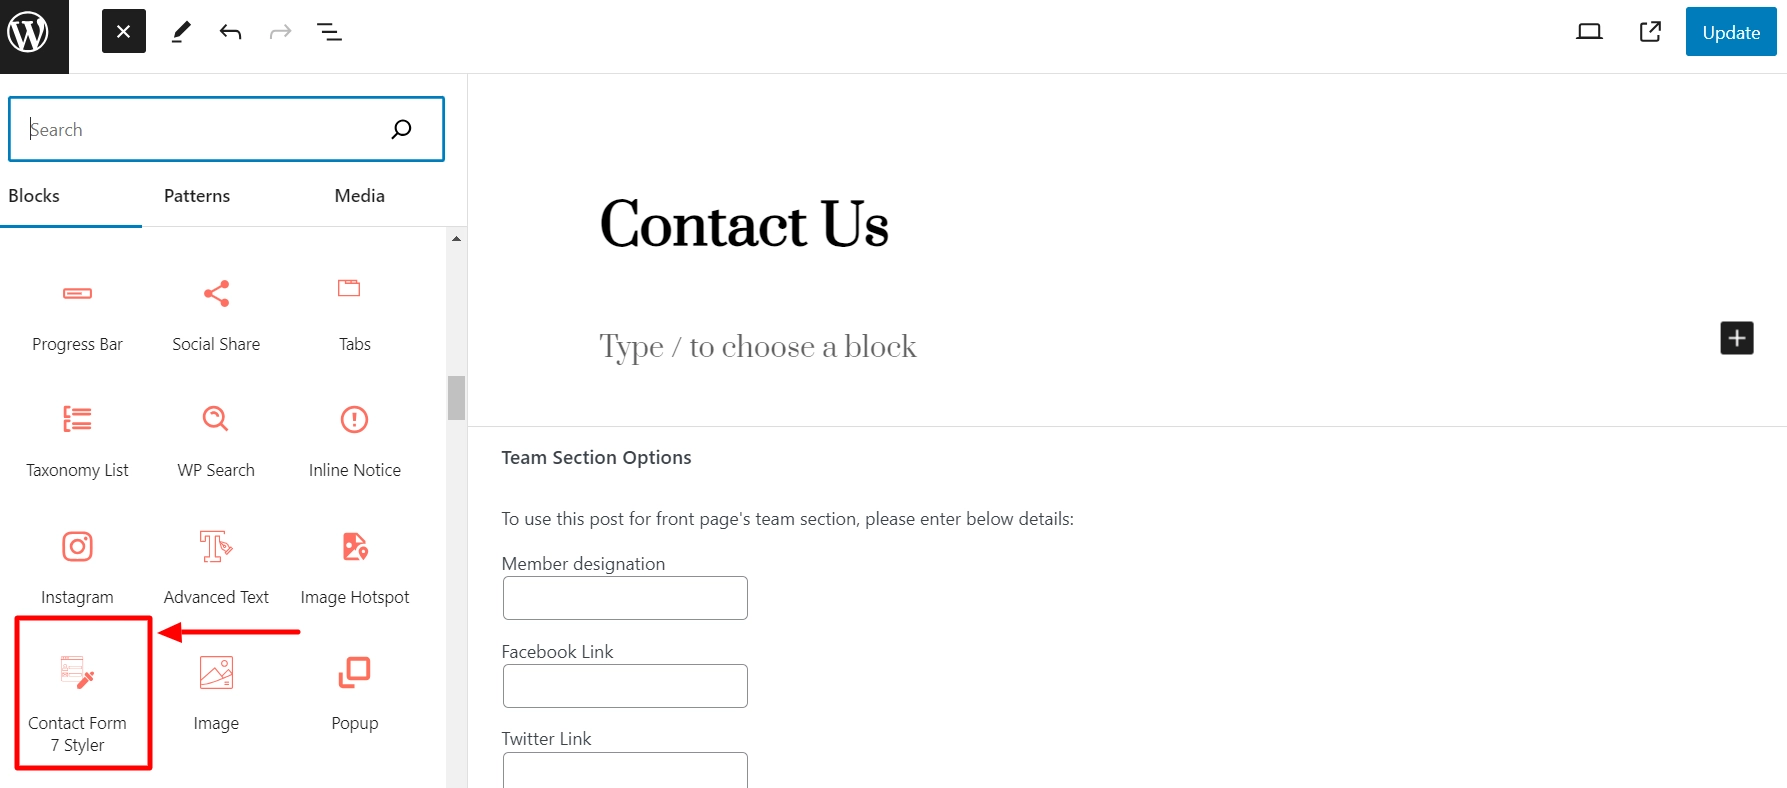
From the menu on the left-hand side, drag the Responsive Blocks’ Contact Form 7 Styler block to the editor.
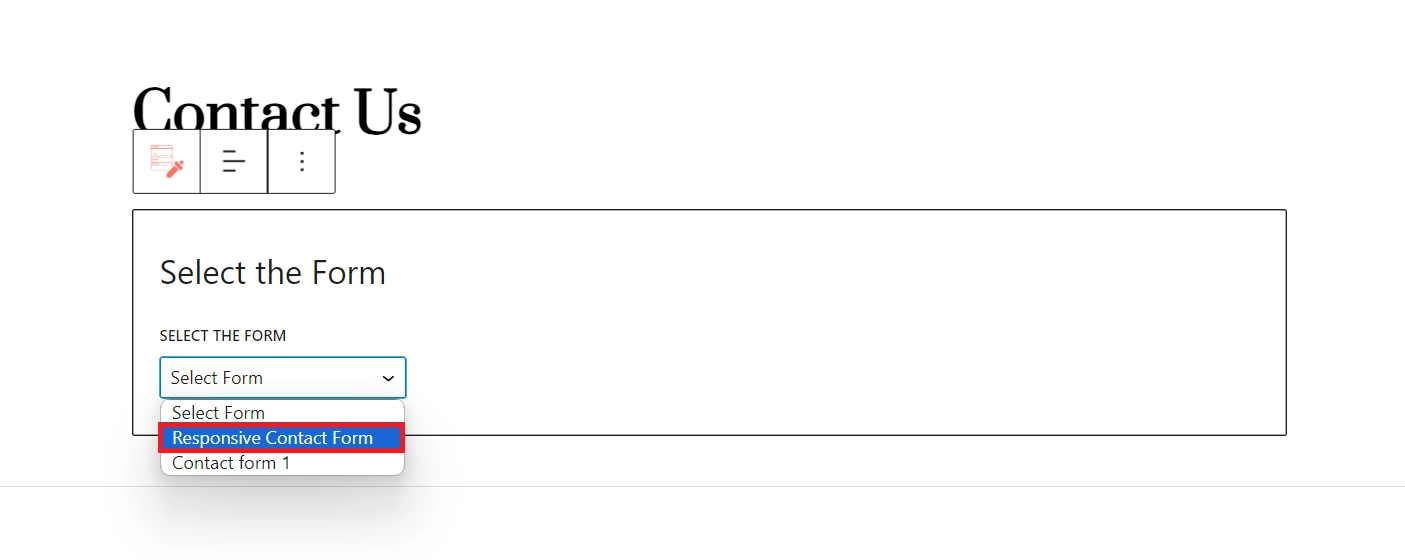
Once you add the widget, it will ask you to select the form for which you want to style it. Here, we’ve selected the Responsive Contact Form.
On the right-hand side block options menu will get open.
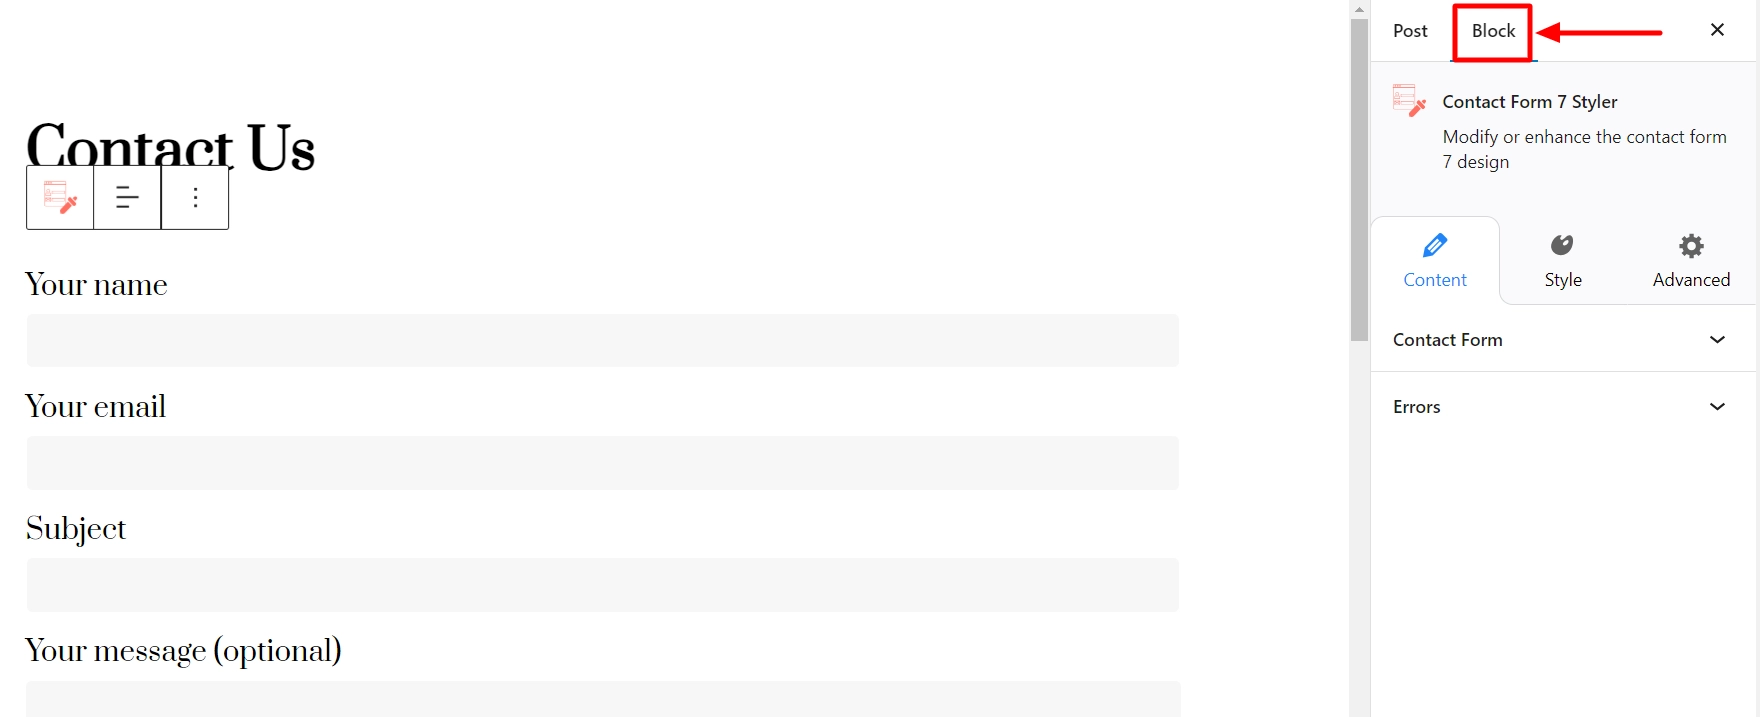
It has three tabs: Content, Style and Advanced.
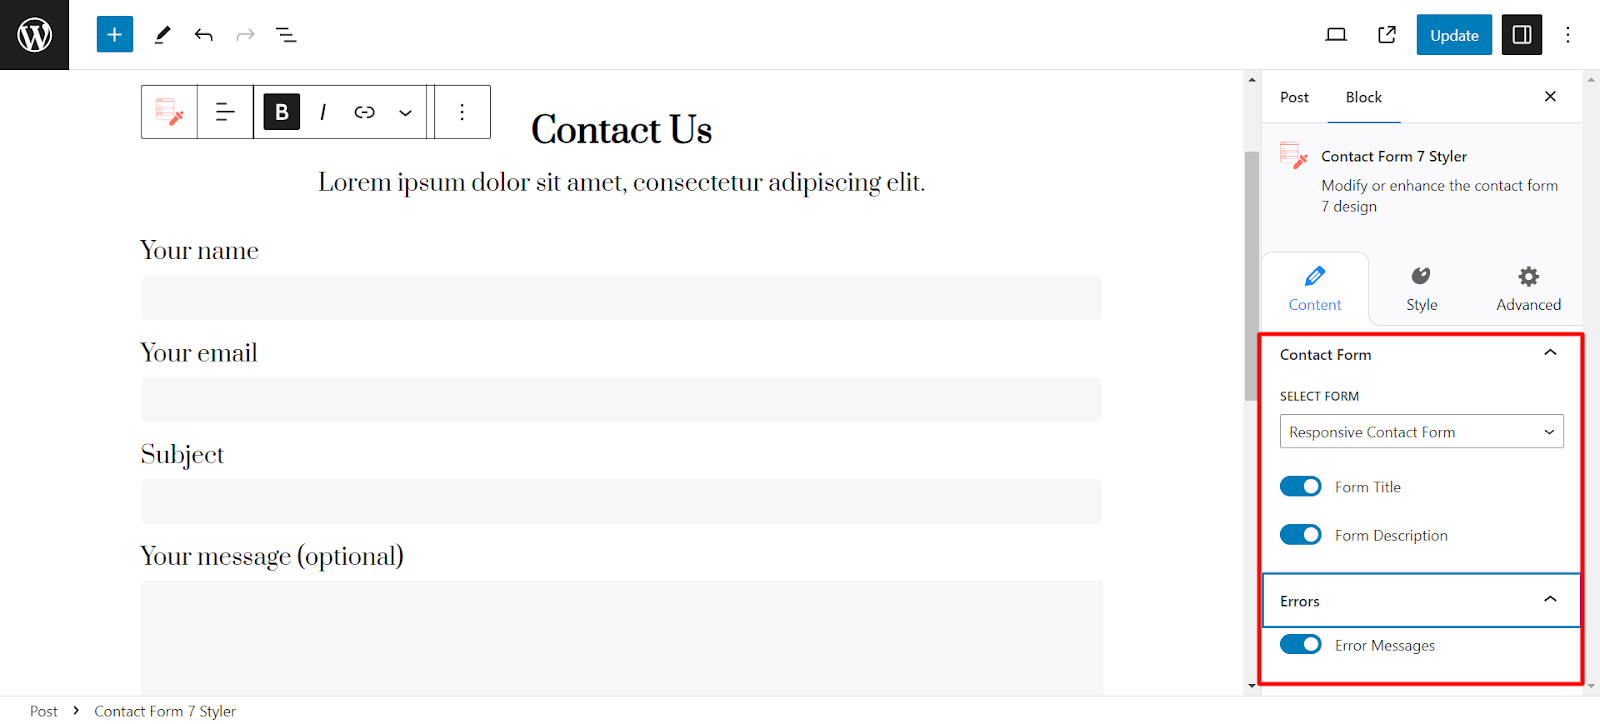
Content Tab
By default, the Content field will be open, allowing you to select which forms you have saved that should appear in the widget.
Enable or disable Form Title and Description and Error Messages.
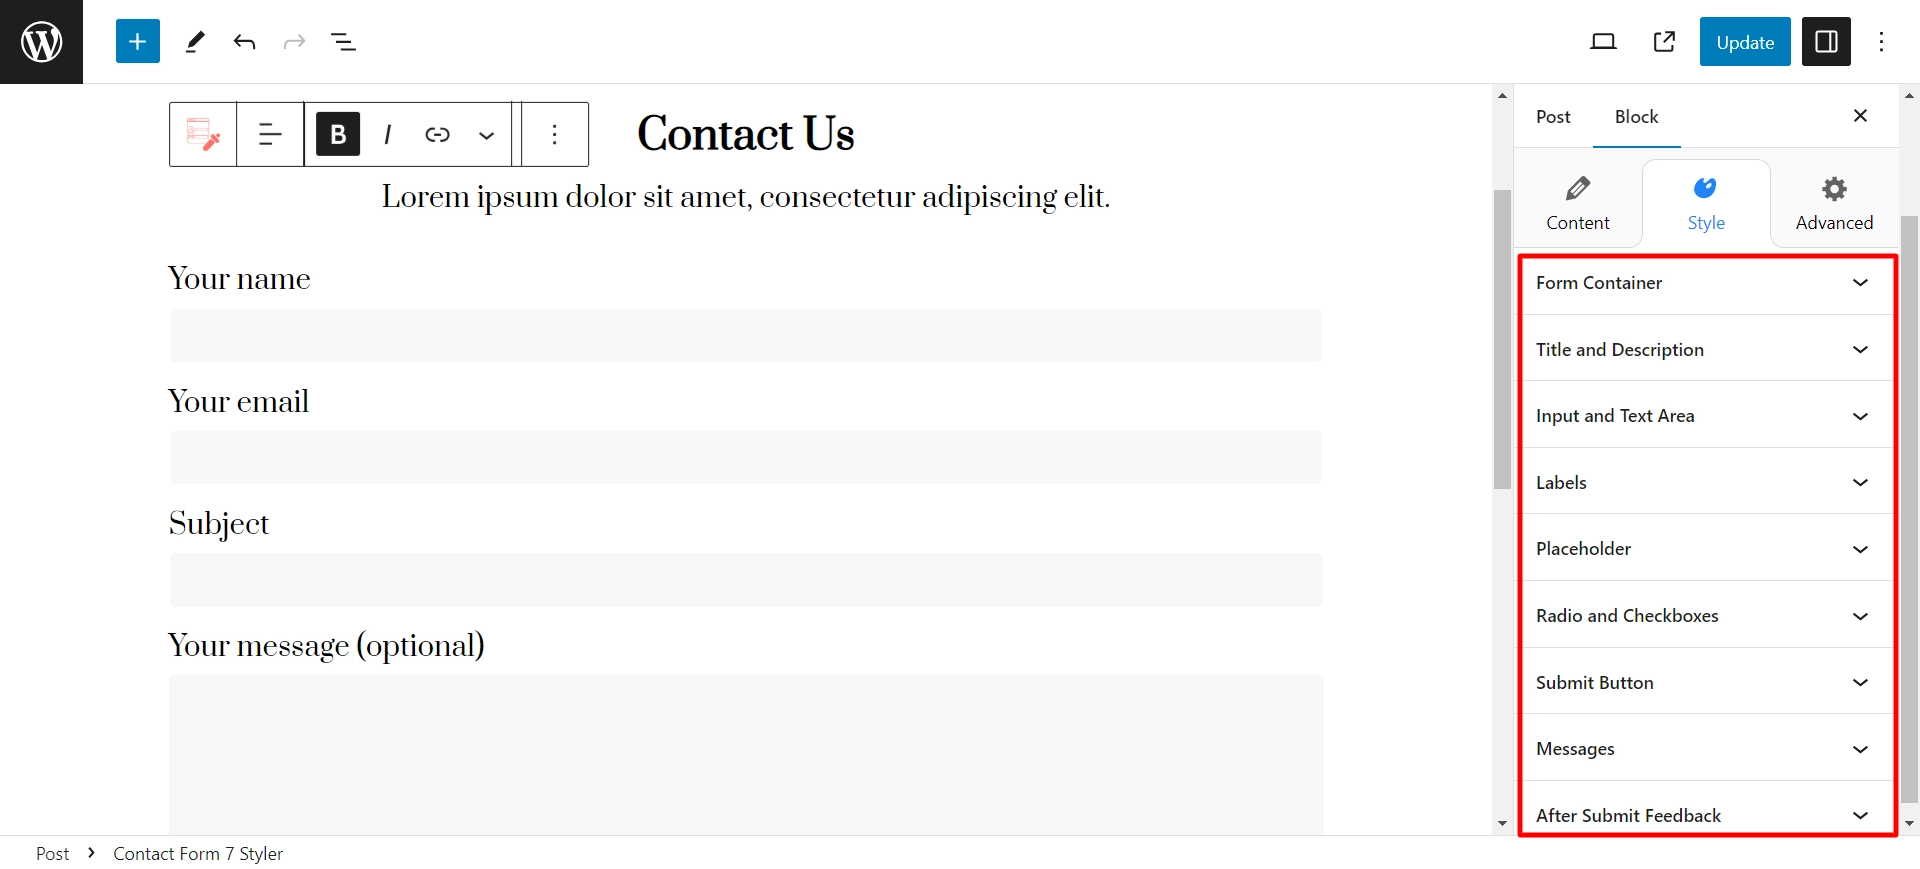
Style Tab
Let’s explore the Style tab, which offers nine sub-tabs for adjusting the appearance of your contact form.
These sub-tabs include
- Form Container
- Title & Description
- Input and Text Area
- Labels
- Placeholder
- Radio and Checkboxes
- Submit Button
- Messages,
- After Submit Feedback
To begin with, let’s take a look at the Form Container sub-tab, which allows you to adjust the settings related to your form’s labels.
Form Container
You can adjust the alignment and width of the form for each device – laptop, tablet, and mobile.
Title & Description
You can customize the form’s title and description by adjusting the Alignment, Title Tag, Typography, Color, Font Family, Font Size, Font Weight, Line Height, and Letter Spacing.
Input and Text Area
Within this sub-tab, you have the following options:
- Text Color and Text Indent (px)
- Background Color and Padding
- Input Width (%) and Height (px)
- Textarea Width (%) and Height (px)
- Input Typography
- Font Family, Size and Weight
- Line Height
Labels
You can configure typography, text color, and label padding.
Placeholder
Enable show Placeholder and then customize the color
Radio and Checkboxes
In this sub-tab, you can customize the contact form checkbox. You can adjust the checkbox input size, typography, color options, border width, and checkbox border radius.
Similarly, you can also modify the radio button in your contact form. You can alter the radio input size and radio button border-radius.
Submit Button
You can set button color, background color, border style and color, and input values for button border width and height.
Messages
You can customize the style of the error messages by adjusting the typography and color settings.
After Submit Feedback
Here you get to style the message that appears after submitting the form. Customize Success and Error Message Colors, Typography, and Spacing with Border.
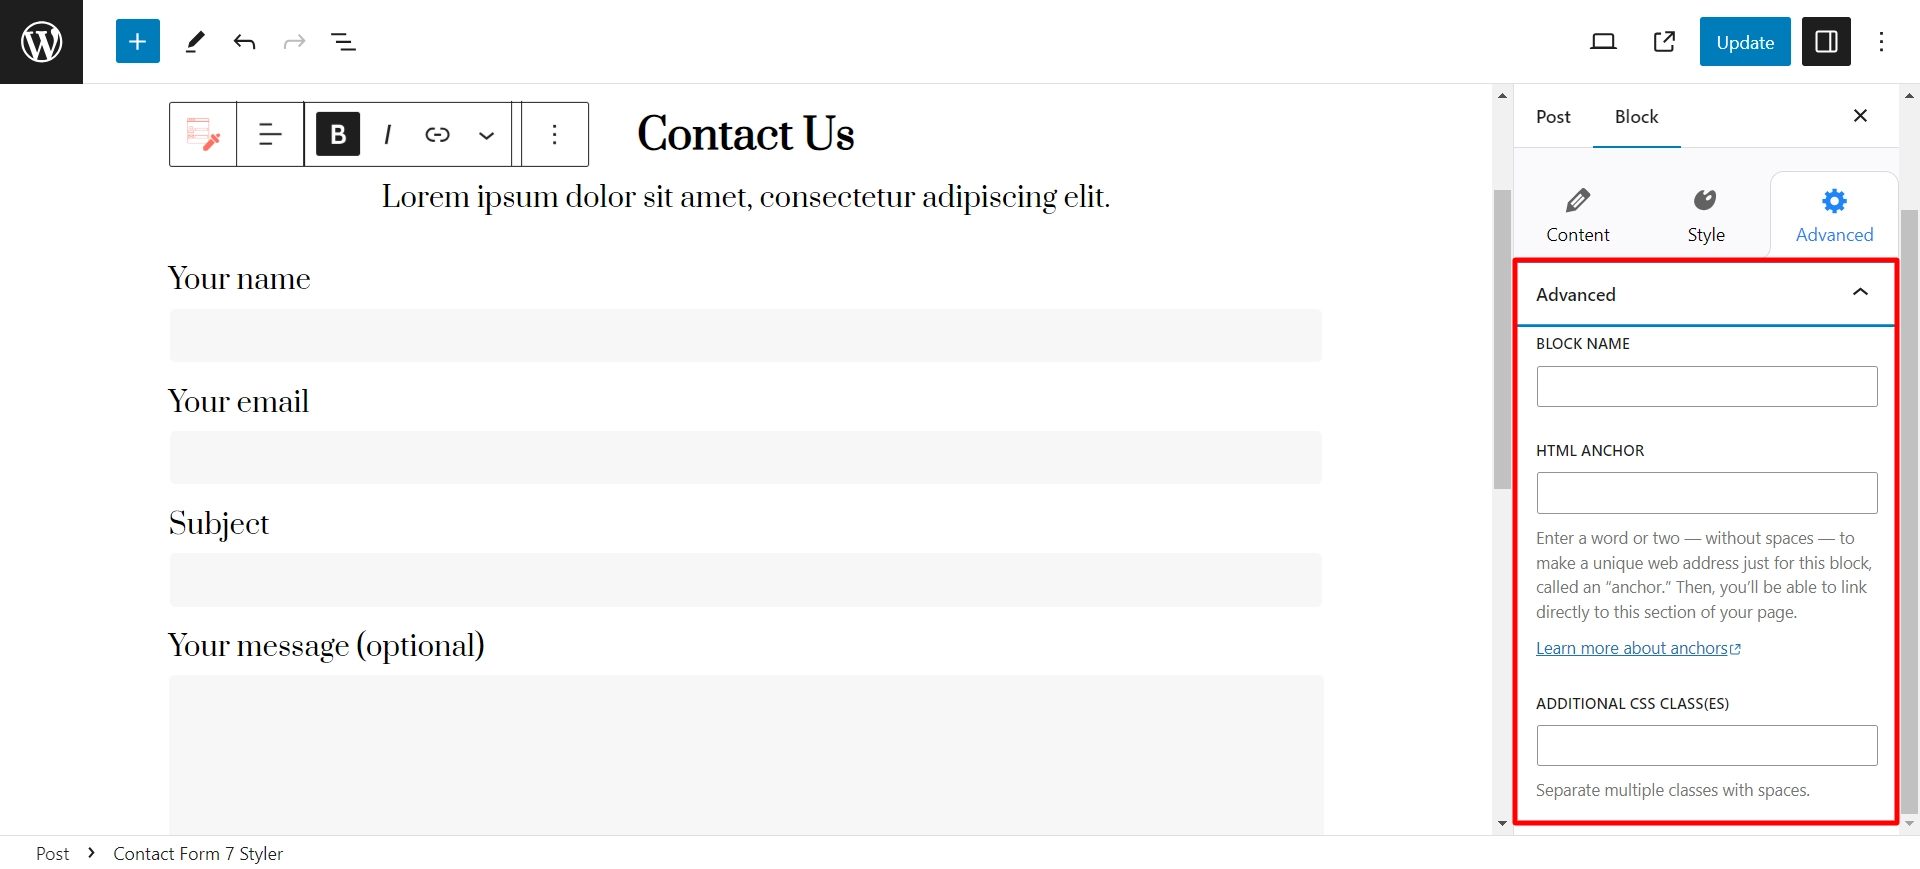
Advanced Tab
You can additionally customize your contact form on the Advanced tab by adding CSS classes.
Enhance your Contact Form 7 experience with the new Contact Form 7 Styler in Responsive Blocks plugin.
When You Should Use CSS
While visual tools and plugins can help make styling Contact Form 7 easy, there are also many situations in which you may want to use CSS instead. Because it will give you more control and flexibility.
You should use CSS in the following situations:
- If you need precise control over spacing, font, color, and advanced style that a plugin cannot provide.
- If you want to create unique effects such as animation, hover event, or transitions for your form elements.
- If you need to use global styles site-wide to maintain consistency among different forms.
- If you must follow certain branding requirements or have strict guidelines that require pixel-perfect customization.
- If you are comfortable with coding and want full control of how the form looks and behaves in the browser.
FAQ
Once you activate the Responsive Gutenberg Block plugin, go to the Resp Blocks tab on the left-hand side of the WordPress admin and turn on the Contact Form 7 Style option.
Enhance your WordPress contact form 7 by installing and activating the Responsive Gutenberg Blocks plugin in the starter. This plugin provides numerous styling functionalities that you can use.
Go to the Style tab to customize the Submit Button in Responsive Gutenberg Blocks. You can adjust various settings to your preference, such as alignment, button width and height, typography, horizontal and vertical padding, border, color settings, and much more.
Conclusion
Having contact forms on your WordPress website is essential so you can interact with your visitors effectively.
Maintaining consistency between the colors and design of your website and the forms you create is crucial, as any disparities can negatively impact user experience and drive them away from your website.
This is where the Responsive Gutenberg Blocks plugin comes in handy, as it enhances the styling of the Contact Form 7 plugin.
If you enjoyed this article, don’t forget to go through these as well:
- Create High-Quality Order Forms On Your WordPress Website
- How To Build A Trustworthy Website?
- How to Style Contact Form 7 Forms Without CSS
Are you looking to create forms on your WordPress website? Grab the Responsive Theme and the Responsive Gutenberg Blocks to get started!