Summary
The article explains how to create a staging site for WordPress. It shows ways to set up a separate test version of your site.
It also covers using plugins or hosting tools to clone your site, make changes safely, and then push updates to the live site without risk.
Are you looking for an easy way to create a WordPress staging site?
Creating a staging site can be a great option if you want to make changes to your WordPress website before making it live.
This way, you can test all modifications before implementing them on your website.
Fortunately, using a WordPress staging plugin can make this process effortless. It enables you to create a copy of your website for testing without adversely affecting the live site.
Several popular WordPress backup plugins also offer staging site creation.
But, in this article, we will show you the only method you’ll need to create a WordPress staging site.
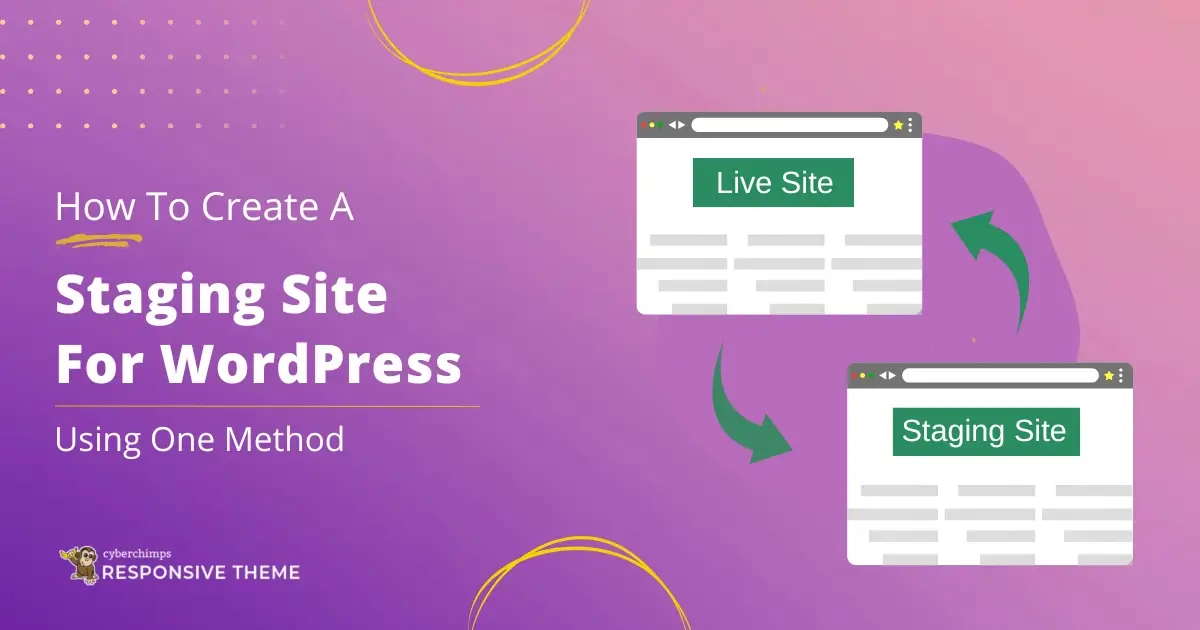
What is a Staging Site?
A staging site is a replica of a website built to test and preview updates or new features before they are launched on the live site.
Such sites are usually hosted on a separate web server to prevent any modifications or updates from impacting the live site while they are being worked on.
Staging sites enable developers and website administrators to safely make any necessary changes and test them without jeopardizing the quality of the live site.
Best Practices for Staging Sites
Before creating a staging environment, you need to consider a few crucial things. Let’s look at each of these separately.
1. Backup Your Live Site
Taking a full backup is essential. This includes backing up all files and databases on either your server or an off-site location where they can be retrieved at any time. You can use backup plugins to create a copy of your site and upload them manually to a subdirectory.
2. Clear Your Cache
The cache may show the previous version when you make website changes, push them to live, and see that nothing has changed. Clearing your cache when you push your new changes to the live site will help you see your changes without any delay.
3. Keep Your Production Database Separate From the Staging Database
When working in a staging environment, never mix the staging database with your production database by overwriting the latter. Interfering with your production database can cause your entire website to break.
4. Don’t Give Public Access to Your Staging Site
Keep your site private and secure by no-index and no-follow. So they don’t appear in search engine results. Also, make sure to password-protect your staging site for extra security.
How to Easily Create a WordPress Staging Site
Creating a staging site using WP Staging can be a great way to test new features and make changes to your website without affecting your live site.
Here are the steps you need to follow to create a staging site:
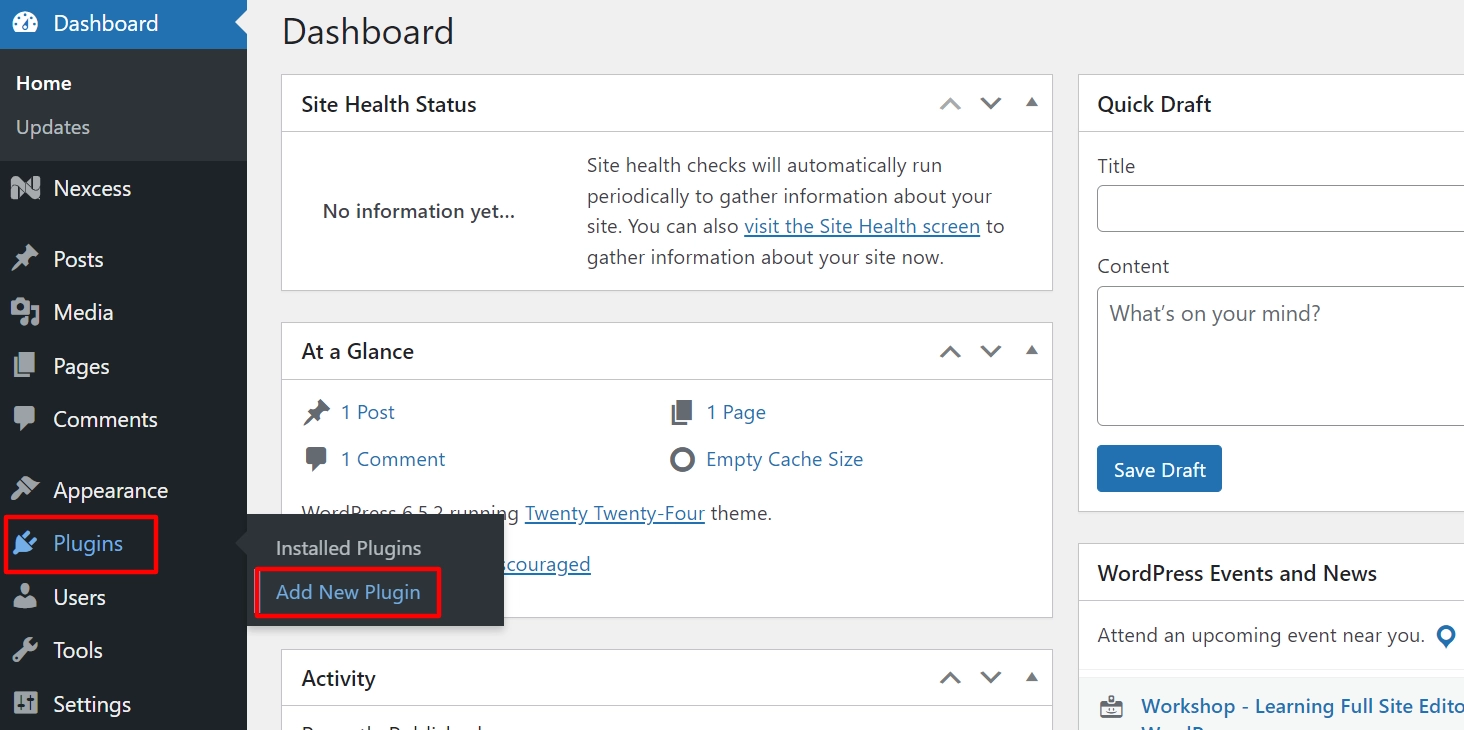
Install and Activate WP Staging Plugin
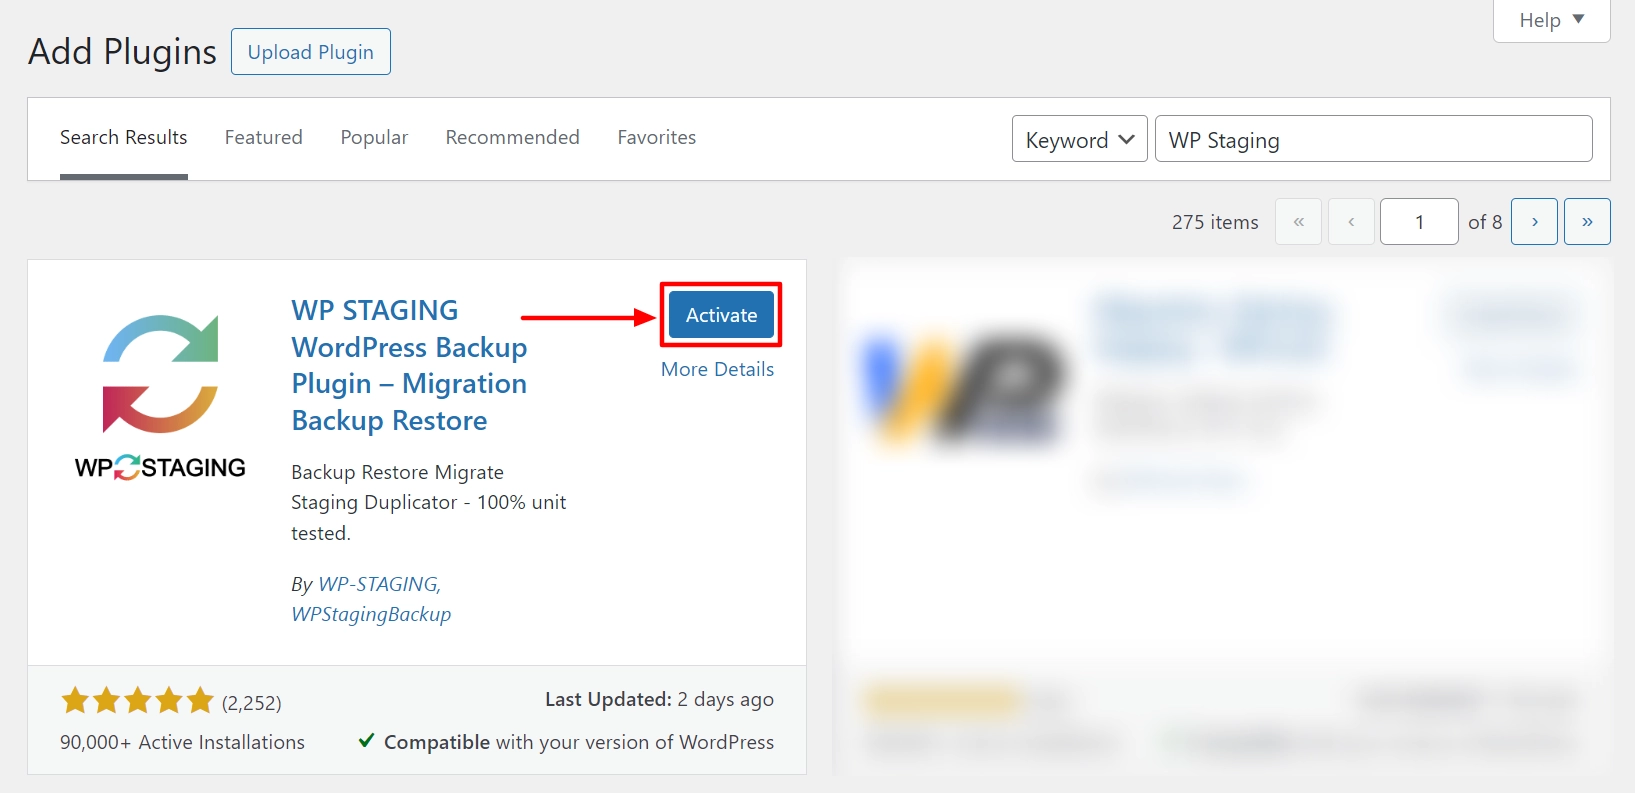
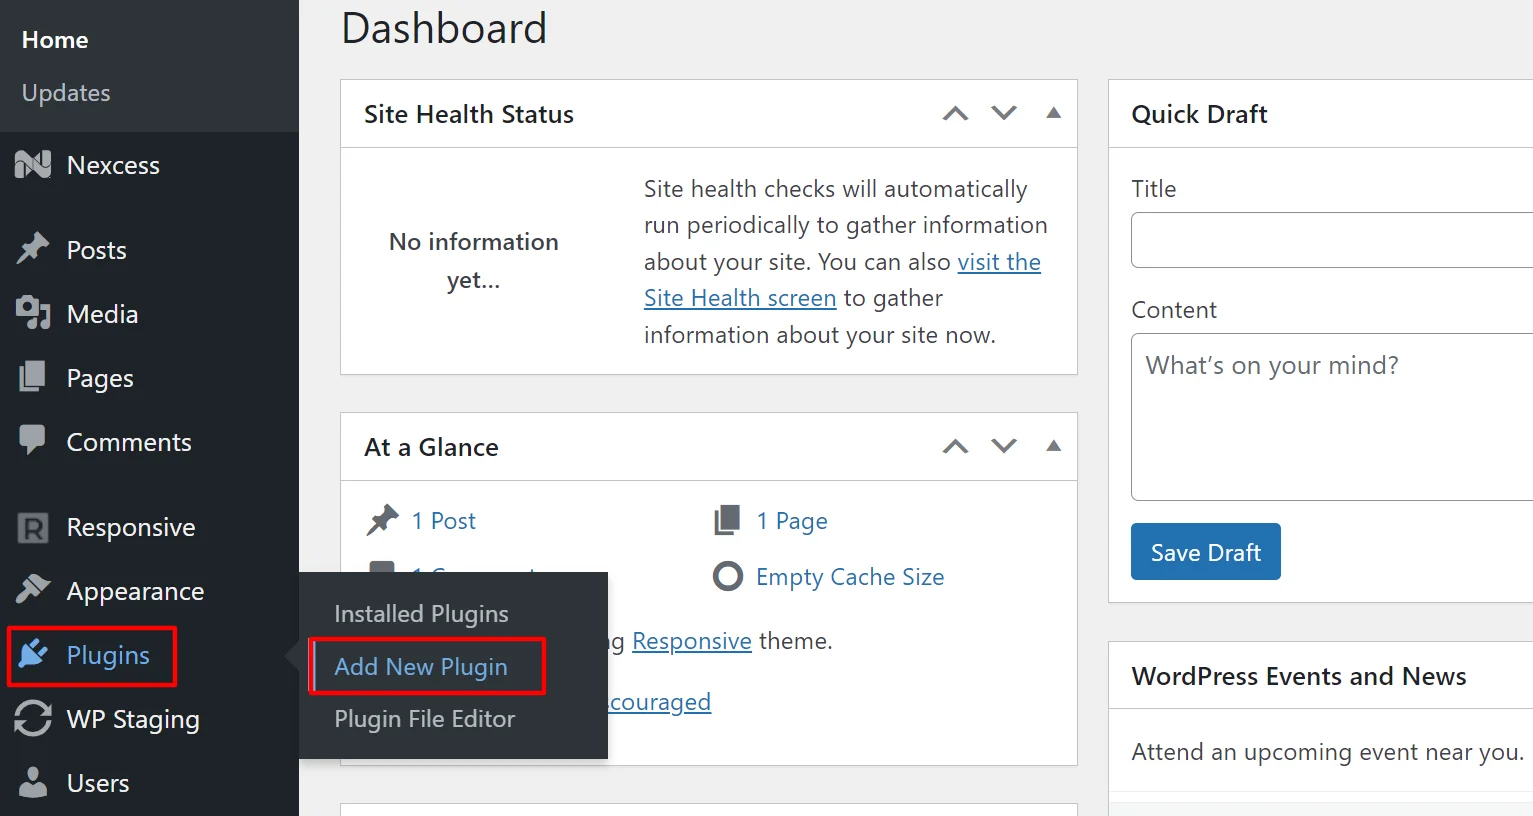
Go to your WordPress dashboard and navigate to Plugins > Add New Plugin
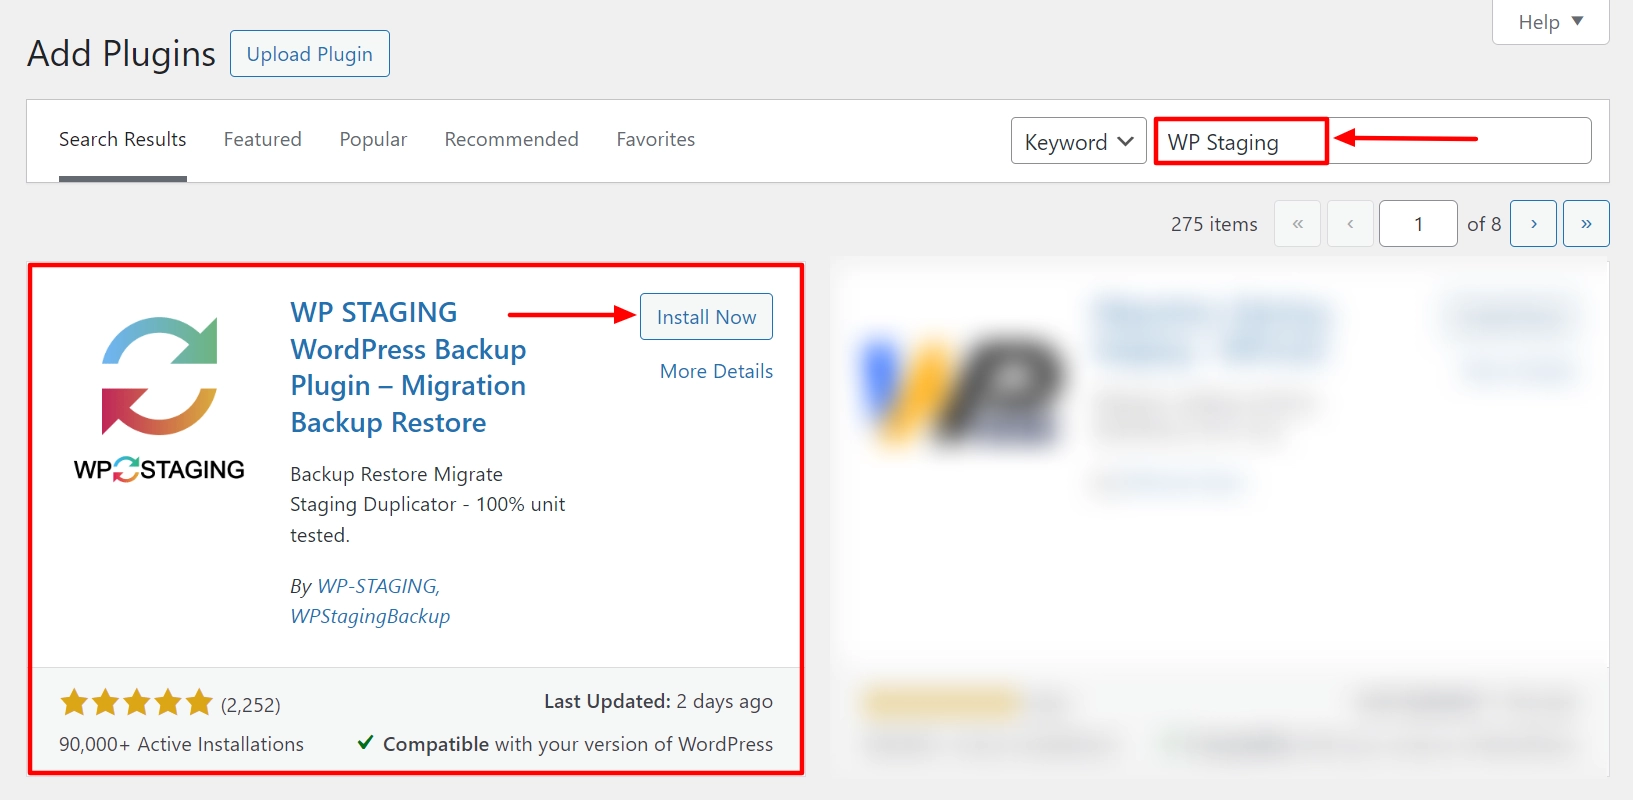
Search for WP Staging in the search bar and click on the Install Now button.
Once the installation is complete, click Activate to activate the plugin.
How to Create a Staging Site Using WP Staging Plugin
After activating the plugin, go to WP Staging > Staging Sites in your WordPress dashboard.
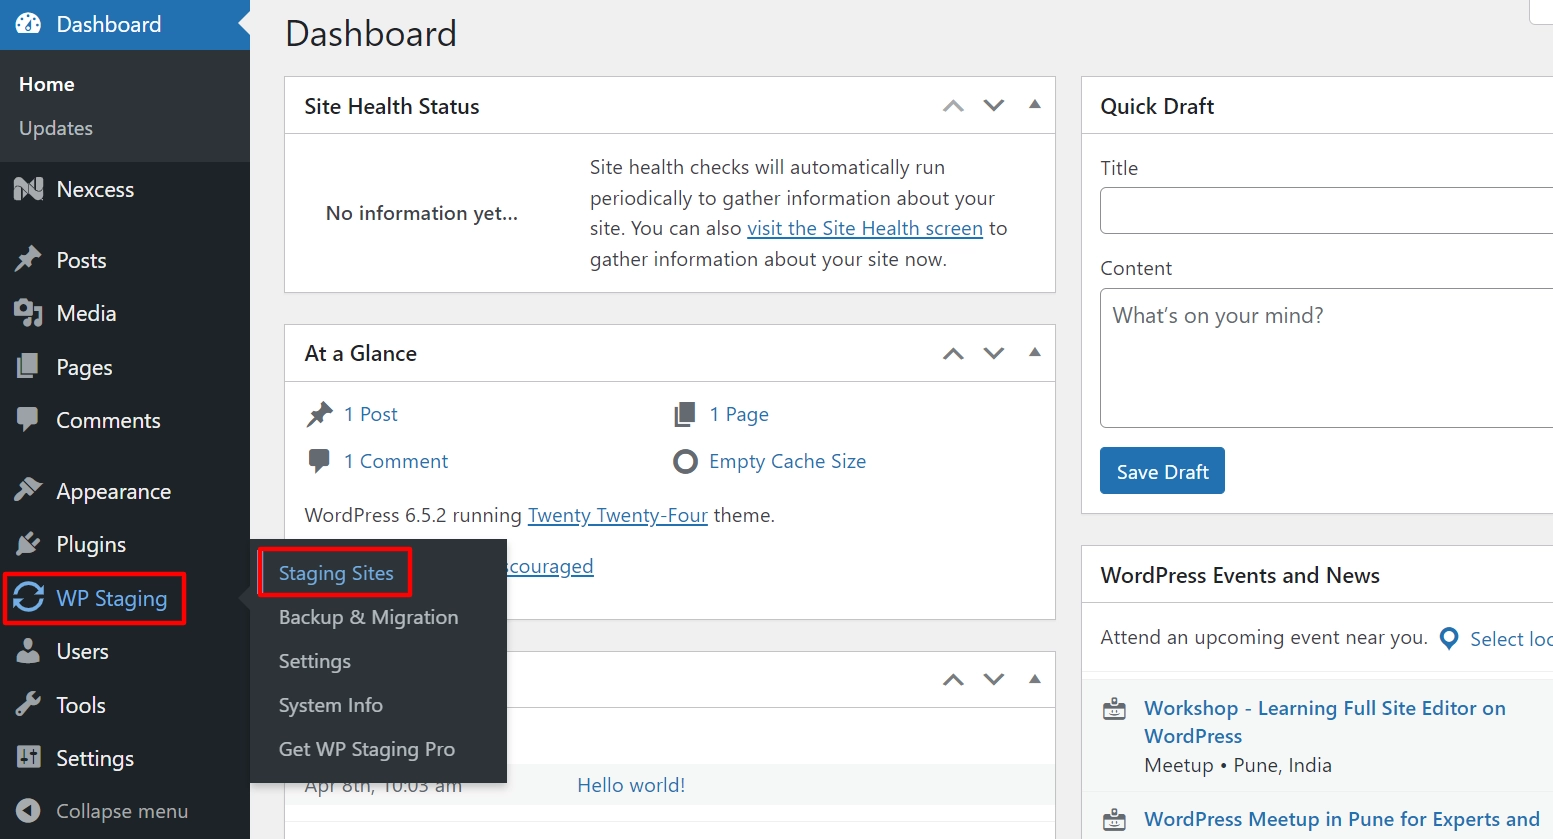
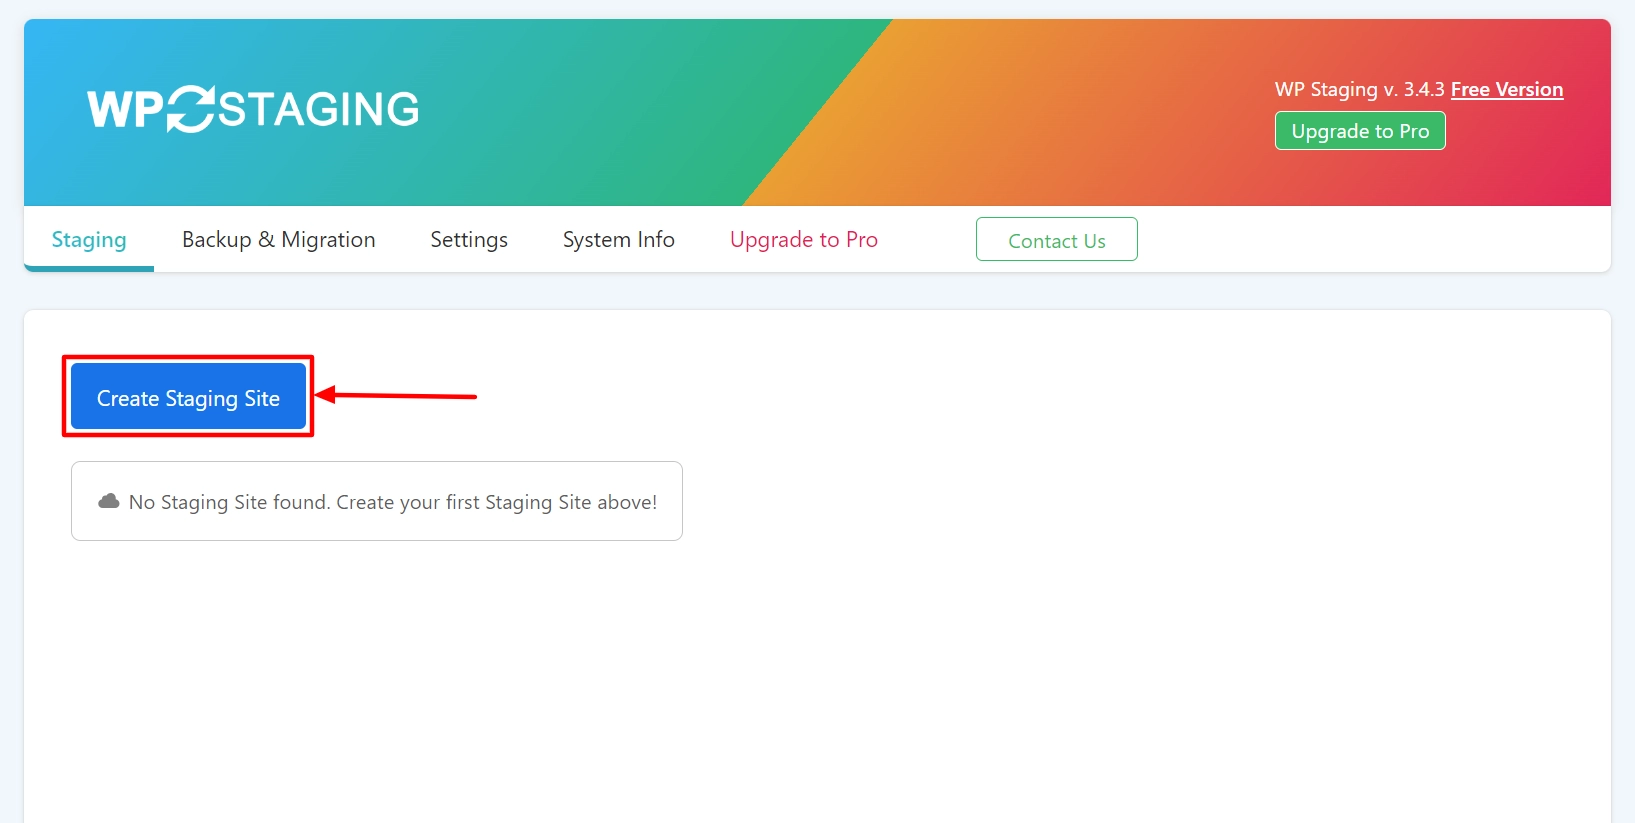
Click the Create Staging Site button.
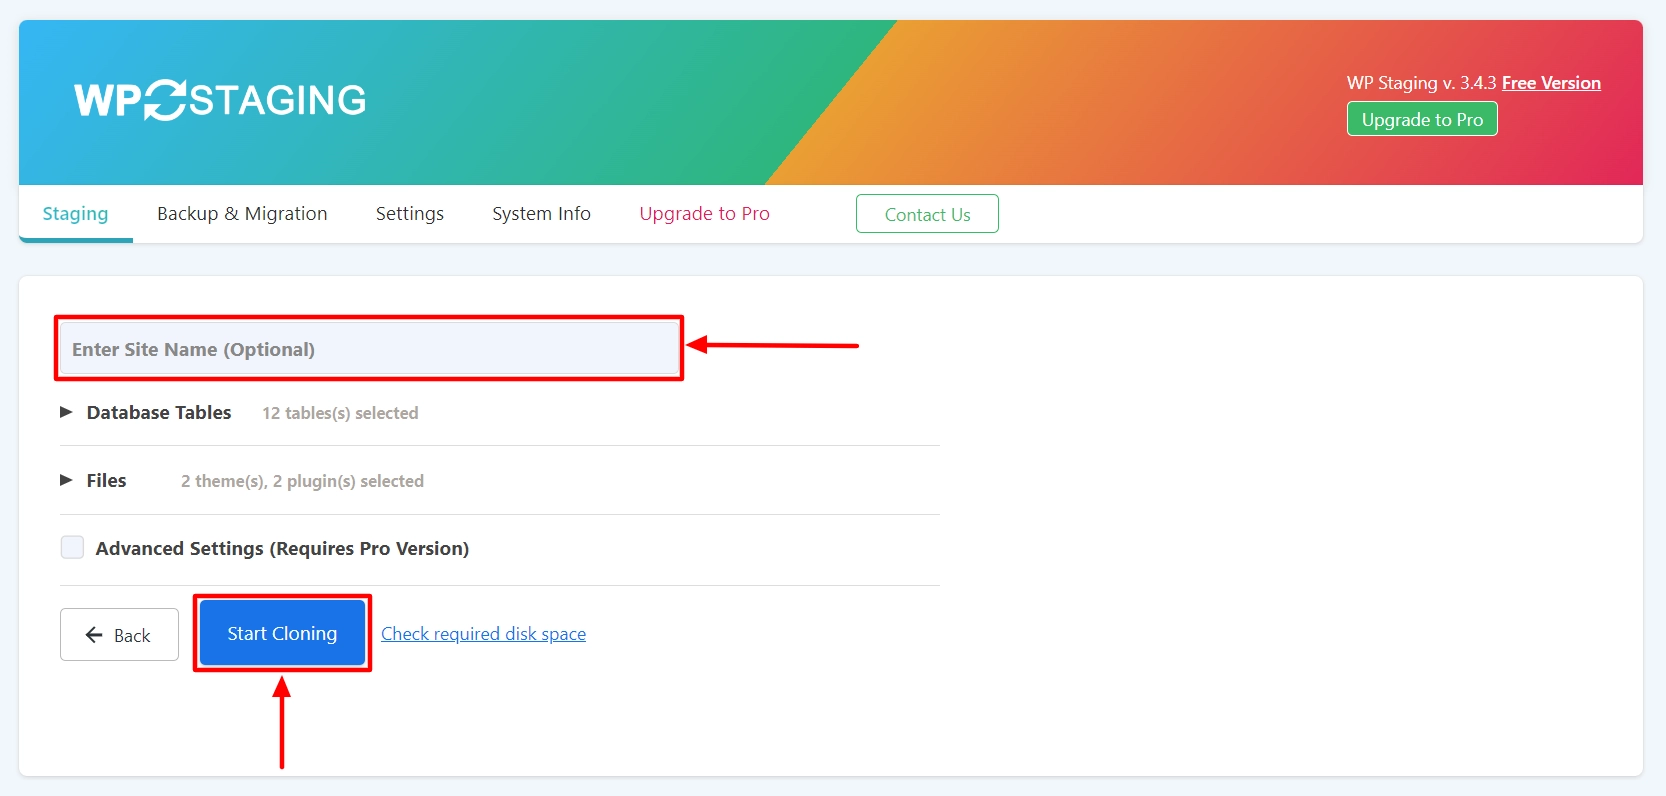
Here, you can add the name of the staging site and select the parts of the database and files you want to clone for the staging site.
We recommend selecting everything by default to get a carbon copy of your website.
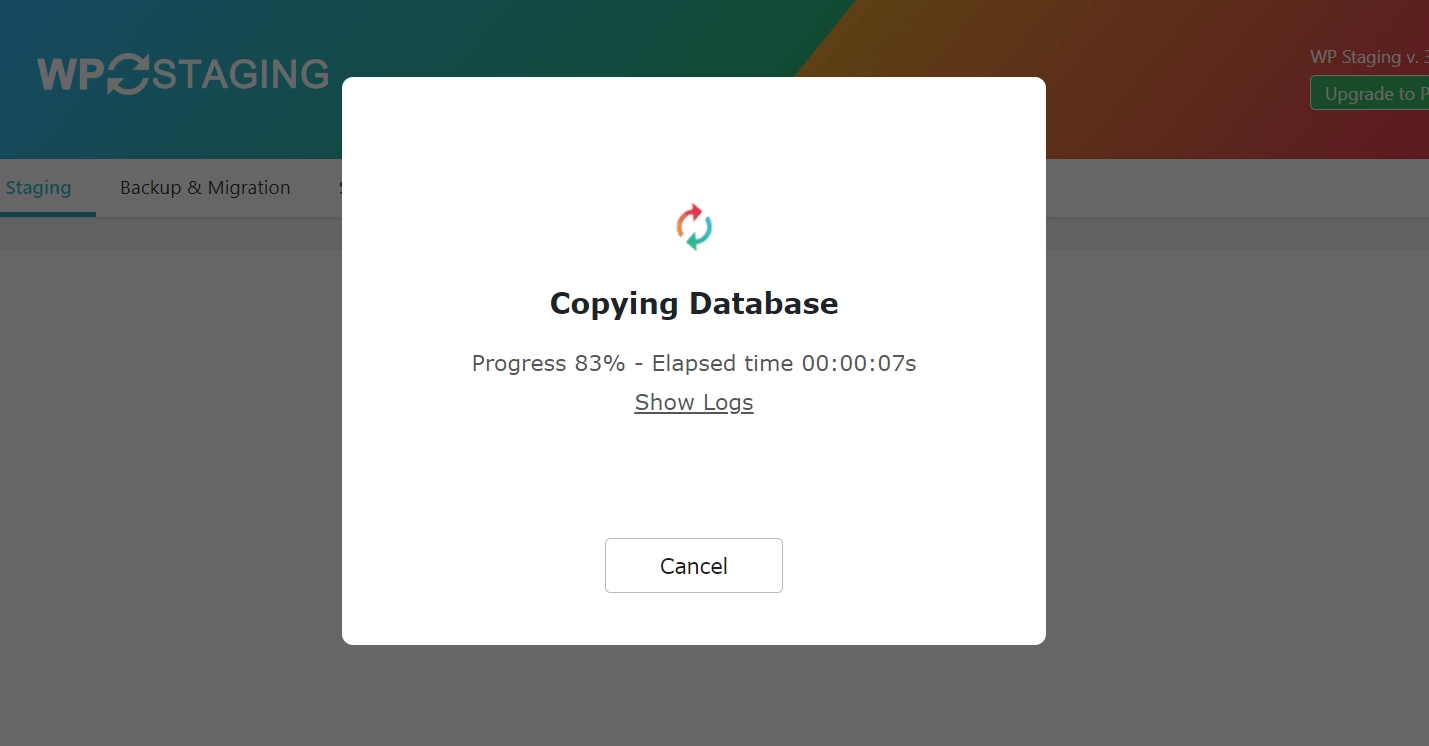
Once you’ve selected the parts of the database and files you want to clone, click the Start Cloning button to start the process.
When you initiate the database copying process, a pop-up window will appear indicating the progress of the copying process.
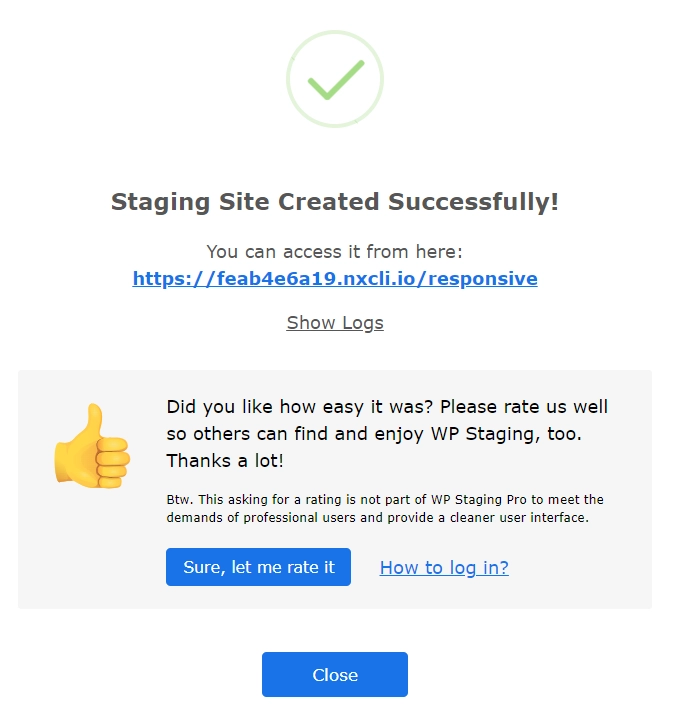
A successful message will appear like this, click on the Close button.
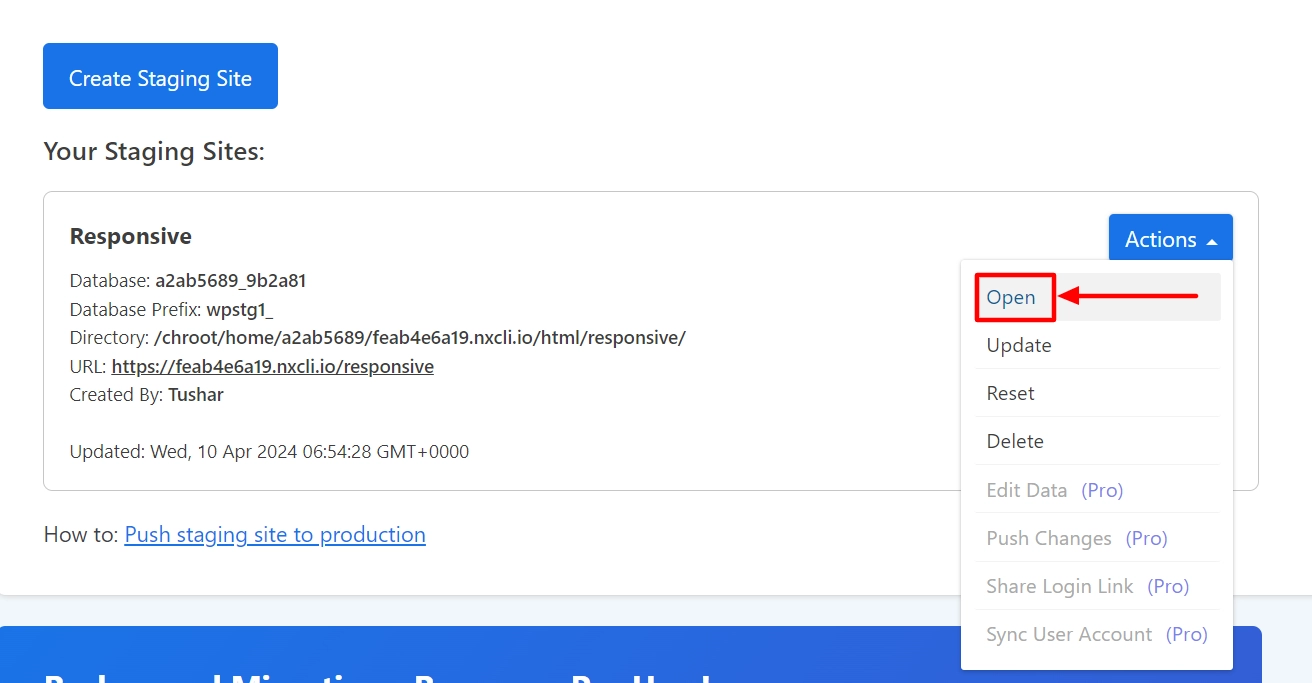
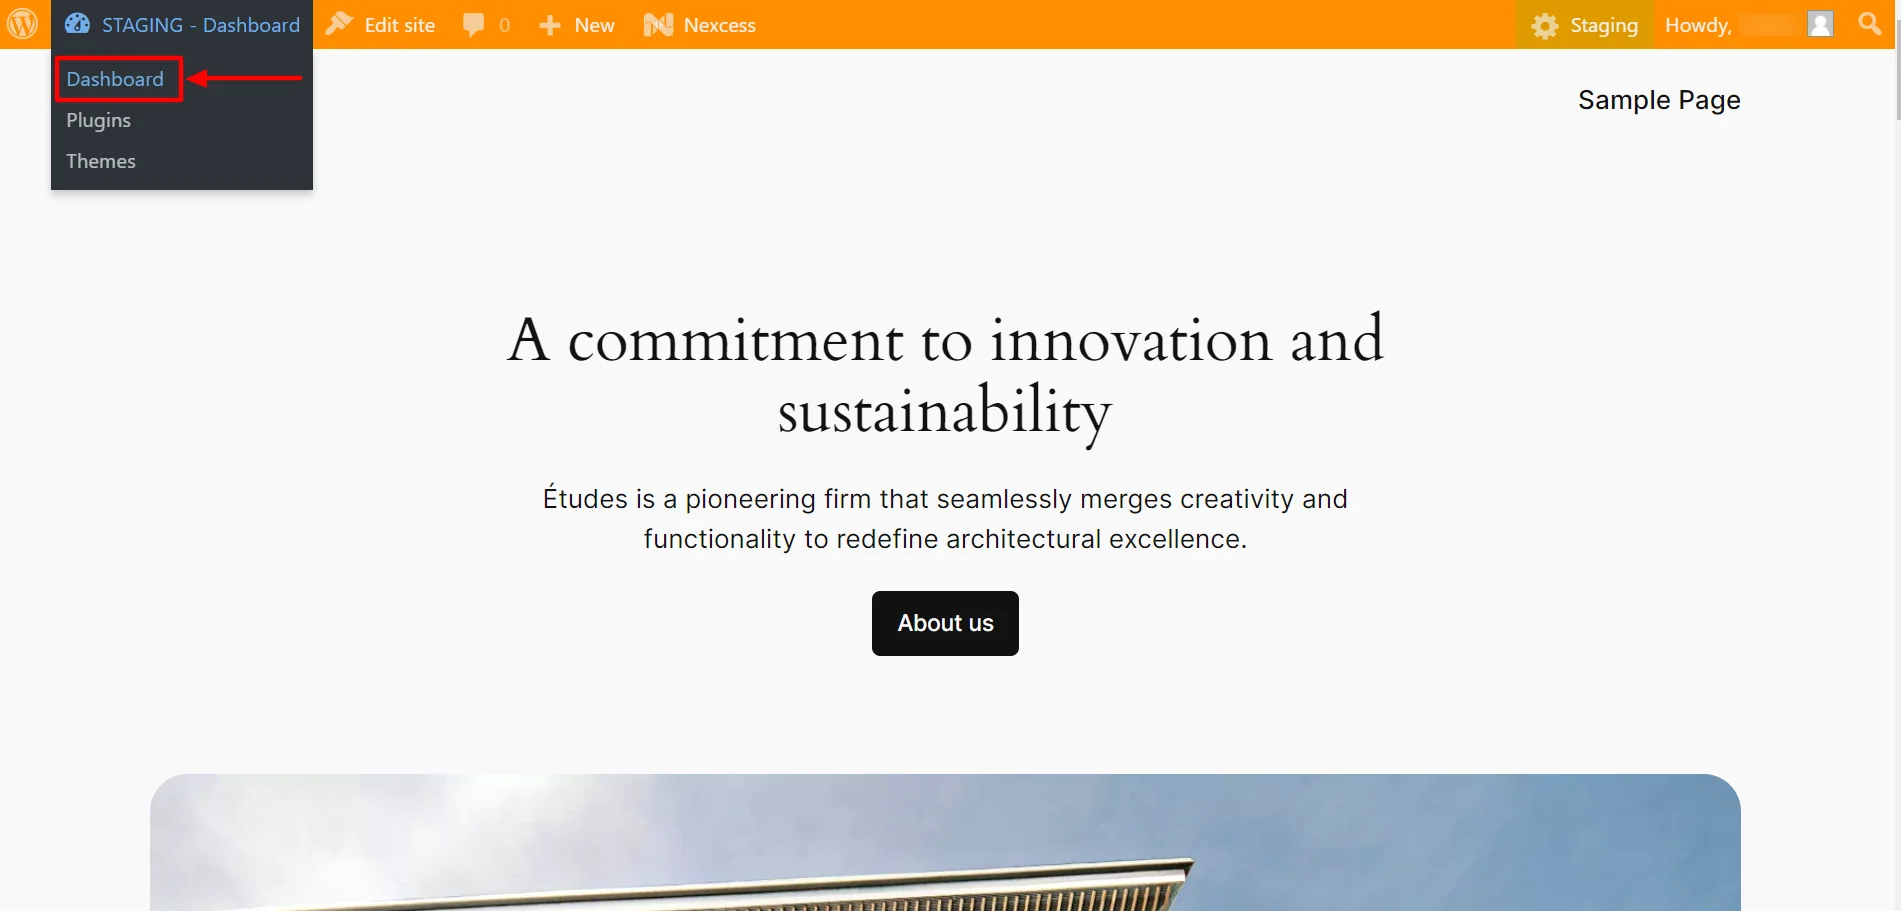
Under actions, you’ll see multiple options like Open, Update, Reset, and Delete. Click Open to open the staging site you’ve just created.
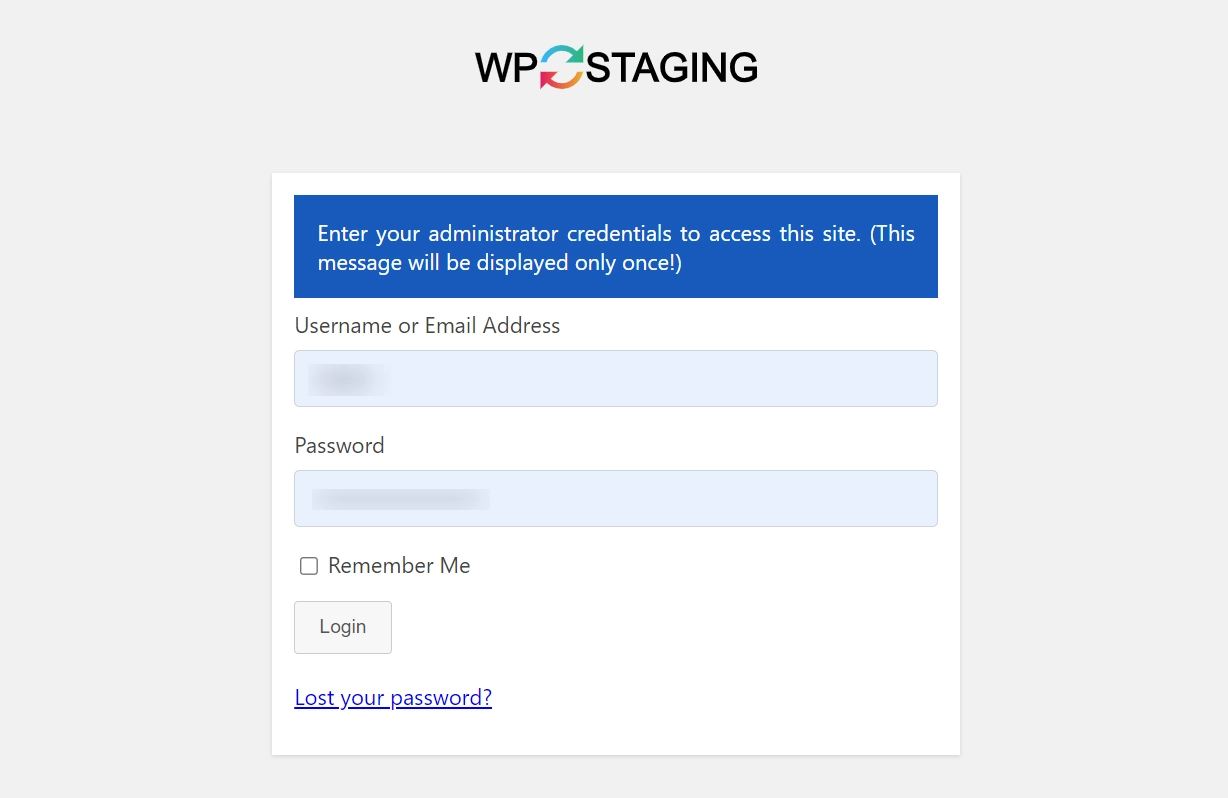
Enter your credentials and click Login to access the staging site.
And you’re done! A copy of your live website has been created successfully.
Now that you have created a staging site, let’s see how to install and activate a WordPress theme and plugins.
How to Install a WordPress Theme on Staging Site?
To install and activate a WordPress theme on your staging site follow these steps:
Firstly, navigate to Staging – Dashboard.
Next, go to Appearance > Themes.
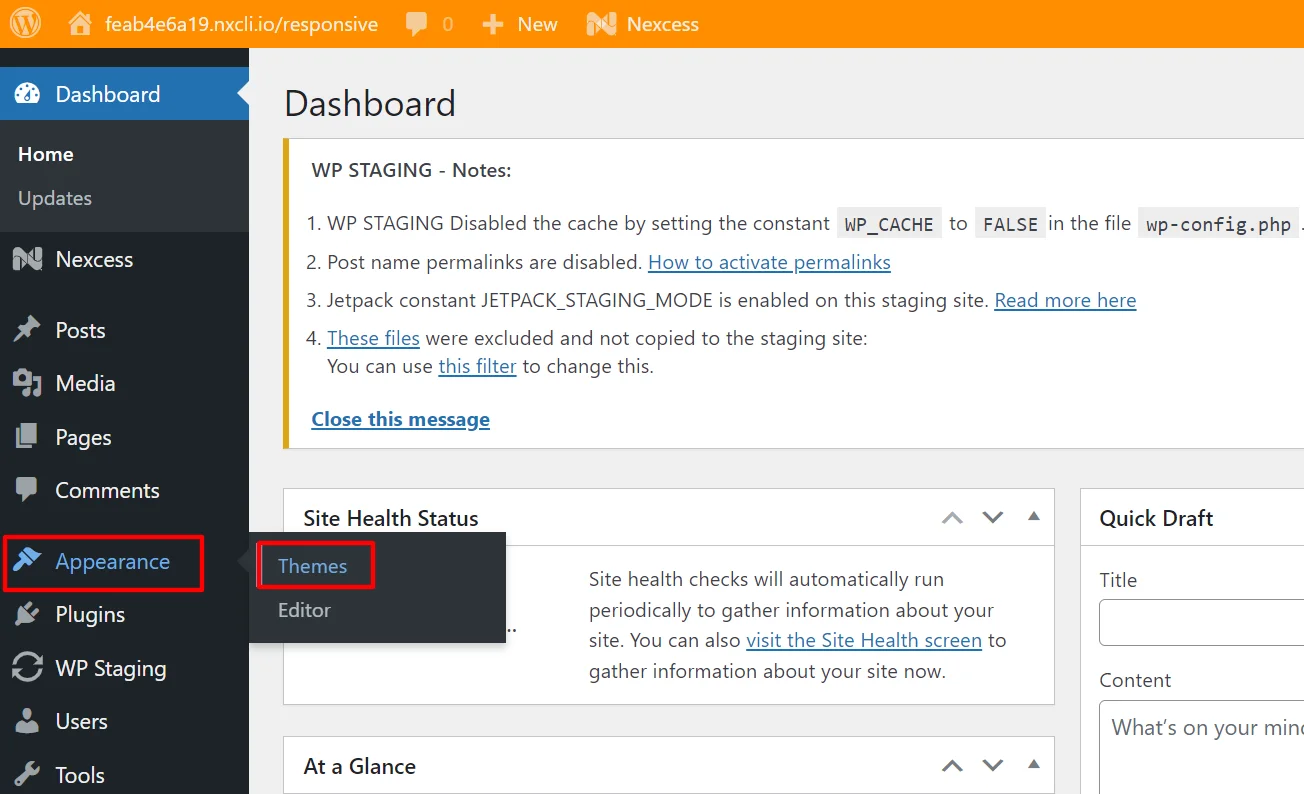
Then, click the Add New Theme button.
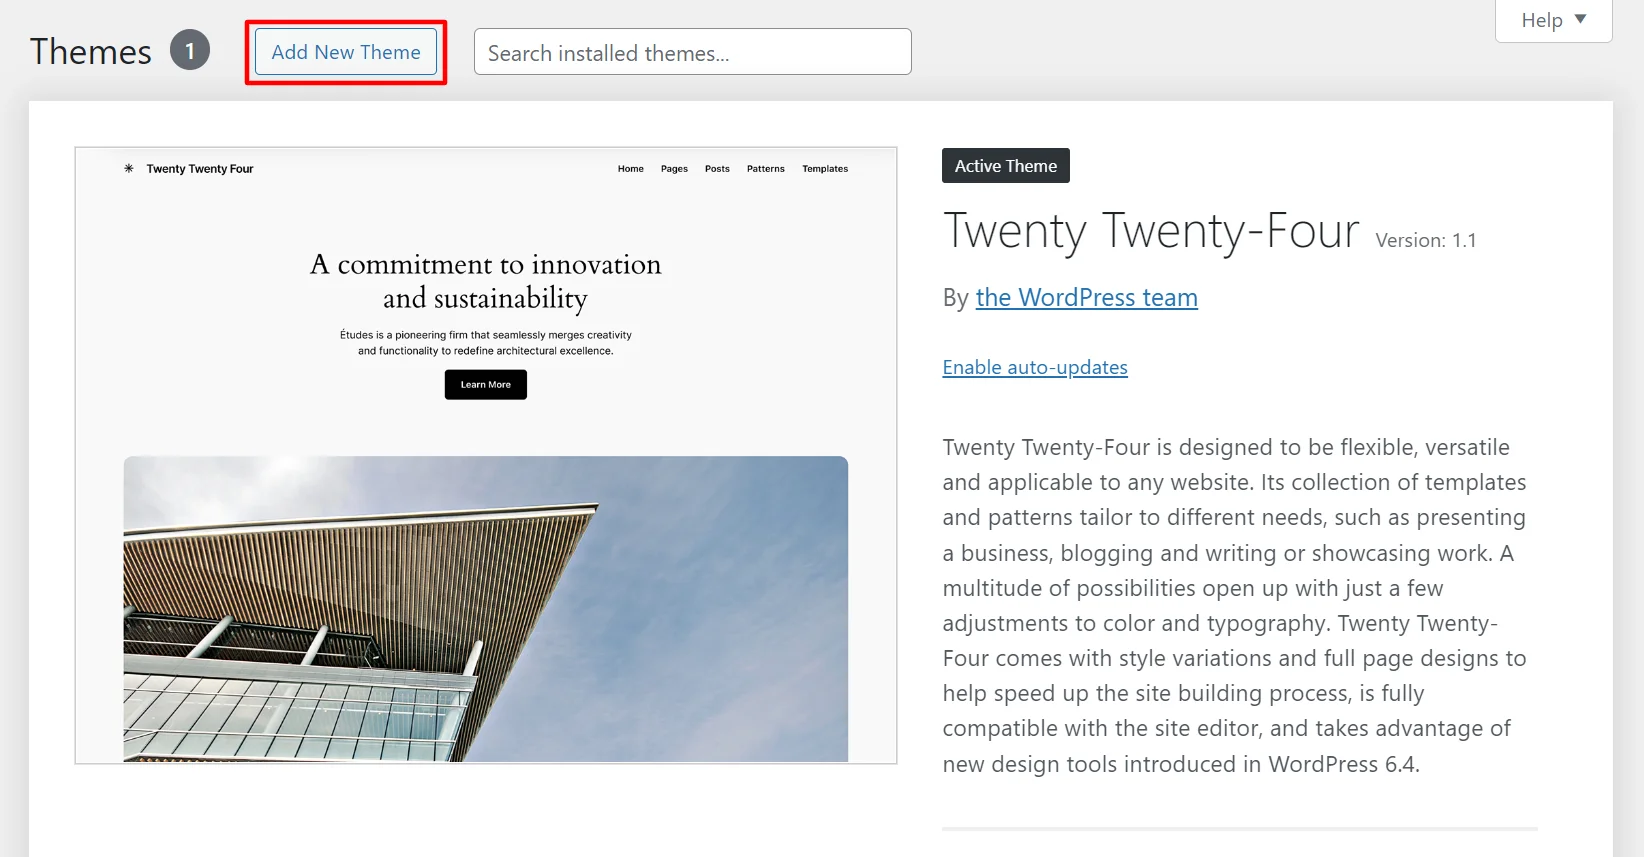
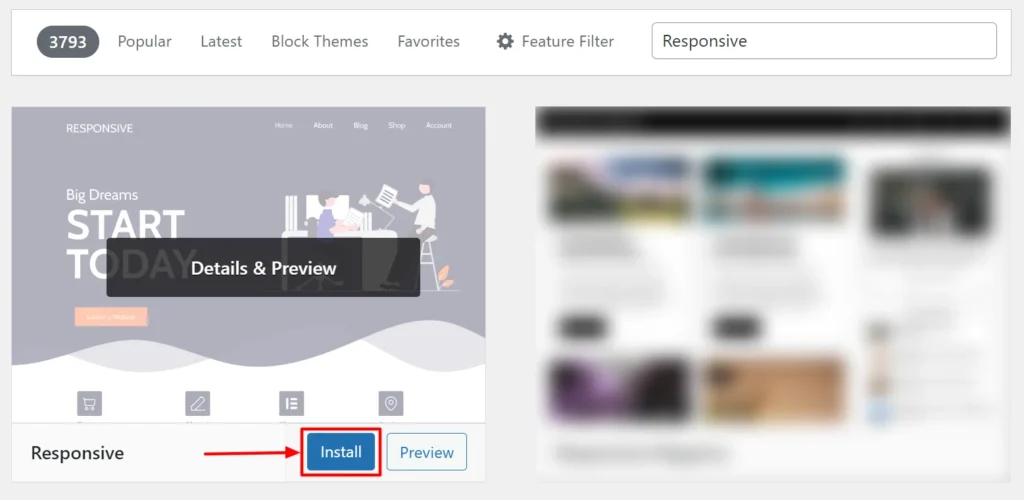
Search for Responsive theme in the search bar.
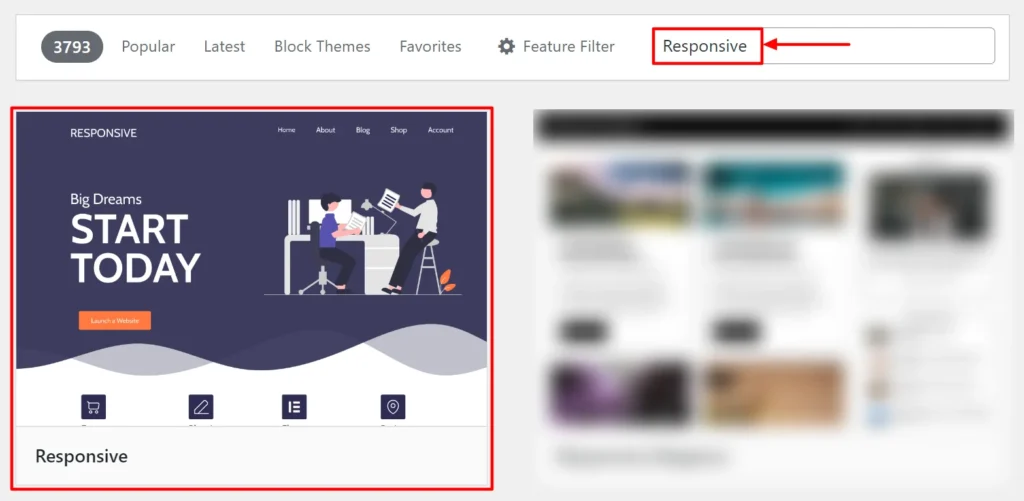
Click the Install button.
Once the installation is complete, click Activate to activate the theme.
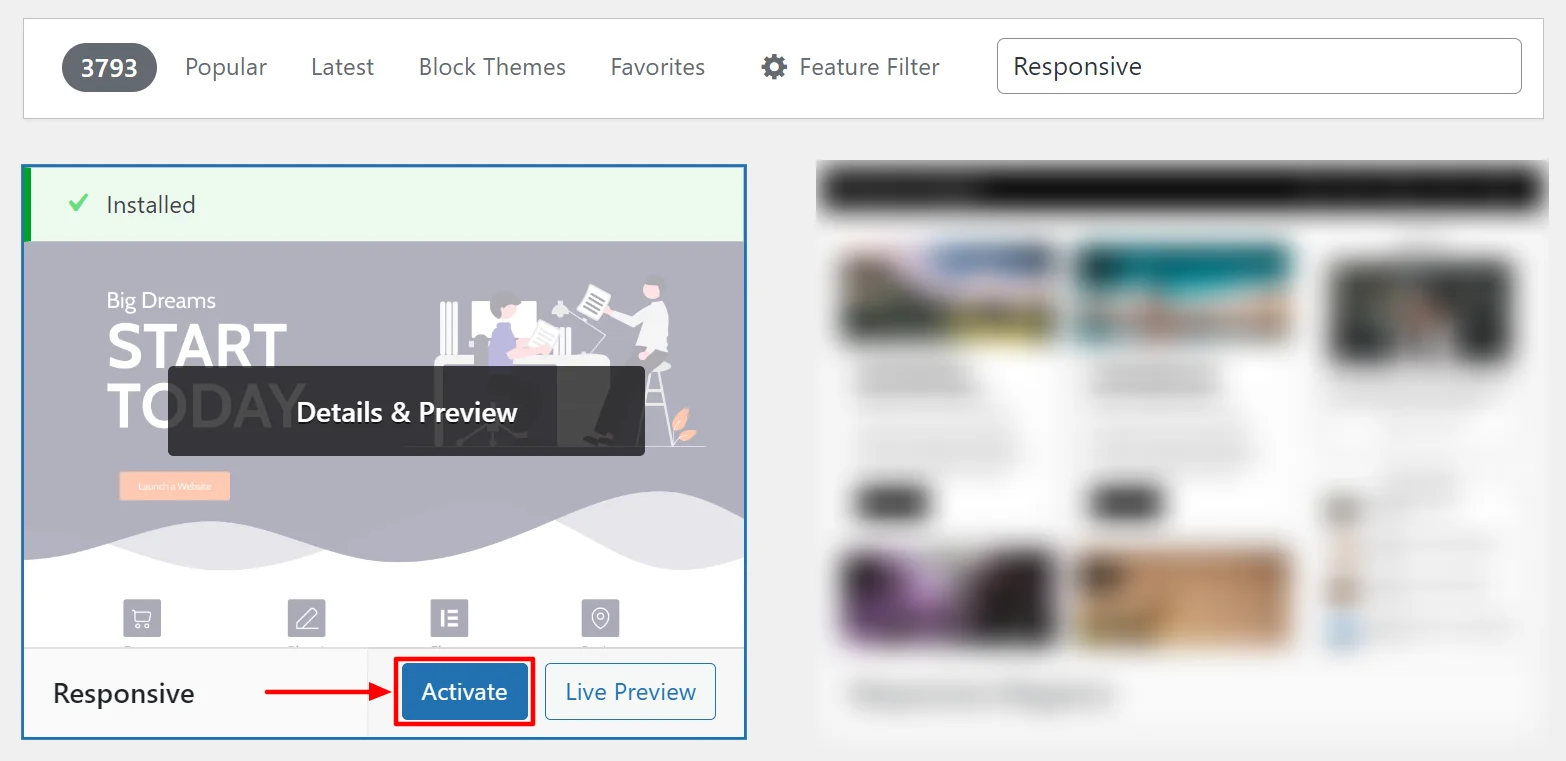
And you’re done! Responsive theme has been successfully installed on your staging site. You can use this theme to make any kind of website for your business. There are a few plugins you’ll need, before you get started.
Lets take a look at how we can install a plugin.
Installing a WordPress Plugin on Staging Site
To install a WordPress plugin on the staging site follow these steps:
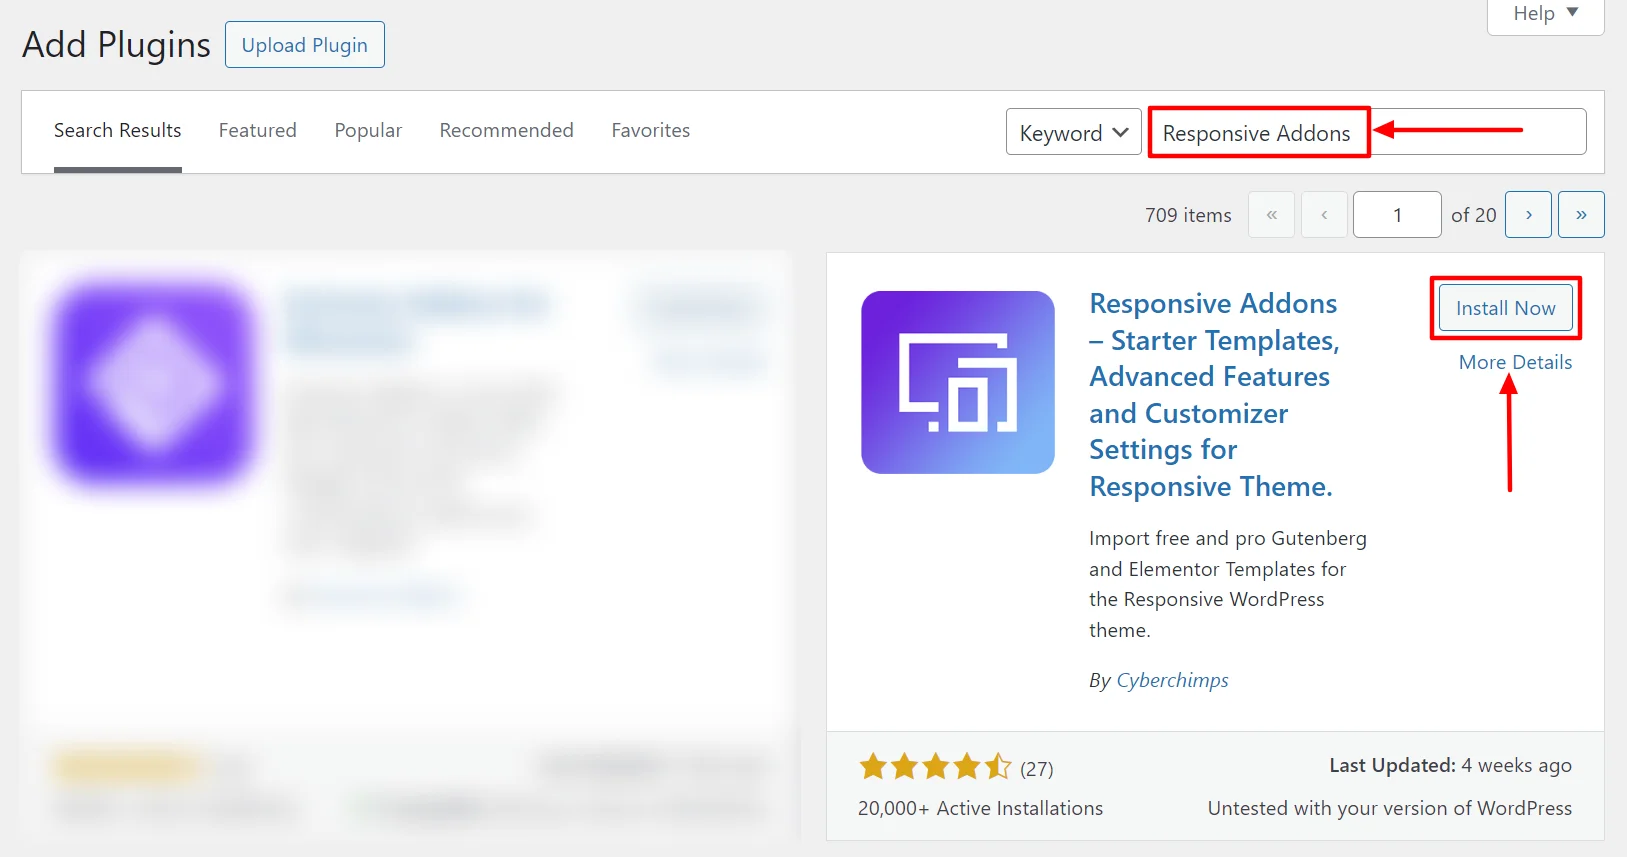
Navigate to Plugins > Add New Plugin from your WordPress dashboard.
Search for Responsive Addons and click the Install Now button.
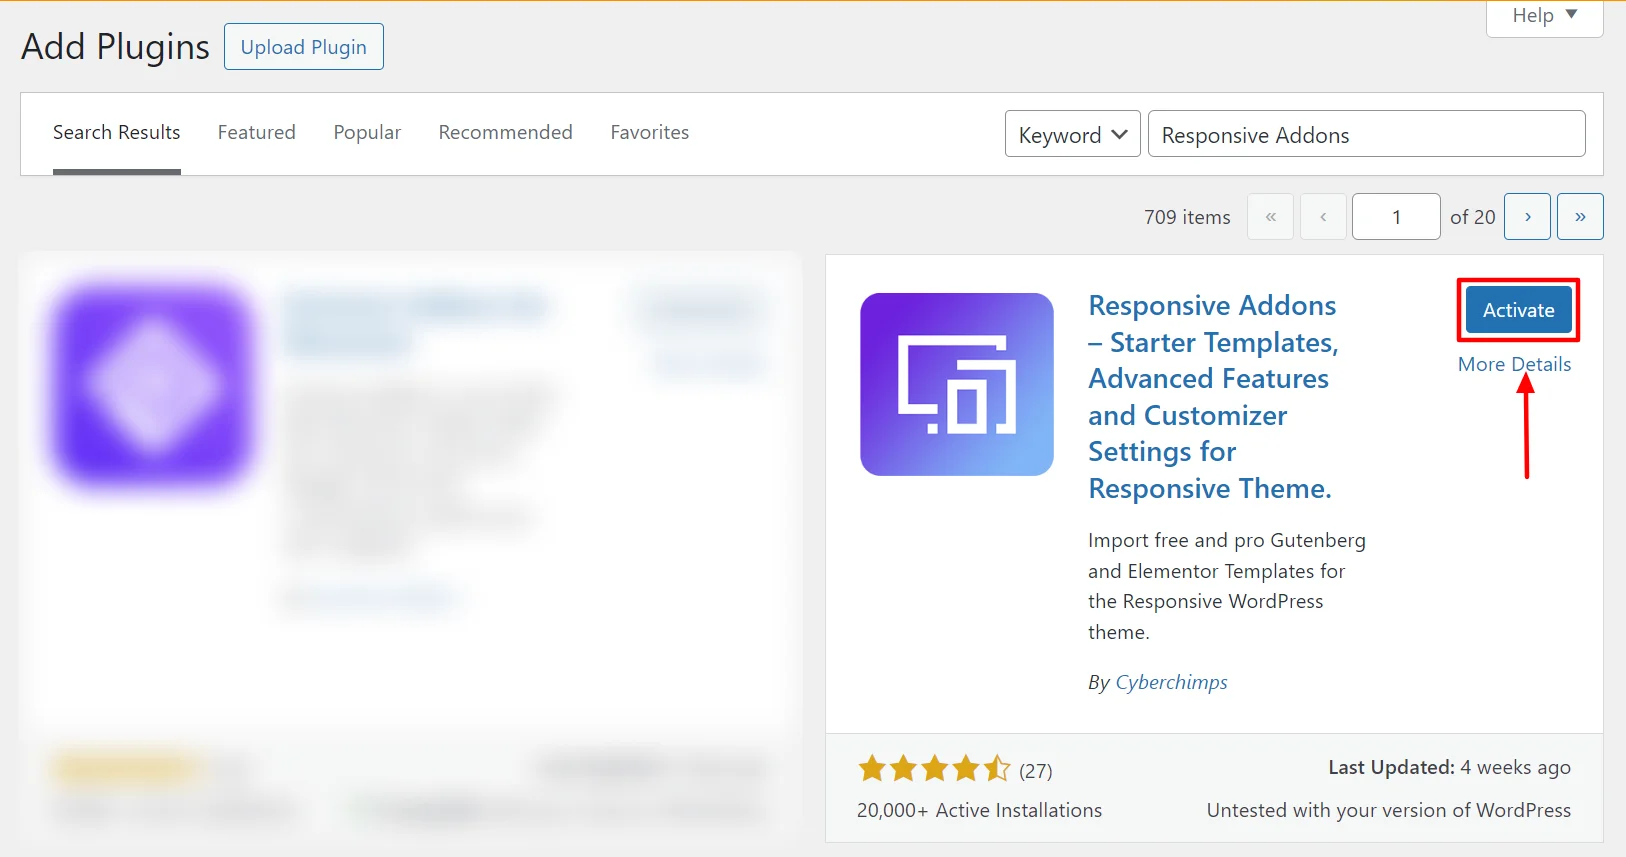
Click on Activate button to activate the plugin.
Importing Template on Your Staging Site
Now follow these steps to import pre-made WordPress templates for your website:
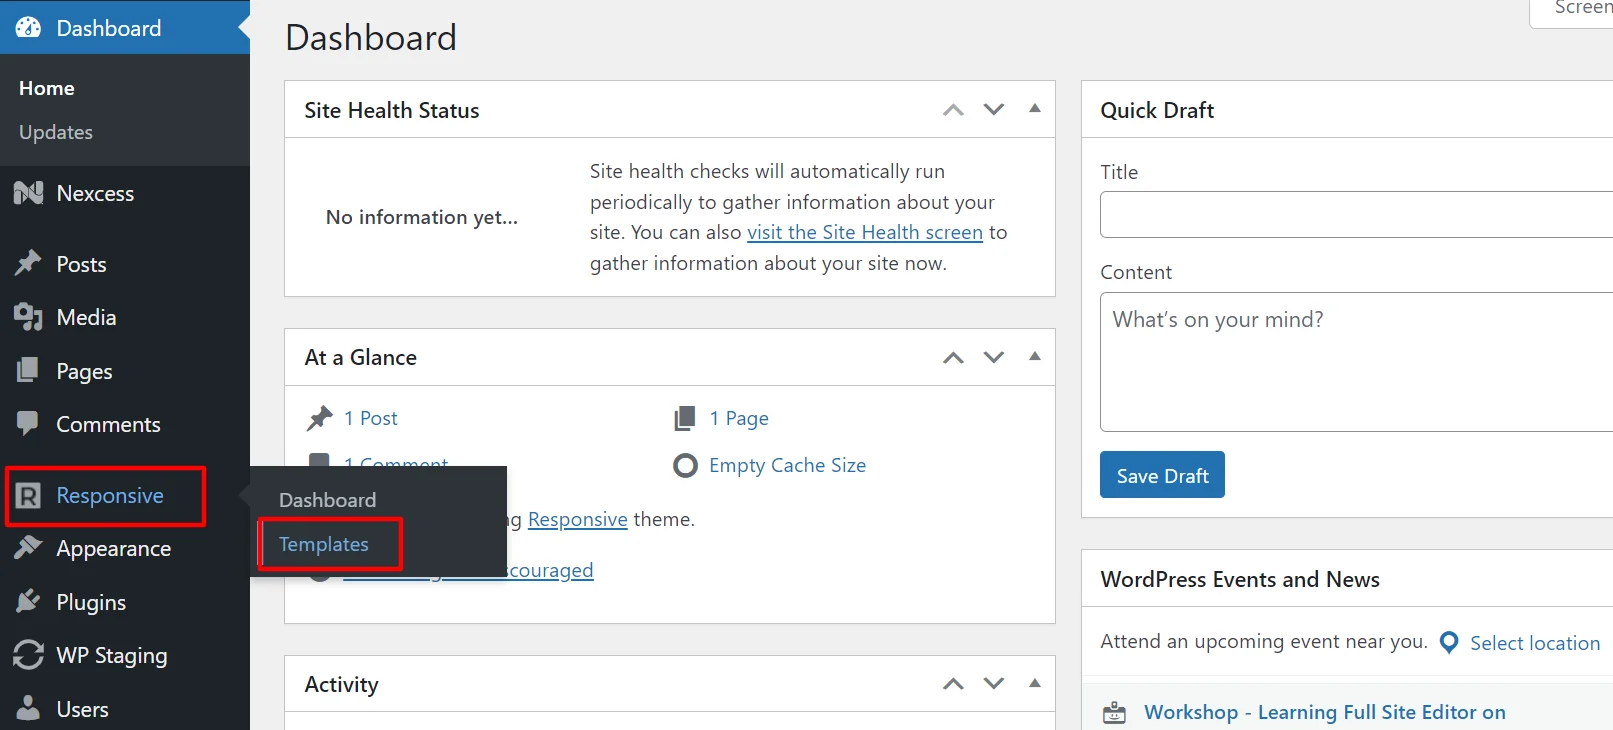
From the WordPress dashboard menu go to Responsive > Templates.
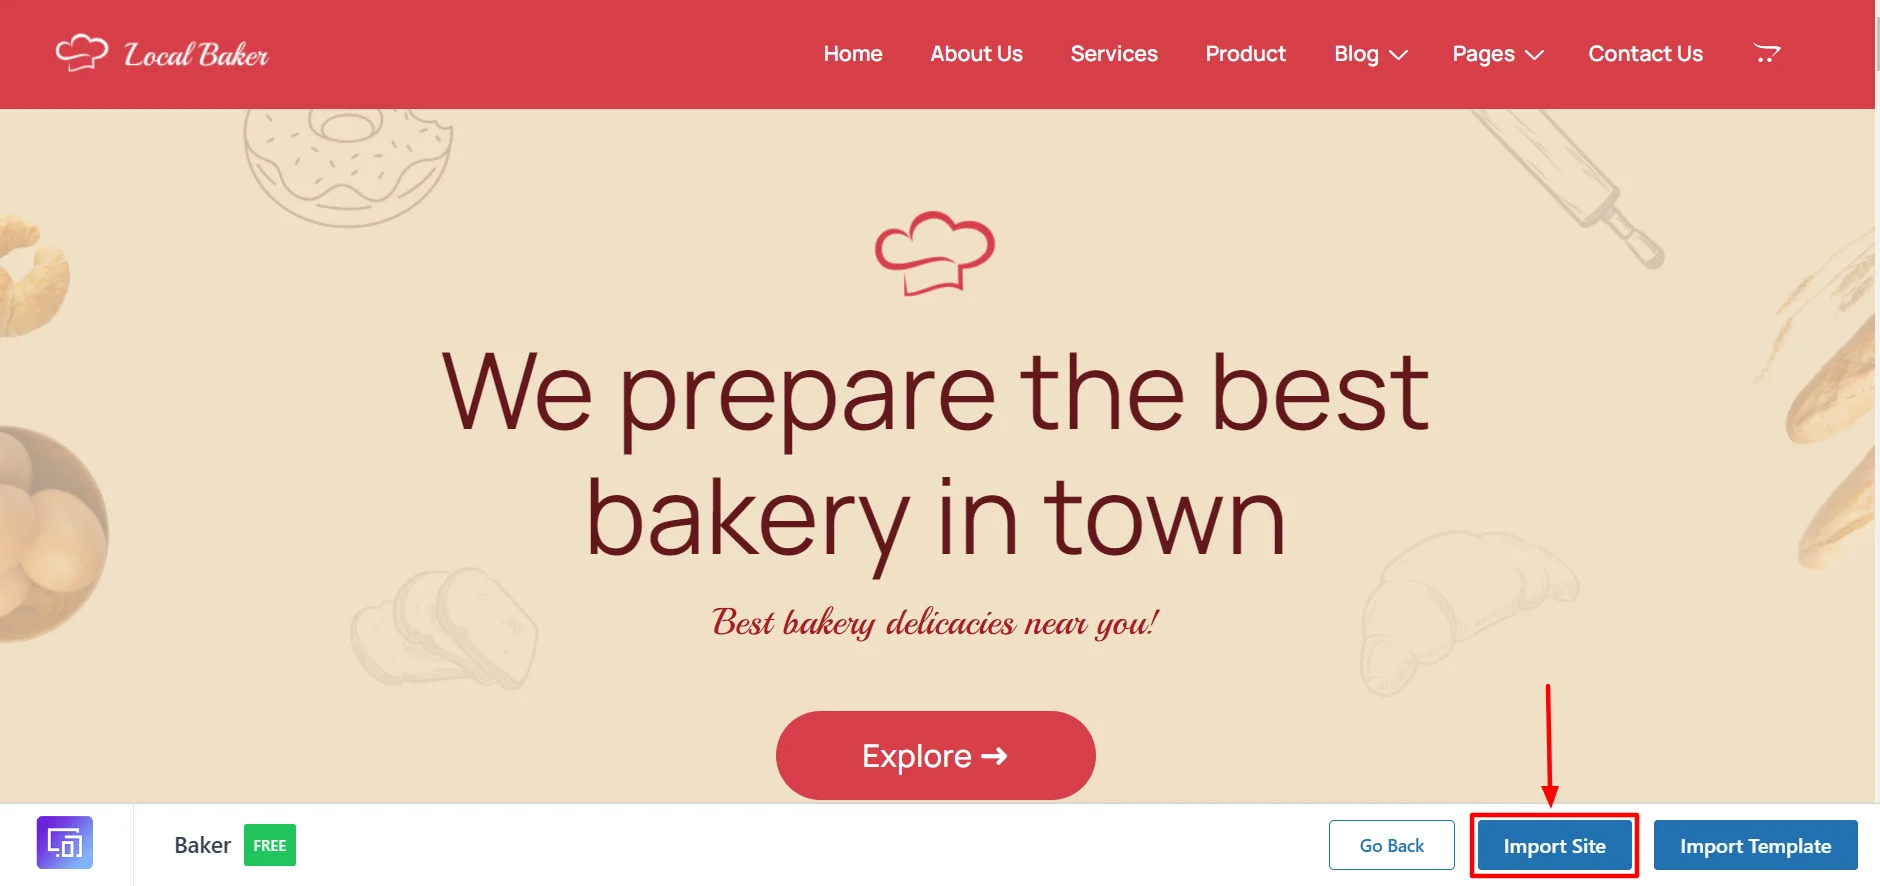
Here, you can choose from over 150+ WordPress Website Templates.
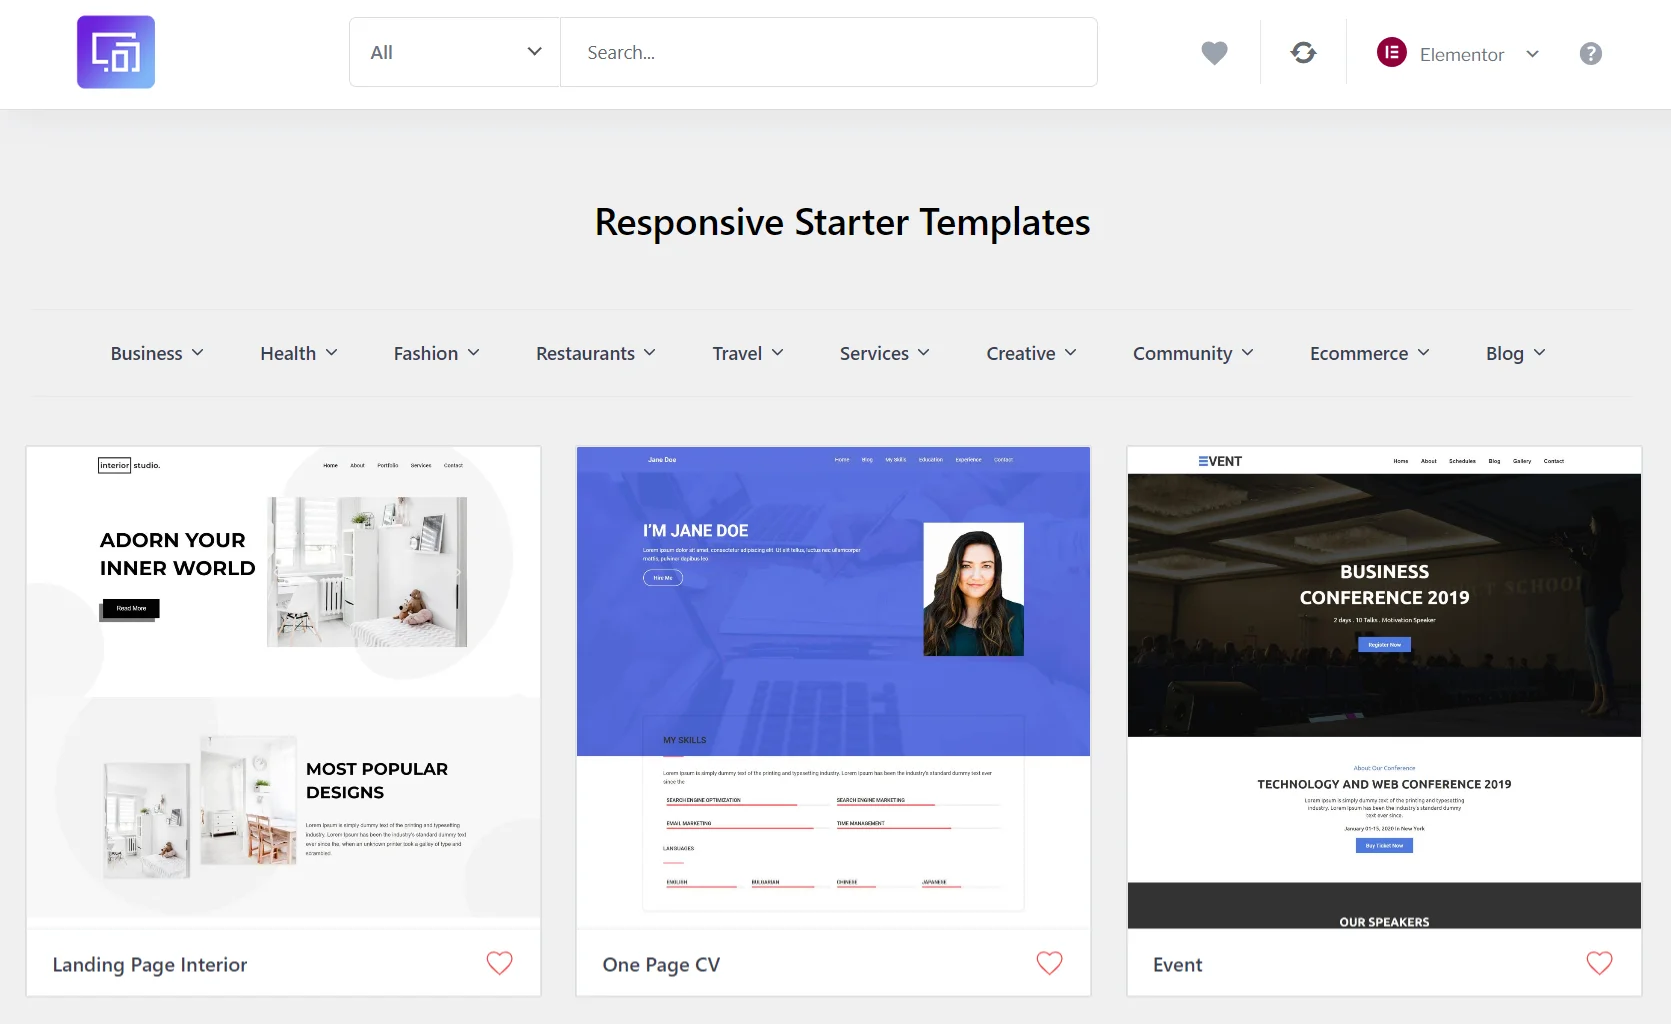
Select any template you wish to import. For this article we are going ahead with Baker template. Next, click on Import Site button.
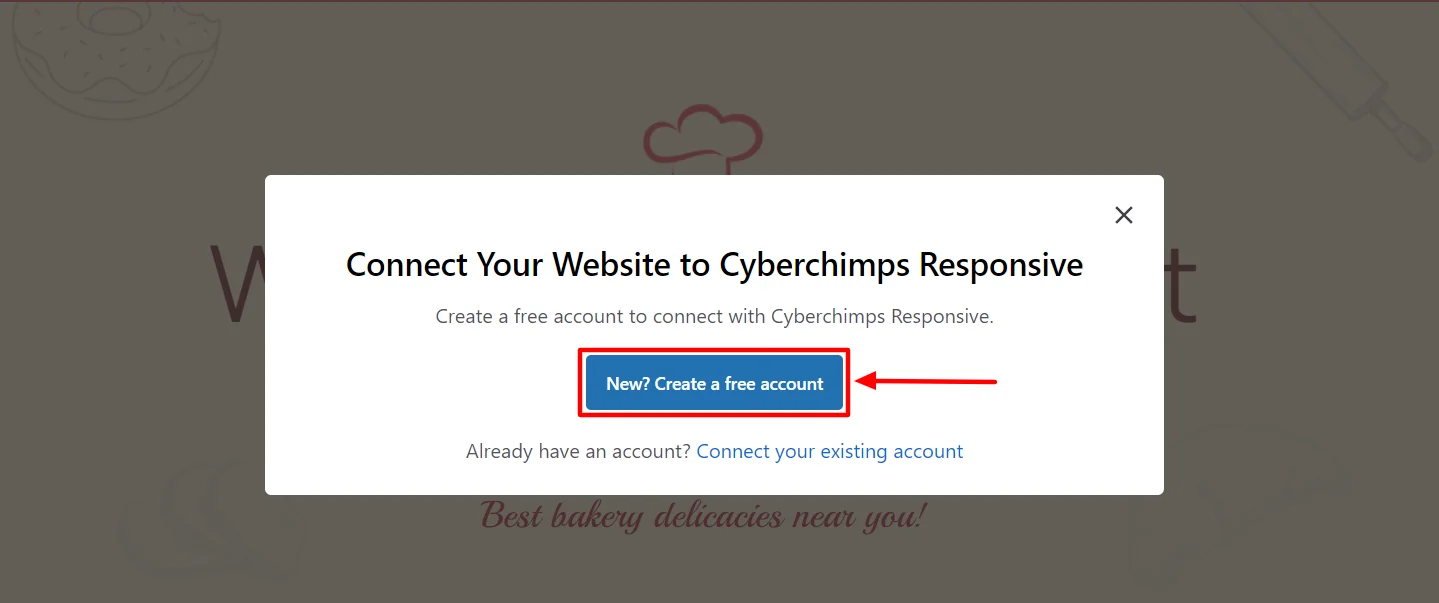
Once you click on it a popup will appear asking you to create an account. Click on New? Create a free account.
If you already have an account you can click on Connect your existing account. But if you’re new to this, click on New? Create a free account.
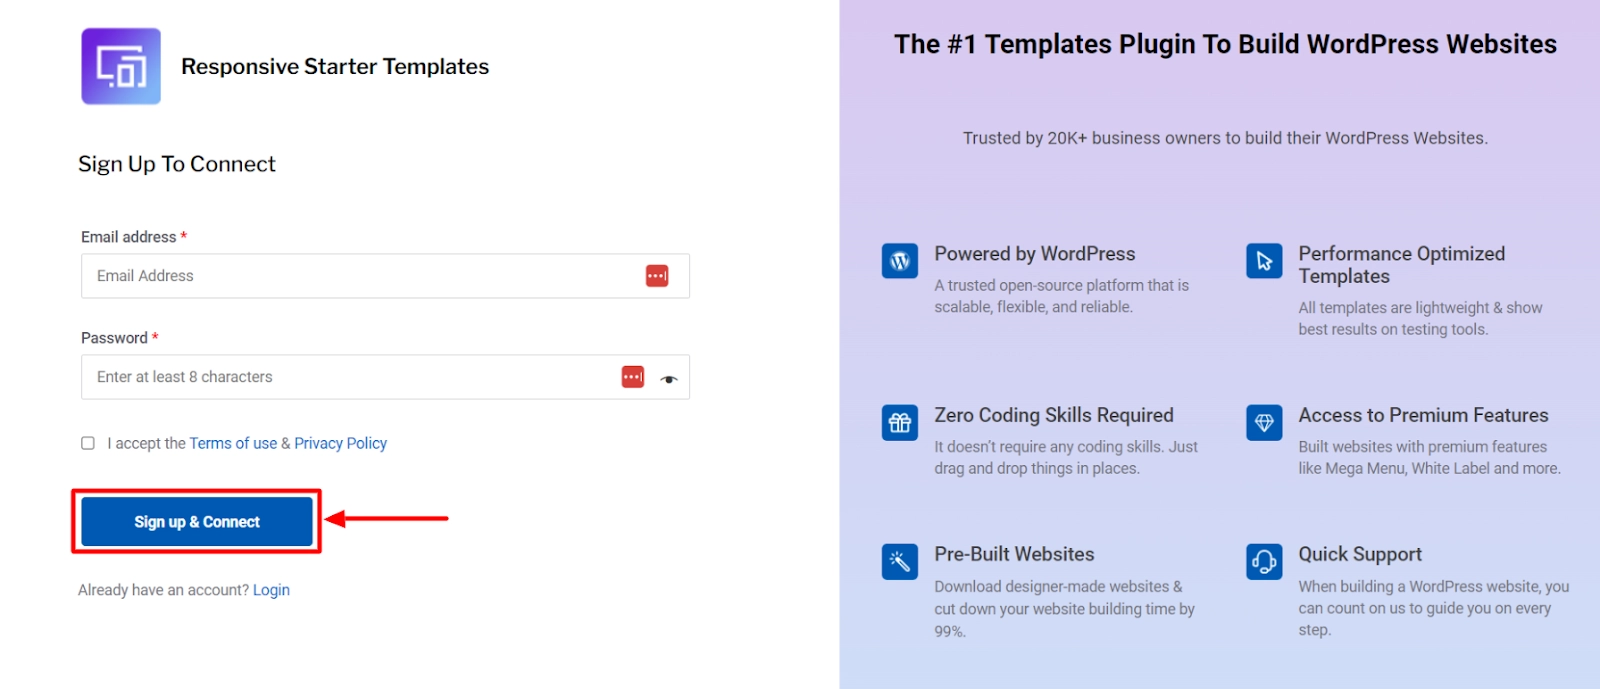
You will be redirected to the signup page window. Once you’ve provided the credentials, click on Sign up & Connect button.
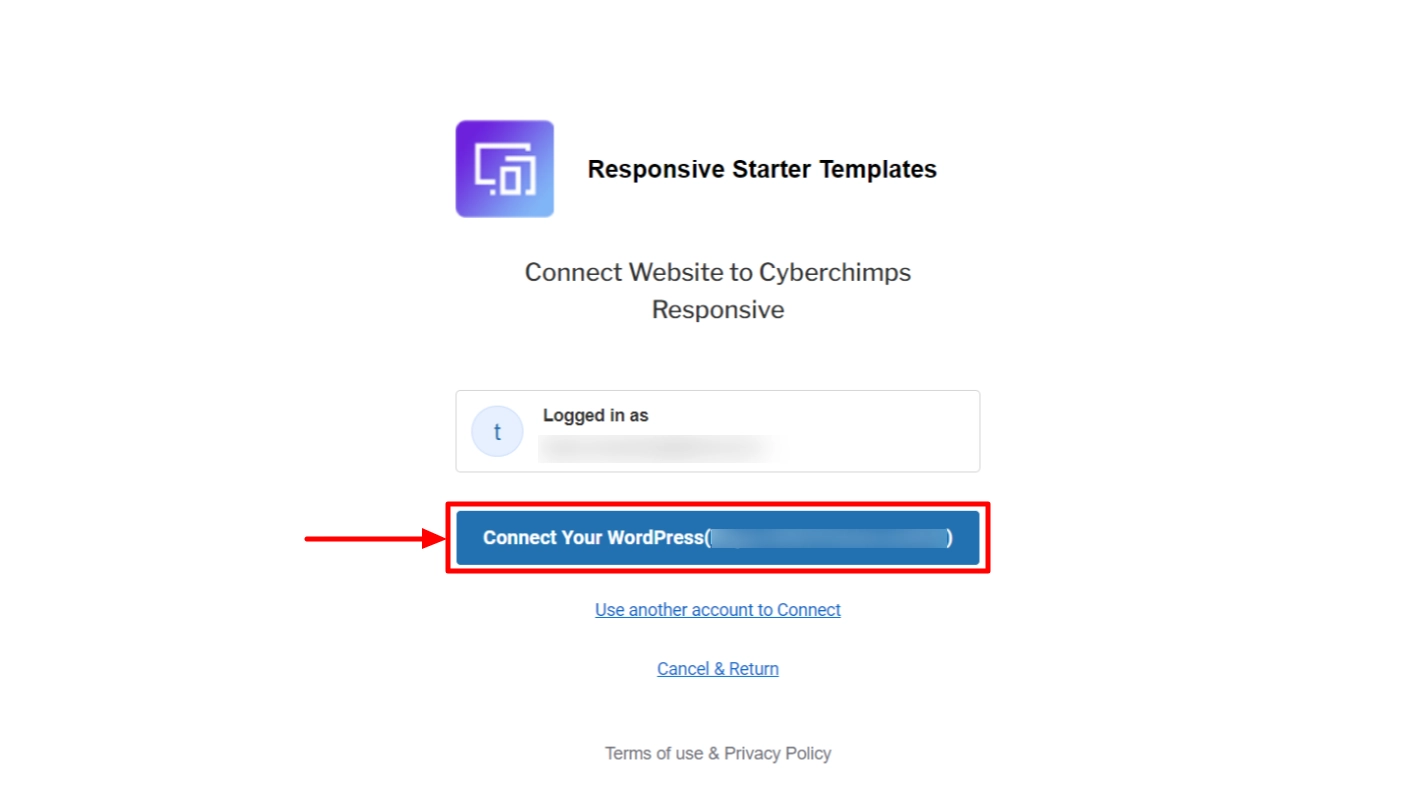
Click on Connect Your WordPress and you’re done.
Now, you’ll need to click the import button again and select the Subscribe & Start Importing button.
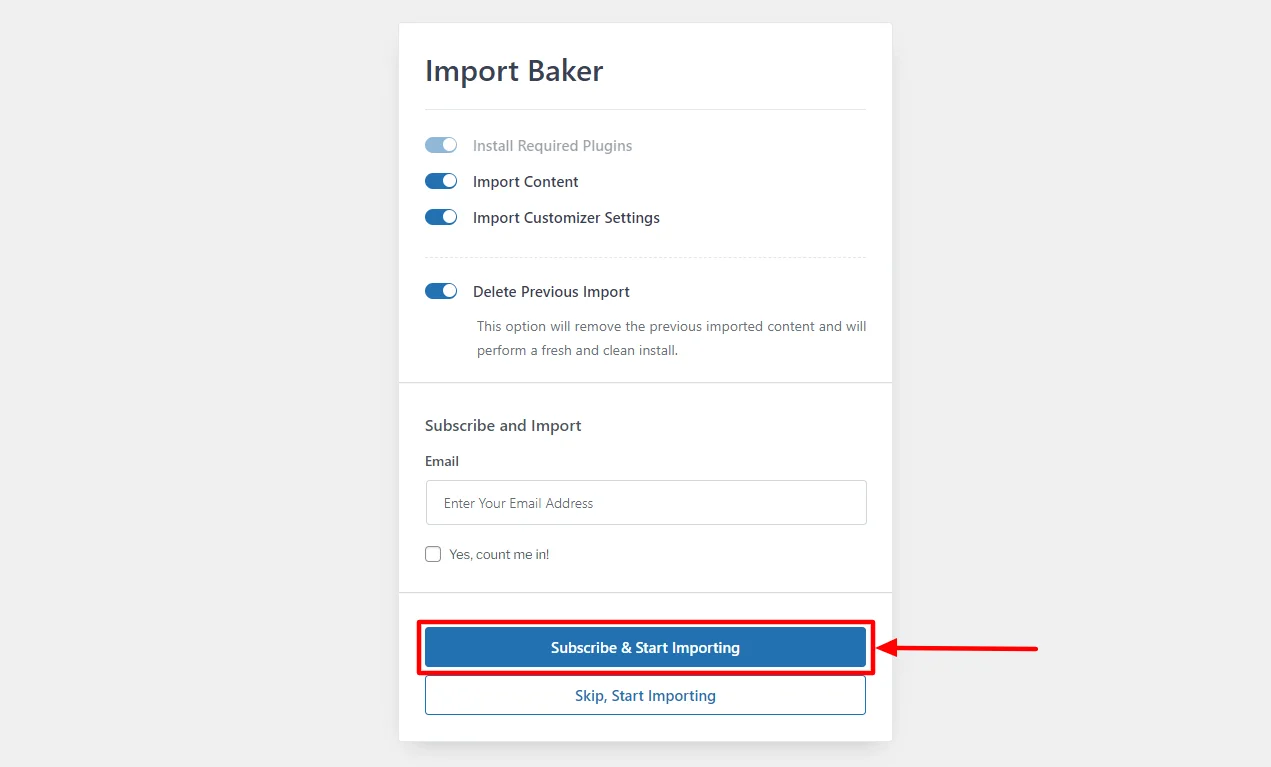
This will automatically install all the required content for your website.
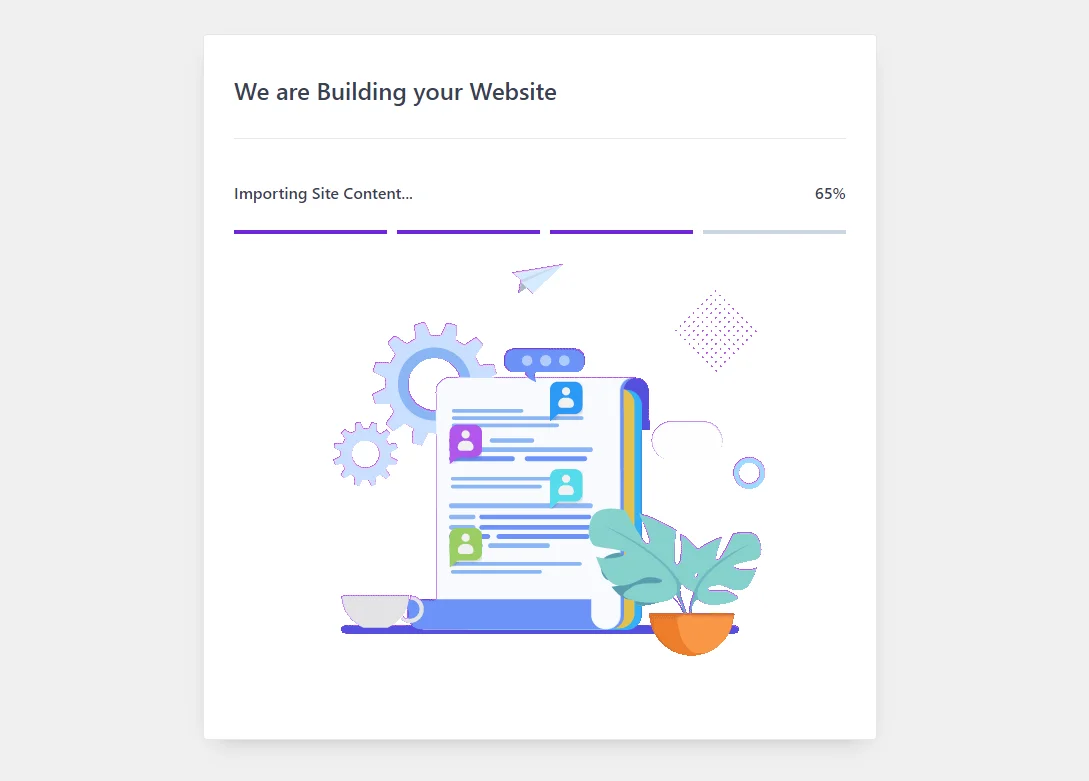
That’s it you only took 91 seconds to build an incredible baker website. You can click View Website to see how the template looks on your staging site.
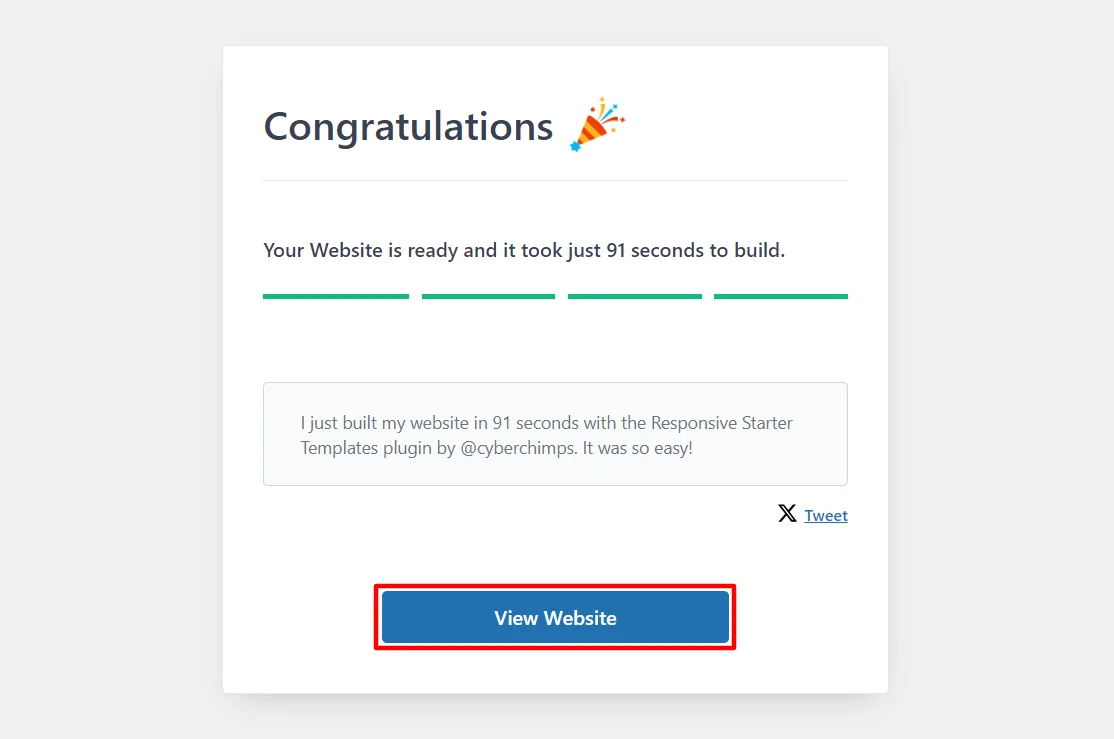
If you want to make changes to the template, just click on the Edit with Elementor button at the top and start customizing it.

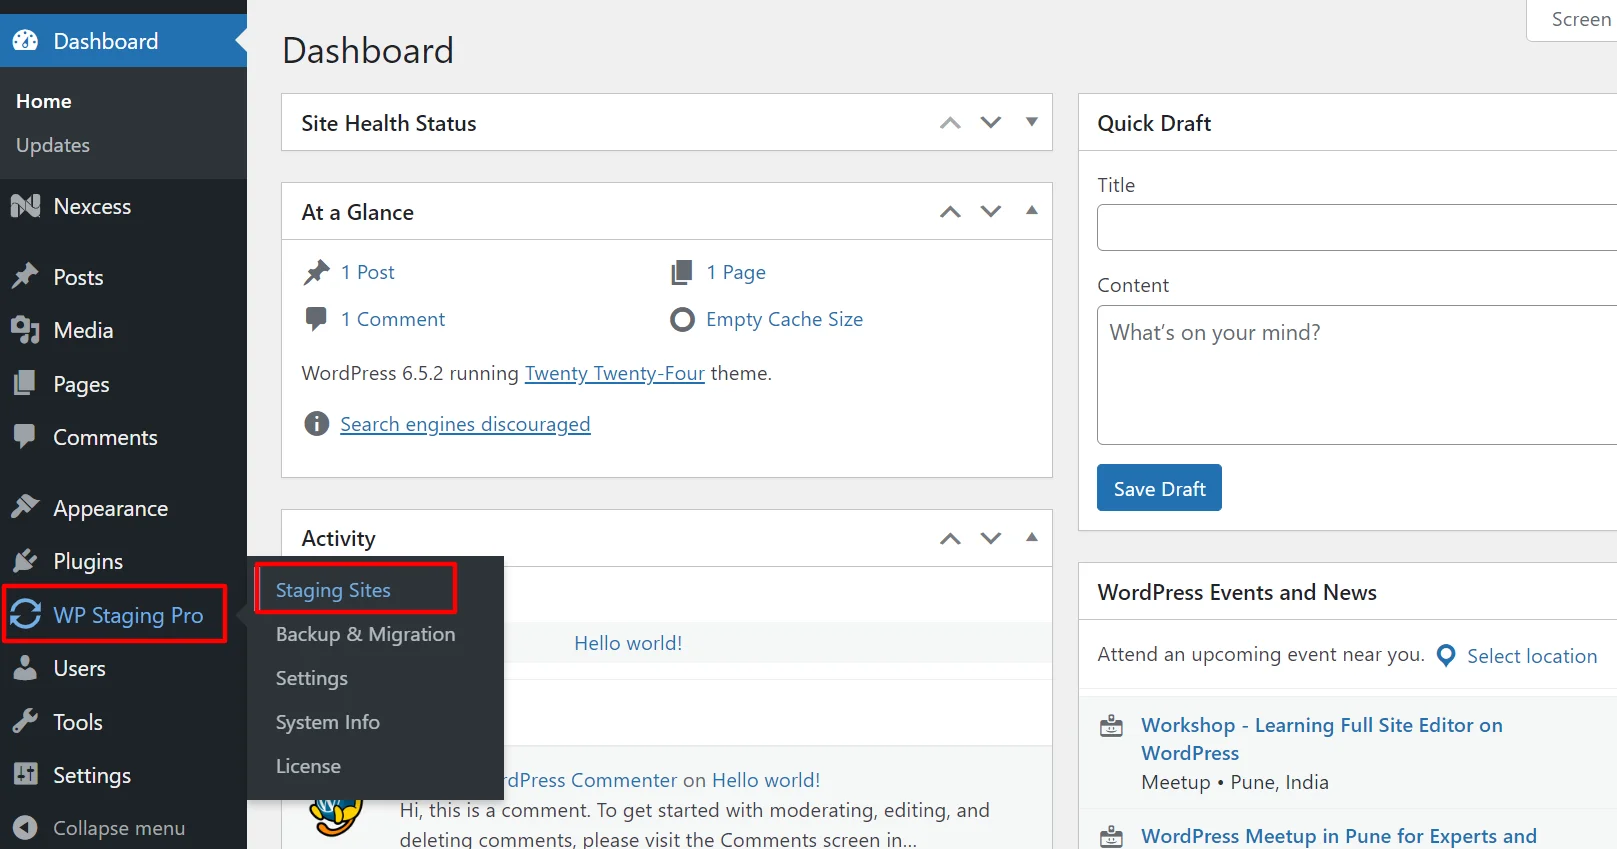
When you’re done making changes to your staging site and want to push those changes to the live site, you need WP Staging Pro.
How to Push Changes from Staging Site to Live Site
To push the staging site to the production site, you need WP Staging Pro.
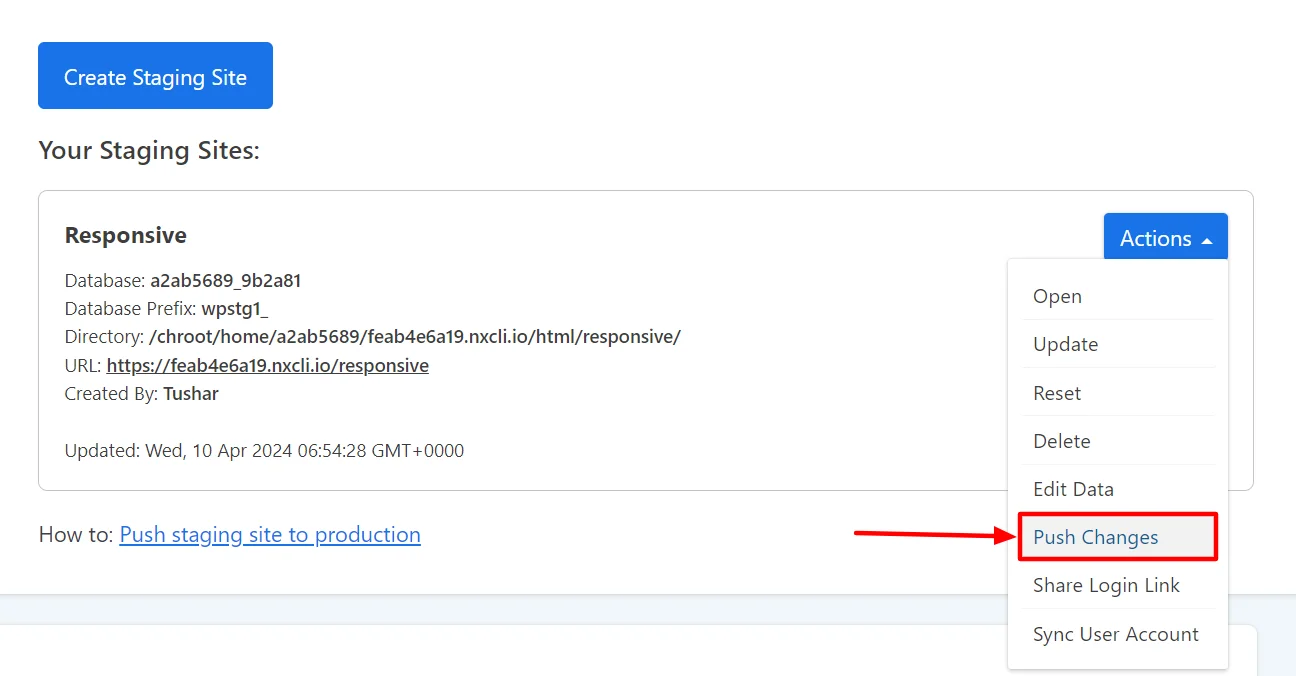
Log in to your production site and navigate to WP Staging PRO > Staging Sites.
Click on the action dropdown and select Push Changes.
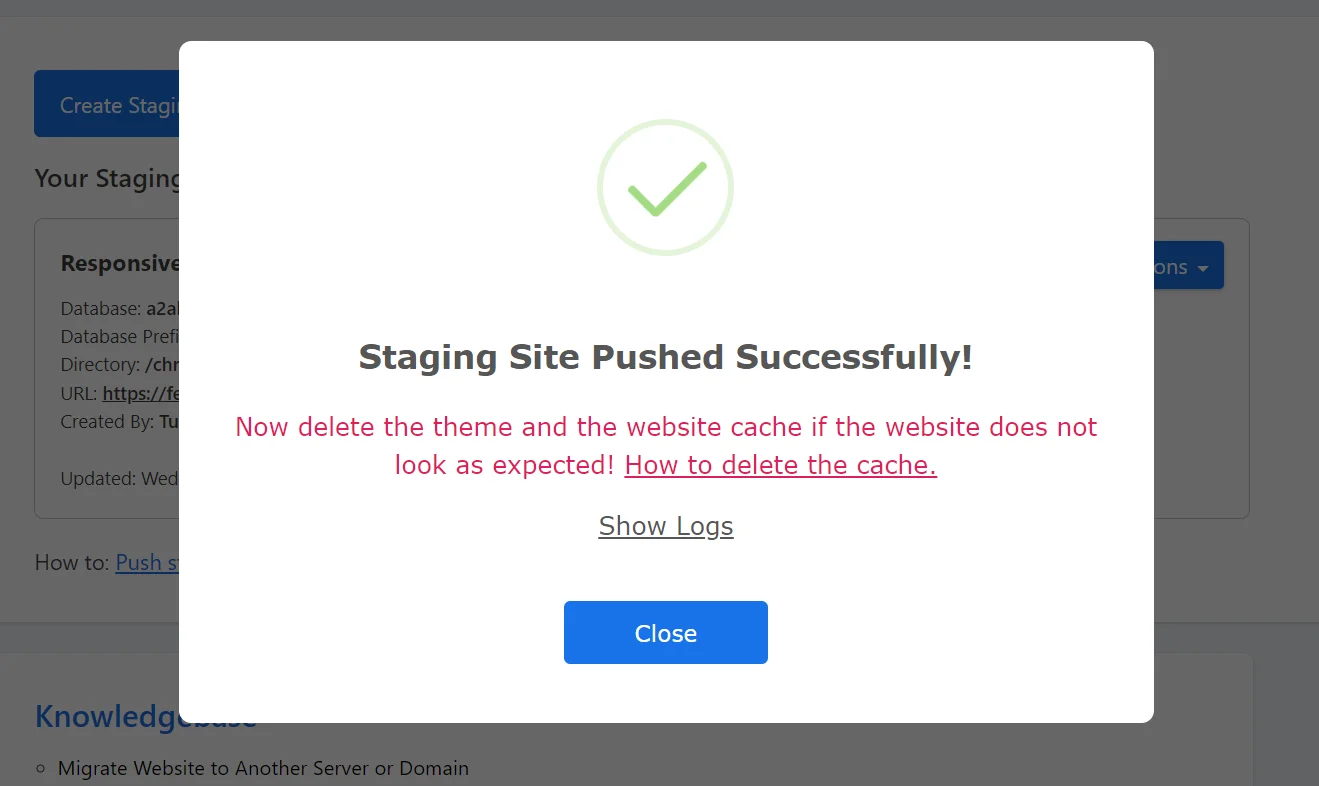
Next, click on Confirm Push button. This will push all the changes you made on your staging site to your live site.

And it’s done! You’ve successfully pushed staging site to live site.
And that’s it! Now you know how to create a staging site, install themes and plugins, and push changes to your live site.
You can try out the WordPress Playground feature to experiment with different themes, plugins, and customization options without affecting your live website.
FAQ
Here are the steps you need to follow to create a staging site for WordPress:
1. Install the WP Staging plugin on your live website.
2. Create a staging site using the plugin
3. Customize your staging site by making any desired changes and testing updates.
4. Once you are satisfied with the updates or changes, export the staging site database and import it to your live site.
By following these steps, you can ensure that your live site remains secure and stable while still being able to test new features and updates in a safe environment.
There are several methods to create a staging site for WordPress, but one of the most popular is using a plugin like WP Staging.
To transfer changes from the staging site to the live site in WordPress, you need to follow these steps:
Make sure that both sites run on the same WordPress version.
1. Create a backup of your live site.
2. Use the WordPress WP Staging plugin to transfer your staging site files and database to your live site.
3. Configure the WordPress site settings, such as permalinks and email settings.
4. Test your live site to ensure that everything is working properly.
Yes, WP Staging is one of the best plugin for creating a staging site. It provides an easy-to-use interface, automatic syncing with the live site, and easy rollback to the previous version.
Wrapping It Up!
Creating a staging site is an excellent way to work on your website without the fear of breaking something up.
A staging site is a copy of your website where you can experiment with it, troubleshoot problems, and change the design before the website goes live.
This way, you do not risk your website getting penalized for SEO, nor will you risk creating a bad user experience.
A staging site is your playground, and you can do anything you want there.
There are several ways to create a staging site. The easiest and perhaps the safest way is through a WP Staging plugin.
If you enjoyed this article, go through these as well:
- How To Backup And Restore Your WordPress Website?
- What Is WordPress Hosting? – Ultimate Beginner’s Guide
- How To Copyright Your Website – A Detailed Guide
Excited to build your website? Grab Responsive Theme and discover endless capabilities for your website!