Summary
The article explains AMP for WordPress. It defines what AMP (Accelerated Mobile Pages) is and how it works to speed up mobile pages.
It also highlights benefits, setup methods, compatibility tips, and potential drawbacks. Helping readers decide if AMP is right for their WordPress site.
Do you want to set up AMP on your WordPress website?
Firstly, AMP stands for Accelerated Mobile Pages.
Setting up AMP on your WordPress website helps to load content faster on mobile devices. This ensures better performance and can improve your website’s traffic drastically.
This article will show you how to set up Google AMP in WordPress.
- What is AMP?
- Benefits of Implementing AMP on Your WordPress Website
- Disadvantages of Accelerated Mobile Pages
- Preparing Your WordPress Website for AMP
- Testing and Validating Your AMP Pages
- Troubleshooting Common AMP Validation Issues
- Optimizing AMP Performance
- AMP SEO Best Practices
- Frequently Asked Questions (FAQs)
- Conclusion
What is AMP?
Google Accelerated Mobile Pages is an open-source framework that helps you create a fast and simpler version of your website.
It creates a duplicate of your website using AMP HTML, which removes the elements that cause your site to load slower, like JavaScript, third-party scripts, etc.
It’s also fully compatible with WordPress.
Benefits of Implementing AMP on Your WordPress Website
The benefits of the AMP format are indisputable.
By offering users AMP that loads quicker, you may improve the user experience. This is taken into account by Google when ranking pages.
Additionally, it reduces your bounce rate and increases visitors’ stay on your website.
Your pages are becoming more visible on Google.
Additionally, Google displays your AMP pages in its carousel, which increases clickthrough rates and traffic.
Increased revenue is yet another advantage of AMP.
Disadvantages of Accelerated Mobile Pages
On the other side, AMP has certain disadvantages as well:
Because AMP’s primary goal is for content to load as rapidly as possible, its design is relatively simple, which impacts the look of your website and makes it challenging for you to set yourself apart from your rivals.
There are also some ad sizes and formats that are unavailable.
Furthermore, simplified HTML and JavaScript code prevents you from displaying your opt-in forms and buttons, which may decrease conversions.
The AMP format is easier for non-developers to implement if you utilize a plugin, which we will discuss in the following section.
Preparing Your WordPress Website for AMP
Installing and Activating the AMP Plugin
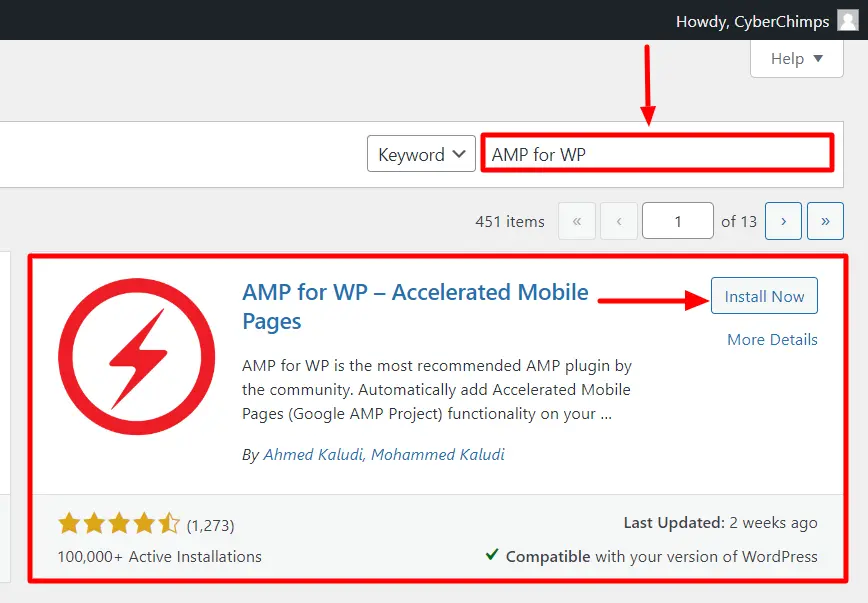
- Go to your WordPress dashboard and click on Plugin > Add New.

- Enter “AMP for WordPress” in the search bar. Install and Activate the Plugin.
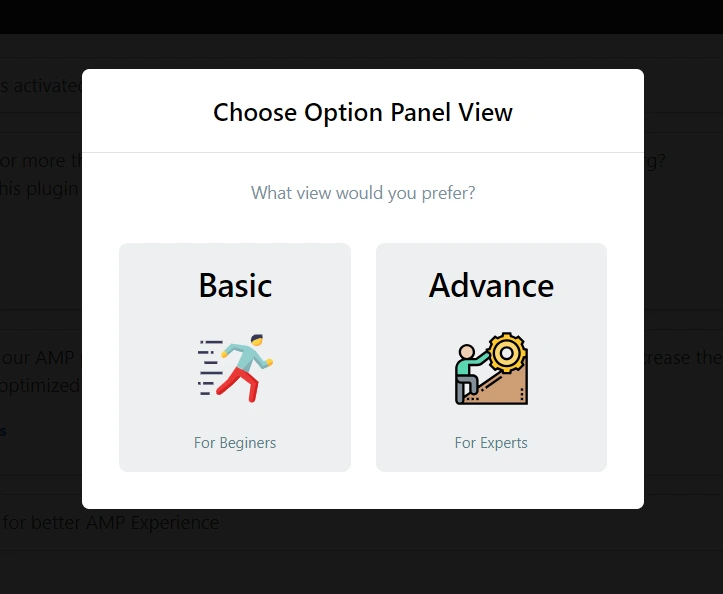
- You will be given the choice to select between “Basic or Advance” after activation. Decide which option you want to take. In this article, I’ll go through the basic view.
Configuring the AMP Plugin Settings
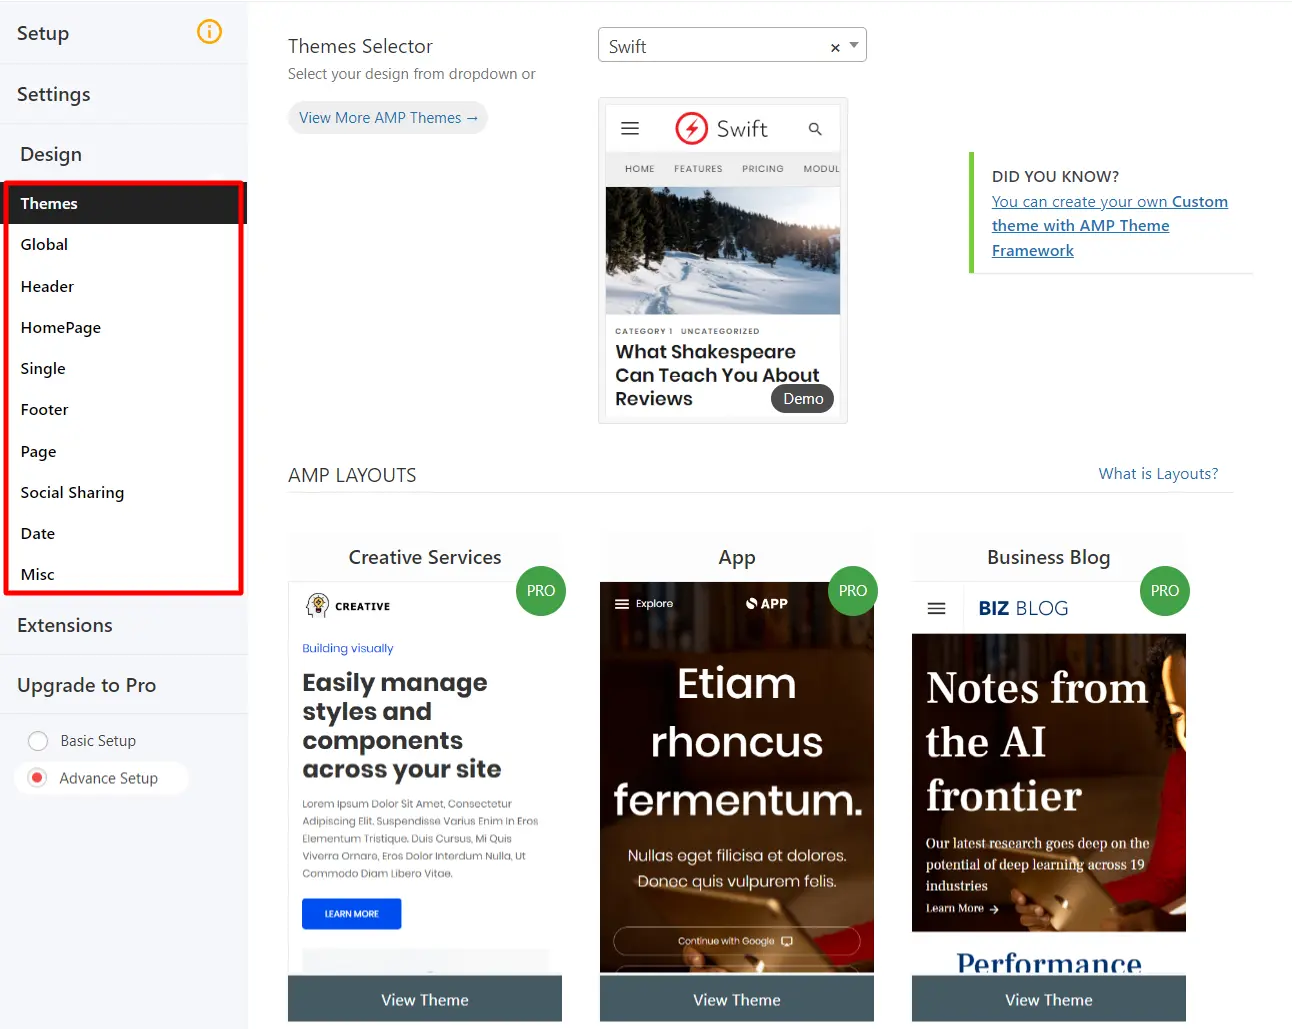
- Go to “AMP” in your WordPress dashboard to use the AMP for WP plugin.

- This will launch the customizer, which is divided into Basic Setup and Advance Setup parts.

- Under Advance Setup, you’ll get these features:

- The plugin’s backend functionalities are primarily displayed in the Settings section and include the following:

- Another crucial section is the Design section, which manages the appearance and feel of the AMP output and contains the following:
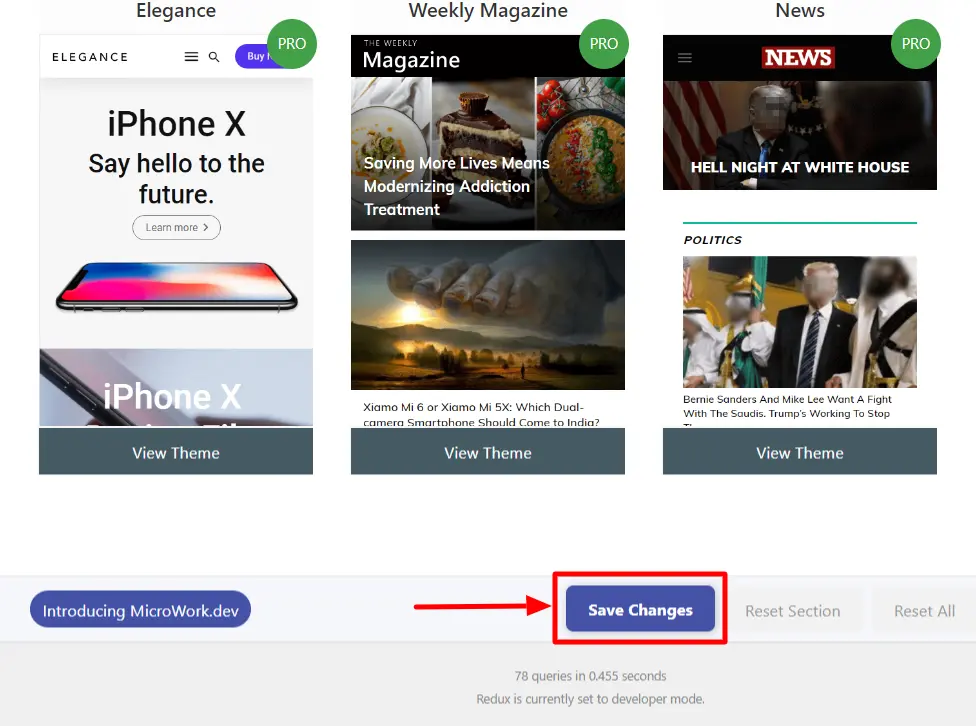
- Always click the “Save Changes” button when you’re done customizing your AMP website.
- Extensions sections provide you with all the helpful extensions you can use along with AMP to enhance the performance of your website.

Testing and Validating Your AMP Pages
You can use Google’s AMP testing tool to test your Google AMP site.
Once on the front page, type in the website URL, page, or post and click “Test URL.” Another option is to paste your website’s code and select “Test URL.”

AMP Test ensures that an AMP page is functional and has the right settings to appear in Google Search results.
Troubleshooting Common AMP Validation Issues
To ensure mobile users have a seamless and optimized experience on your website, you may need to troubleshoot AMP (Accelerated Mobile Pages) validation problems.
There are two methods to validate AMP pages. Each will generate a pass or fail outcome, allowing you to select the one that aligns with your development approach:
1. Browser Developer Console
To validate your AMP pages, you can use the browser developer console.
Open your AMP page in your web browser and add “#development=1” at the end of the URL.
Then, open your browser developer console by right-clicking on the page, and go to Inspect > Console to check for any validation errors.
The errors displayed in the console will look similar to this:

2. AMP Validator Web Interface
To use the web interface, copy and paste your source code into the designated URL field.
Click the validate button at the top of the page (as demonstrated below). If there are any mistakes, they will be displayed in the page’s HTML source code along with the corresponding line.

Optimizing AMP Performance
Optimizing AMP (Accelerated Mobile Pages) performance refers to improving and fine-tuning various aspects of AMP pages to make them load faster, provide a seamless user experience, and adhere to the best practices set by the AMP Project.
1. Minifying CSS and JavaScript
It’s one of the most effective methods to optimize your AMP performance. The process involves deleting unused characters from these files, such as white spaces and comments, to reduce file sizes and speed up downloads for mobile users.
Speed up page rendering and enhance the user experience by minifying CSS and JavaScript to reduce the data needed over the network. This is especially important for mobile users with constrained bandwidth and slower connections.
2. Caching AMP Pages
It’s one of the important method for improving the performance of Accelerated Mobile Pages (AMP).
This involves saving AMP pages that have already been loaded so that subsequent visits can access the content without having to refresh it from the source by retrieving it from a nearby server.
As a result, it improves user experience and speeds up page times, especially for frequent users.
3. Optimizing Images for AMP
Accelerated Mobile Pages (AMP) performance needs to be optimized for images. Poorly optimized photos can dramatically slow down loading times and consume critical bandwidth for mobile users.
AMP SEO Best Practices
To make AMP pages load more quickly and offer a smooth user experience, follow these best practices:
- Implementing Structured Data for AMP: Structured data is essential for improving the visibility of your AMP pages in search engine results and for boosting how your content is shown in search listings.
- Optimizing Metadata for AMP Pages: Metadata is vital in improving the visibility and click-through rates of your Accelerated Mobile Pages (AMP) in search engine results.
Frequently Asked Questions (FAQs)
The official AMP plugin is free to download and use.
The plugin converts your existing content to AMP-valid content where possible. It inserts boilerplate AMP code into your site’s header and provides you with development tools to ensure AMP validity is maintained.
This plugin allows you to use your existing WordPress theme while benefiting from all the great features AMP brings to a website for owners and visitors alike, particularly a better-performing website that follows modern web standards and best practices.
Conclusion
In conclusion, setting up AMP (Accelerated Mobile Pages) on your WordPress website is a powerful way to enhance your site’s performance and cater to the growing number of mobile users.
Following the step-by-step guide, you can create fast-loading, user-friendly pages that improve search engine rankings and boost user engagement and conversion rates.
If you liked this article, don’t forget to check out these as well:
- How To Enable Or Disable Elementor Widgets In REA Plugin
- How To Install A WordPress Plugin
- Top WordPress Timeline Plugins And How To Add A Timeline
Are you looking to start building your website today? Grab the Responsive Theme now!