Summary
The article explains how to add an Elementor pricing table in WordPress. It shows how to insert the pricing table widget, add plan details, prices, and features.
It also covers style options like colors, fonts, layout, and buttons for better design.
Are you looking to add an Elementor pricing table on your WordPress website?
The pricing table is a crucial element for any commercial website, and it needs to be attention-grabbing, informative, and stylish.
An effective pricing table plays a vital role on a website that sells courses, packages, or other services.
It helps users compare different features, making it easy to decide on the purchase.
If people can see the value in your offer through a clear pricing table design, they are more likely to become paying customers.
In this article, we’ll show you how you can easily create an Elementor Pricing Table with just a few steps.
Responsive Addons for Elementor is the Best Elementor Addons plugin – Get it for free!
Tools Required to Create an Elementor Pricing Table in WordPress
To create an Elementor pricing table for your WordPress website, you’ll need to make sure you’ve installed a few plugins:
Elementor Page Builder

This core plugin empowers you to create stunning pages using a drag-and-drop interface. (If you haven’t already, installing Elementor is the first step!)
Responsive Addons for Elementor

📢 My Real-World Test Results:
- Number of widgets: 80+
- GTmetrix Performance Score: 100%
- Includes Cross-site Copy-paste feature
- 5+ Extensions like Scroll animations, Sticky Section, Page Duplicator, & more.
- Save design time with 100+ Premium-grade Starter templates
Responsive Addons for Elementor plugin offer over 50 widgets, including a dedicated free pricing table widget.
With this plugin, you can easily integrate clear and compelling Call-to-Action buttons within each plan, directing users toward the desired action.
Your pricing tables will look flawless and function seamlessly across all devices, from desktops to smartphones.
Adding an Elementor Pricing Table to the WordPress Website
Without further ado, let’s see how to easily add an Elementor pricing table to your WordPress site.
Step 1: Install and Activate Responsive Addons for Elementor
You need to install and activate Responsive Addons for Elementor, and to do that, follow these steps:
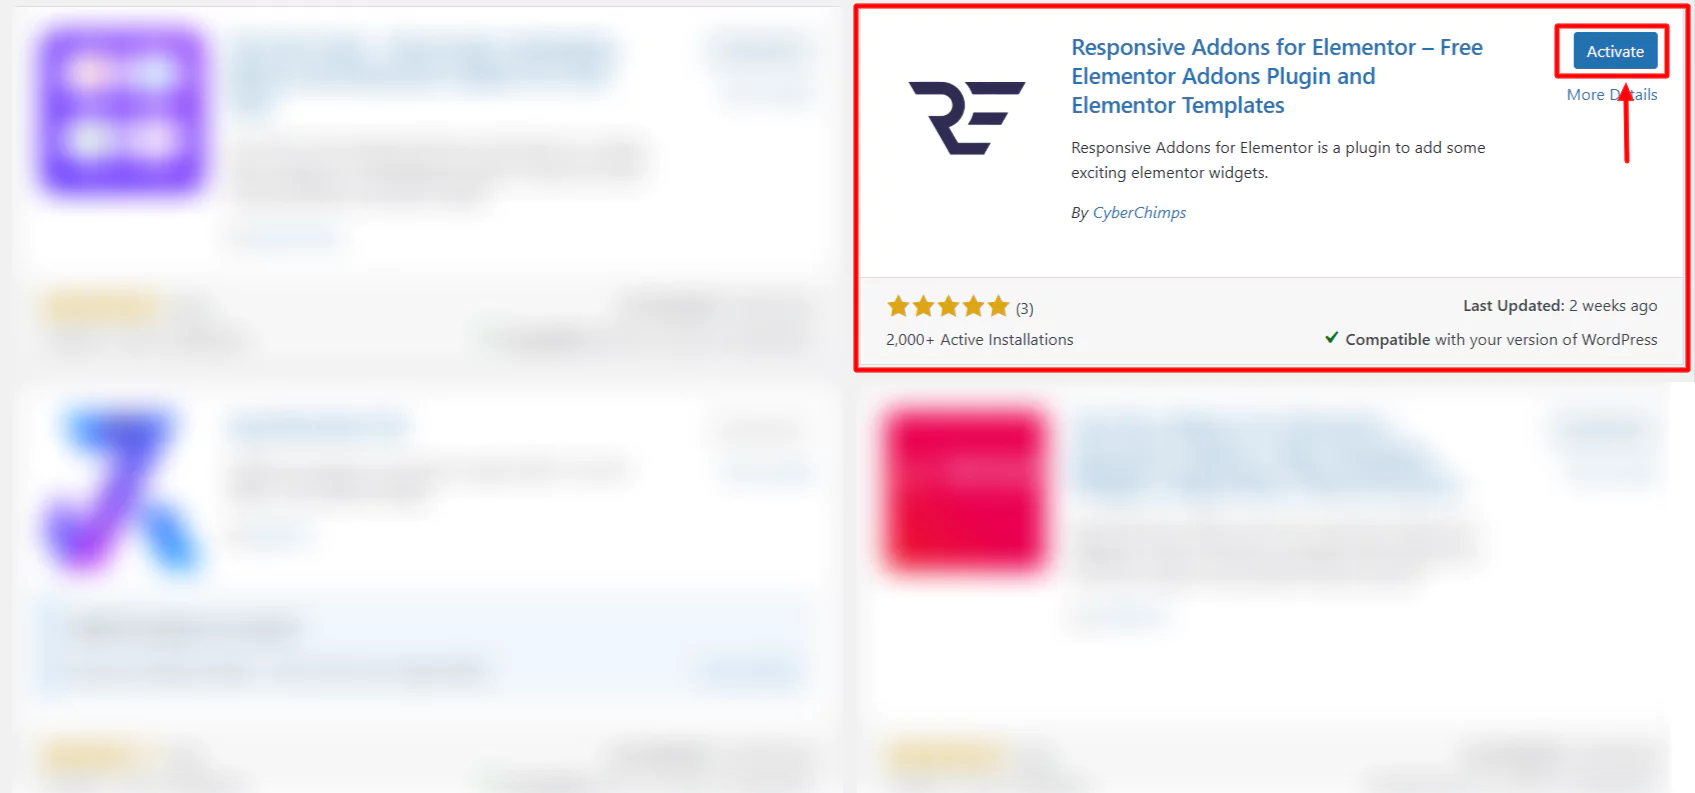
Login to your WordPress dashboard and go to Plugins > Add New Plugin.

Search for Responsive Addons for Elementor plugin and click the Install Now button.

After the plugin is installed, click Activate to activate it.
To create a pricing table with Elementor, select the page where you wish to add the Pricing Table widget. To do that, go to Pages > Add New Page.

Click the Edit with Elementor option/button.

Drag and drop the Pricing Table widget in the Elementor editor. By default, it will look like this:

As you can see, all the necessary elements are already included.
Step 2: Add Elementor Pricing table widget
Navigate to the end of the Elementor editor and click on the plus icon in the box.
Click on Flexbox and select the desired layout for your use.

Drag and drop the pricing table widget into the block.

You can add pricing widgets as you need.

Step 3: Configure the Widget
Click on the Pricing table widget to configure it. Three blocks with different settings will appear: Content, Style, and Advanced. Let’s look at them one by one.
1. Content Tab
The Content tab is where you can adjust the various content settings of your widget.
Five sections in total let you customize the widget’s content. Let’s take a closer look at each section and what it offers:
1.1. Header Section
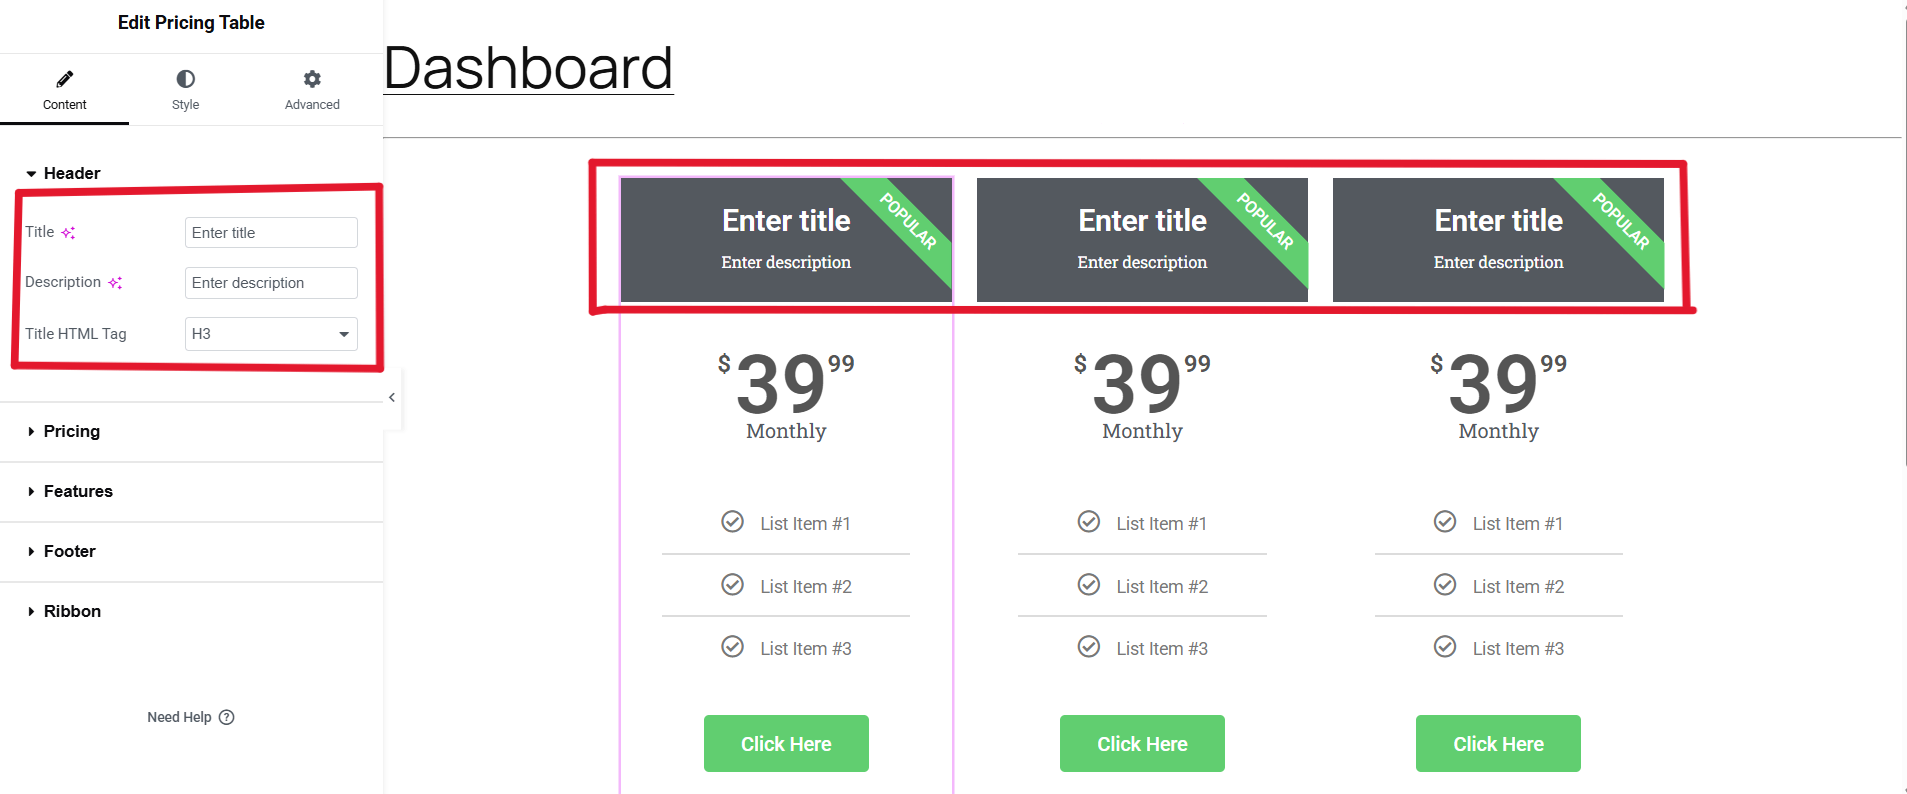
This is the first section of the pricing table. It includes a Title, Description, and Title HTML Tag. Depending on the title’s importance, you can select from H2 to H6 tags.
As you can see, I have changed the title, description, and title HTML. You can edit the rest of the pricing box according to your needs.

1.2. Pricing Section

The pricing section allows you to display the cost of the packages. The details that can be added include the Currency Symbol, Price, Currency Format, Sale, and Payment Period.
Edit the price from the price box or change the period.

1.3. Features
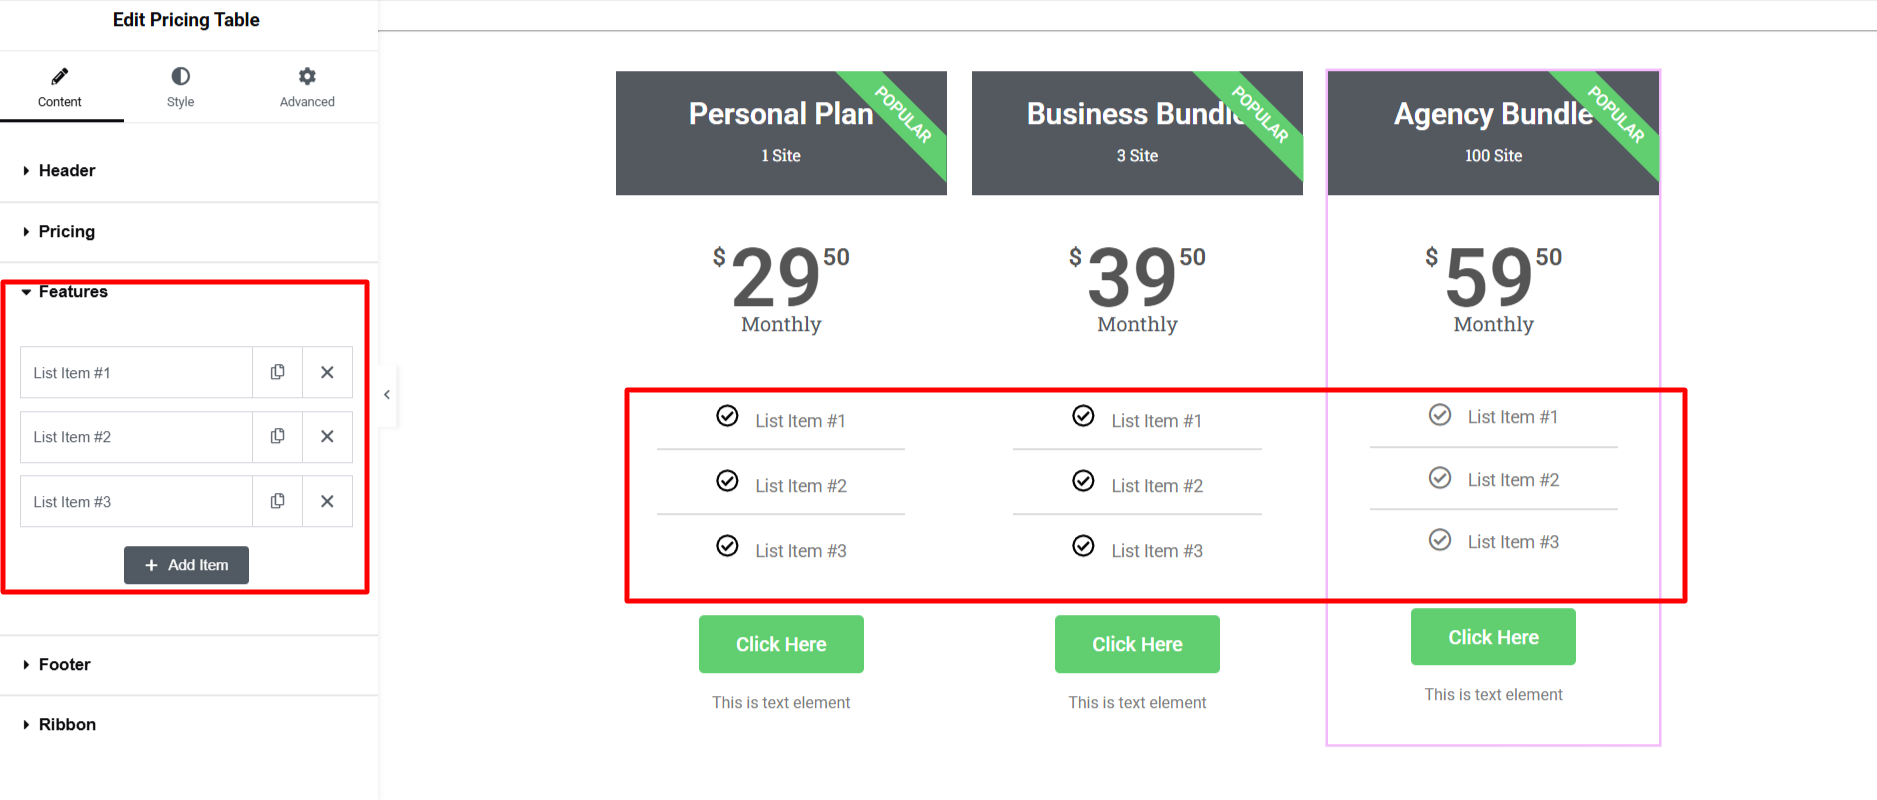
Under List Items, you will find a list of all the features. You can drag and drop them to change their order.
To add another item to the list, click the Add Item button. To delete a list, click the cross icon. Each item has separate settings that you can customize by clicking on it.
You can customize the following settings for each item:

- Text: Enter a description of the feature.
- Icon: Choose an icon from a list of Font Awesome icons or upload an SVG.
- Icon Color: Choose a color for the icon.
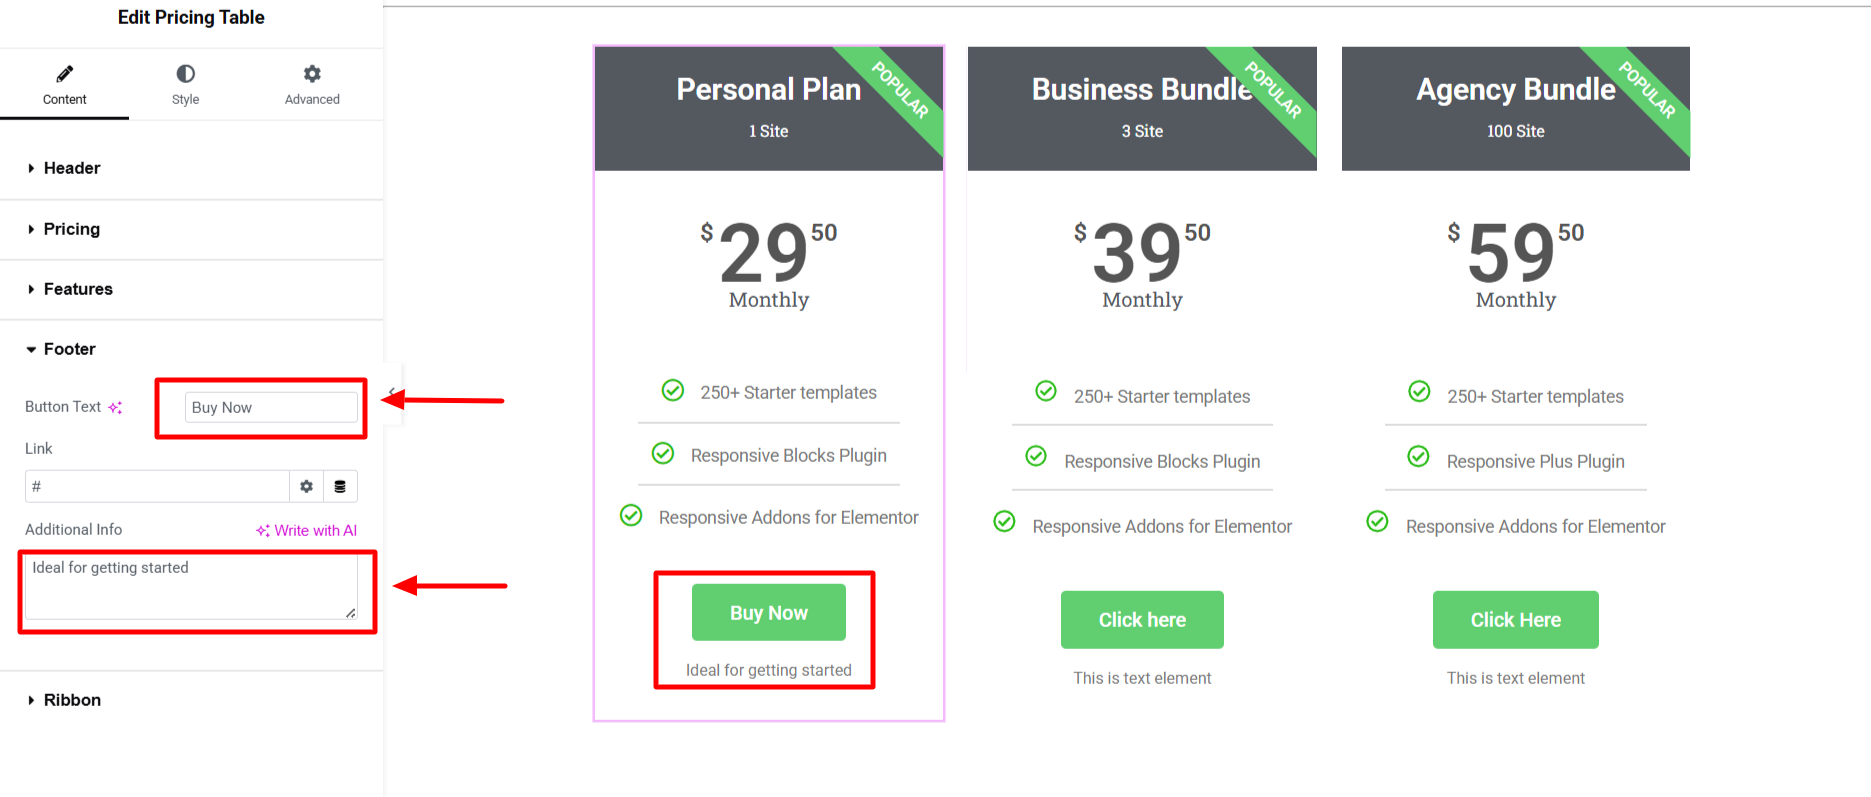
1.4. Footer
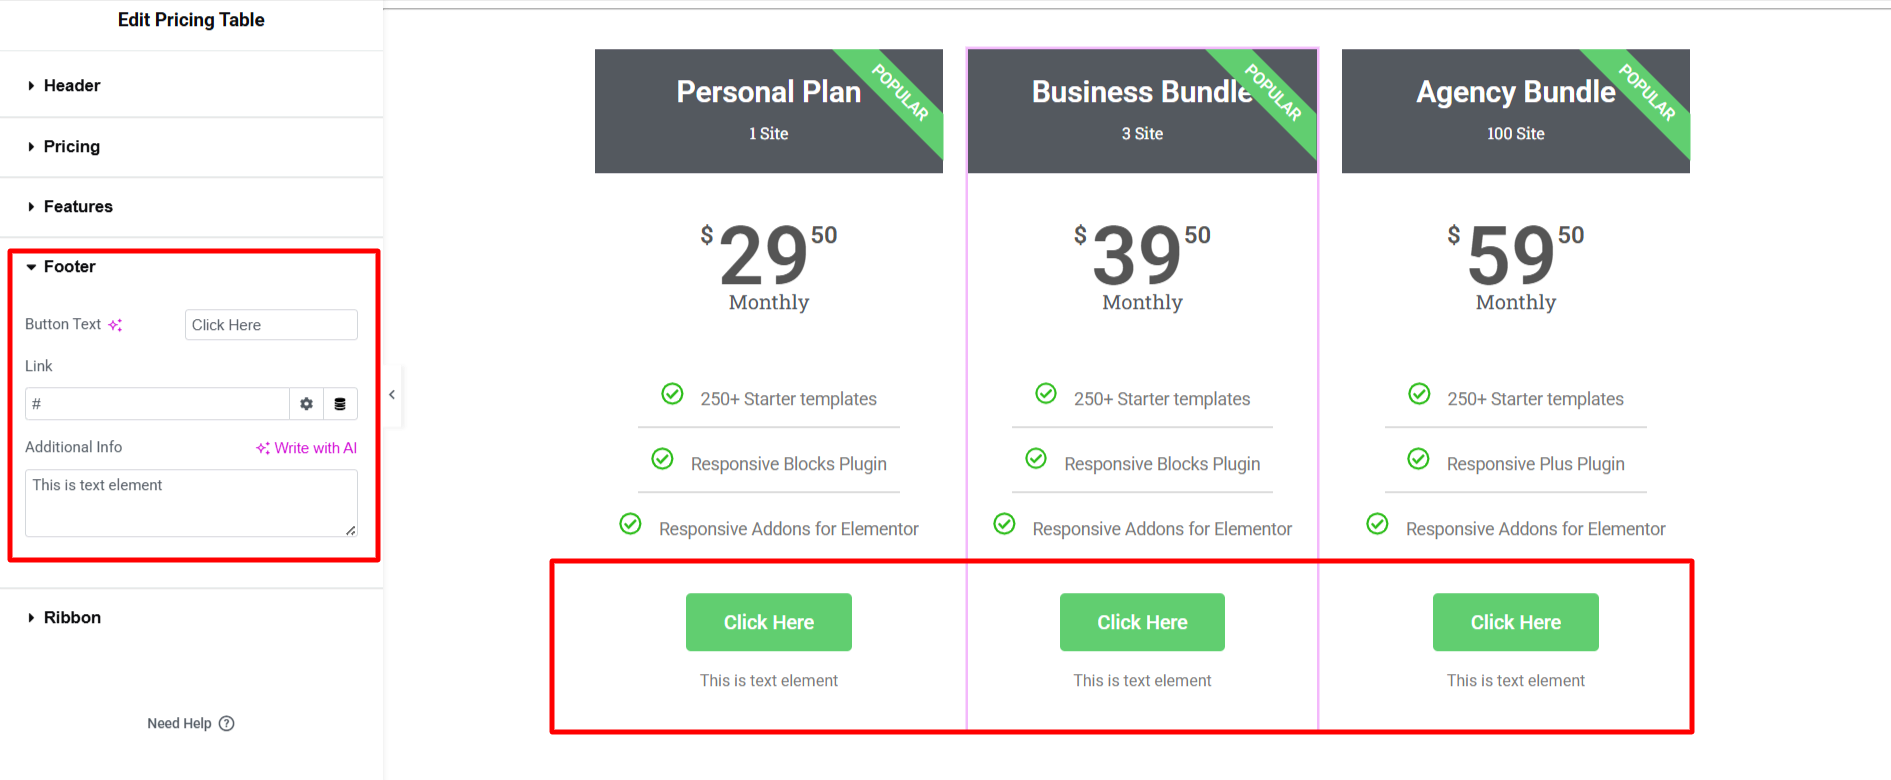
You can customize a call-to-action button by providing the button text and item URL. You can also choose link options and add additional information below the button.
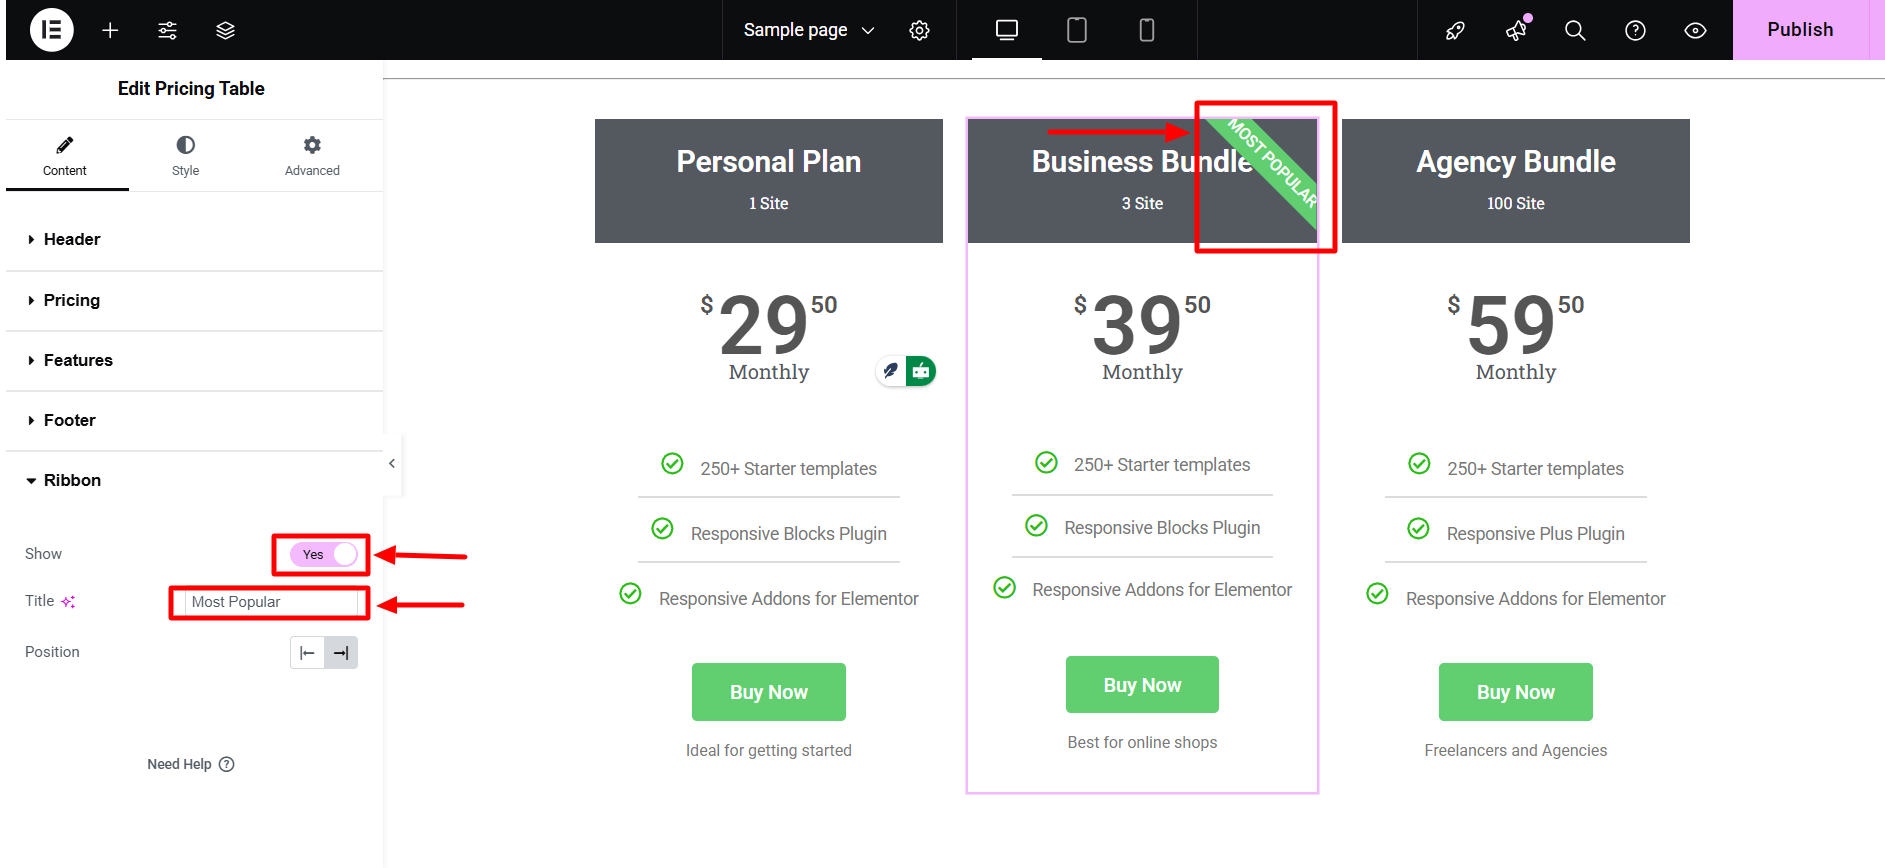
1.5. Ribbon
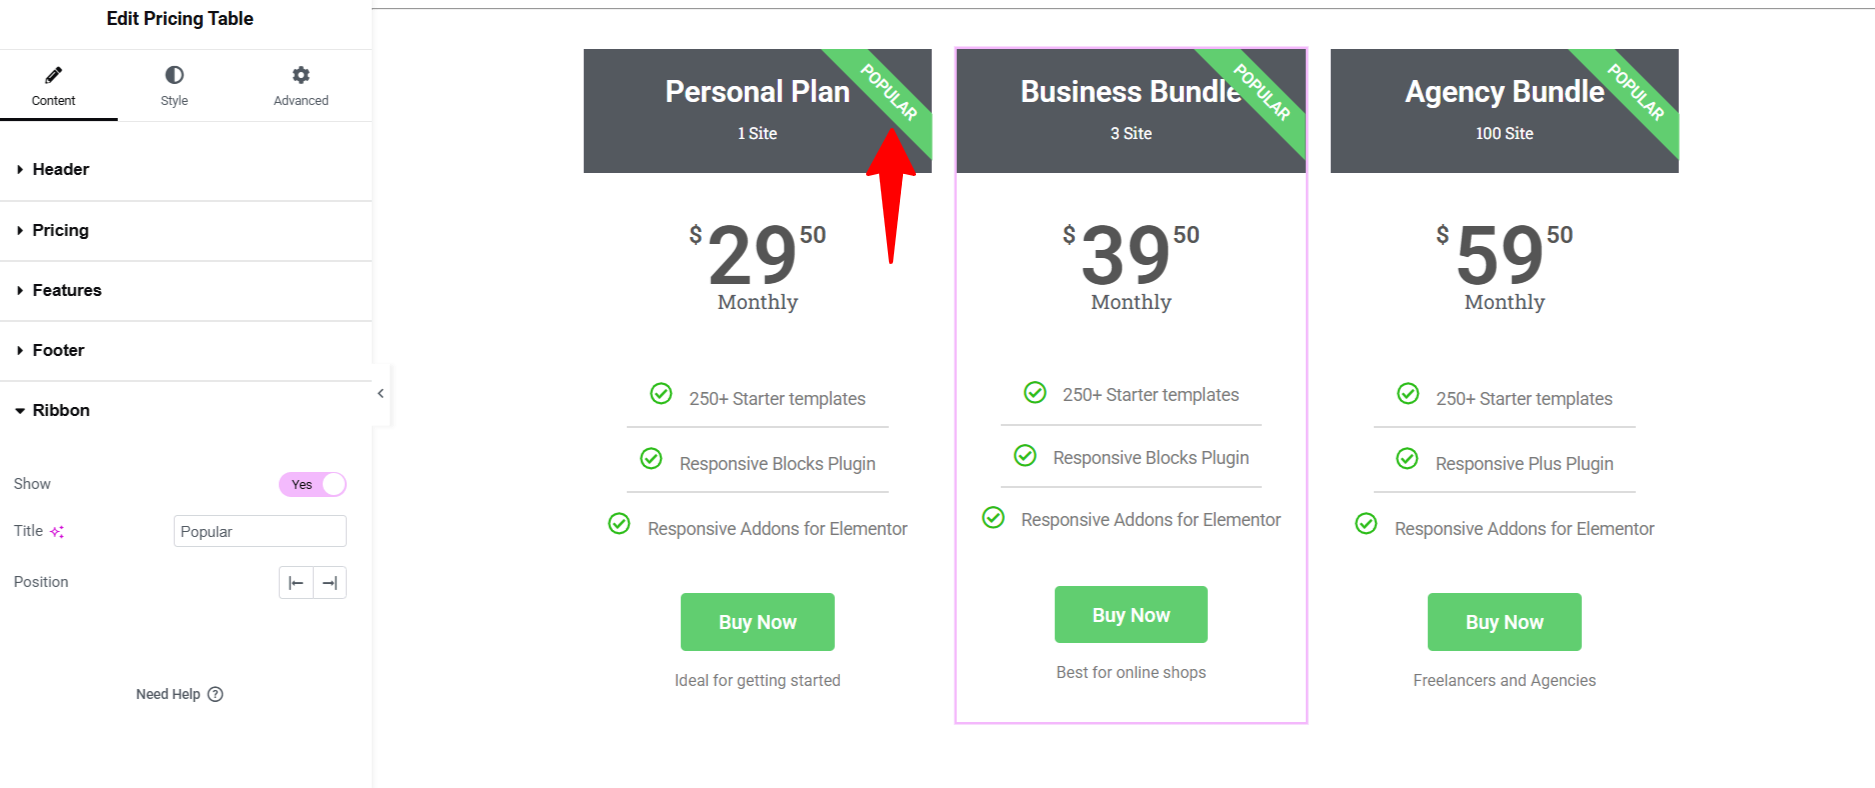
It’s a text formatting feature that highlights text at a diagonal angle. You can enable or disable the Ribbon button to show or hide the ribbon.
2. Style Tab
Once you have set up the layout of your pricing table, you can access all the styling options by switching to the style tab.
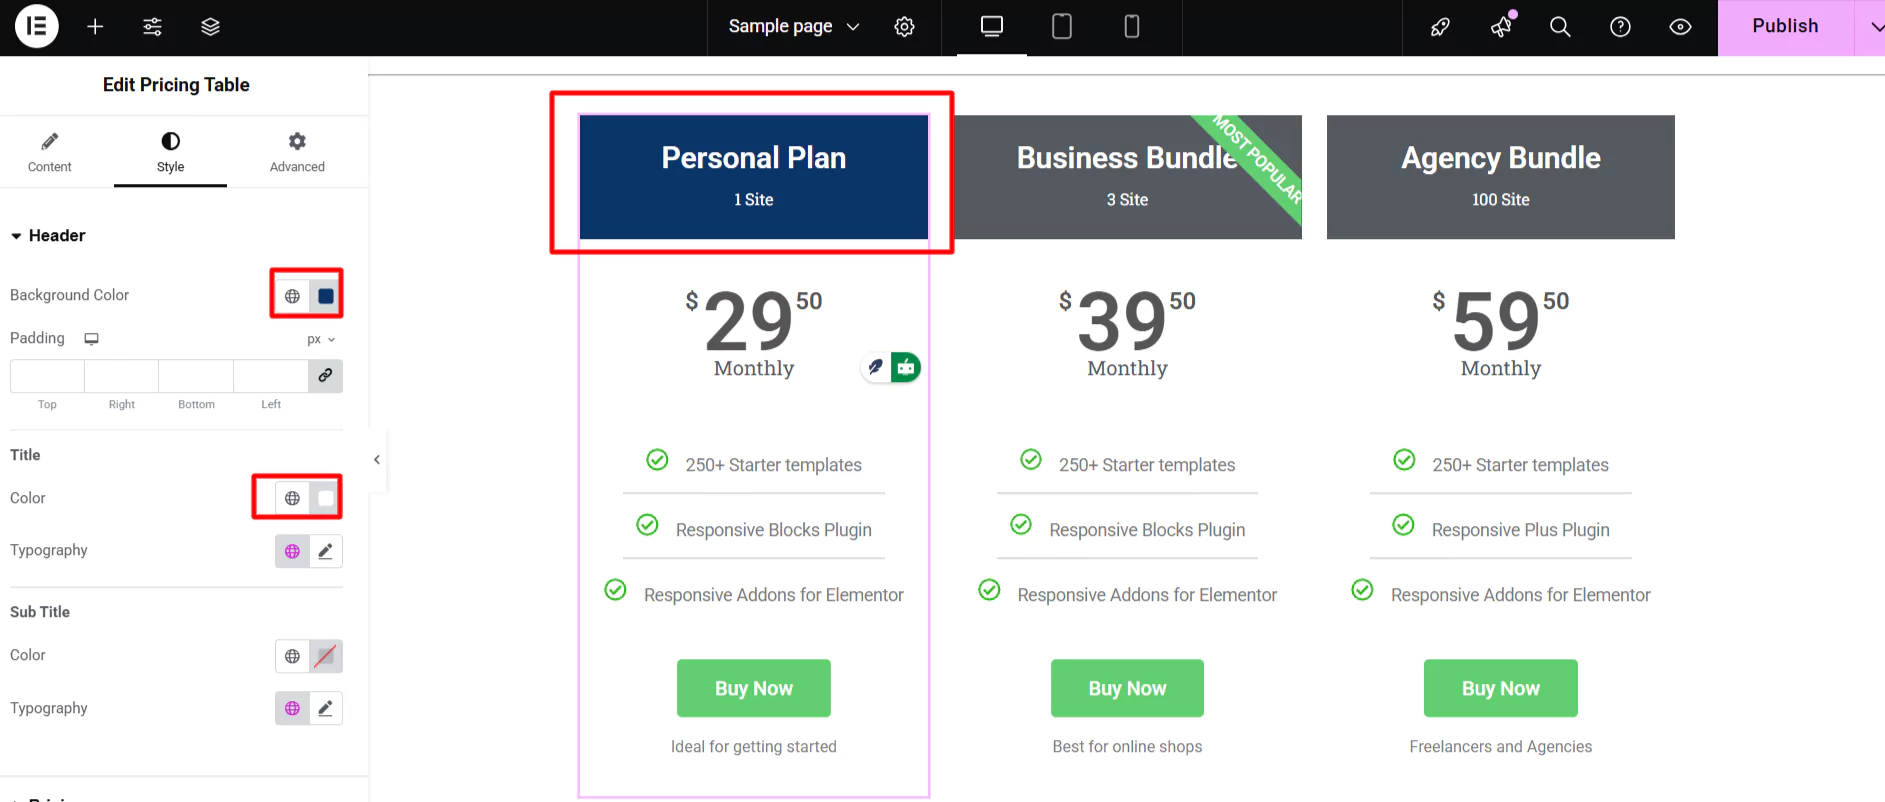
2.1. Header Section

You can style your pricing table’s icon, title, and subtitle in this section. And you can also add a background color, border type, and other styling features.
2.2 Pricing Section
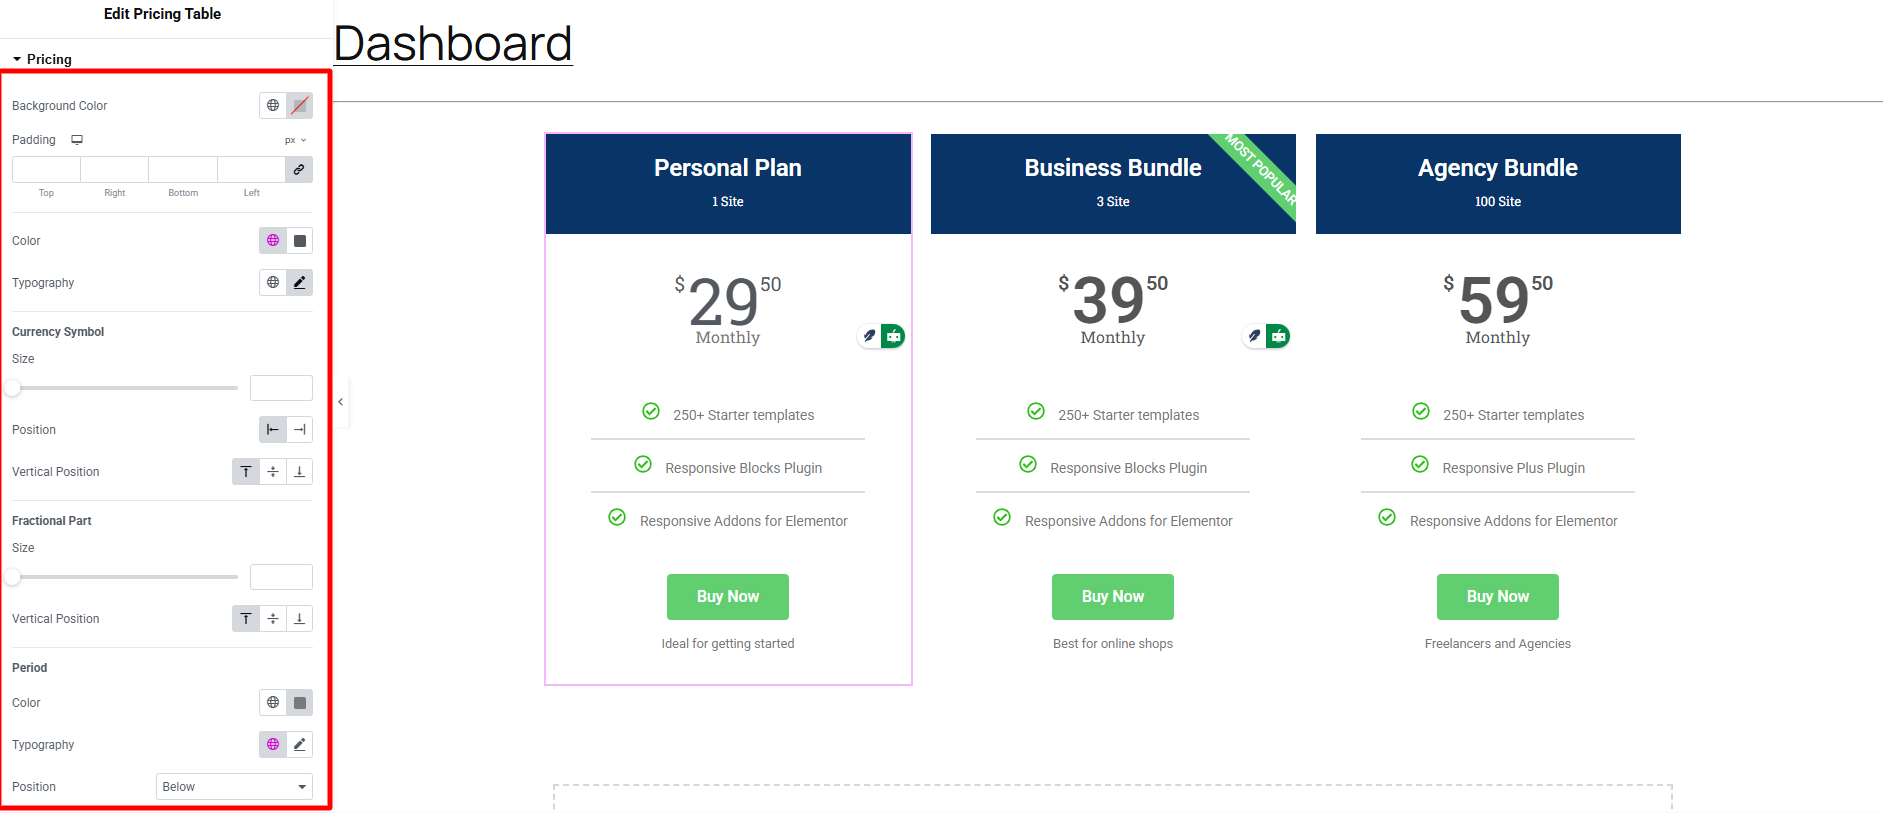
Customizable options under pricing include background color, padding adjustment, price text color, font, size, and style.

2.3. Feature Section

Under the feature section, you can adjust the background color, padding, text color, typography, alignment, and width to improve visual appeal. Further choosing a suitable divider style, color, weight, width, and gap can help.

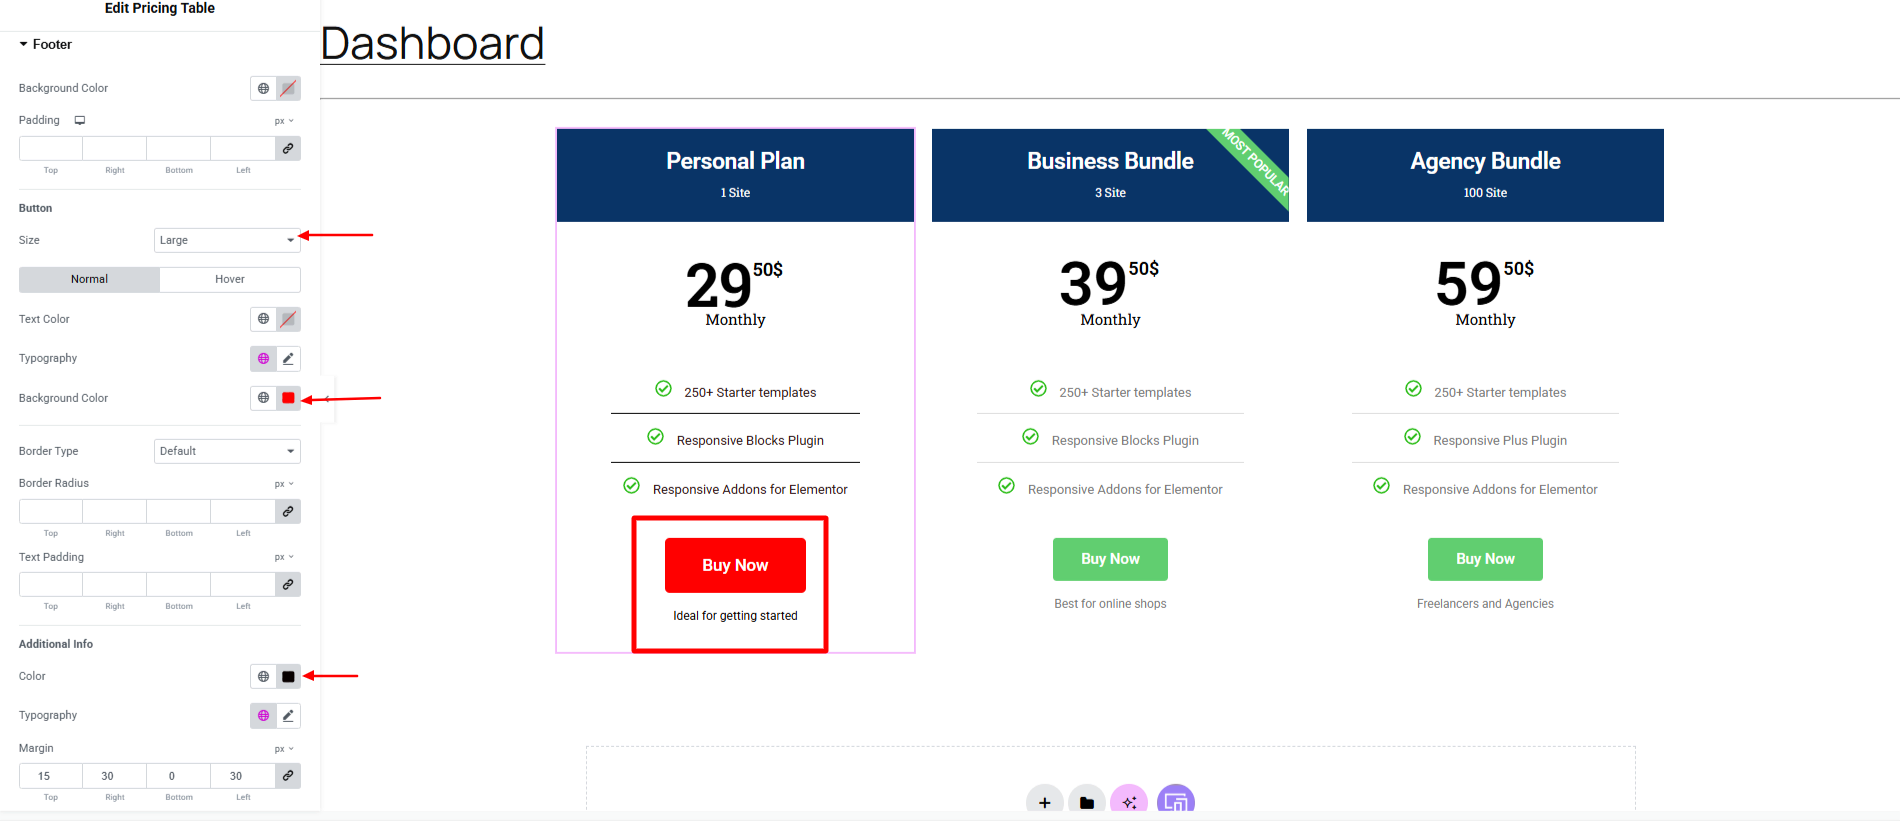
2.4. Footer Section
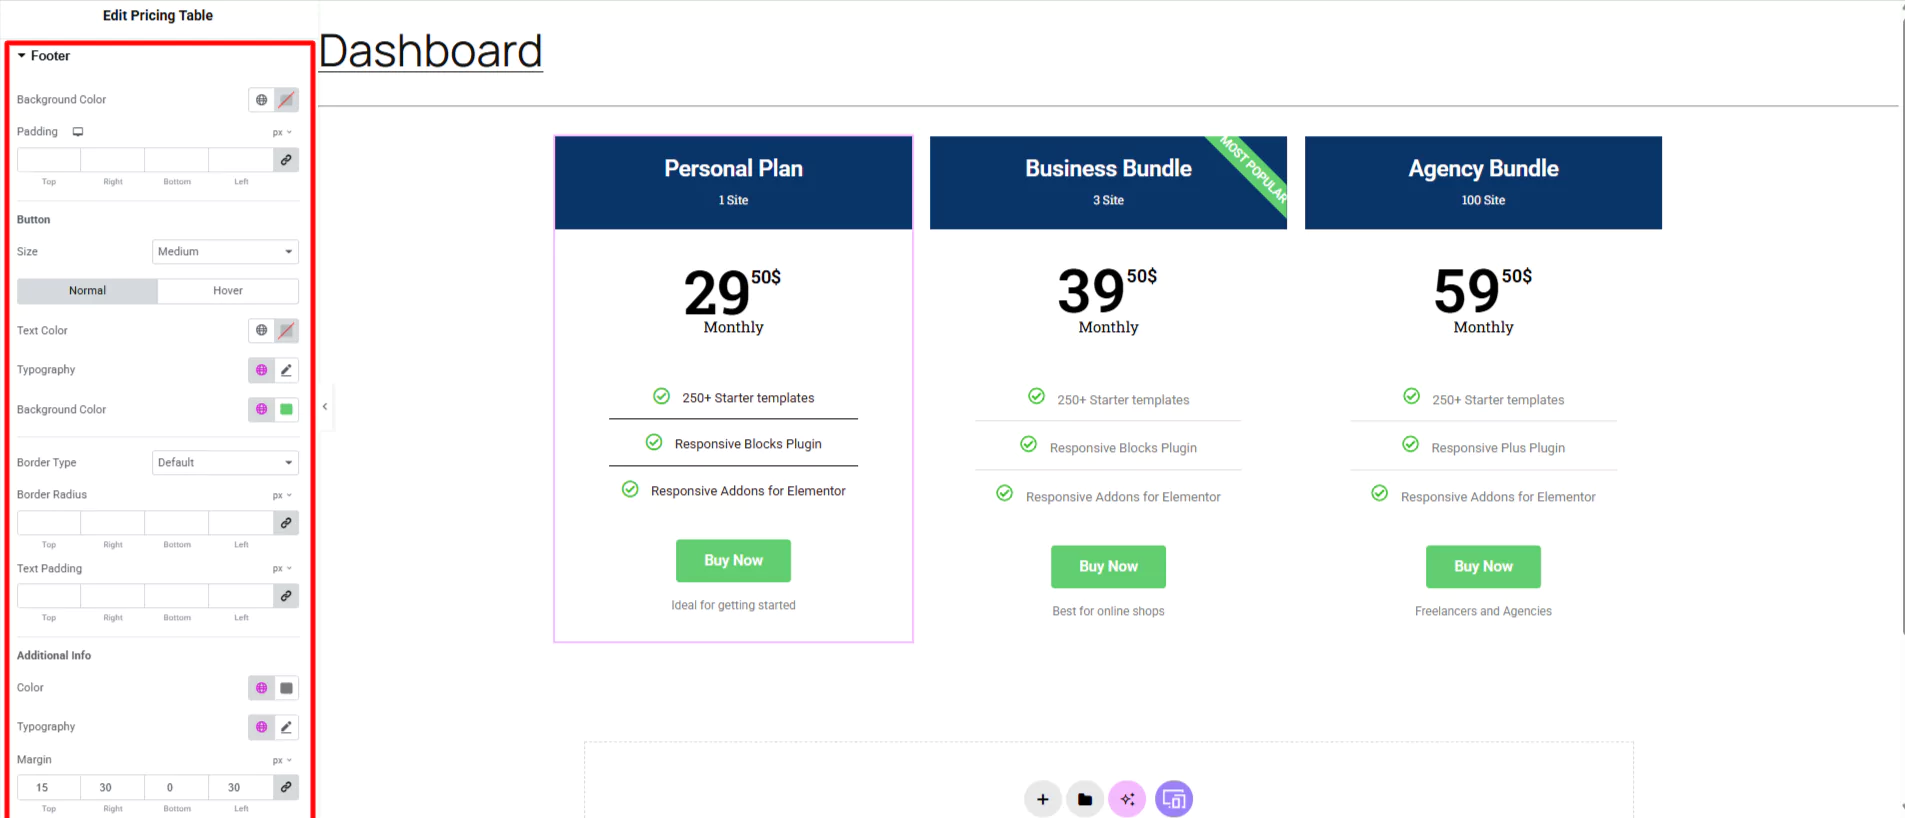
Customizing your website’s footer is vital to achieving a professional look. Choose the right background, padding, button size, text color, typography, border type, radius, padding, additional information style, and margin to make a visually appealing first impression.
2.5. Ribbon
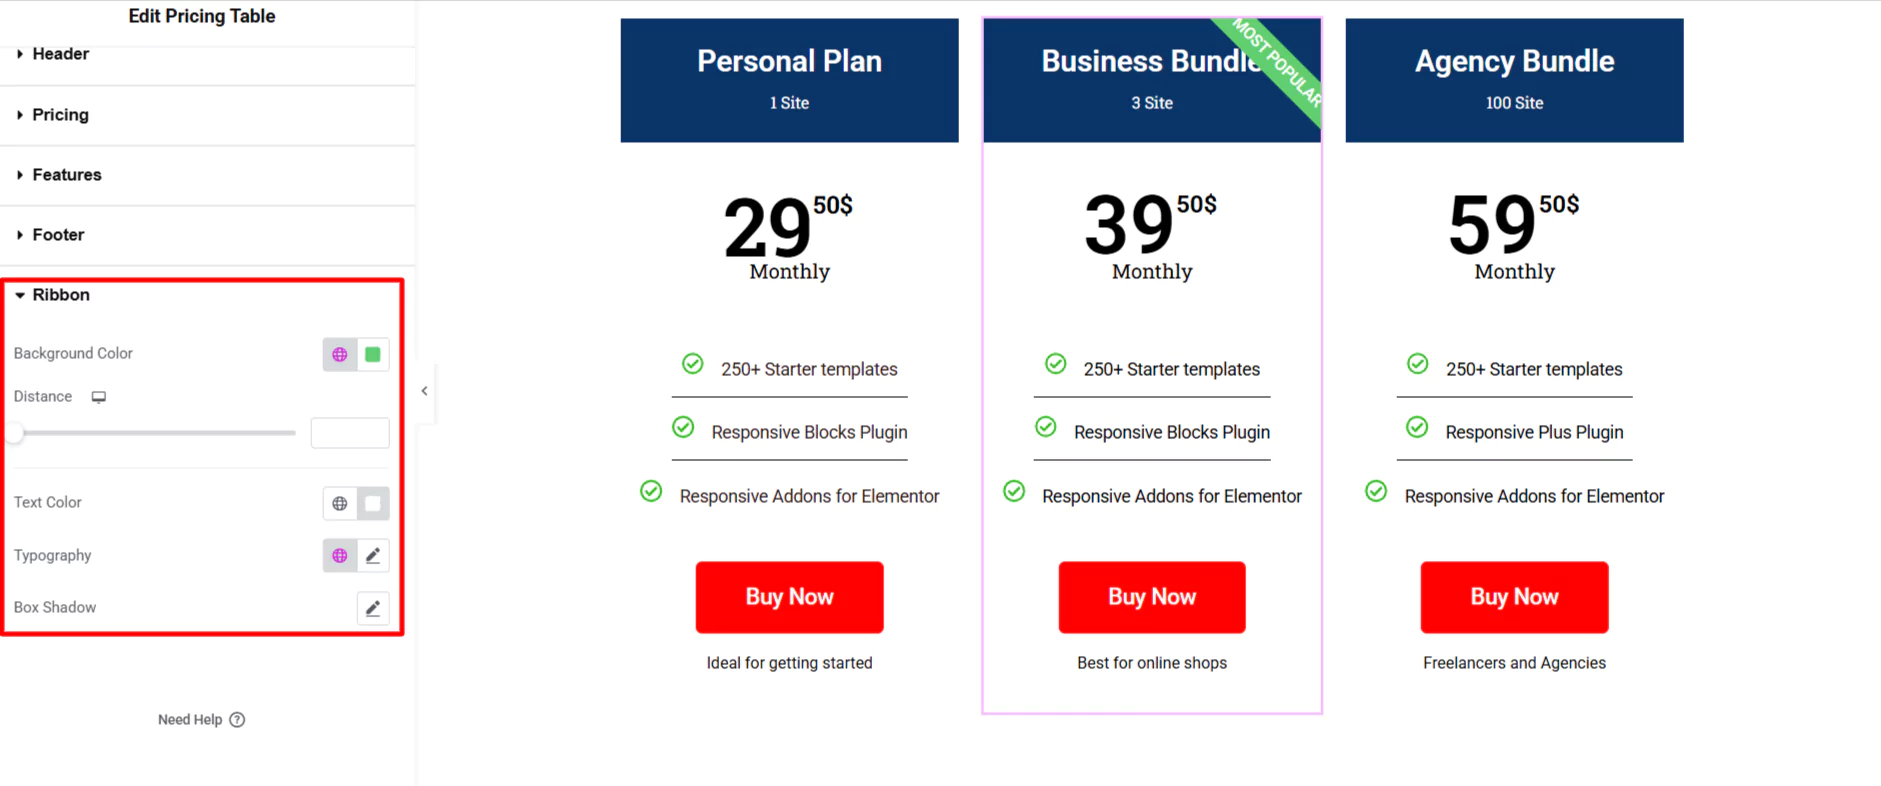
Under the Ribbon section, you can select the background color, adjust the spacing, choose the text color, set typography, and add a box shadow effect to the Ribbon.
By using these customizable options, users can create a pricing section that is both functional and visually appealing.
Once you have made all the changes in the style tab, this is how your pricing table looks like:

FAQ
To add a pricing table to a WordPress website, you can use various plugins available in the WordPress plugin repository, such as Responsive Addons for Elementor. This plugin offers customizable and responsive pricing table options with features like table styles, ribbons, and pricing formatting.
Several plugins are available for adding pricing tables in Elementor, but one of the best is Responsive Addons for Elementor. This plugin offers over 50 widgets, responsive design, and easy integration with popular e-commerce platforms.
Conclusion
Now you’ve unlocked the power of Elementor pricing tables! Creating an excellent pricing table can be a game-changer for your business.
To create a good pricing table, remember your target audience, highlight important features, use clear package names, show the best deal, and make the call-to-action button noticeable.
Responsive Addons for Elementor is an addon that makes this process easier by providing customizable icons, images, and hover effects.
With this plugin, you can create an attractive pricing table that can convert visitors into customers.
Remember to personalize your pricing tables with your brand colors, fonts, and messaging to create a cohesive experience for your audience. Now, go forth and showcase your amazing offerings in style!
And if you liked this article, don’t forget to give these a read as well:
- How To Create A Countdown Timer For Your WordPress Website
- How To Create Flip Box Overlays And Hovers In WordPress
- How To Add Breadcrumb Navigation To Your WordPress Site (Easy Method)
Are you ready to add a pricing table to your website? Grab the Responsive theme now!