
Summary
The article explains how to install a WordPress theme from a ZIP file. It defines the process of uploading and activating a theme manually using the WordPress dashboard.
It also highlights step-by-step instructions, common issues, and tips for theme setup. Helping readers quickly install and use themes not found in the official directory.
Are you looking for how to install a WordPress theme?
WordPress themes are widely accessible (both for free and for money).
Whether creating a brand-new site or updating an existing one, WordPress themes make it quick and easy to add individuality.
Step-by-step instructions for installing a WordPress theme are provided in this article.
To help you select the one that works best for you, we’ll go over three ways to install a WordPress theme.
Cyberchimps Responsive is the Best WordPress Theme – Get it for free!
What is a WordPress Theme
A WordPress theme is the entire design of a website.
It contains every aspect of web design you might be familiar with, such as color schemes, headers, footers, and sidebars.
With WordPress themes, you can build an appealing online presence without starting from scratch.
What is a WordPress Template
A template is a page layout that is offered by a theme in WordPress terminology.
Simply put, the template is only a layout for a single page, not the entire website. A theme can have an unlimited number of templates when using WordPress.
A WordPress template defines the look and feel of a particular page on your WordPress website.
It differs from a WordPress theme in that a template can be used for a specific page, whereas a theme applies to the entire website.
How To Install A WordPress Theme
WordPress Themes can be installed in three ways: through the theme directory, uploading, or file transfer protocol (FTP).
Although the theme directory and ZIP method are simpler, installing over FTP is recommended for large themes, custom themes, or when the WordPress dashboard is not accessible.
Installing a WordPress Theme Through Theme Directory
You can look for and download a free WordPress theme from the theme directory on WordPress.
Here is the step-by-step process:
- To get started, log into your WordPress account.
- Navigate to Appearance > Themes.

- Click “Add New” on the Themes page.

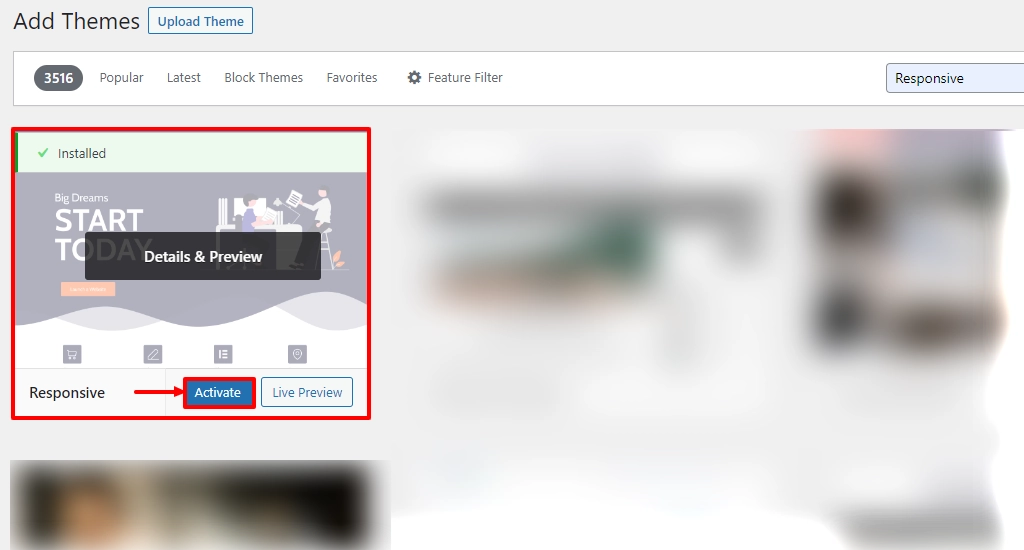
Simply enter the theme name you wish to use in the “Search theme” field.

For example, we looked for a well-known Responsive theme.
One of the best WordPress themes, it offers 250+ starter templates and complete customization to simplify building websites.
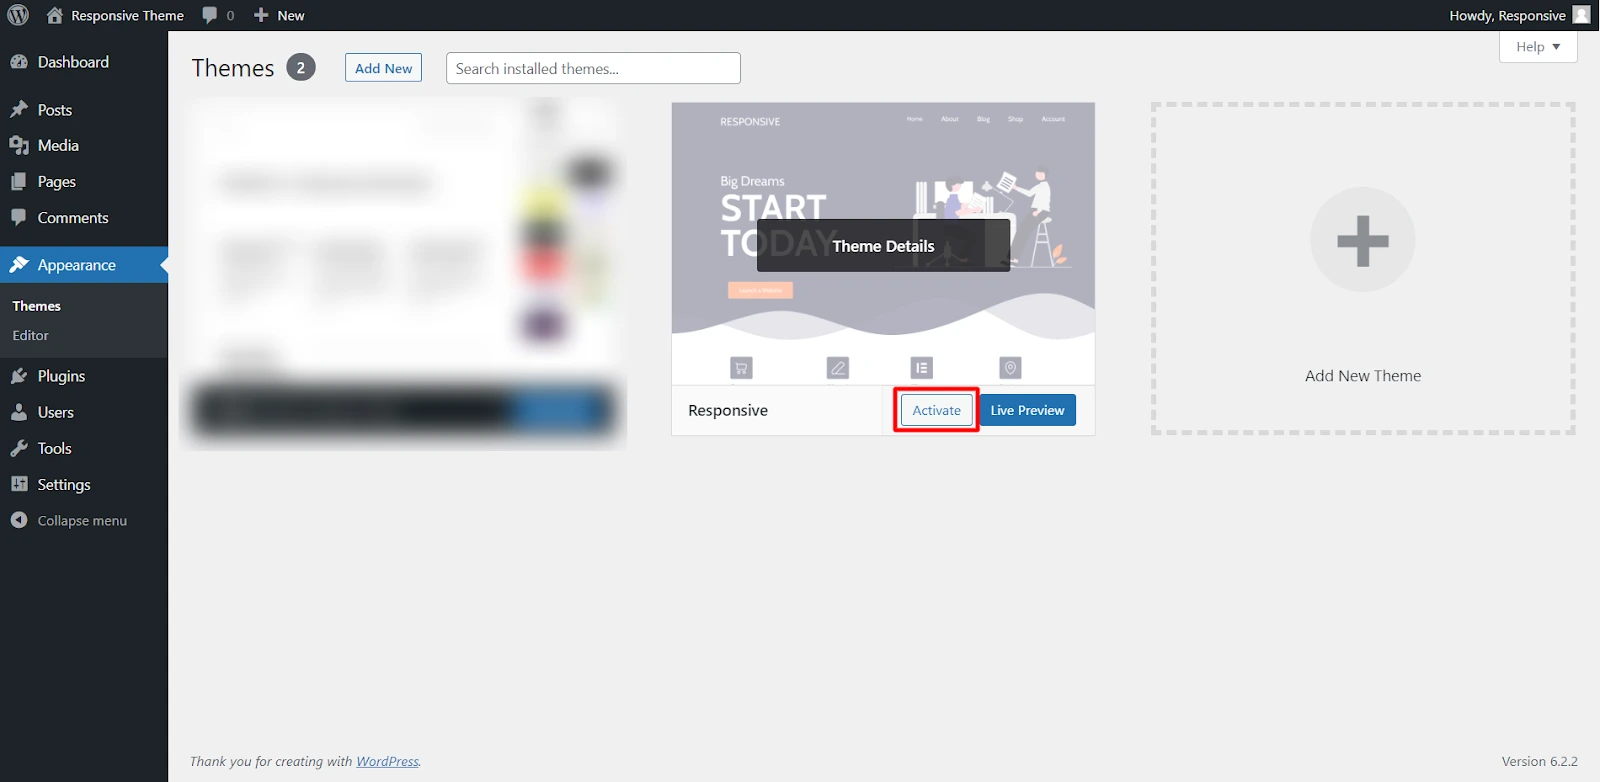
- Click “Install” to begin the installation process.

The theme installation will take some time. After it is finished, you will be notified that the installation was successful.
- Click “Activate” once completed.
Installing a WordPress Theme By Uploading a ZIP File
The following are the fundamental steps for manually installing a zipped WordPress theme:
- Start by downloading the theme file you bought from a marketplace or a commercial theme store.

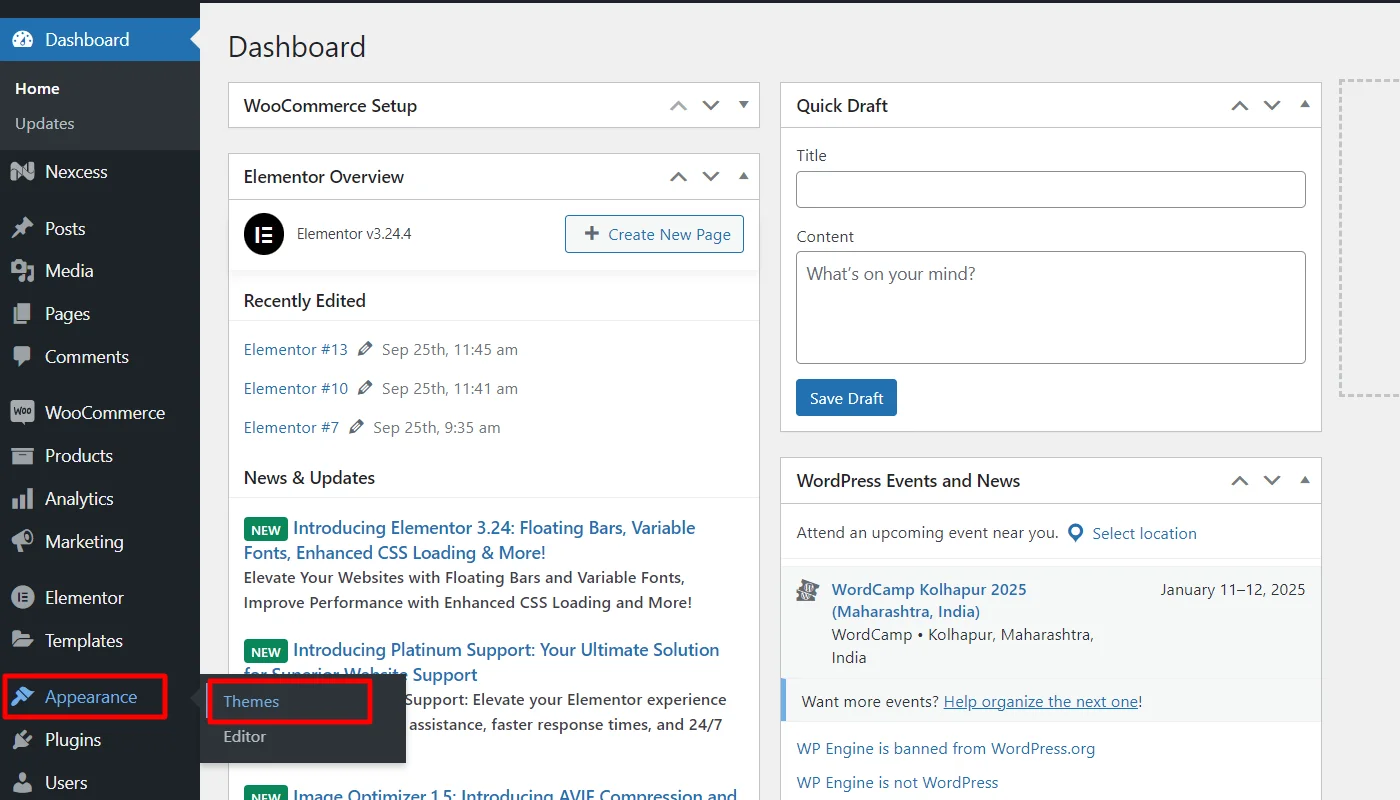
- Log in to your WordPress site, and go to the Admin Dashboard and navigate to Appearance > Themes.
- Click on “Add New” to install a new WordPress theme.

- Next, click “Upload Theme.” To insert a file, drag it into the area or click “Choose File” and use your operating system’s file browsing to find it.

- To upload your WordPress theme, click the “Install Now” button.

- Links to live preview or activate your theme will also be visible. Click “Replace active with uploaded” to begin using this theme on your WordPress website.

You should now be able to see your new theme in action if you visit your website.
Installing a WordPress Theme via File-Transfer Protocol (FTP)
Another way to install a WordPress theme is via FTP.
File Transfer Protocol is referred to as FTP. It is a standard method for moving files from your PC to your hosting account for your website. It can be compared to online file management.
You can use this software tool to log in and add or remove files from your website server.
Let’s see how it’s done.
- First, install FTP Client on your computer.
- Set up the FTP account.
Typically, you must create your own FTP user account within your hosting panel. However, the procedure varies depending on the hosting company.
You often receive a username and password from the hosting company when you create a new account, which you’ll need to create an FTP Client account.
- Next, download the theme.zip file and unzip it.
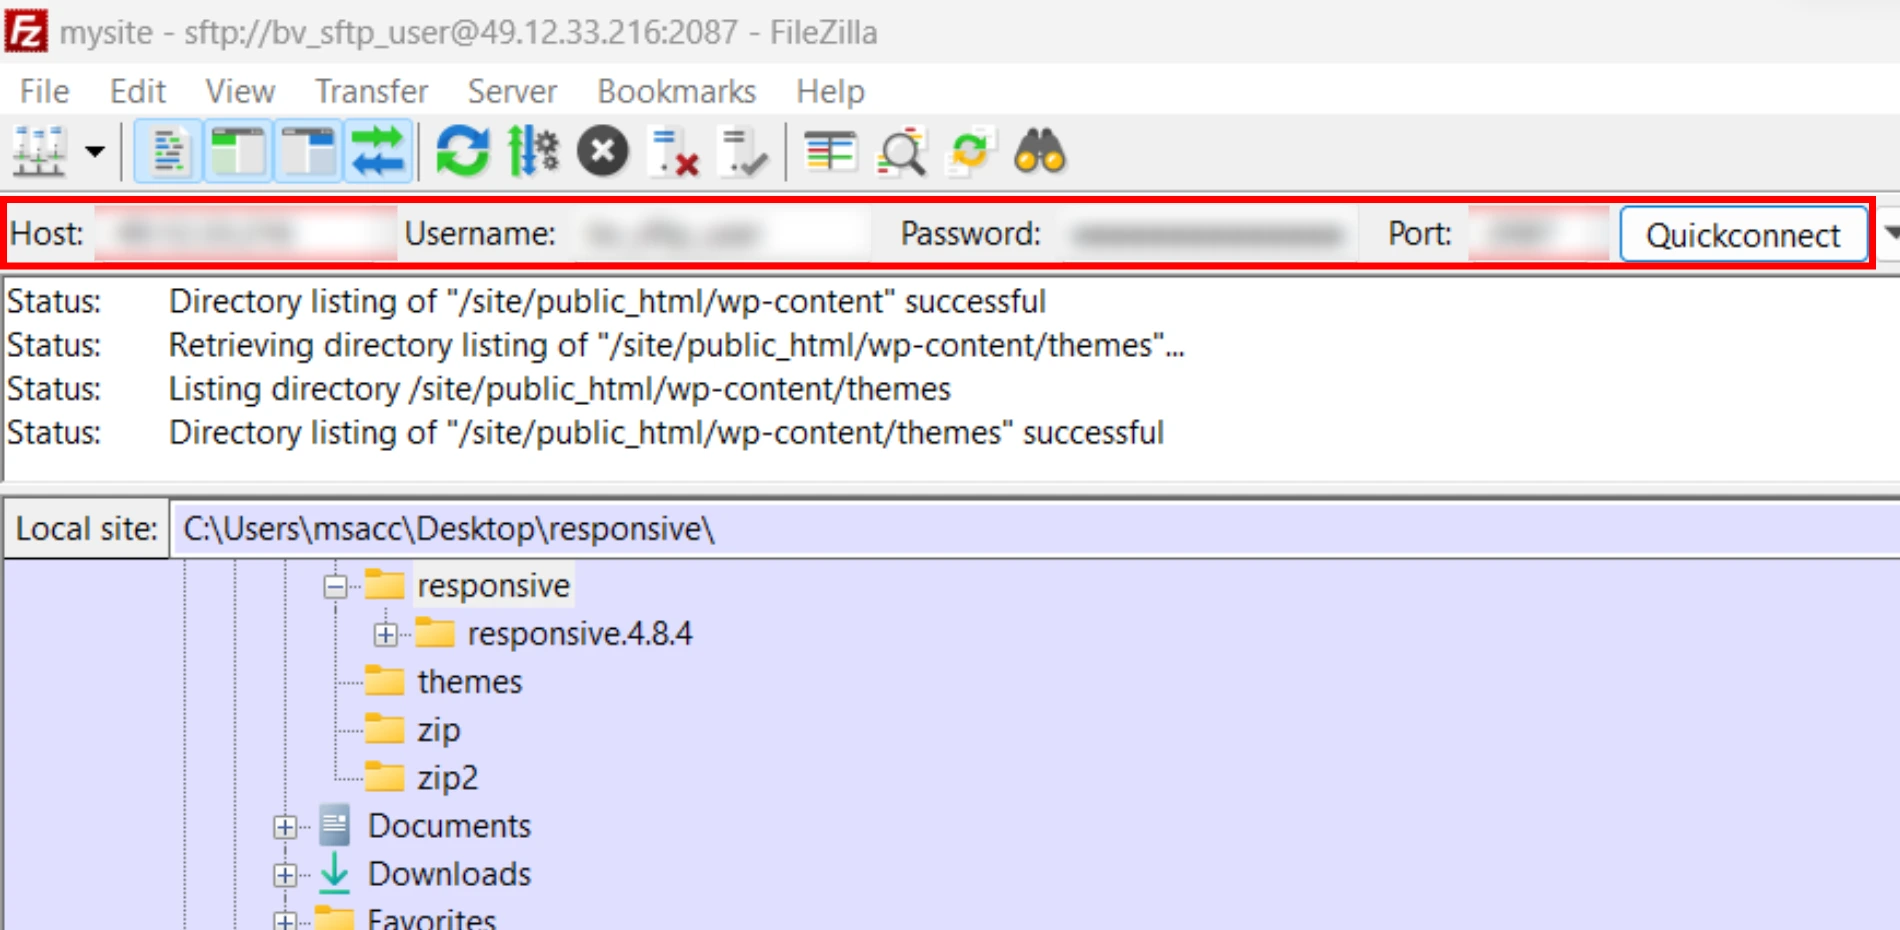
- Then, you need to connect to your WordPress hosting account using an FTP client.
- Provide host, username, password, and port, and click on “Quickconnect.”
- Navigate to the “/wp-content/themes/” folder after connecting.

- You’ll see folders for each of the active themes on your website.
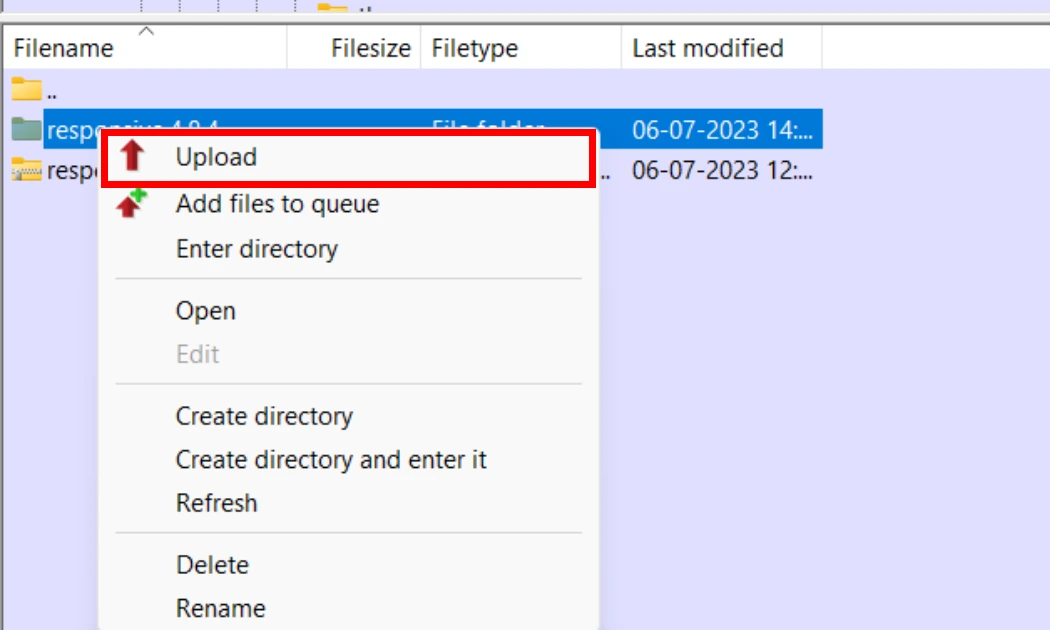
- Next, drag and drop the unzipped file into your website’s ‘themes’ folder.
- Right-click on the file and then click “Upload.”
- Once the theme has been uploaded, return to your WordPress dashboard.
- After that, click Appearance » Themes.

- The theme that you just uploaded should now be visible.
- Hover your mouse over the theme and press the “Activate” button.
Conclusion
This article helped you learn how to install a WordPress theme.
These methods will set up your website to draw in and convert visitors, regardless of whether you manually uploaded a premium or custom theme or located a free theme in the WordPress directory.
If you liked this article, don’t forget to check our other similar articles:
- WordPress Block Editor – Beginner’s Guide
- What Is WordPress? Ultimate Guide For Beginners
- How To Find Your WordPress Page ID And Post ID In Easy Steps
Are you ready to start building a WordPress website? Get the Responsive theme right away!