Summary
The article explains how to create a 301 redirect in WordPress. It shows steps to safely redirect old URLs to new ones.
It also covers using plugins or server rules to set up redirects that preserve SEO and improve user experience.
Have you ever wondered how to create a 301 redirect for your WordPress website?
Being a website user, redirecting is one of the most essential techniques that you can use to fix multiple issues related to the web pages of your website.
With the help of redirecting a URL, you can ensure that your visitors won’t land on a broken or duplicated page; instead, you’ll direct them to a clean page with a different URL.
Redirecting provides information to the search engines that you’re moving a web page from one URL to another. This way, all your web content, including the link value, passes from the original page to the redirected page.
Of all the redirects, 301 redirect is the most popular one, the cause being you can permanently redirect any link.
With that said, here in this article, we’ll provide an in-depth guide to the 301 redirect and how it can help your page move from one address to another.
Now, without much delay, let’s dive into the content.
What is a Redirect in WordPress?
Knowing the concept of redirects is fundamental for everyone who owns a website. Basically, a redirect is a technique that guides users from one URL to another seamlessly.
Redirects serve several crucial purposes, including fixing broken links, updating content, moving content from one domain to another, and, most importantly, enhancing user experience.
In WordPress, redirects help visitors access the content they are looking for, even when you’ve changed your site’s structure, content, or permalink.
For instance, when you delete an old page or move content to a new location, you can use redirects to guide users to the updated, relevant pages seamlessly. This enhances user satisfaction and preserves your webpage link’s SEO value.
When implementing redirects in WordPress, various methods and tools are available, ranging from plugins to manual configurations.
Each method serves specific purposes, and choosing the right one depends on your expertise and the complexity of your redirection needs.
We’ll explore some of these methods further in this article, helping you better understand how to create a redirect effectively on your WordPress website.
Benefits of Using Redirects
Redirecting has multiple benefits, and in this section, we’ll look at some of the key benefits of using redirects.
1. Guiding Users to the Right Content
Imagine your users are trying to visit your site, but the site shows up with a 404 error. This creates a negative impact, and the user might no longer look for your website again.
To avoid such situations, a redirect provides a clear path to a new URL with relevant content and ensures you reach the correct web page.
2. Provides a Smooth Experience
Redirects help to maintain a smooth online experience for your users.
When you change your website’s structure or update any content, you can use redirects to ensure that your users don’t land on a 404 error.
3. Preserving SEO
When you move a page to a new address using a 301 redirect, you’re telling the search engines that the page has been permanently moved to the new address.
The 301 redirect plays a crucial role in preserving your old URL’s link value, thereby ensuring that the search engines continue to index and help rank your site.
This way, all the SEO value, SERP rankings, and credibility get transferred to the new URL.
4. Improved Analytics
When you’re redirecting a link to a proper address, you are more likely to track accurate results or run effective marketing campaigns. This leads to improved analytic performance, thereby enhancing your website performance.
Types of Redirects
There are different types of redirects. Choosing the correct one is important when you want to create a redirect.
Let’s break down the types of redirects.
Server Side Redirects (SSR)
SSR, abbreviated as Server-side redirects, is a redirection process that occurs directly on your website’s main server.
When a user’s browser requests a URL with a redirect, the server guides the browser to the new destination URL. This method maintains speed and performance, almost matching the original URLs.
There are two common types of SSR redirects:
- 301 Redirects: These are used for permanent redirects, ensuring a seamless transition from old URLs to new ones while preserving the webpage link value.
- 302 Redirects: These are temporary redirects, ideal for situations like page maintenance, as they signal to search engines that the change is not permanent and usually leave the SEO of the original page unaffected.
Client Side Redirects (CSR)
Client Side Redirects, also known as CSR, shift the responsibility of redirection to the user’s browser. In this scenario, the server doesn’t play a direct role in redirection.
When a user clicks on a URL, the server advises the browser to request a different URL, resulting in a two-step process that can be slower than SSR.
Importantly, CSR can leave your SEO vulnerable since no changes are made on the server side.
There are two main types of CSR:
- Meta Refresh: This type of CSR is implemented through an HTML meta tag in the document’s header. While it’s easy to set up a redirect, it can slow down the webpage performance, potentially affecting SEO.
- JavaScript: JavaScript can also be used for redirection, but it requires users to have JavaScript knowledge to implement the redirects. When implementing JavaScript redirects, it’s essential to adhere to best practices and guidelines to ensure they work correctly.
Now that you’ve understood the different types of redirects, let’s closely look into the 301 redirect and see when to use it.
When to Use a 301 Redirect?
You can use a 301 redirect for your WordPress website, which is needed in various situations to ensure a seamless user experience.
Here are some common scenarios when you should consider implementing a 301 redirect:
- Changing Permalink Structure: If you decide to change the permalink structure of your WordPress site, which defines how URLs are structured, you should use 301 redirects.
- Moving to a New Domain: When you change your website’s domain name, setting up 301 redirects from the old domain to the new one is essential. This helps transfer the authority and traffic from the old domain to the new one.
- Merging or Deleting Pages: If you’re merging multiple pages or posts into a single page or want to delete specific pages, you should create 301 redirects from the old webpage’s URLs to the most relevant new URL.
- Updating or Renaming Posts/Pages: When you update or rename a post or page, the URL changes. To avoid broken links, set up 301 redirects from the old URL to the new one.
- Reorganizing Site Structure: If you’re restructuring your website, like moving content to different categories or changing the hierarchy of pages, using a 301 redirect can help maintain a seamless flow for your users.
- Canonicalization Issues: Canonicalization issues can arise when multiple versions of your website’s URL (e.g., www vs. non-www or HTTP vs. HTTPS) exist. Implementing 301 redirects to the preferred version (e.g., from HTTP to HTTPS) helps search engines index the correct URLs and avoids duplicate content issues.
Using 301 redirects, you can easily fix multiple issues affecting your website and its performance.
Best Methods to Create a 301 Redirect
There are multiple ways to create a 301 redirect in WordPress. Of the many ways, there are two effective methods that you can always use. The first method uses the Yoast SEO plugin, and the second uses the help of the 301 Redirects plugin.
Let’s closely examine how to create a 301 permanent redirect using these two plugins.
301 Redirect Using Yoast SEO
Yoast SEO is a popular WordPress plugin that helps to optimize your website for SEO. Of its many features, 301 redirecting is a popular feature.
In order to use the 301 redirect feature, you need to upgrade your free Yoast to the premium version.
You can purchase the Yoast SEO Premium from their official website. Once you’ve purchased the plugin, you’ll receive a zip file of the pro version.
Next, let’s see how to install the plugin on our WordPress website.
Install and Activate Yoast SEO Premium
To install the Yoast SEO premium version, head over to your WordPress dashboard. Hover over the Plugins and click on the Add New button.

Click on the Upload Plugin button.

Next, upload the zip file that you’ve received after purchasing the product. Then, click on the Install Now button.

Activate by clicking on the Activate Plugin button.

Once activated, you’ll see a link to configure the plugin. Click on the Yoast SEO First-time configuration link.

Configure your Yoast SEO setup wizard according to your needs.
How to Create a 301 Redirect Using Yoast SEO
In this section, let’s look at how we can create a 301 redirect with the Yoast SEO plugin.
From the WordPress dashboard, click the Yoast SEO menu and click on the Redirects premium option.

Choose 301 redirects and fill in the Old URL and the URL you want to redirect to. Finally, click on the Add Redirect button.

That’s it! You’ve successfully redirected the old URL to a new one.
301 Redirect Using WP 301 Redirects Plugin
WP 301 Redirects is another WordPress plugin that you can use to redirect from one URL to another.
But there’s a catch. The redirection features come only with the premium version of this plugin.
So, to use this feature, first purchase the product from the WP 301 Redirects website. Once you’ve purchased the product, you’ll receive a zip file containing the premium plugin.
Next, go to your WordPress dashboard and click on Add New from the Plugins menu.

Click on the Upload plugin button.

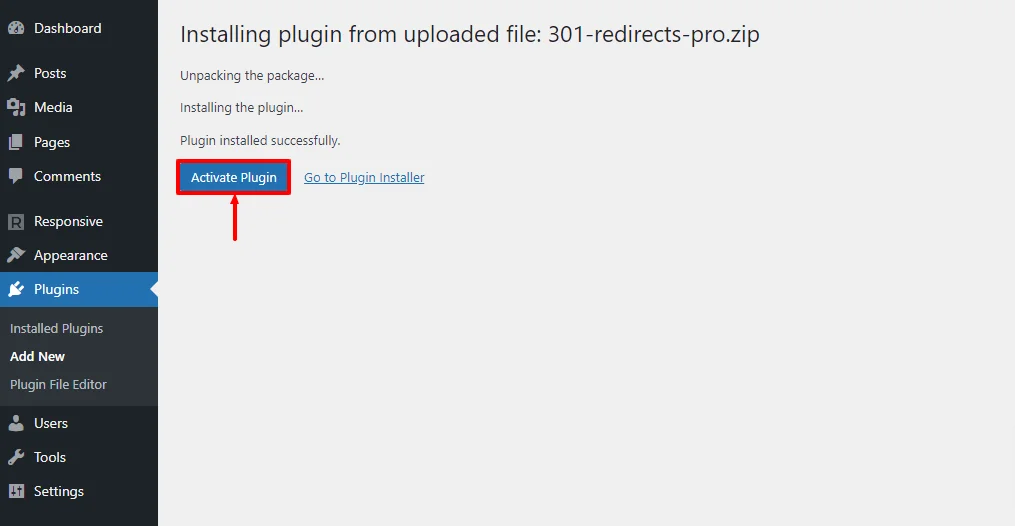
Upload the zip file you received and click the Install Now button.

Next, activate it by selecting the Activate Plugin button.
WP 301 Redirects plugin’s welcome page will look like this.

How to Create a 301 Redirect Using WP 301 Redirects Plugin
Once you’ve activated the plugin, you’ll be able to create a 301 redirect.
Here are the steps to create a 301 redirect using the WP 301 Redirects plugin:
Head to your WordPress dashboard, hover over settings and click on the 301 Redirects Pro menu.

This will open the WP 301 Redirects Pro welcome page.

From the page, click on the Add New Redirect Rule button.

In the Add New Redirect Rule page, mention the old URL in the Redirect From: option and provide the new URL in the Redirect To: option. Then, select the 301 Redirect Type and click on the Add Rule button.

That’s it! You’ve successfully redirected your old URL to a new URL.
Conclusion
When you make changes to your website, such as altering the URL structure, deleting or consolidating pages, or moving content to new locations, 301 redirect steps as a crucial factor.
The major benefit of creating a 301 redirect is that when users attempt to access a page or resource that has been moved or altered, they are seamlessly redirected to the new, relevant location.
This process is invisible to users, preventing them from encountering dead-end pages like the 404 error.
There are two effective methods that you can use to create a 301 redirect on your website. One uses the Yoast SEO plugin, and the other uses the 301 Redirects plugin. Both these plugins are fully compatible with popular themes like Responsive theme.
If you’ve liked reading this article, don’t forget to check our other engaging articles:
- How To Redirect Based On Geolocation On Your WordPress Website
- What is a URL? – A Complete Guide for Beginners
- How to Easily Check for Broken Links on Your Website?
Thinking of redirecting a page on your website? Grab the Yoast SEO plugin along with Responsive theme now!