
Mega Menu is a robust navigation menu feature to boost your website’s functionality. Using this, you can create visually organized and simplified navigation.
Responsive Pro Plugin provides the best customization options for designing a fully functional and interactive mega menu.
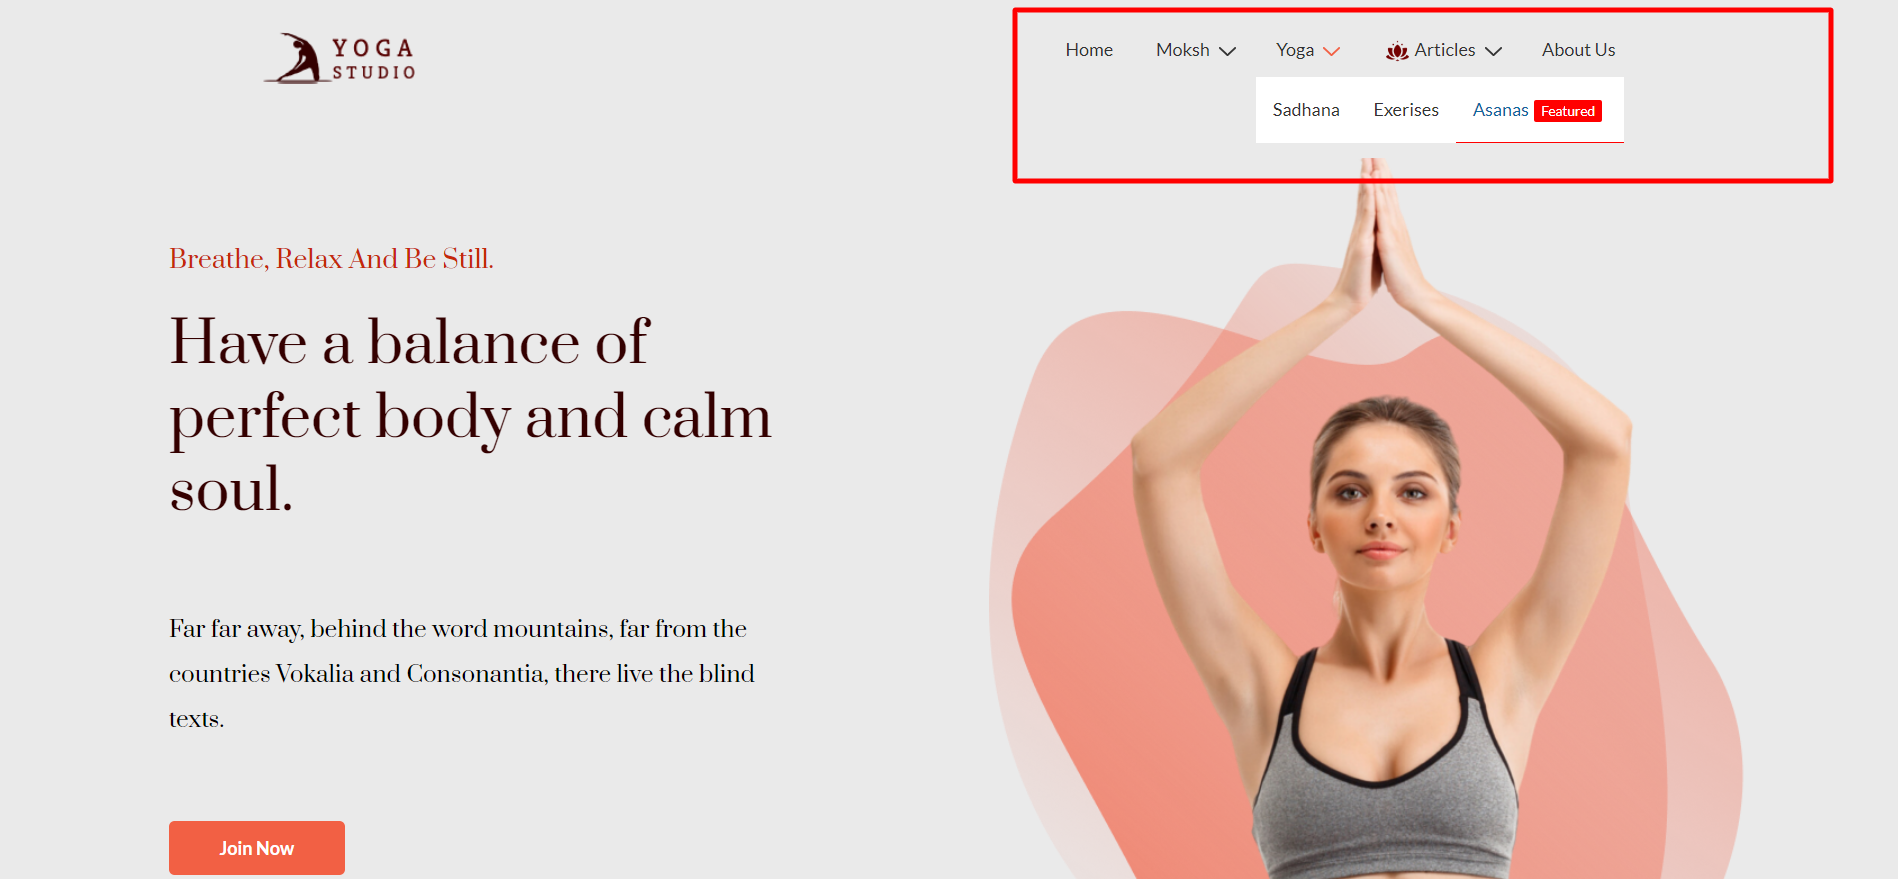
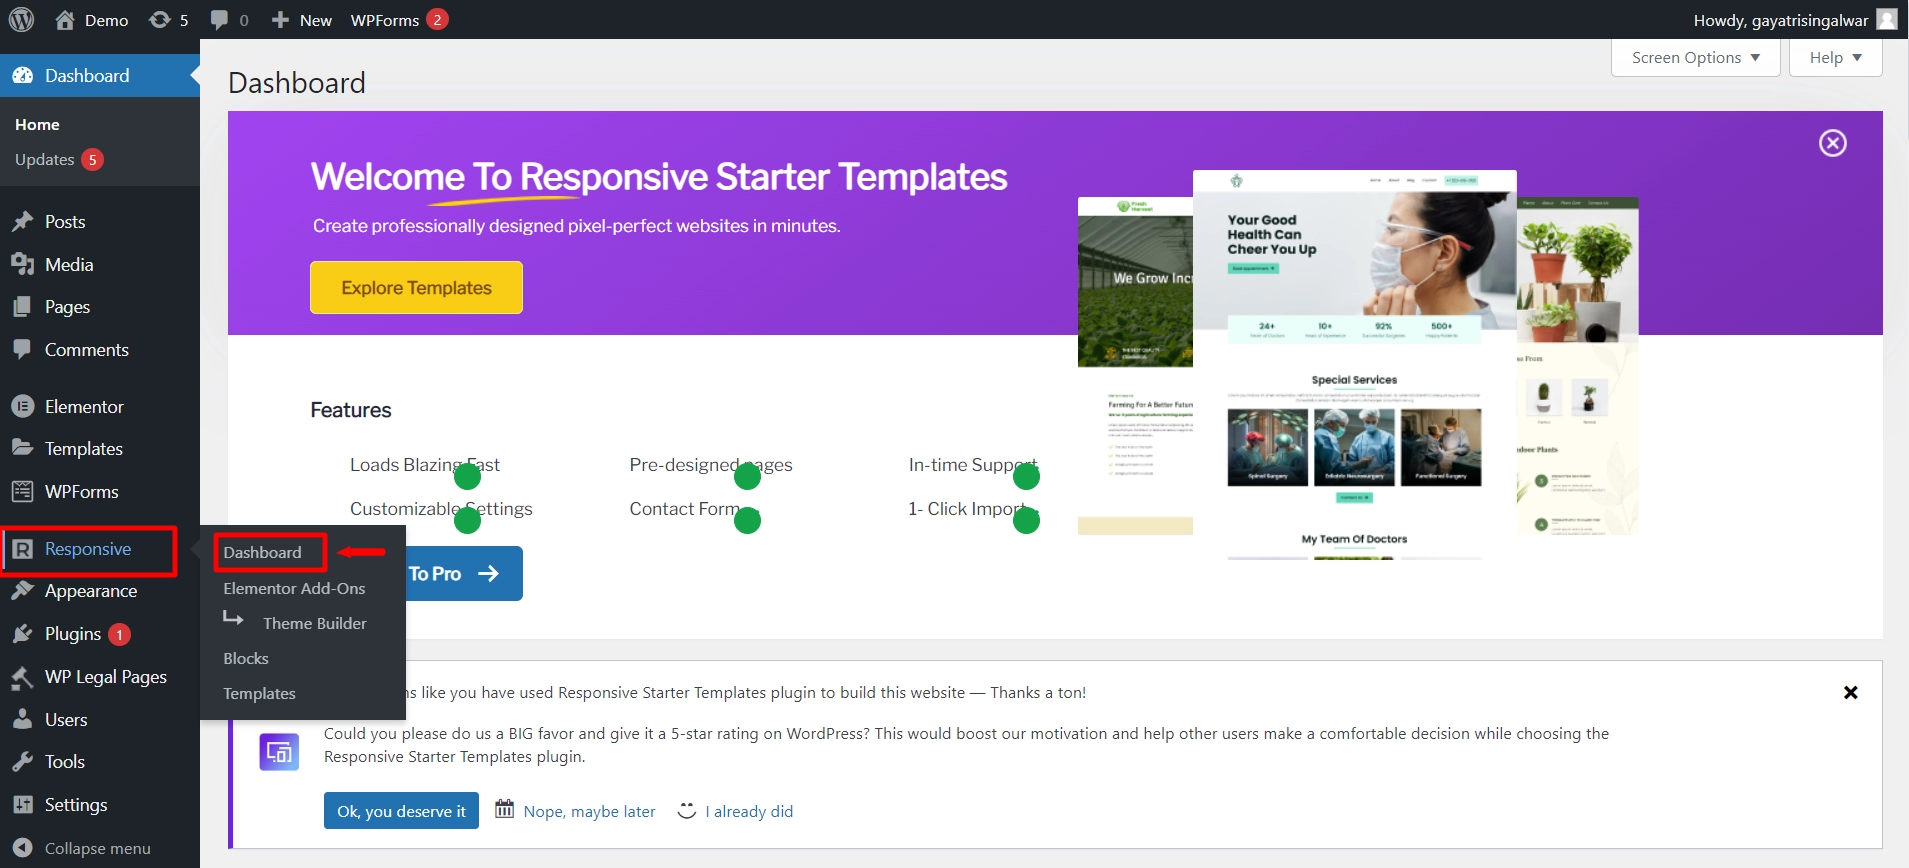
To use the mega menu, you must install the Responsive theme and the Responsive Pro plugin on your website.
How to Activate Mega Menu?
Follow the below steps to use the mega menu on your website.
Step 1: Ensure you have the Responsive Pro plugin installed and activated.
Step 2: From your WordPress dashboard, navigate to Appearance > Responsive Options.
Step 3: Now, you’ll see the Home tab from the Responsive Theme dashboard. Scroll down to the Responsive Addo-ons Features section and enable the Mega Menu block.

This will enable the mega menu feature on your website.
How to Create a Mega Menu?
Follow the below steps to create a mega menu for your website:
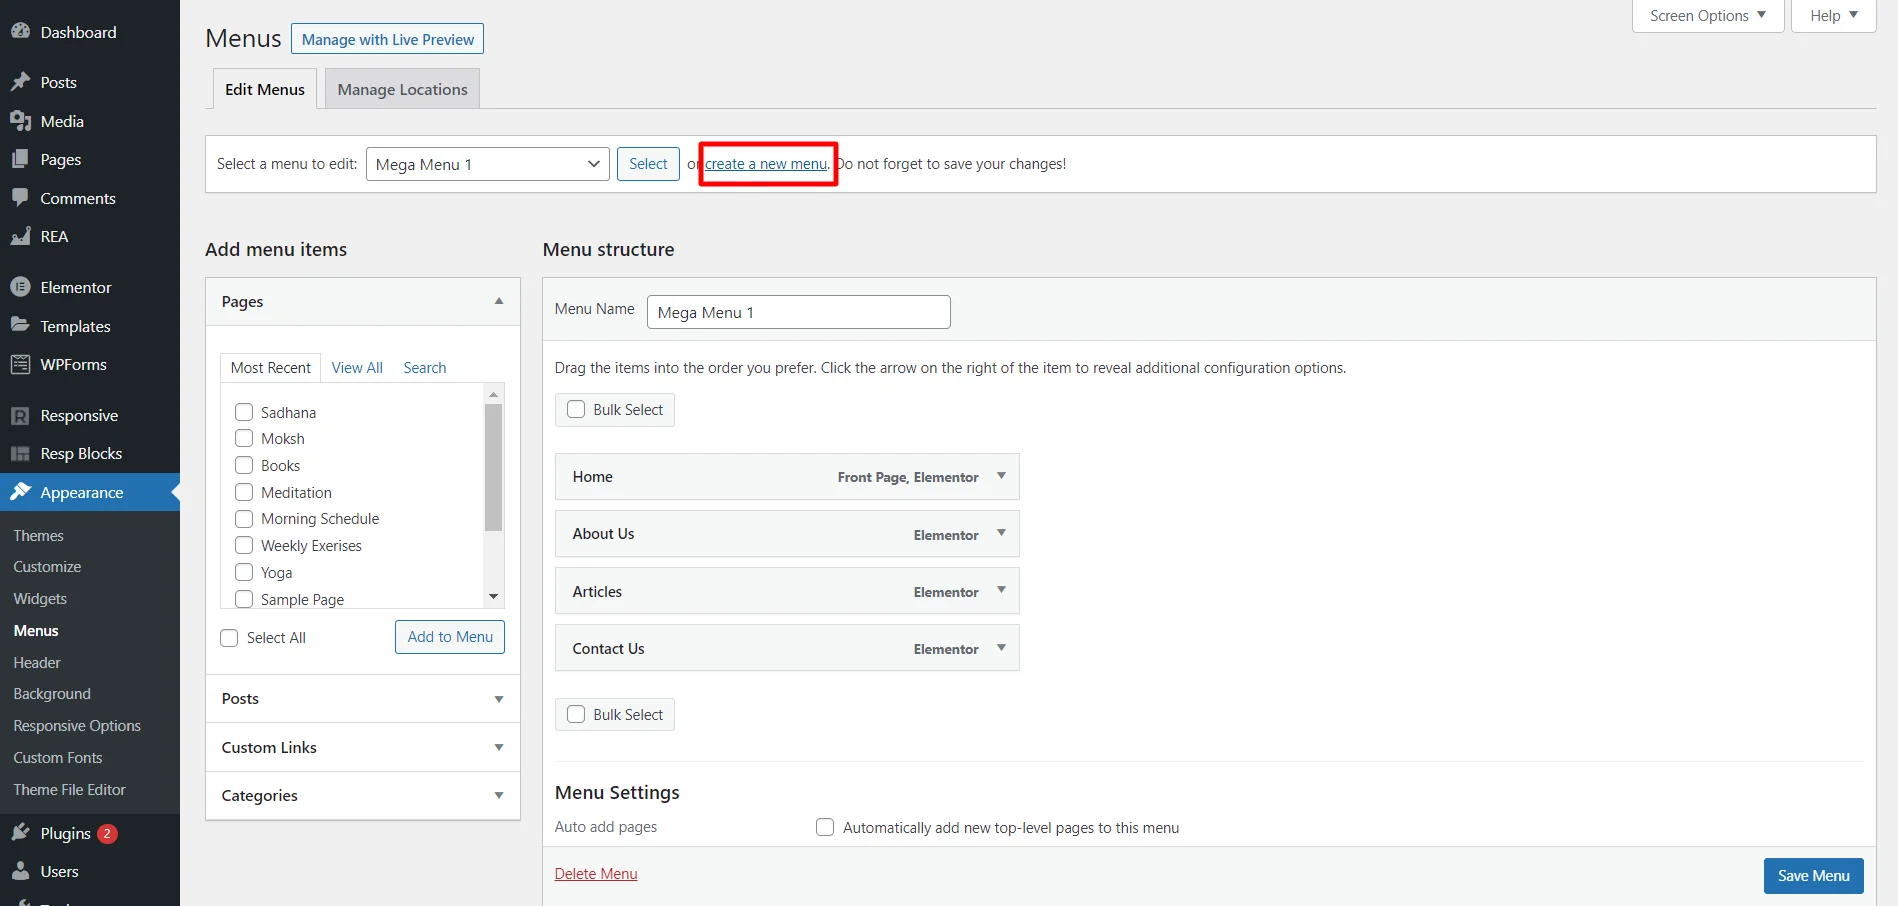
Step 1: To create a new menu, navigate to Appearance > Menus from your WordPress dashboard.
(If you have an existing menu layout, skip to step 5.)
To add a new menu, head to the Edit Menus tab and click on create a new menu.
Step 2: Enter your menu name and click Create Menu.
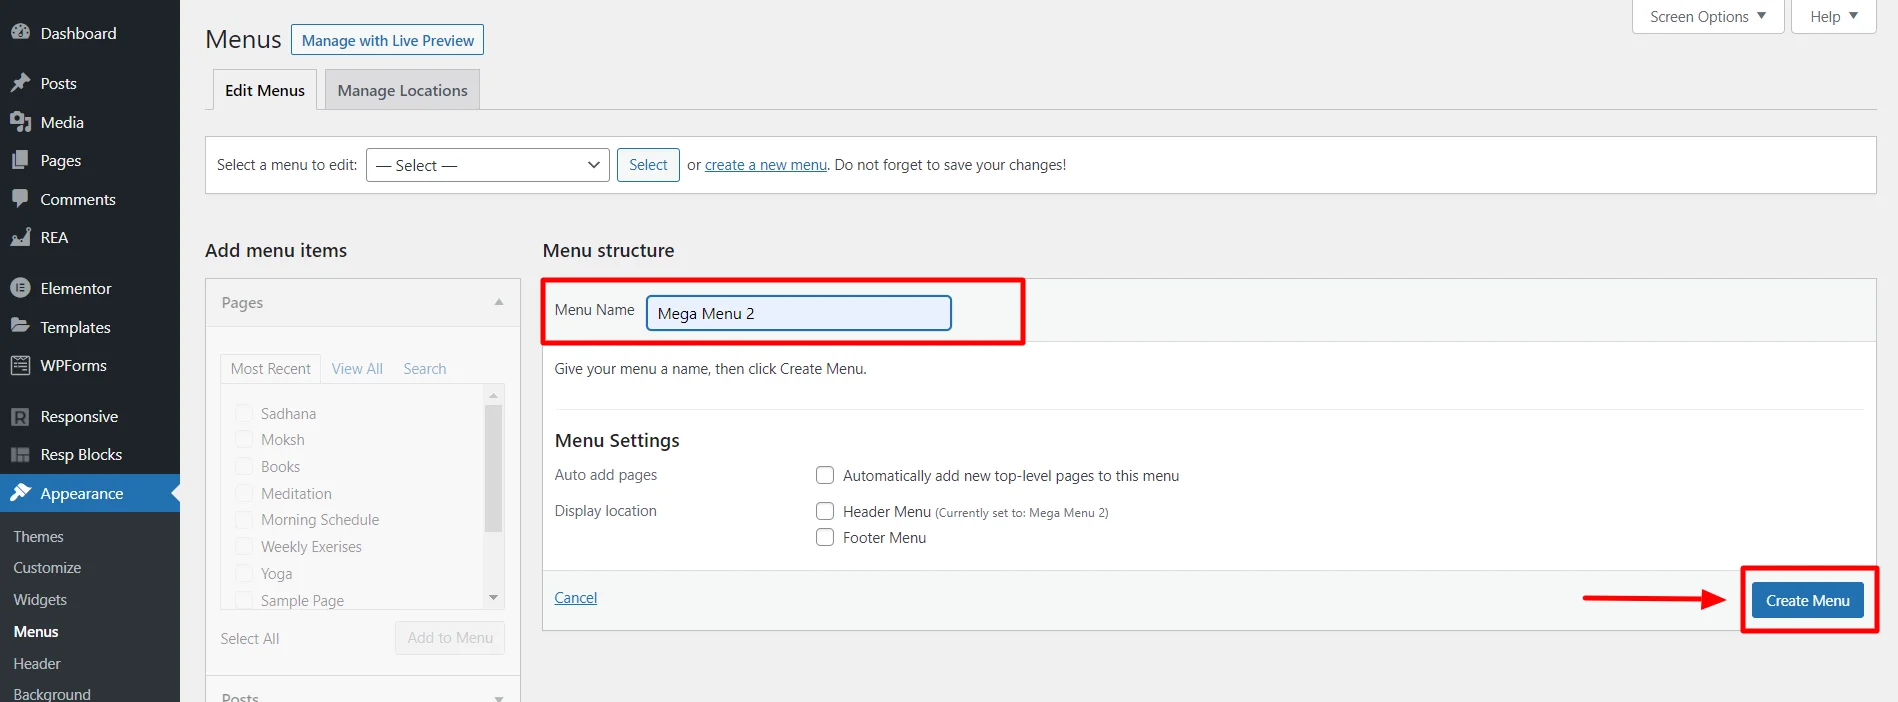
Once your new menu is created, move on to adding new menu items.
Step 3: In the pages tab, select all the pages you want to add to the menu. Click Save Menu.
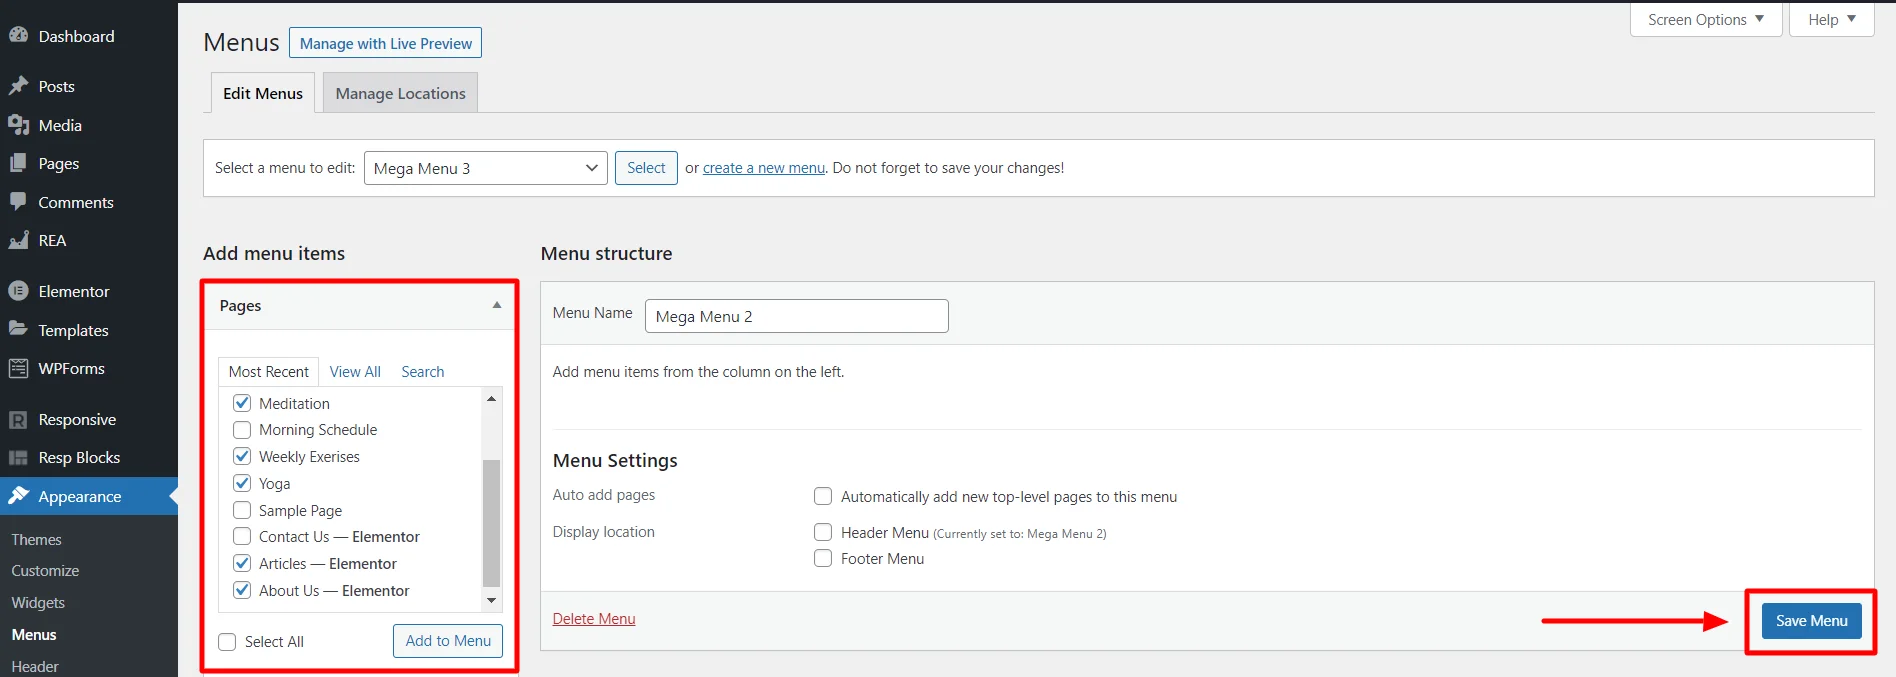
You can add menu items based on Pages, Posts, Custom Links, Categories, and Tags.
Step 4: Arrange the menu to create perfect navigation and click on Save Menu.
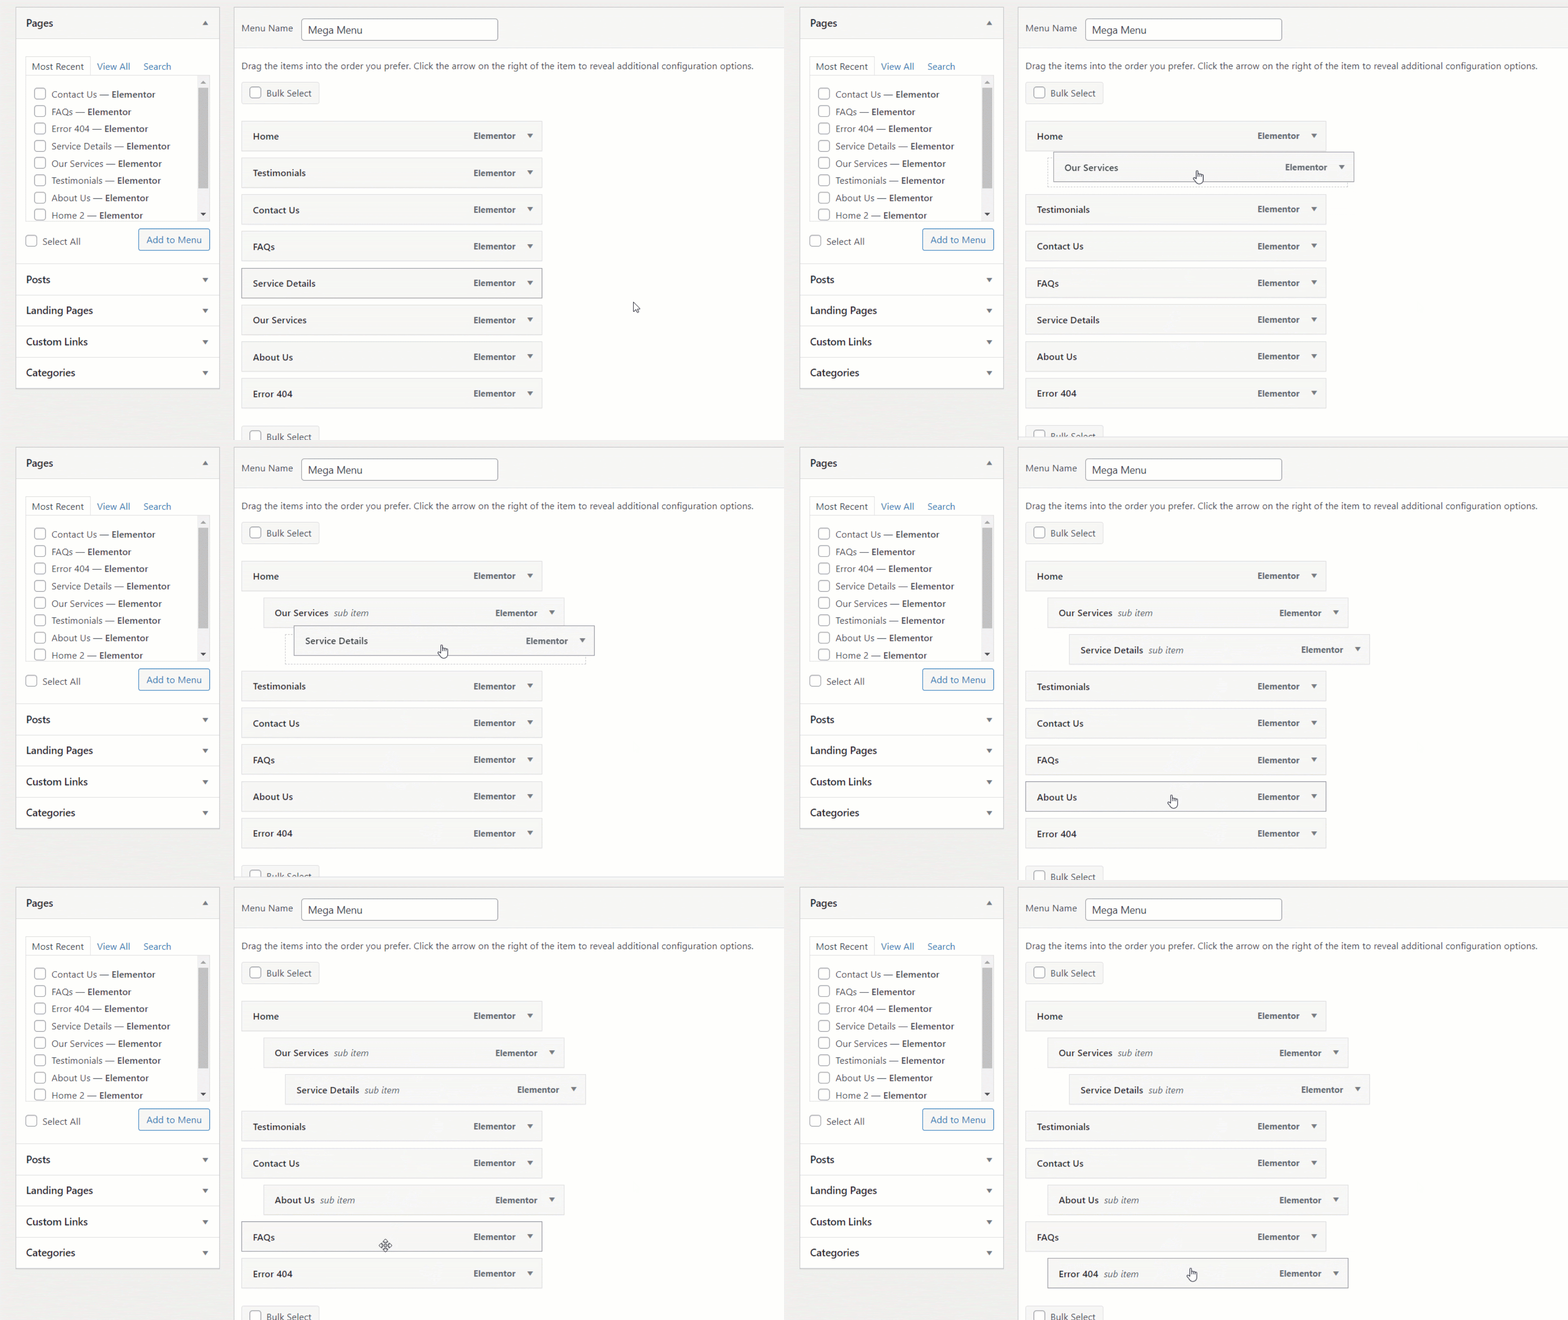
You can create parent columns with sub-menu items for proper categorization.
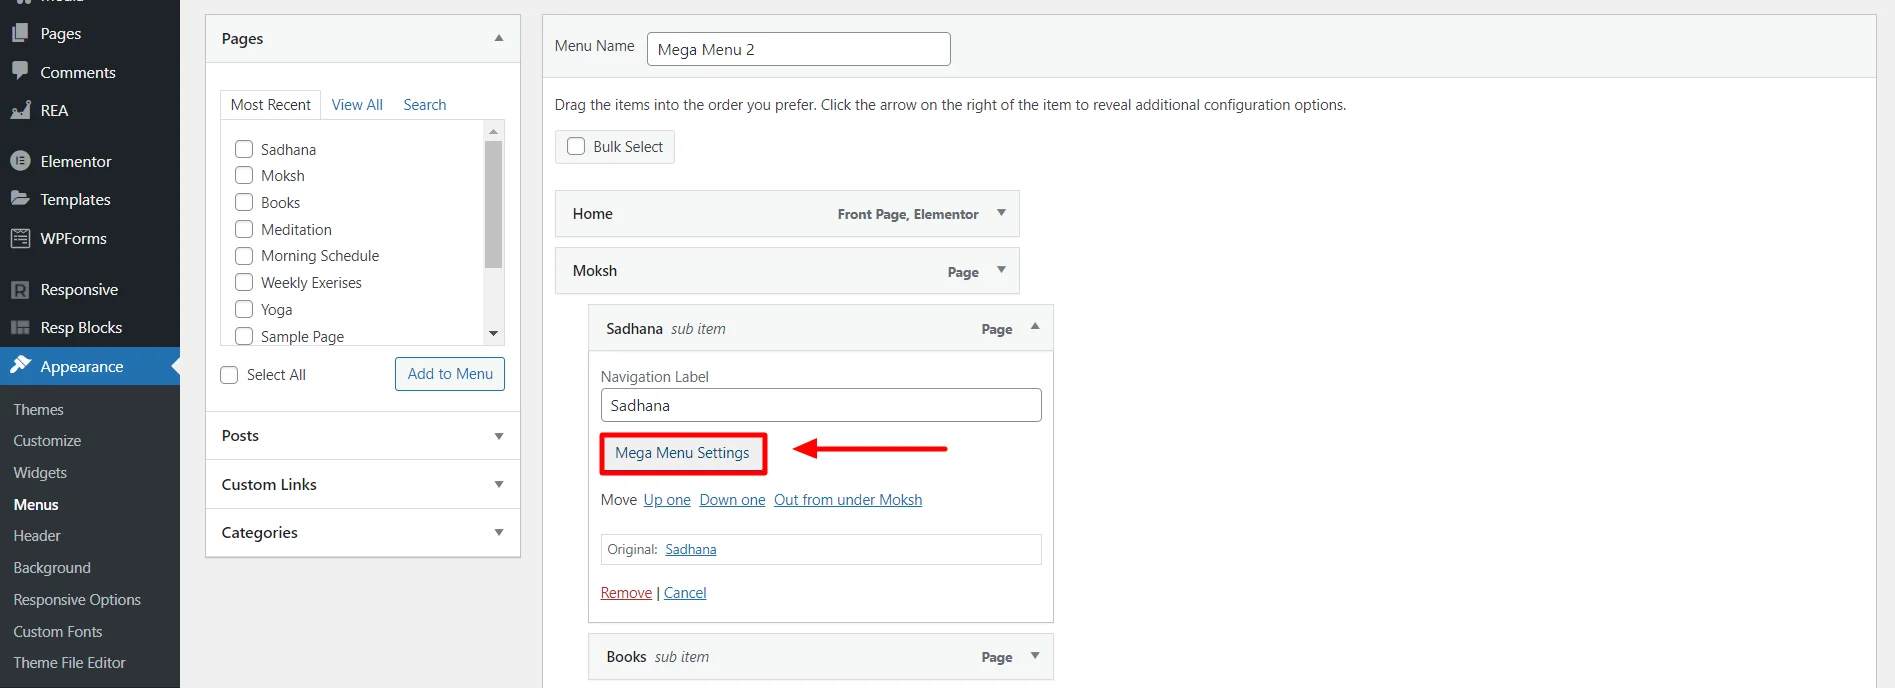
Step 5: Select a parent item and select Mega Menu Settings to enable customization.
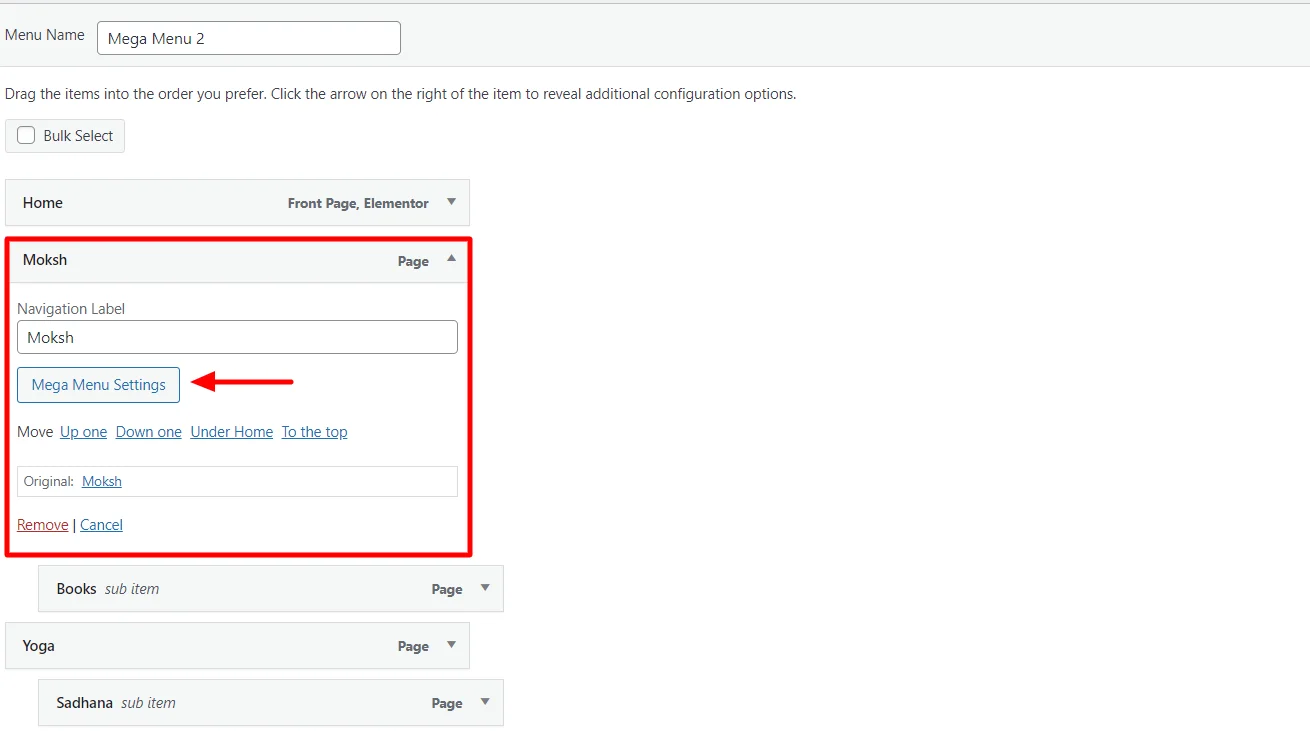
Switch on the Enable Mega menu button. Now, you can customize the submenus in this column.
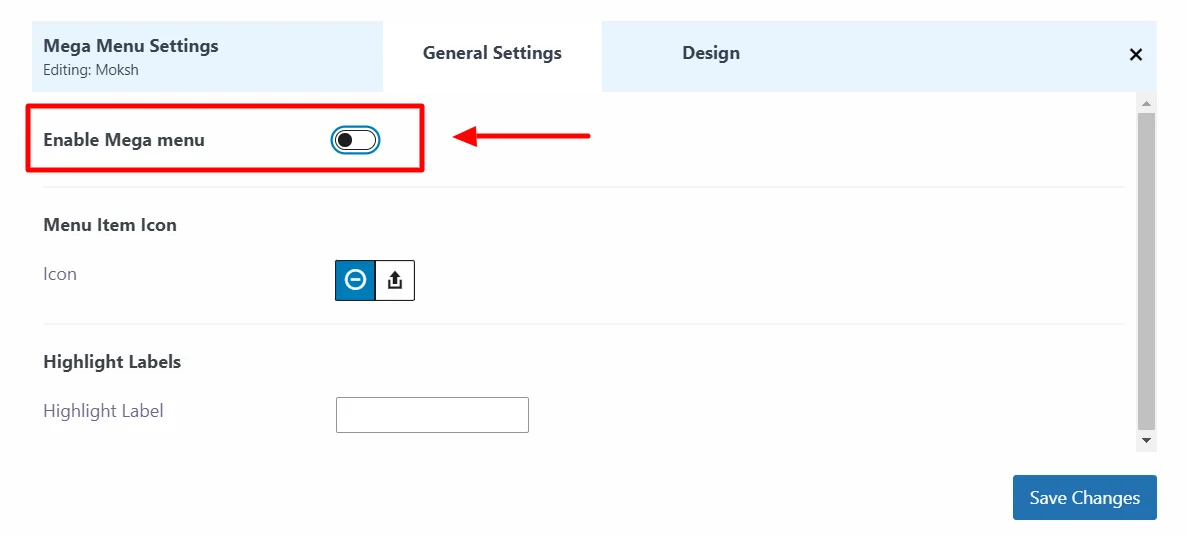
Here, you can also customize the width and style of your parent menu using the Mega Menu Width feature.
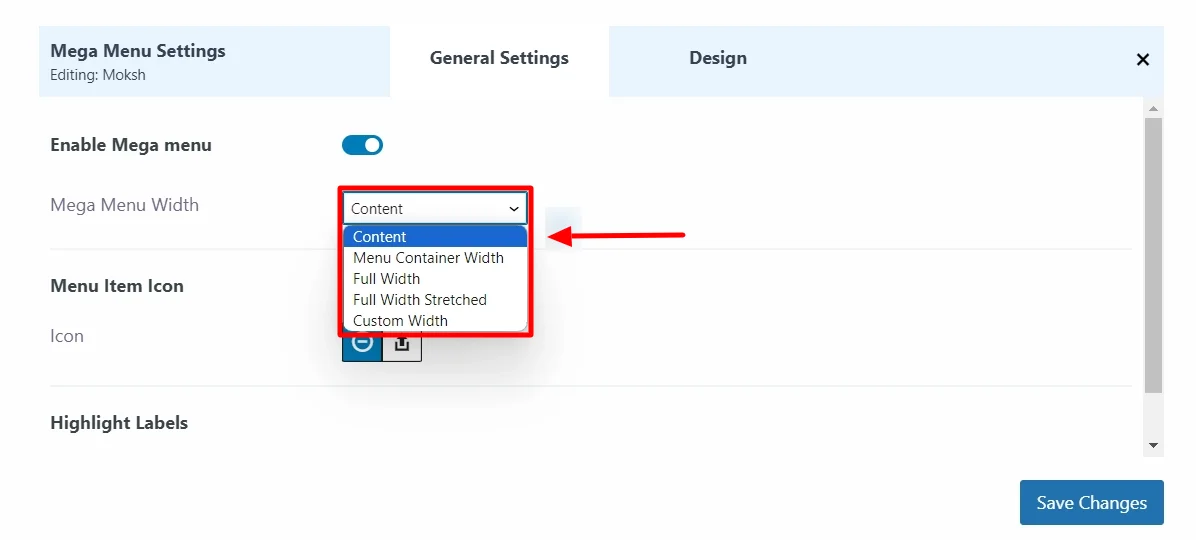
Mega Menu Width: You can select a style for the submenu dropdown. Various styles include Content, Menu Container Width, Full Width, Full Width Stretched, and Custom Width.
Example 1:
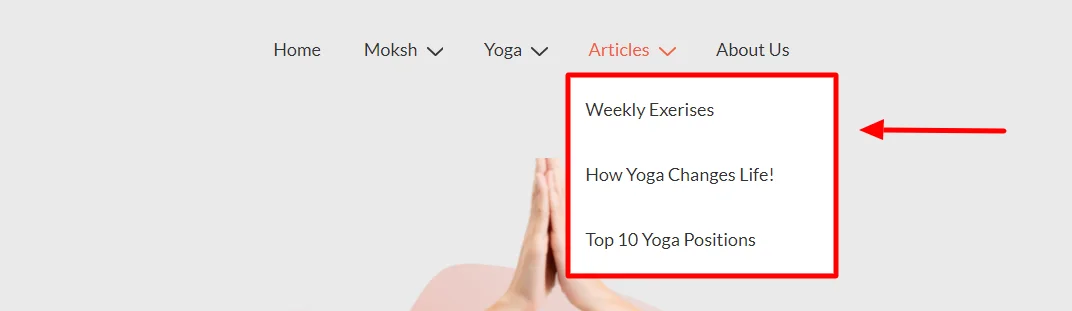
Example 2:

Step 6: To edit the sub-menu items, click on the dropdown and select Mega Menu Settings.
This opens up the General Settings tab. Customize the menu settings based on your preferences.
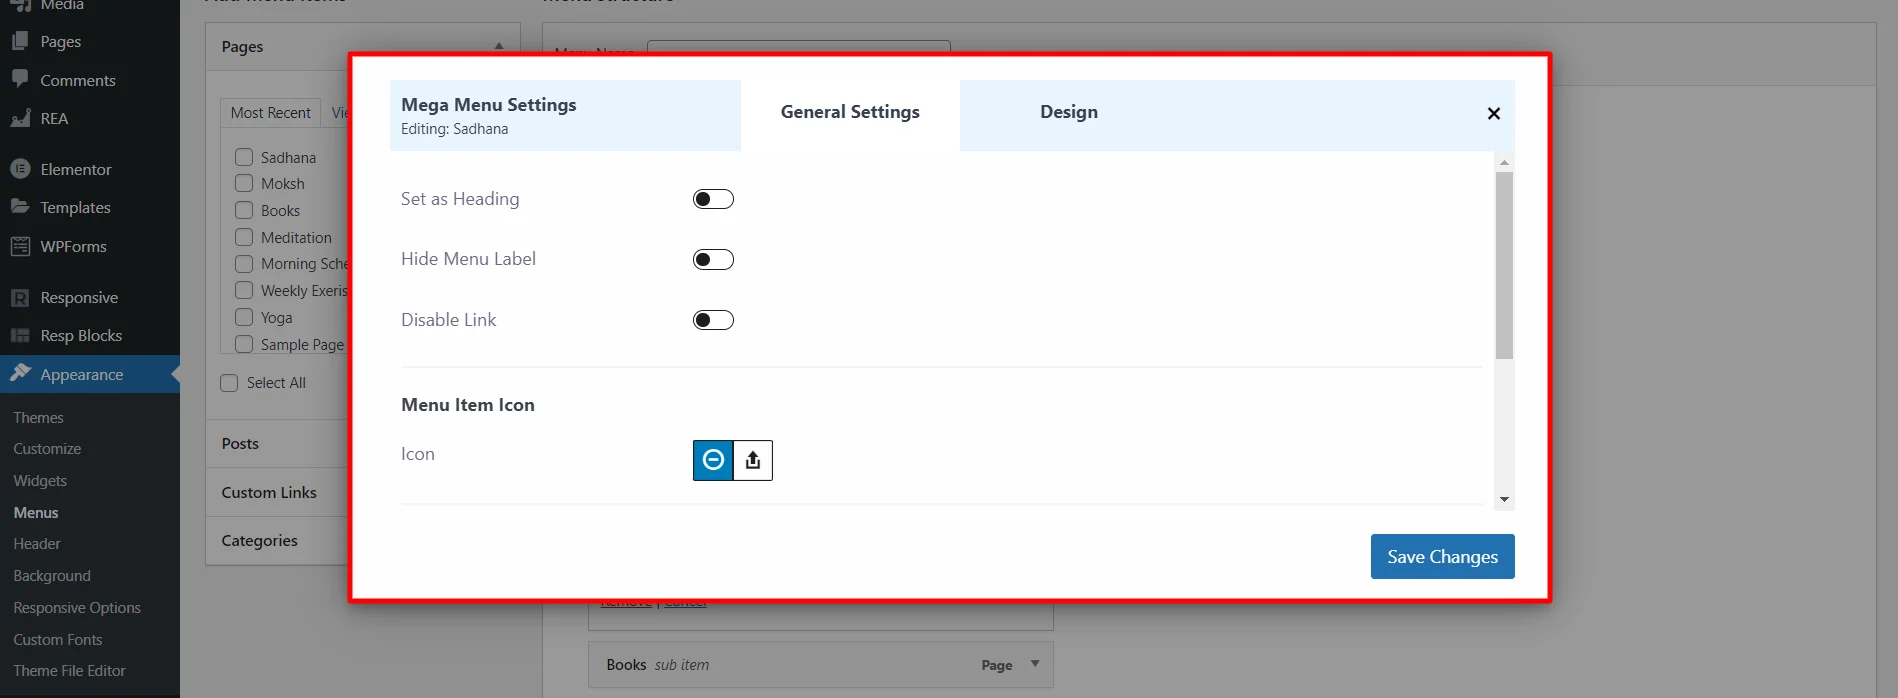
In the General settings, you can use the following features:
- Set as Heading: Allows you to designate a menu item as a main header, providing visual hierarchy in your mega menu.
- Hide Menu Label: This enables you to hide menu items from the menu.
- Disable Link: Prevents a menu item from being clickable, making it non-functional while still visible in the menu.
- Menu Item Icons: You can add custom visual symbols(icons) for users to quickly recognize and understand the content or purpose of each menu item.

You have multiple settings to create the perfect icon impression.
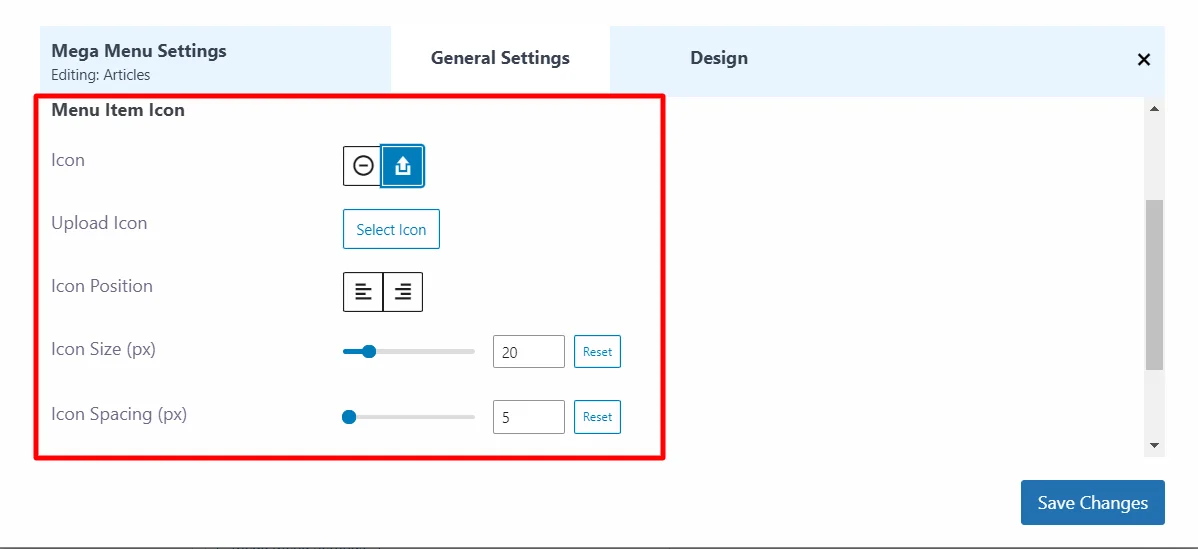
You can upload your own icon or select from a library of inbuilt icons. Play with settings like icon position, size, and spacing to get the desired results.
- Content Source: This allows you to display a description box alongside your submenu title, which can include custom text.
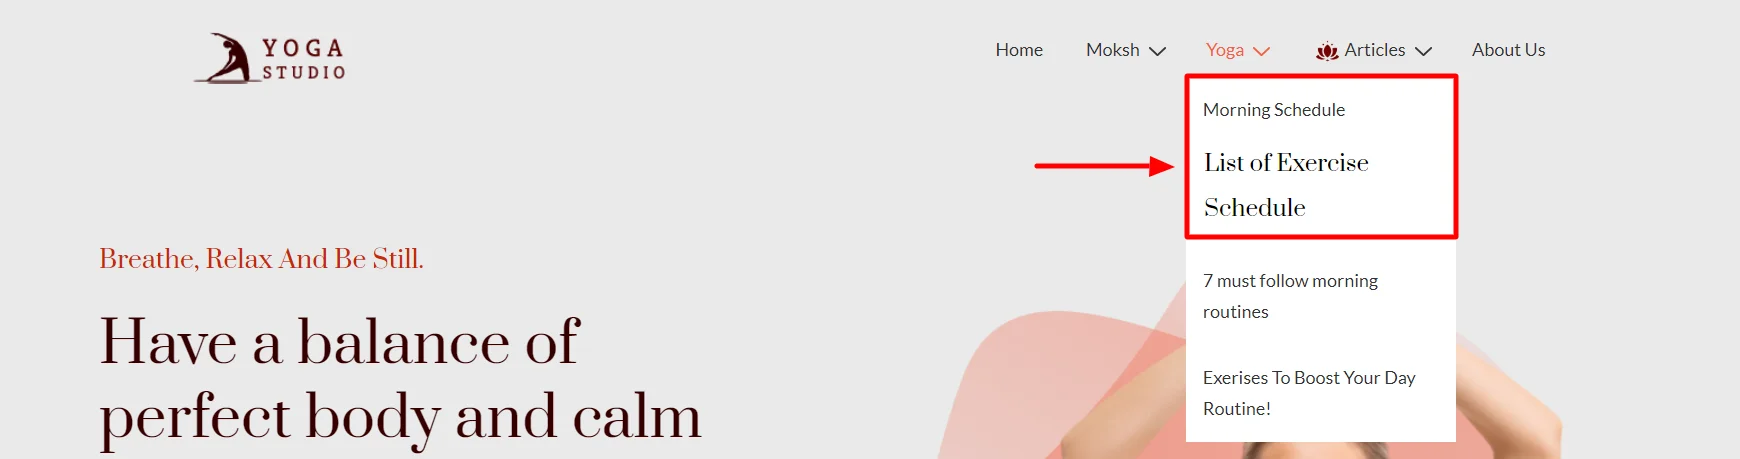
- Highlight Labels: This visualizes text in a mega menu to draw attention to specific items or important content, helping users engage with featured elements.

Step 7: At the bottom of the page, customize other menu settings like Auto-add pages and Display location.

Click Save Menu.
Your mega menu is updated on your website.
Location of Mega Menu
Using the Mega Menu feature of Responsive Pro, you can personalize your MENU location with ease. The theme offers 2 menus each at the header and footer.
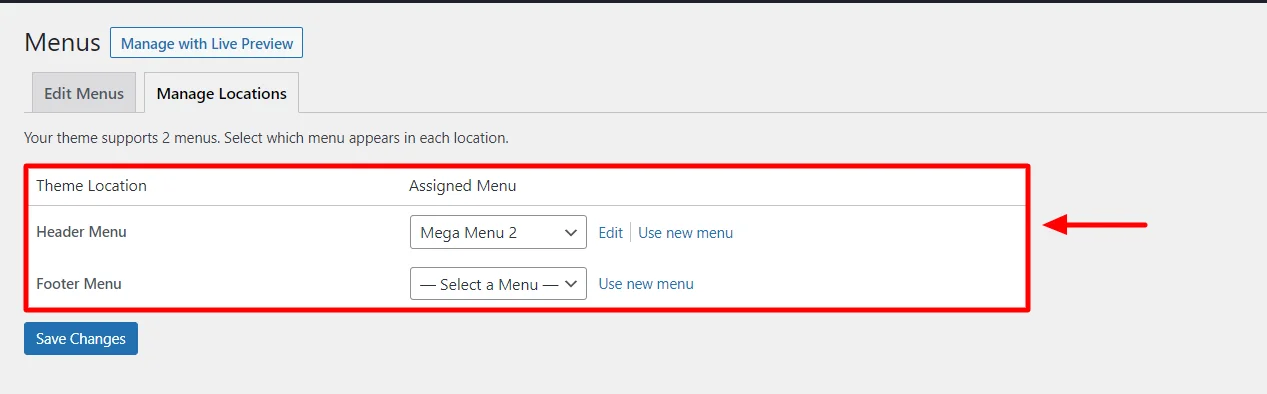
You can customize and place mega menus in various positions on a website, offering users access to menu options from multiple areas. You can also position different mega menus at different locations for better user convenience and accessibility.
Designing Your Highlight
You can customize the visual appearance of your highlight labels in the Design tab.
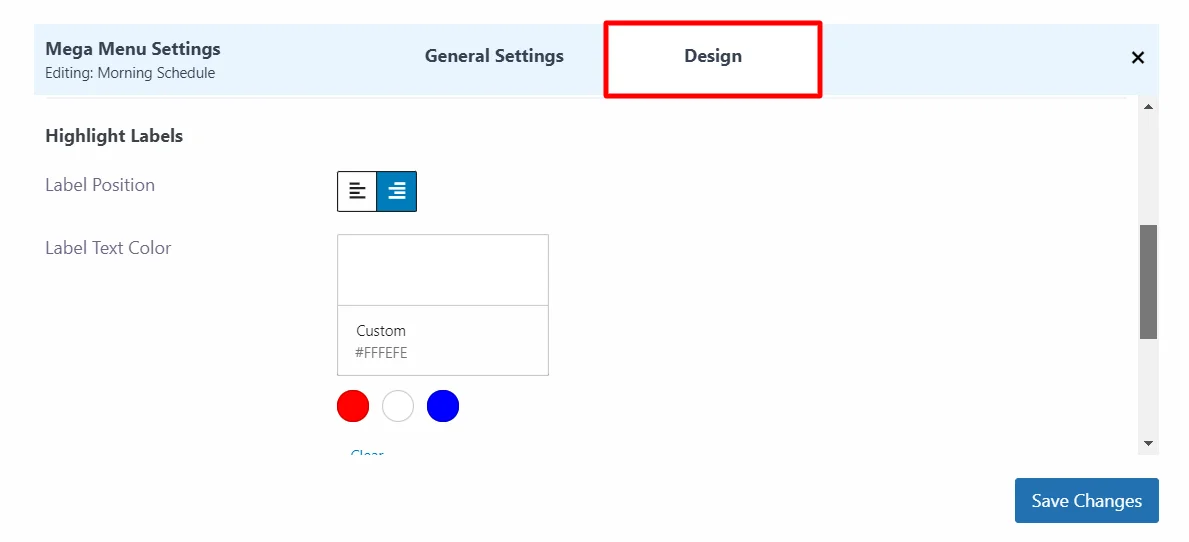
The design tab offers various customization features such as:
- Separator Colour: Allows you to customize the color of the lines or dividers used to separate items within the mega menu.
- Label Position: Allows you to align your label to right or left.
- Label Text Color: This lets you specify the color of the text used for item labels
- Highlight Colour: Allows you to select a color for the highlight banner.
- Background Color: This allows you to set the color of the mega menu’s backdrop.
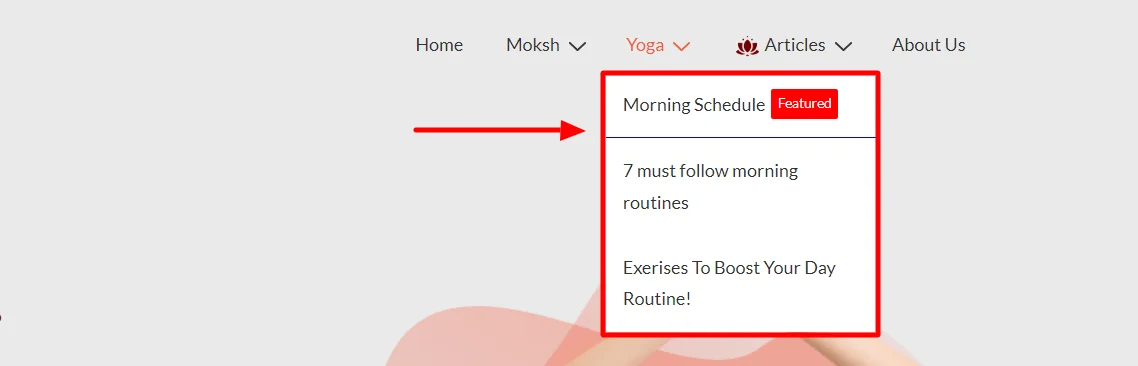
Responsive Pro allows simplified access to a wide array of content and options using the mega menu feature.
Once you’re done, click on Save Menu.
Congratulations, you have successfully added a mega menu to your website!
Get Responsive Pro For Your Website Today!


