Note: Responsive Pro Plugin only works with Responsive Theme 3.0 and above. If you are using an older version of the Responsive Theme, please get in touch with us at https://cyberchimps.com/contact
To better understand the process of installing and activating the Responsive Pro plugin, we recommend watching the video:
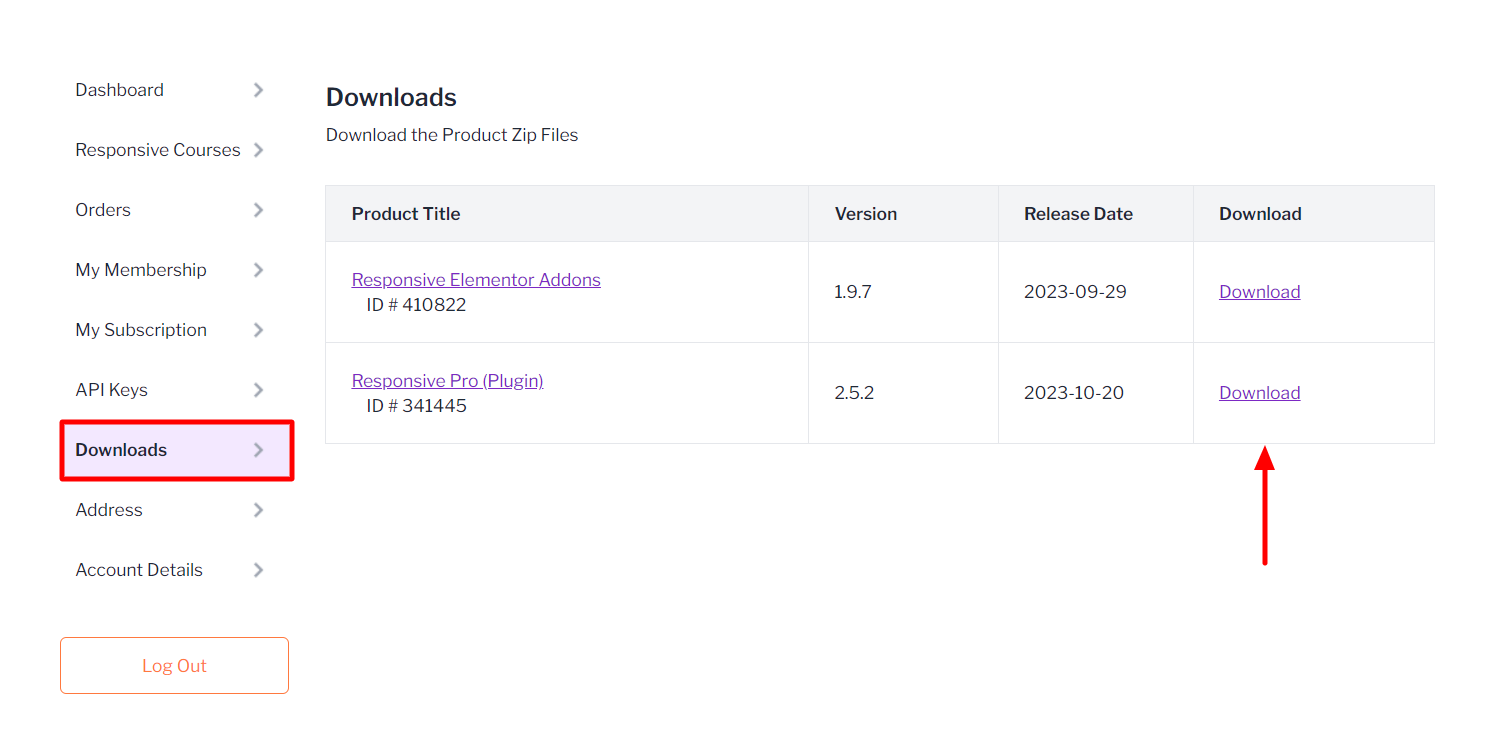
After you have purchased Responsive Pro Plugin, go to Cyberchimps and navigate to My Account > Downloads. There, you will find the latest version of the purchased plugin with a download link. Click on the download link to download the plugin zip file.
Once you have downloaded the Responsive Pro plugin zip file, follow these steps to install and activate it:
Install Responsive Pro Plugin From WordPress Dashboard #
To install the Responsive Pro Plugin manually, follow the installation process.
Step 1: Download the latest Responsive Pro plugin from the API Downloads
Step 2: Login to your WordPress Dashboard
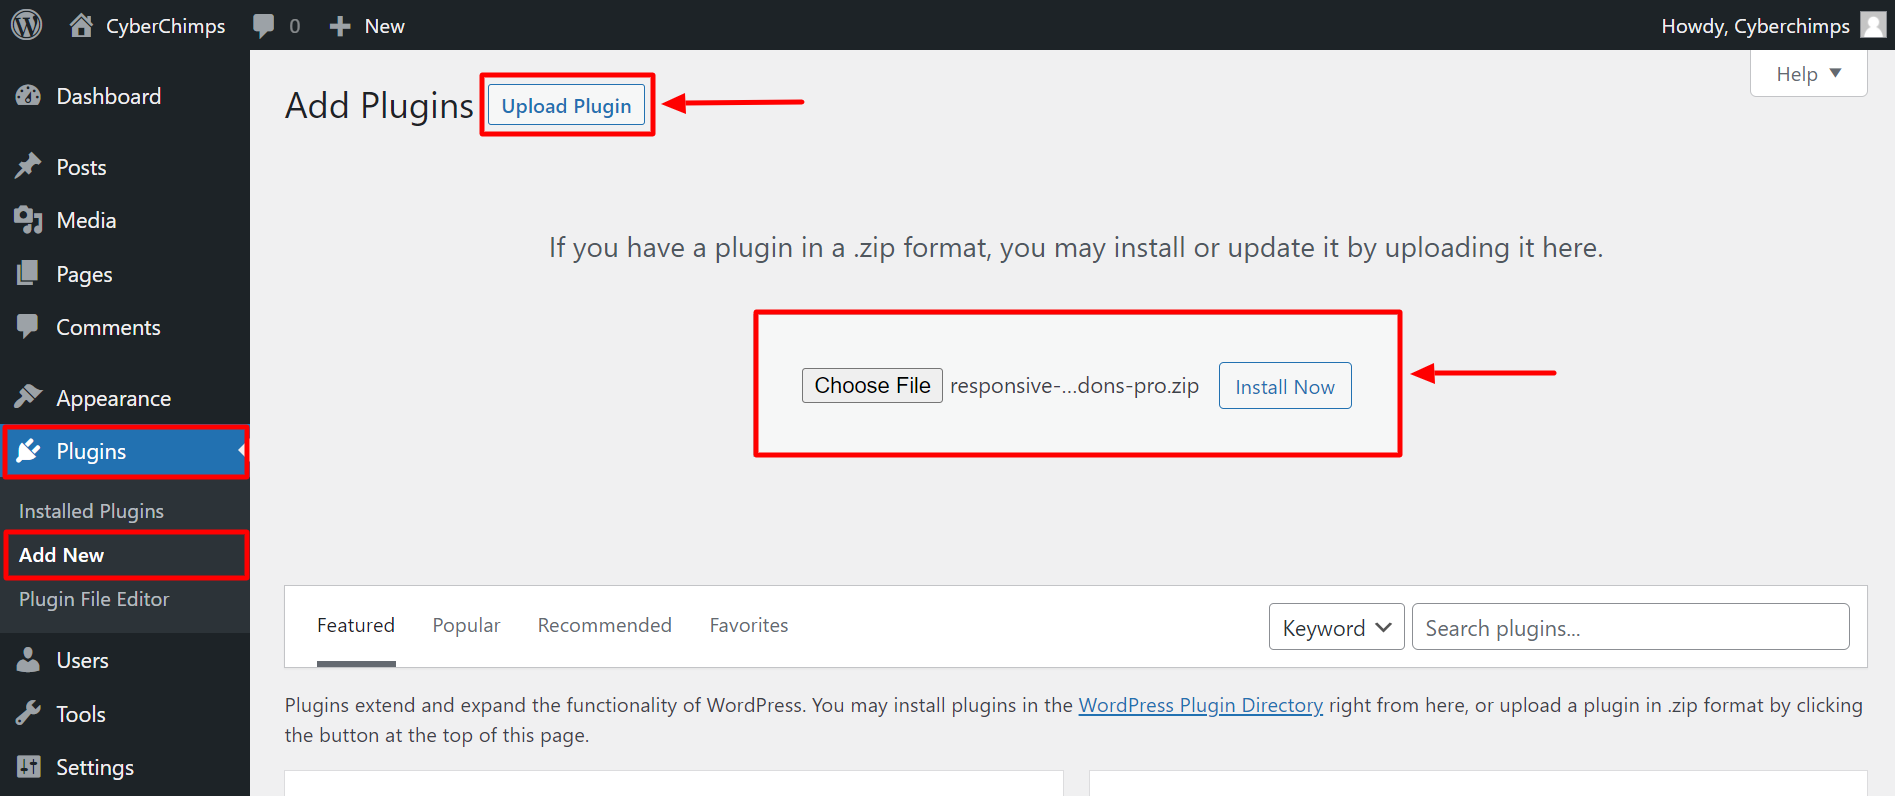
Step 3: Navigate to Plugins > Add New > Upload Plugin
Step 4: Upload the downloaded plugin zip file
Step 5: Click on Install Now to install the Responsive Pro plugin
Step 6: Activate it
Installating Responsive Pro Plugin via FTP #
To install the Responsive Pro Plugin via FTP:
Step 1: Download Responsive Pro zip from Downloads.
Step 2: Unzip the Responsive Pro zip file.
Step 3: Open your WordPress site via FTP. We would recommend you use FileZilla.
Step 4: From FTP, visit the root of the WordPress install.
Step 5: Now visit the wp-content folder > plugins.
Step 6: Upload Responsive Pro unzipped folder from Step 2
Step 7: Go to WordPress admin dashboard and navigate to Appearance > Themes and Activate the theme.
And that’s all! Following these two methods, you can easily download and install the Responsive Pro plugin on your WordPress website.


