Summary
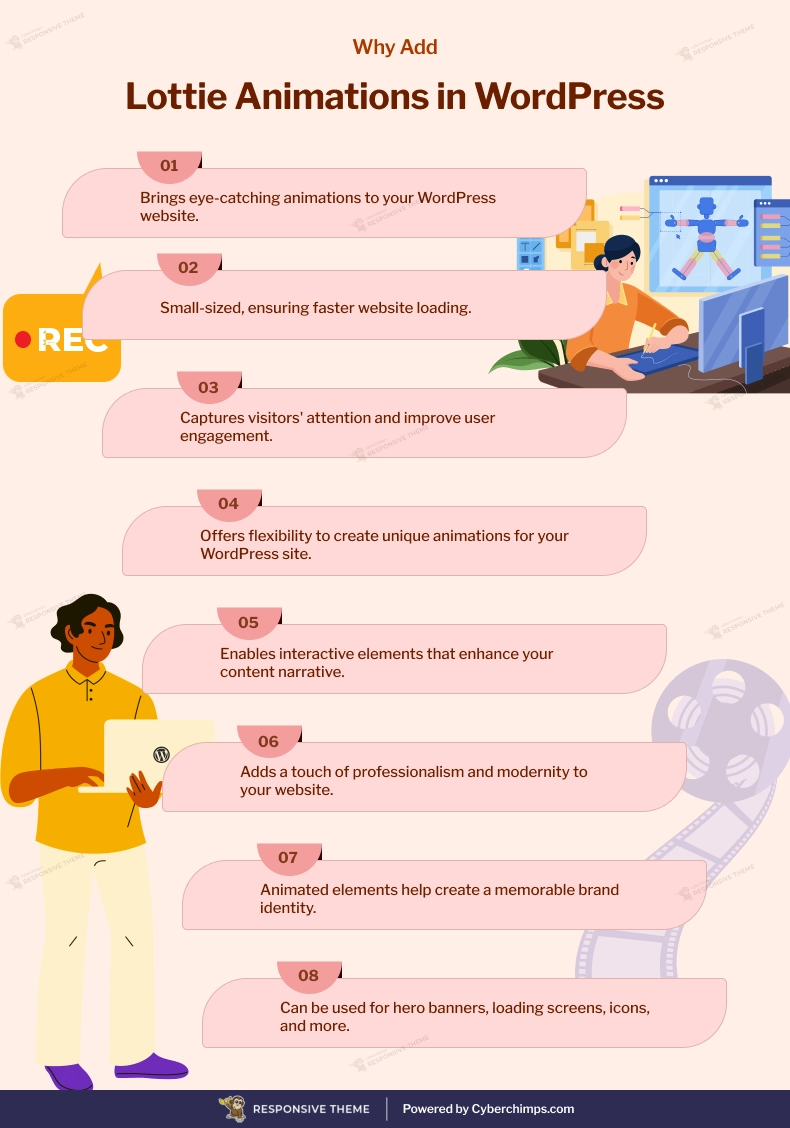
We experimented with Lottie animations on WordPress and discovered how a single lightweight JSON file can transform static pages into interactive experiences.
Using Elementor and Responsive Addons, we brought our website to life while keeping it fast and responsive.
Are you wondering how to add animations to your Wordpress site?
Animation is undeniably becoming one of the most sought-after elements. Despite many options, GIF is a prevalent format web designers use worldwide.
However, one of its major issues is that it makes a web page heavier to load. Thus, a group of engineers developed Lottie in 2017. Quickly, Lottie created a buzz in web development and designed a community for being a lighter alternative.
Moreover, a Lottie file supports various platforms, including web, iOS, and Android. This article quickly takes you through the process.
Responsive Addons for Elementor is the Best Elementor Addons plugin – Get it for free!
What Are Lottie Animations?

Lottie is a React Native, Android, and iOS library developed by people at Airbnb and allows you to render After Effects animations in real-time. It also lets you use animations as easily on native apps as static assets.
As JSON files, it uses animation data exported from Bodymovin, an open-source After Effects extension. The extension comes with a JavaScript player that can render animations on the web.
One of the best things about Lottie is that it lets engineers build richer animations without the painstaking overhead of rewriting.
How To Use Lottie Animations On WordPress?
If you’re looking forward to adding Lottie animation to your WordPress website, there are a few ways that you can follow based on the editor you’re using. Let’s find out about these methods one by one.
Finding the Right Animation
You will indeed find a gamut of options when adding a Lottie animation. With this, finding the right option may become a bit taxing. However, by following these steps, you can make the hunt much easier:
Visit the LottieFiles website

Once there, you can find both free and premium animations
To find free animations, hover your cursor on the Product option in the menu and click Free Animations.

Here, you can find a variety of animations and use them without paying a penny.
However, hover your cursor on the Product option in the menu to get premium animations and click Marketplace.

Here, you can find varying paid animations.
How to Add a Lottie Animation in Gutenberg?
As you know, Gutenberg is the default WordPress editor. You can use the custom HTML block to add a Lottie animation in this editor.
Follow these steps to do so:
Once you’ve selected a Lottie file that you wish to use, click on it.

A window will appear with varying options.
Click on the Save to Workspace option, and click Embed HTML.

A new window will open where you must copy the generated code from the Embed HTML section.

Now, open Gutenberg on your WordPress dashboard and add a new custom HTML block.
Paste the copied code.

If you want to see how the animation looks, click on Preview.

Also, if you wish to change the animation’s size, width, or height, you can modify the code by replacing the width and height variables per your preference.
And, you are done.
How to Add Lottie Animation in Elementor?
You can easily add Lottie animation using Elementor on your WordPress website.
Unlike the Gutenberg editor, the animations in this editor can be customized thoroughly, such as applying CSS filters, setting the size, triggering the animation effect, and more.
However, you’ll need to use Elementor Pro because the widget doesn’t work with the free version.
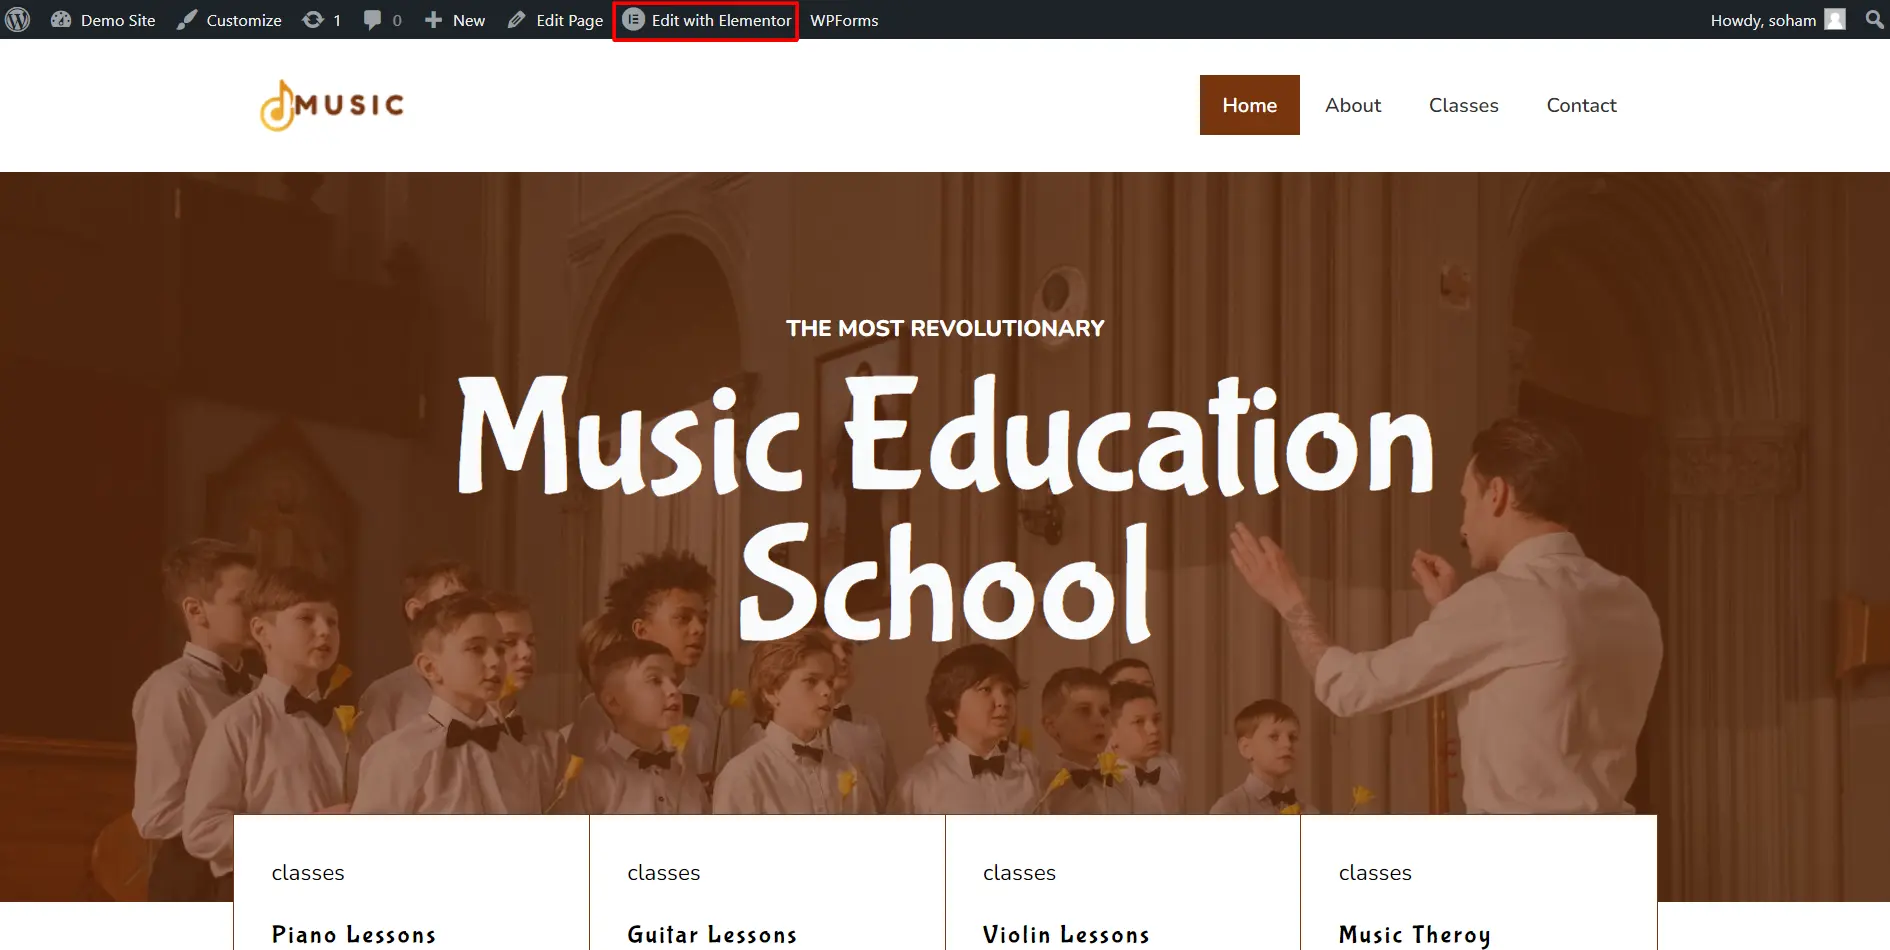
Open the page where you want to add Lottie animation to the Elementor Editor. For tutorial purposes, we will use a Music School Template by Cyberchimps. Click on Edit with Elementor.
On the Elementor editor, search for Lottie and add the element to the required area.

Now, go to the Lottie panel. Under the Lottie section, on the Source option, choose how you wish to add the file. Here, we will upload the json file.

If you wish to upload a Lottie file yourself, choose the Media File option and select the file by clicking the upload icon.
However, if you wish to add a file from LottieFiles, you can choose the External URL option and paste the URL into the available field.
You can open the Settings block on the Settings panel to set up the trigger type, start, and endpoints. You can visit the Style tab and apply CSS filters to set the animation size.

Once you’re satisfied with the edits, click the “Publish” button, and you’re done.
Add Lottie Using Responsive Elementor Addons Plugin

Now that you’re ready to use Lottie animation on your site try the Responsive Elementor Addons’ Lottie widget, which lets you add these animations seamlessly through the source URL or by uploading the file.
The plugin is straightforward to activate and use. Furthermore, it provides plenty of efficient widgets.
Let’s learn about installing Lottie animations on your WordPress site through Responsive Addons for Elementor by Cyberchimps.
Step-By-Step Installation Guide
The RAE Lottie widget comes free with the installation of Responsive Addons for Elementor Plugin.
Login to your WordPress Dashboard. Go to Plugins > Add New

Search for Responsive Addons for Elementor by Cyberchimps.
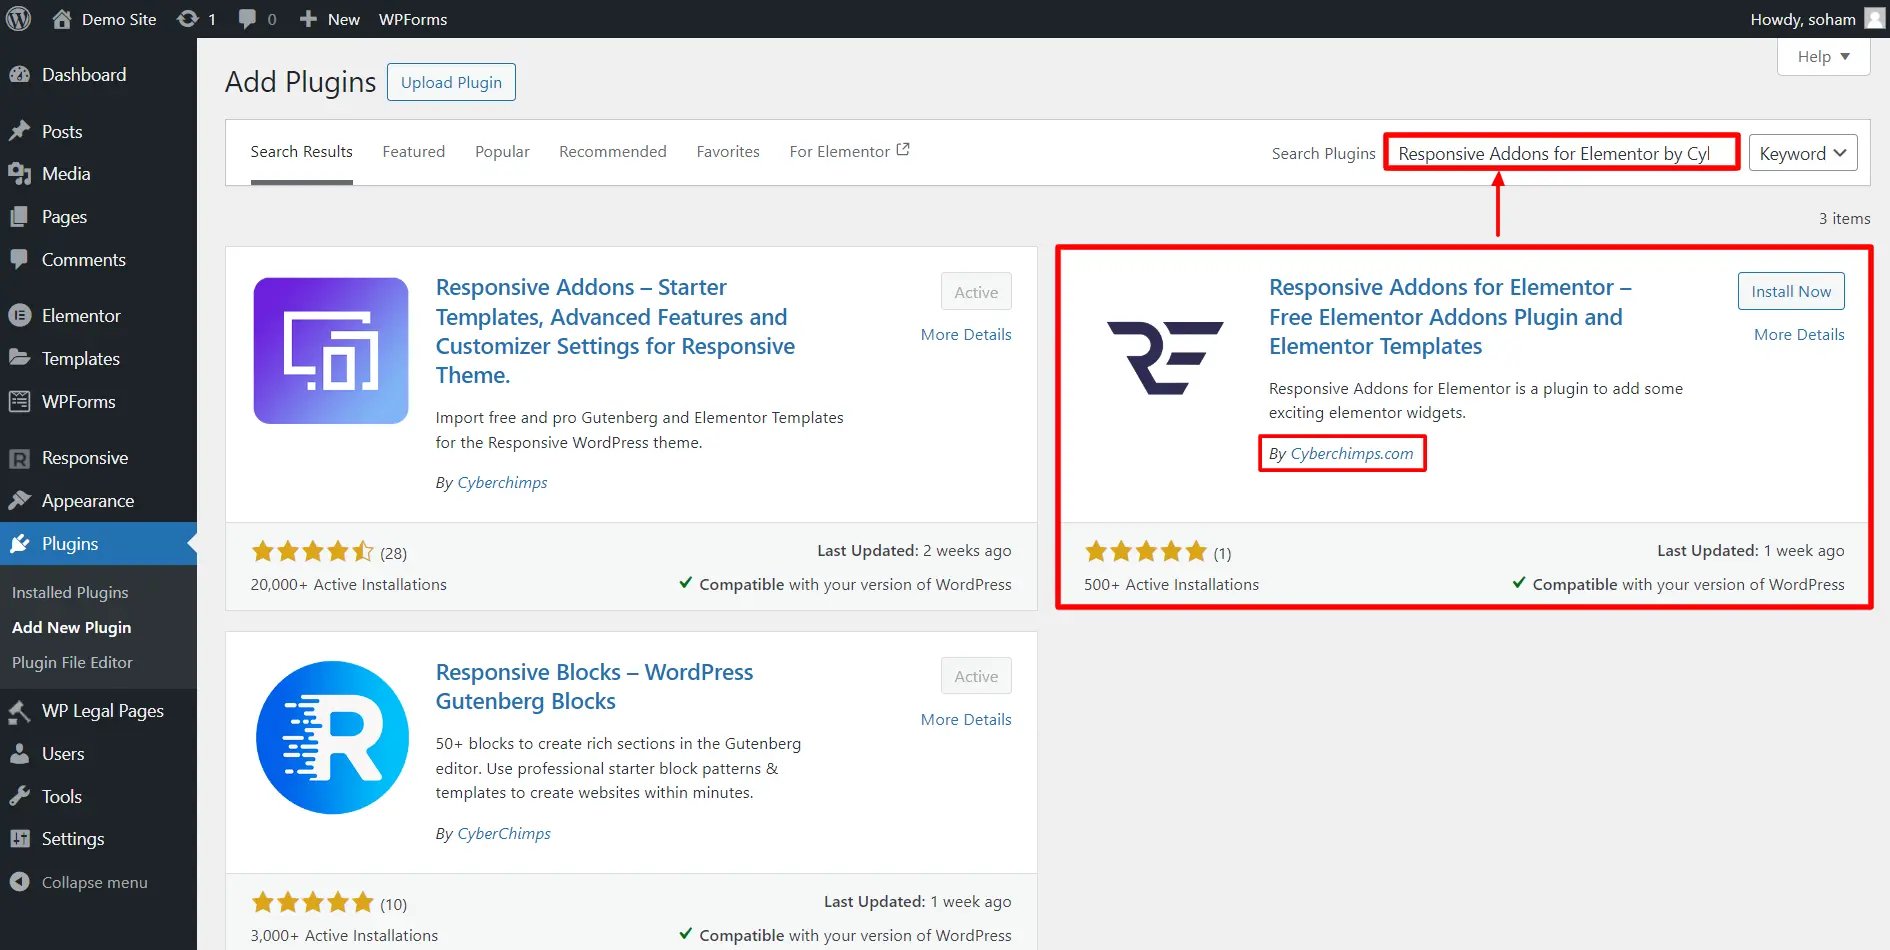
Install the Responsive Elementor Addons plugin.

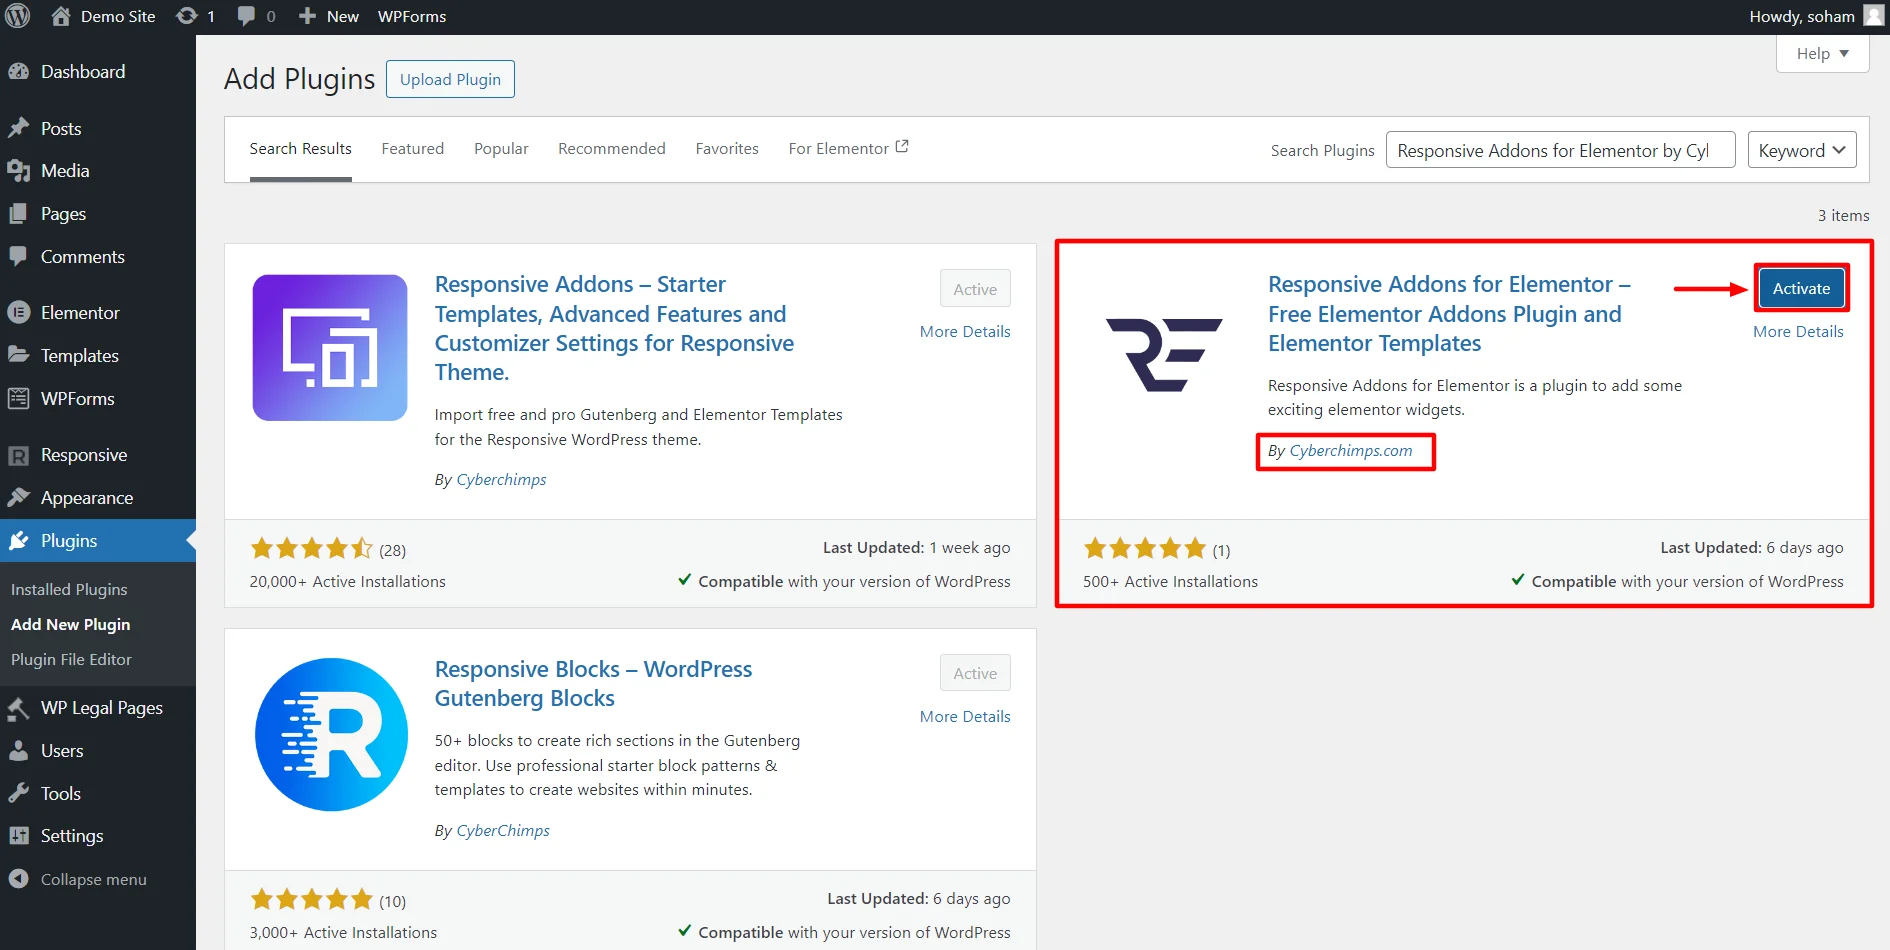
After installing, activate the plugin by Clicking on Activate.
How to Add RAE Lottie Animation in Elementor?
Open the page where you want to add the Lottie animation in the Elementor editor.
Search for the RAE Lottie animation widget and insert it. (you can either upload the animation file or copy-paste the link)

And you are done.
Additionally, the RAE widget also allows you to customize Lottie animations to a great extent, such as:

| Source | Select how the caption will be added from the given options: custom, caption, title, none. |
| Alignment | Set the animation’s alignment as horizontal |
| Custom Caption | Select how the caption will be added from the options: custom, caption, title, none. |
| Link | Select whether a custom link should be added or not |
Additionally, here are a few customizations you can do in the Settings panel of the widget:

| Trigger | You can choose the action when the animation is triggered from the options: none, scroll, hover, click, and viewport. |
| Loop | Choose the action when the animation is triggered from the given options: none, scroll, hover, click, and viewport. |
| Play Speed | Set the play speed of the animation |
| Start & End Point | Set the start and endpoints of the animation |
| Reverse | Whether or not the animation should reverse |
| Renderer | Set the animation renderer type, be it Canvas or SVG |
| Lazyload | Whether or not the animation should lazyload |
Apart from the ones mentioned above, you can also customize the following aspects:
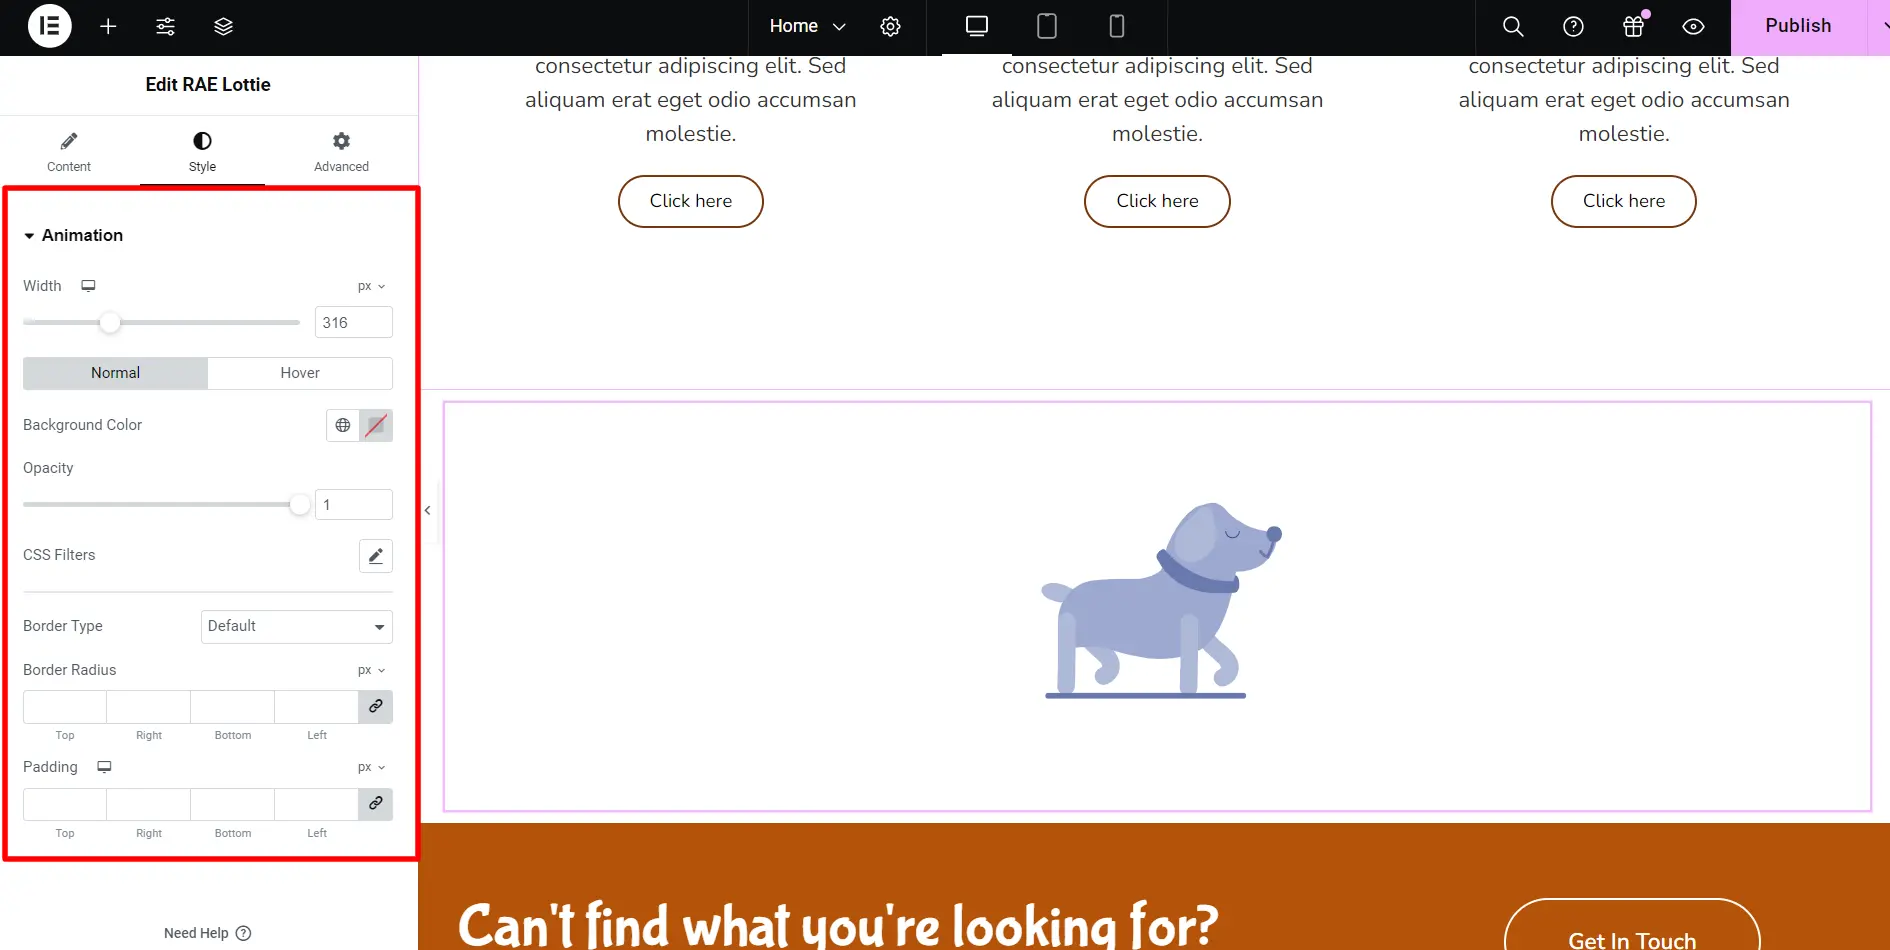
| Width & Max Width | Set the width and max-width of the animation container |
| Border Type & Radius | Set the border and its radius for the animation container |
| Padding | Set the animation container’s padding |
| Background Color, Opacity & CSS Filters | Set up the background color, opacity & CSS filters for every stage of the animation container |
FAQ
You can add Lottie animations to your Elementor website by installing Responsive Addons for Elementor. You can add the RAE Lottie widget while editing the Elementor page.
Lottie Animation is a JSON file used for websites and apps. It allows you to add high-quality animations without slowing down your website. These files are small in size and work smoothly.
Yes, you can add Lottie animations for free using Lottiefiles and Responsive Addons for Elementor Plugin. This plugin is free to use and offers over 80 widgets.
Wrapping Up
At last, it’s nearly undeniable that by adding Lottie animations to the WordPress website, you can easily make it look visually pleasing, thereby retaining more traffic than usual.
So, follow the steps mentioned above, make the most of the Responsive Addons for Elementor plugin widget, and add attractive animations to your site like never before.
If you liked reading this article, here are more interesting articles to look at:
- How to Build a WooCommerce Website with Elementor
- How to Create an SEO Consultant Portfolio Website Using WordPress
- What Is An E-Commerce Website & How To Build One
Ready to get started? Check out the Responsive Theme and start building your website today!