Summary
The article explains how to fix the WordPress HTTP image upload error. It defines what the upload error is and why it happens when adding images.
It also highlights common causes, troubleshooting steps, and fixes. Helping readers resolve the error and upload media smoothly.
Are you facing the HTTP image upload error when uploading media files in WordPress?
WordPress is a fantastic platform for creating a website. But when you encounter an error while building a website, it can be frustrating.
Usually, you run into an HTTP error when uploading files to the media library. Troubleshooting this error is often hard as we don’t know the primary cause.
But, here in this article, we’ve handpicked the best ways to fix the WordPress HTTP image upload error to help you surpass this issue.
Let’s learn what exactly is the HTTP image upload error and explore the different ways to fix the HTTP image upload error issue.
What is the HTTP Image Upload Error in WordPress?

An HTTP image upload error in WordPress occurs when something goes wrong while you’re trying to upload images or other media files. Even though the problem sounds easy to fix, it’s pretty hard to troubleshoot.
There could be multiple reasons why you’ve landed at this error. The most common cause of HTTP image upload errors is cache issues. Most times, clearing the cache will help you solve the HTTP error.
If the cache is not the issue, it’s hard to pinpoint any particular reason for the error. So, in the next section, we’ll list the reasons that could cause the HTTP image upload error.
What Causes the HTTP Image Upload Error in WordPress?
There could be several reasons leading to the HTTP image upload error. We’ll look into the different aspects that affect the image upload process.
Here are the top reasons that cause the HTTP image upload error:
- Exceeding the maximum file upload size: By default, WordPress sets a maximum size for the file you’re uploading. If the image file you’re trying to upload exceeds this limit, it will trigger an error.
- File name or format issues: Special characters, symbols, or file names that conflict with WordPress or server restrictions can cause upload errors. Similarly, unsupported or corrupted file formats may lead to failures.
- Insufficient file permissions: If the directory doesn’t allow you to upload the image, WordPress won’t be able to save the file, resulting in an upload error.
- Cache: Sometime, the cache could cause WordPress to trigger errors.
- Memory limit restrictions: WordPress has a memory limit that determines how much memory can be allocated for image processing during uploads.
- Server misconfiguration: Issues with server configuration, such as incorrect PHP settings or security modules like mod_security, can restrict the image upload.
- Plugins: In some cases, plugins can disrupt the image upload process, resulting in errors.
Now that you know the different causes of the HTTP error, let’s look at how to fix them.
How to Fix the WordPress HTTP Error
There are multiple ways to fix the HTTP image upload error in WordPress. It is important to check each solution stepwise to eliminate the error.
Let’s move ahead and check the different ways:
1. Check if the HTTP Error is Temporary
Occasionally, a momentary server malfunction can lead to a WordPress HTTP error. Verifying if the error consistently occurs is essential before attempting any of the solutions provided in this post.
To start, wait a few minutes and try uploading the media file again. If the second attempt succeeds, it indicates a temporary problem during the initial error.
Moreover, eliminate certain characters such as apostrophes and semi-colons from the image file name.
2. Compress the Media File Size
To resolve WordPress’s HTTP image upload error, you may need to edit the files actively. This could involve reducing the file size (in KB) or adjusting the width/height (in pixels).
It is recommended to utilize third-party plugins that automatically handle image optimization by compressing and resizing them during uploading. When selecting a plugin, ensure it optimizes images on external servers rather than locally to avoid negatively impacting your site’s performance.
While WordPress supports high-resolution images for responsive display, it is generally advisable to actively keep the final image size under 100 KB.
Additionally, actively experimenting with different file types, such as WEBP, PNG, and JPG, can result in notable variations in file size. Depending on your WordPress host’s configuration, you may also need to explore increasing the maximum upload file size.
3. Rename the Media File
If you’re not in luck with the previous method, try to follow this one.
We’re replacing the existing file name with the one WordPress understands in this method.
To rename the media file, kindly go through these steps:
- Access your file manager where you’ve got the media file.
- Look for the folder containing the media file.
- Navigate to the problematic image file causing the error.
- Rename the image file by right-clicking and selecting the Rename option. Give it a different name, excluding special characters like apostrophes and colons, but instead, add a hyphen between the names.
For example, image-file-1.png, image-file-2.png. Adding a dash at the end helps Google understand the term as a single entity.
- After renaming the file, try uploading it again.
Check if the HTTP image upload error is resolved. If the issue persists, there may be other factors causing the problem, such as file permissions.
4. Clear the Cache

A cache is one of the most common reasons causing an HTTP image upload error. The best way to eliminate this cache issue is to clear the cache.
To clear the cache, follow these steps:
- Refresh the web page when you see the image upload error.
- If you’re still facing the issue, Press Ctrl + F5/ Ctrl + Shift + R (Windows) or Command + Shift + R (Mac) to perform a hard refresh, which clears the cache for that specific page.
- If the error persists, clear your browser’s cache completely. You can use keyboard shortcuts like Ctrl + Shift + Delete (Windows) or Command + Shift + Delete (Mac) to open the cache-clearing menu directly.
You can also try some of the best WordPress cache plugins to clear your website cache.
After clearing the cache, close and reopen the browser. Now you must be able to upload the image.
Still, facing the issue? Move to the next method.
5. Check File Permissions
Sometimes your WordPress doesn’t let you upload the image because you’re not granted permission to upload. When this happens, it’s better to check if you have permission to upload the file.
Ensure your web server is permitting you to upload the image. Or else contact them for further instructions on file permissions.
If your issue is solved at this step, that’s great. If not, then move to the next step.
6. Deactivate Plugins
If you installed a plugin and encountered the WordPress HTTP image upload error, deactivating the plugin causing the issue is the best solution. Deactivate all the plugins you used for image optimization and try to upload the media file again.
To disable the plugin, you can follow these steps:
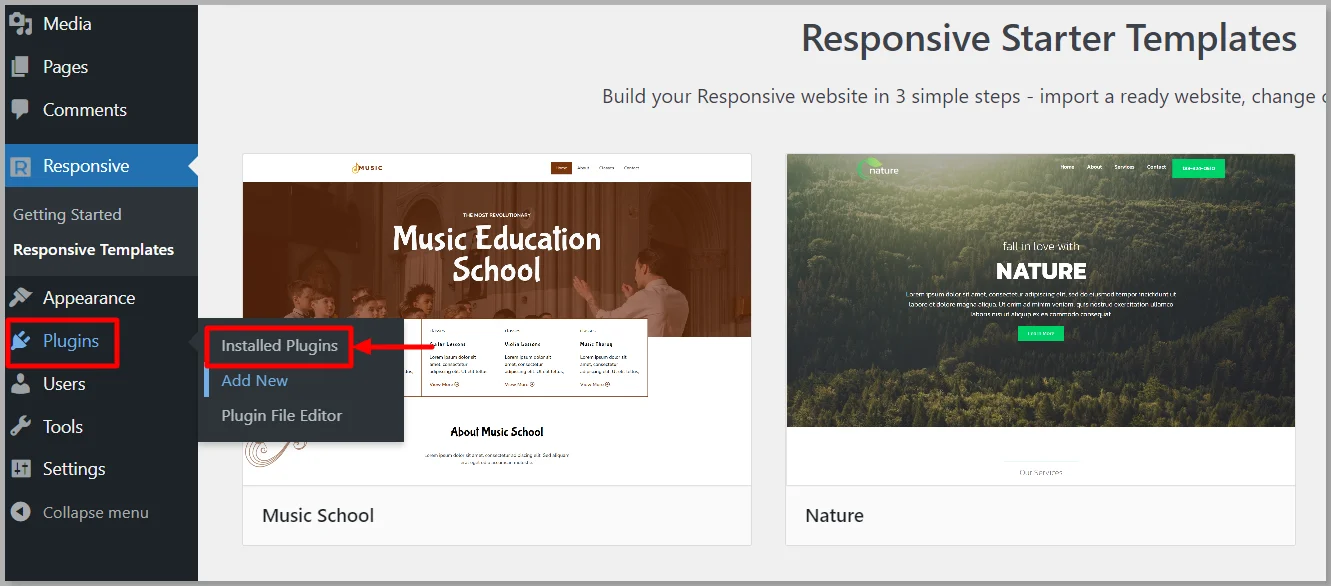
Access your WordPress admin dashboard, go to the Plugins menu, and click on Installed Plugins.
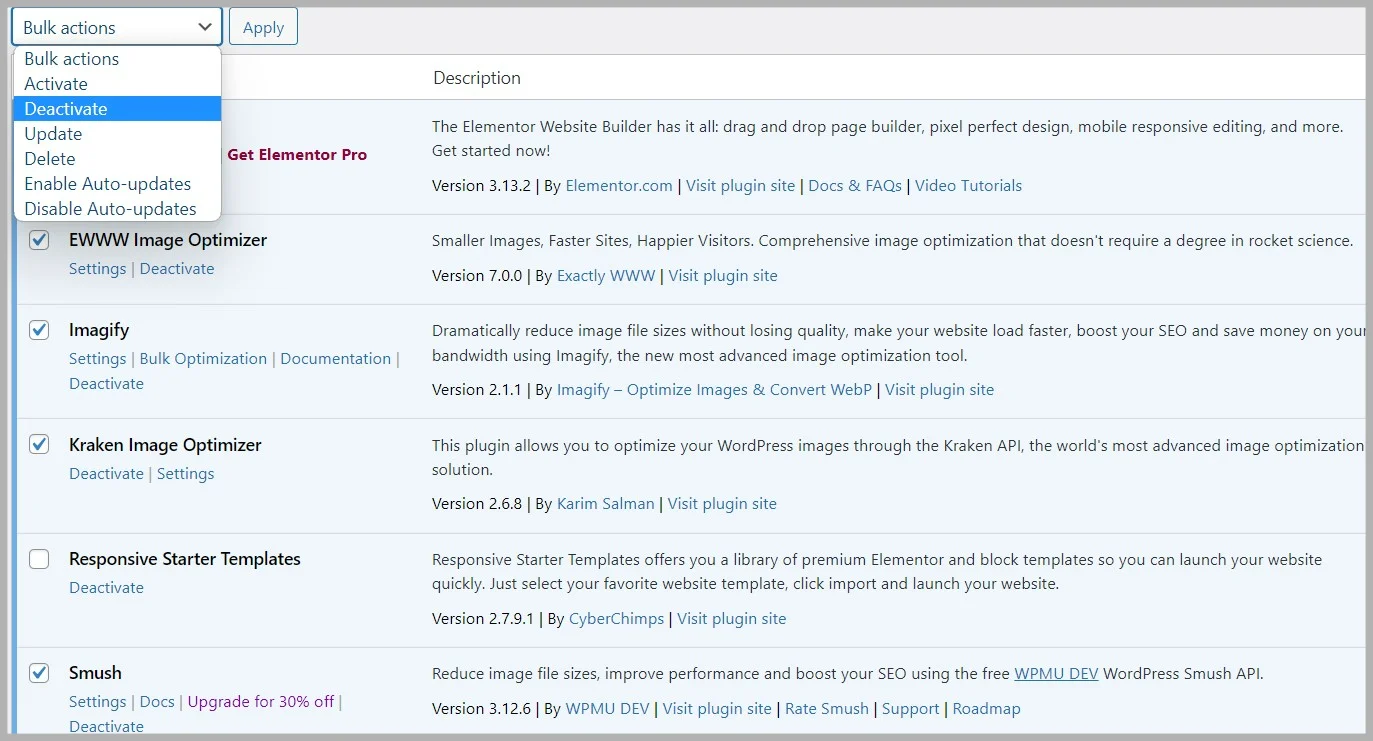
Select all the plugins responsible for image optimization, and from the Bulk Actions dropdown menu, select Deactivate and click on the Apply button.
Once the plugins are deactivated, try uploading the image again.
If the error no longer occurs, reactivate the plugins individually, and upload an image after each reactivation until you identify the plugin causing the HTTP error.
Note: Use caution when disabling plugins, as some might be essential for your website’s functionality.
If disabling all plugins does not resolve the error, proceed to the following solutions.
7. Increase WordPress Memory Limit
To increase the memory limit for WordPress, you can follow these simple steps:
Edit the wp-config.php file located in the root directory of your WordPress installation.
Find the line that says define(‘WP_MEMORY_LIMIT,’ ’64M’);. This line sets the memory limit for WordPress.
Increase the memory limit by changing the value. For example, depending on your requirements, you can set it to 128M or 256M.
Save the changes and upload the modified wp-config.php file back to your server.
Check if the memory limit has been successfully increased by visiting the WordPress admin area and going to Tools > Site Health > Info > Server.
This way, you can easily increase the memory limit in WordPress. Once you have expanded the memory, try to upload the media file again.
8. Edit the .htaccess
If the previous method was unsuccessful, the last step is to edit the .htaccess.
To fix the HTTP image upload error in WordPress using the .htaccess file, try the following steps:
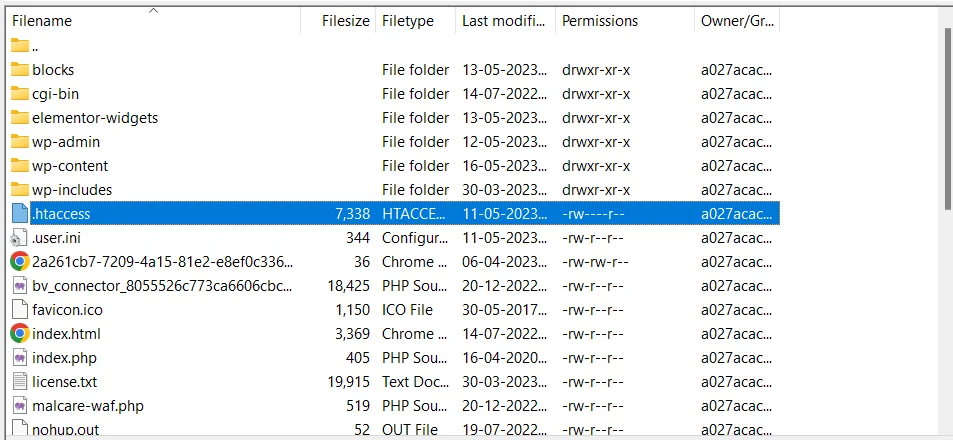
- Access your website’s root directory using an FTP client or a file manager provided by your hosting provider.
- Locate the .htaccess file in the root directory. If you can’t find it, make sure you have enabled the option to show hidden files.
- Create a backup of the .htaccess file before making any changes. This allows you to restore it in case something goes wrong.
- Open the .htaccess file in a text editor.
- Add the following code at the beginning or end of the file:
| <IfModule mod_security.c> SecFilterEngine Off SecFilterScanPOST Off </IfModule> |
- Save the changes to the .htaccess file.
- Upload the modified .htaccess file to your server, overwriting the existing one if necessary.
- Once you have edited the .htaccess, try to upload the media file and check if the HTTP image upload error is resolved.
Note: If this method causes issues, removing the code from the .htaccess file and restoring the backup you created earlier is recommended.
Conclusion
An HTTP error while uploading an image is frustrating. Multiple reasons can cause the HTTP image upload error.
Having read the article, hope you were able to remove the error when trying to upload the media file.
If you’ve liked reading this article, don’t forget to check our other engaging articles:
- Elementor Review: Is It Still The Best Page Builder?
- What is WordPress? Ultimate Guide For Beginners?
- What Is An E-Commerce Website & How To Build One?
Want a compatible theme for WordPress? Grab the Responsive theme now!