Summary
The article explains how to build free landing pages in WordPress. It shows ways to create effective pages without extra cost.
It also covers using built-in blocks, templates, and page builders to design and customize landing pages for different goals like lead capture or promotions.
Are you looking to build free landing pages on your WordPress website?
A landing page can be compelling for achieving your marketing or advertising campaign goals by increasing conversions, generating leads, and ultimately driving sales.
It can boost your WordPress site’s conversion rate by encouraging visitors to take specific actions, such as signing up for a newsletter, purchasing, or registering on a website.
In this article, we will provide two methods on creating a landing page for your WordPress site.
What Are Landing Pages?
Landing pages are a stand alone web page designed specifically for advertising, email, social media, or marketing campaigns.
When users click on these sources, they will land on this page first. The primary purpose of these pages is to convert visitors into customers by motivating them to take specific action on your website.
This action could be anything from purchasing a product, subscribing to your email list, filling out a form, or engaging in any other activity that benefits your site.
Landing Page Vs Homepage
Many people often confuse a website’s homepage with a landing page.
The homepage is the first page that visitors see when they visit your WordPress site.
It typically contains relevant information about your company or business, such as your company name, images, and links to other pages or content on your site.
Whereas landing pages are specifically designed to generate leads by capturing visitors’ information.
This is what a typical homepage would look like:

Compared to what a landing page looks like:
The layout, format, and design of landing pages vary depending on your business type and the resources you offer.
The information requested is entirely up to you. Some sites may only ask for email addresses to send newsletters, while others may require more detailed information such as name, phone number or address.
How to Build Free Landing Pages in WordPress
You now understand the importance of landing pages and what they require to reach customers effectively.
But how do you create a landing page in WordPress?
In this section, we’ll provide you with a step-by-step guide on creating a landing page using two popular WordPress page builders: Elementor and Gutenberg.
Let’s look at them one by one!
Method 1: Importing Free Elementor Landing Pages
When building a landing page in WordPress, you need Elementor website builder and Responsive Starter Templates installed and activated on your website.
Here are the steps to install Elementor:
From the WordPress dashboard, navigate to Plugins > Add New Plugin.
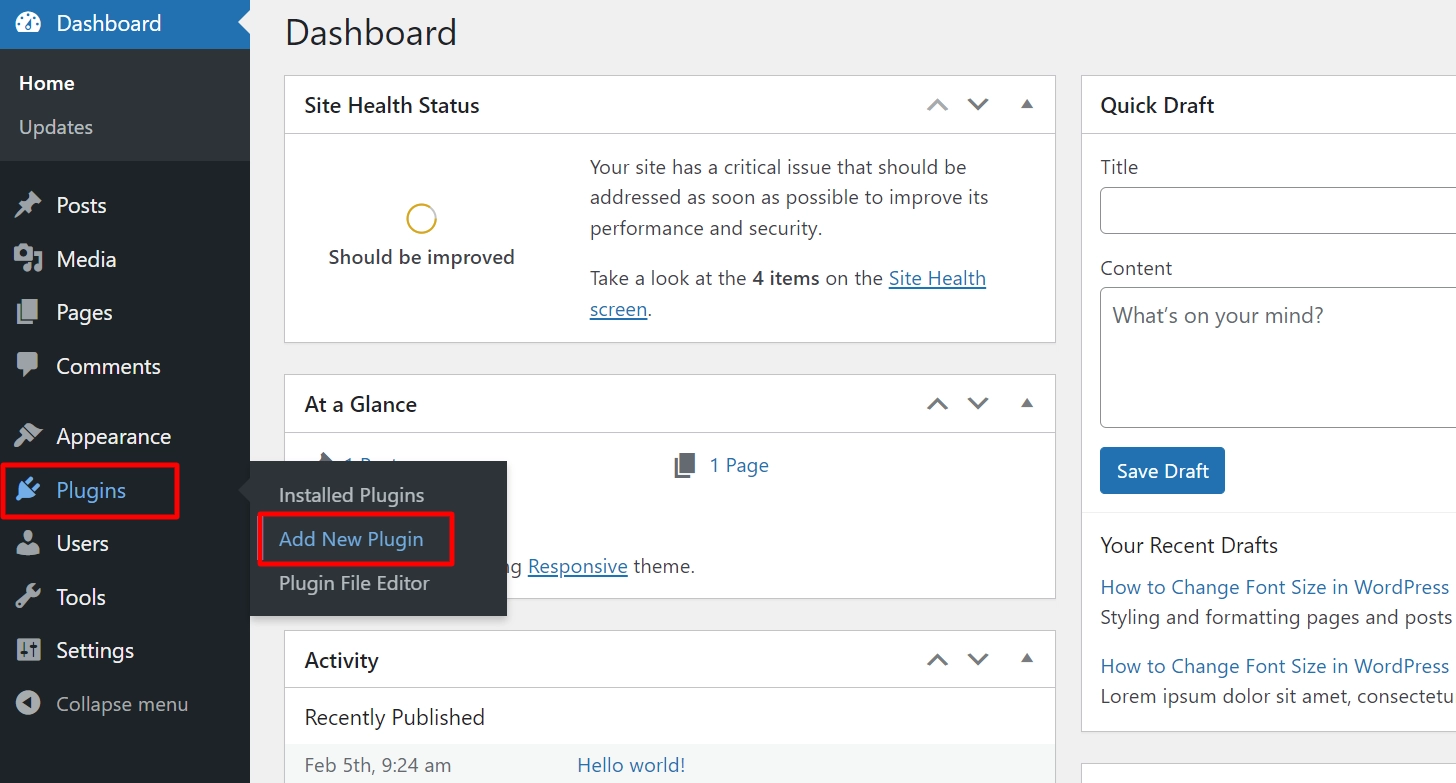
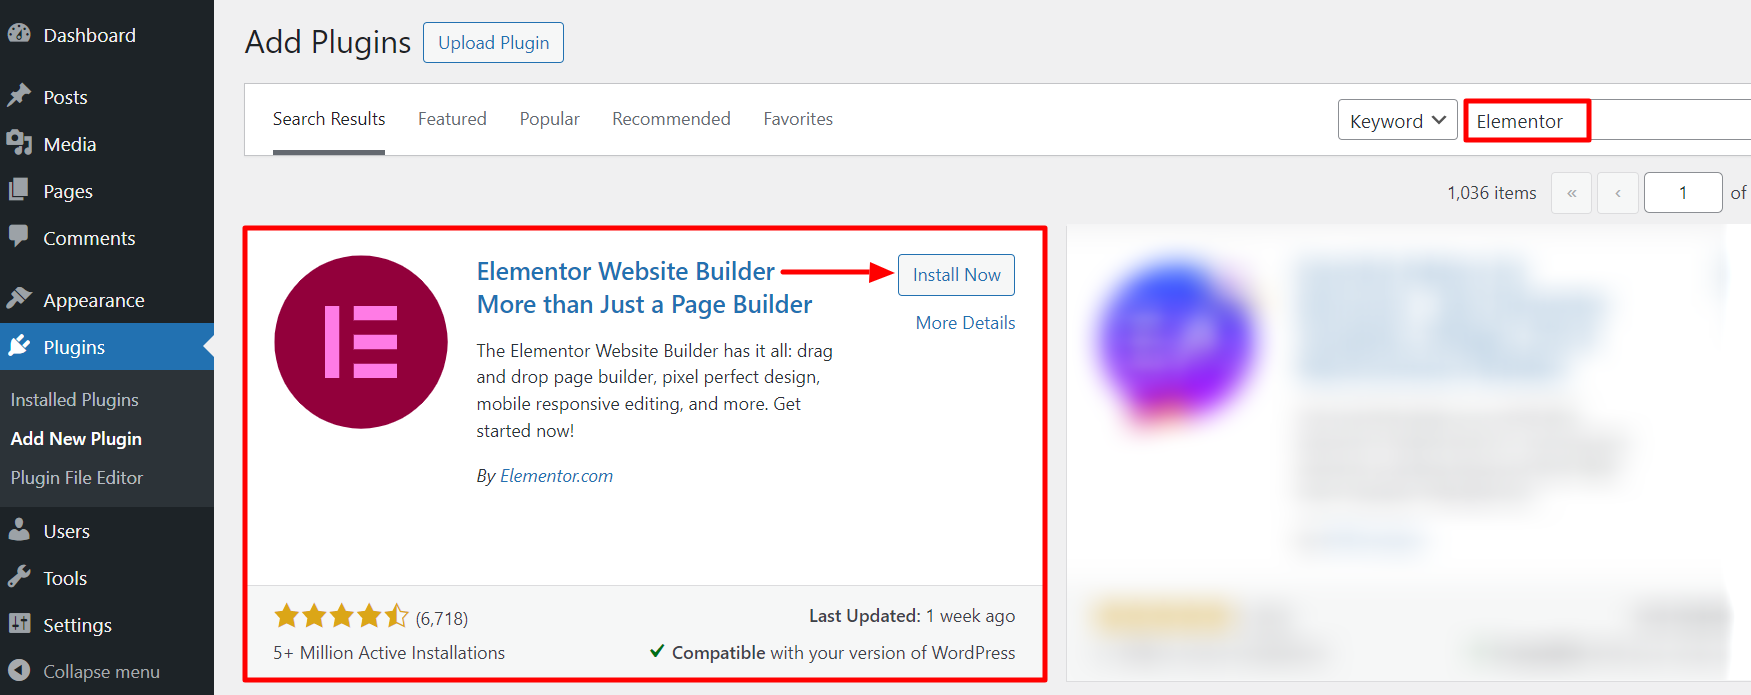
Search for Elementor and click on Install Now button.
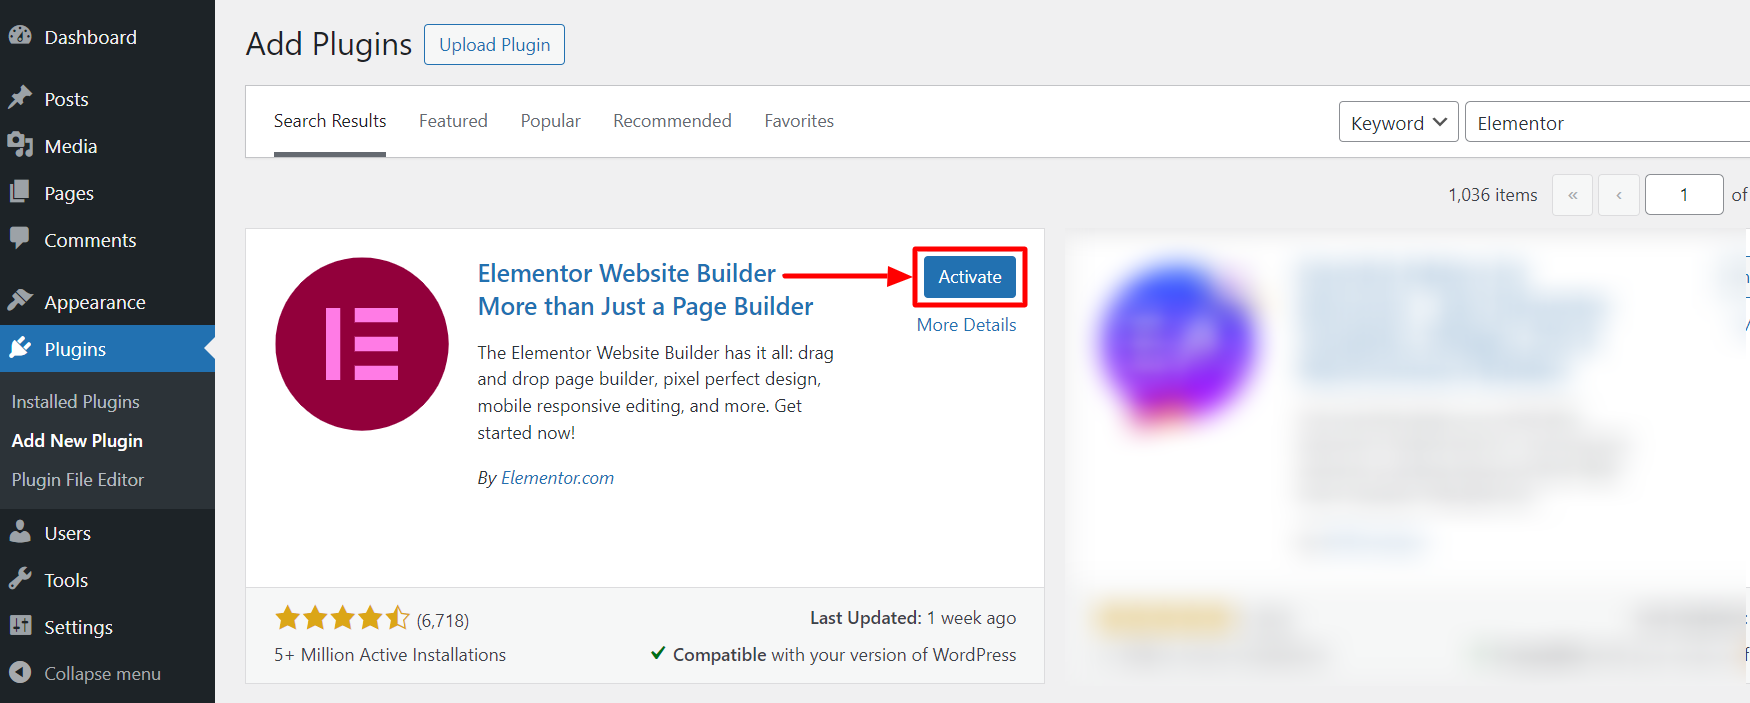
Once the plugin has been installed, click Activate.
Now, let’s see how to install and activate Responsive Stater Templates.
Responsive Starter Templates plugin provides a wide range of website templates optimized for speed and performance.
You can choose from over 150 professionally designed templates tailored for the Elementor page builder and WordPress block editor.
To install Responsive Starter Templates plugin, follow these steps:
Go to your WordPress dashboard and navigate to Plugin > Add New Plugin.
Search for Responsive Starter Template in the search bar and click on Install Now.
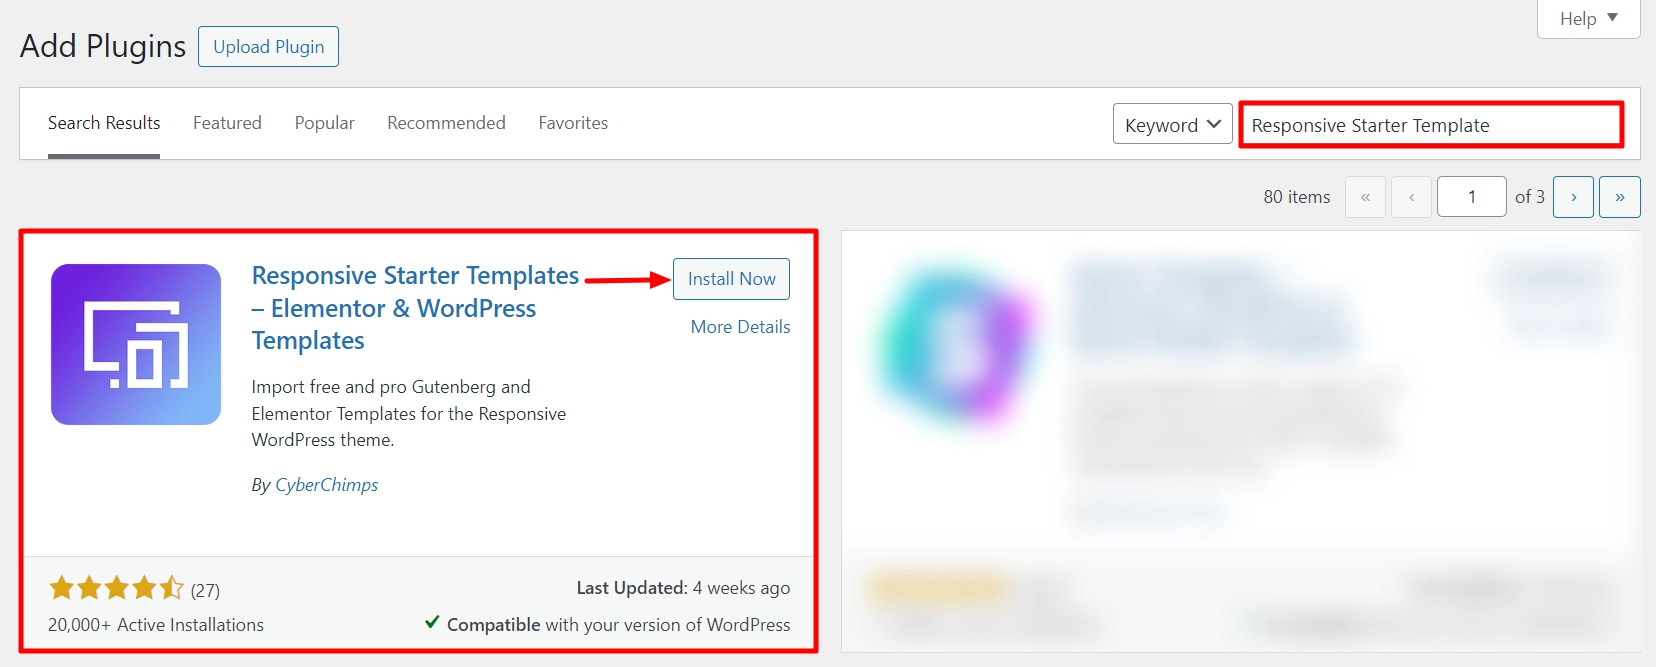
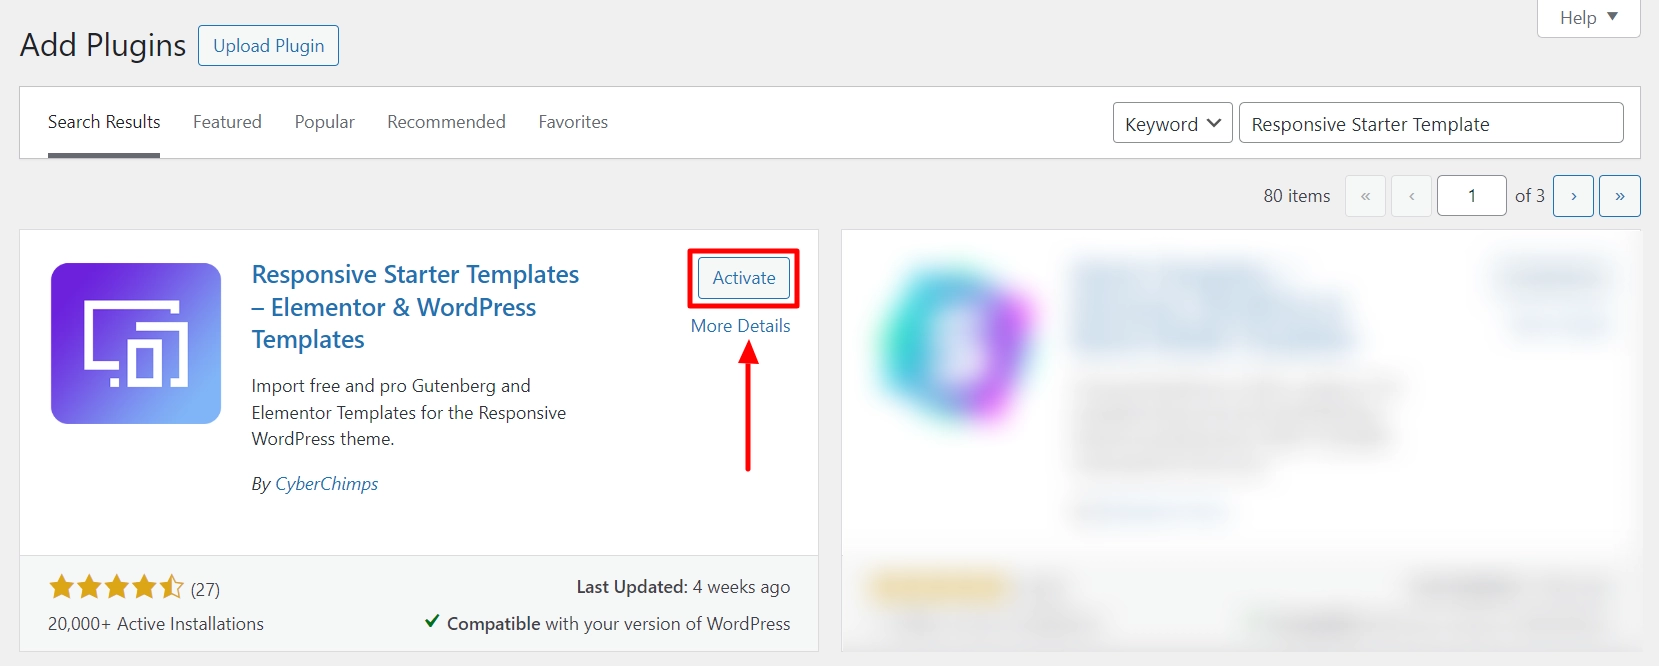
After the installation is complete, click on Activate to start using the plugin.
From this plugin, you can use a stunning range of templates for free.
Using Premium Elementor Landing Pages
However, premium templates, labeled as PRO, offer extra functionality and design capabilities. You can access these premium templates by purchasing the Responsive Pro plugin.

You can buy the Responsive Starter Templates plugin for a discounted price on DealFuel.
Once you have purchased the Responsive Pro plugin, follow these steps to activate it.
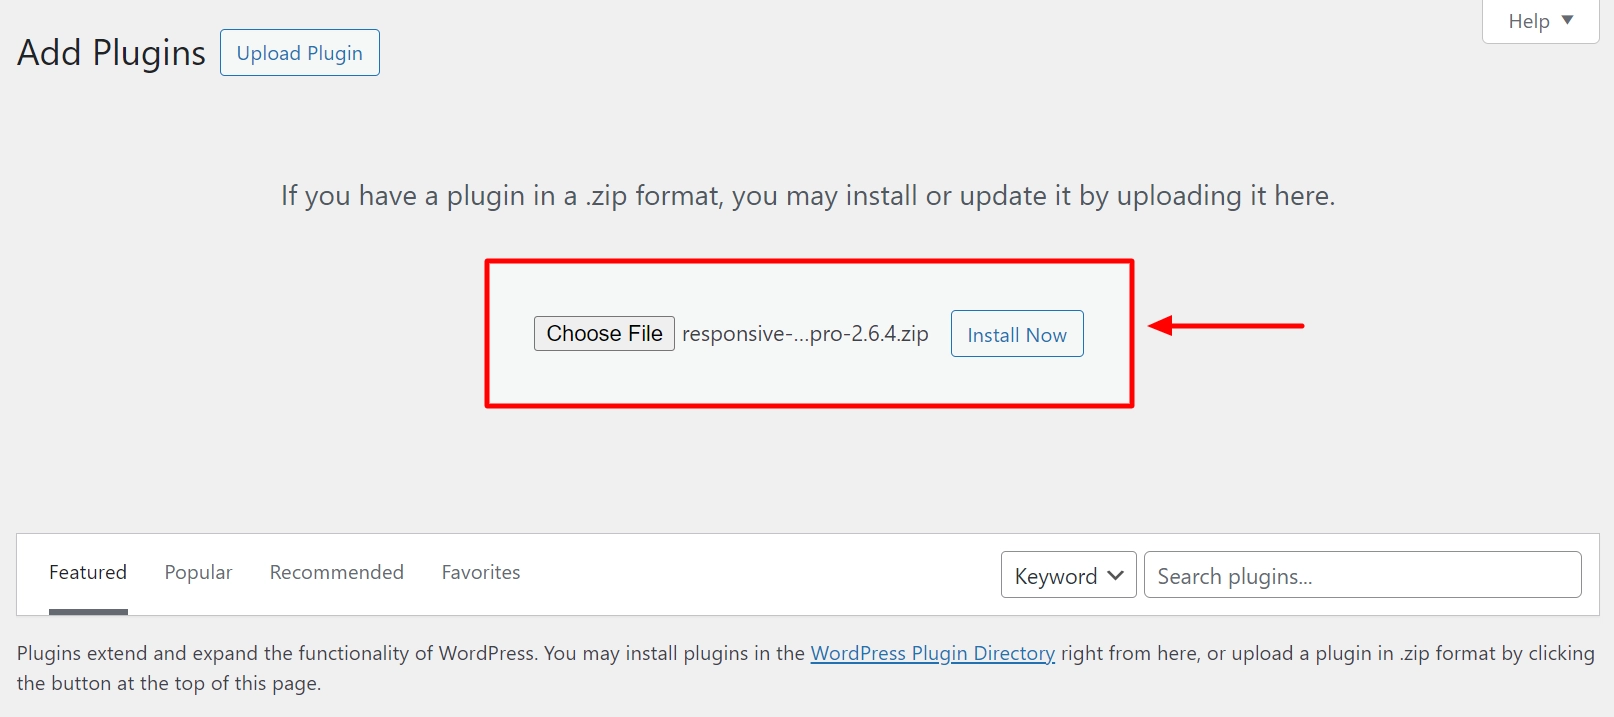
Navigate to Plugins > Add New and Click on Upload Plugin.
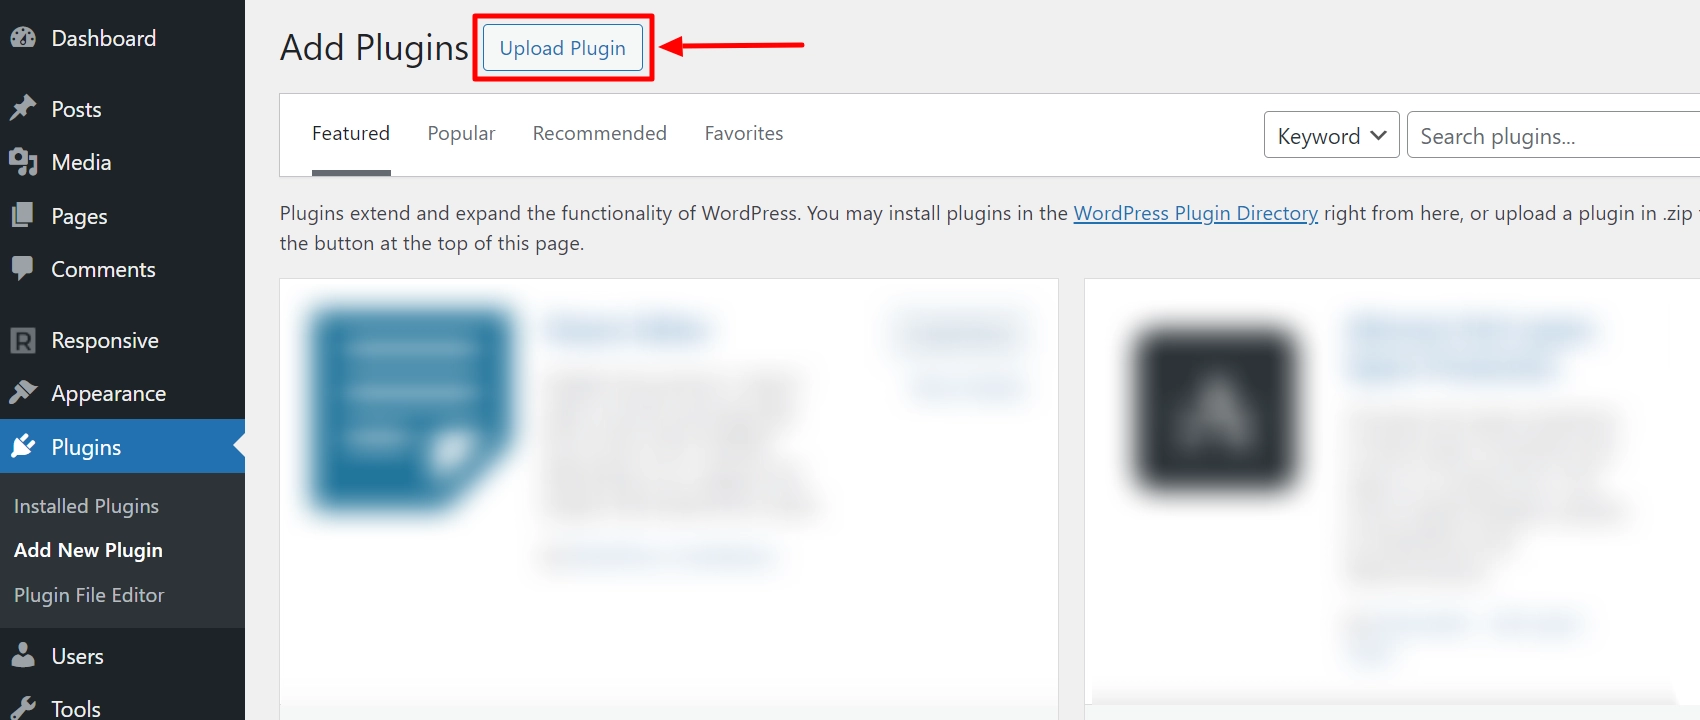
Upload the Responsive Pro zip file that you purchased from DealFuel and click the Install Now button.
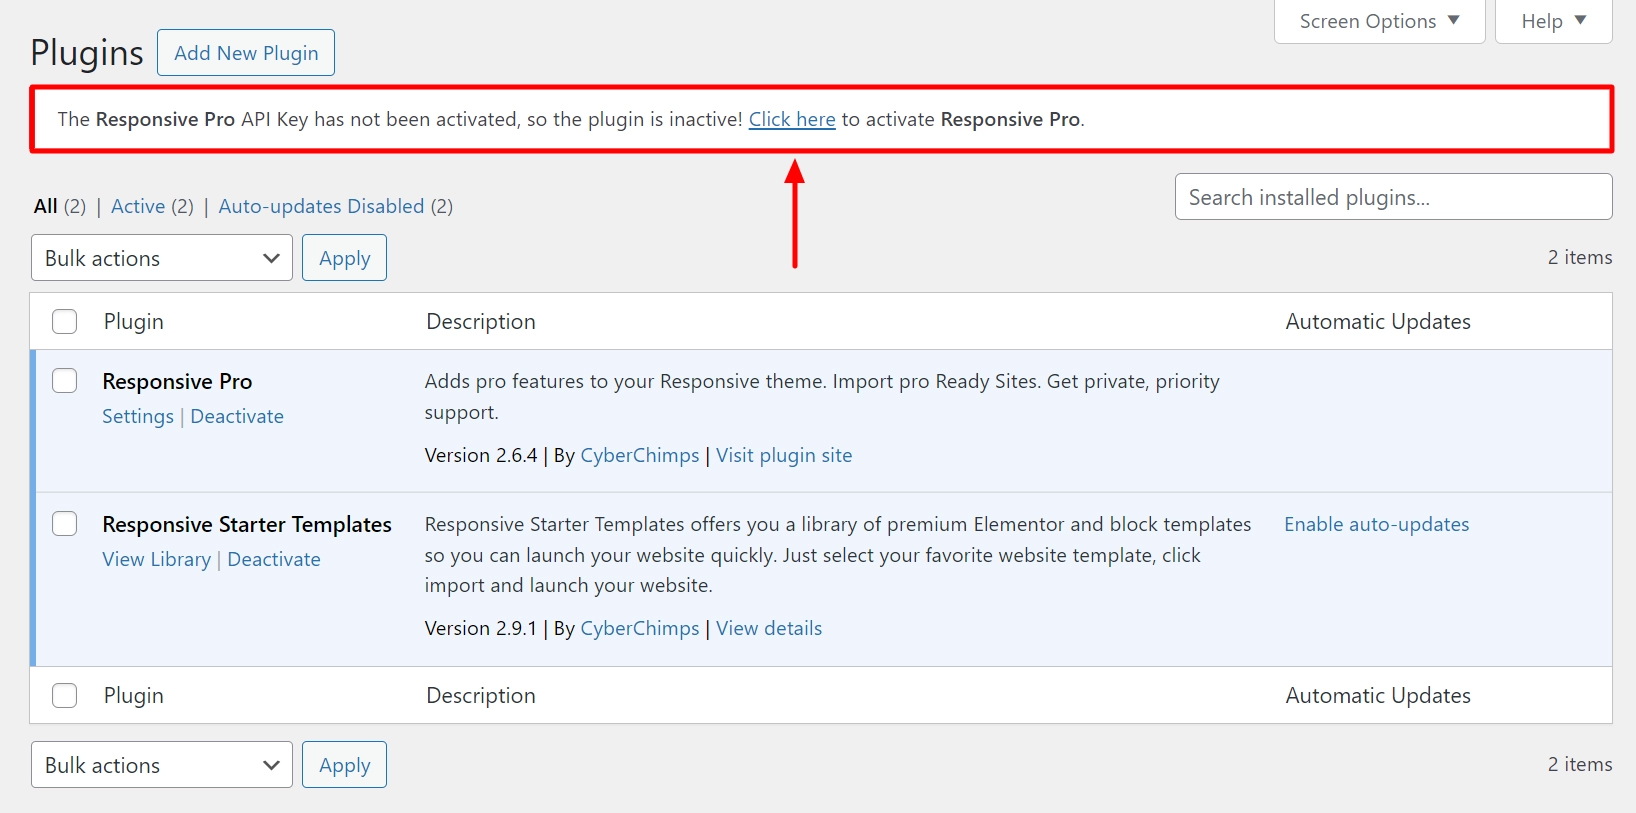
From your dashboard, select the Click here banner to activate Responsive Pro.
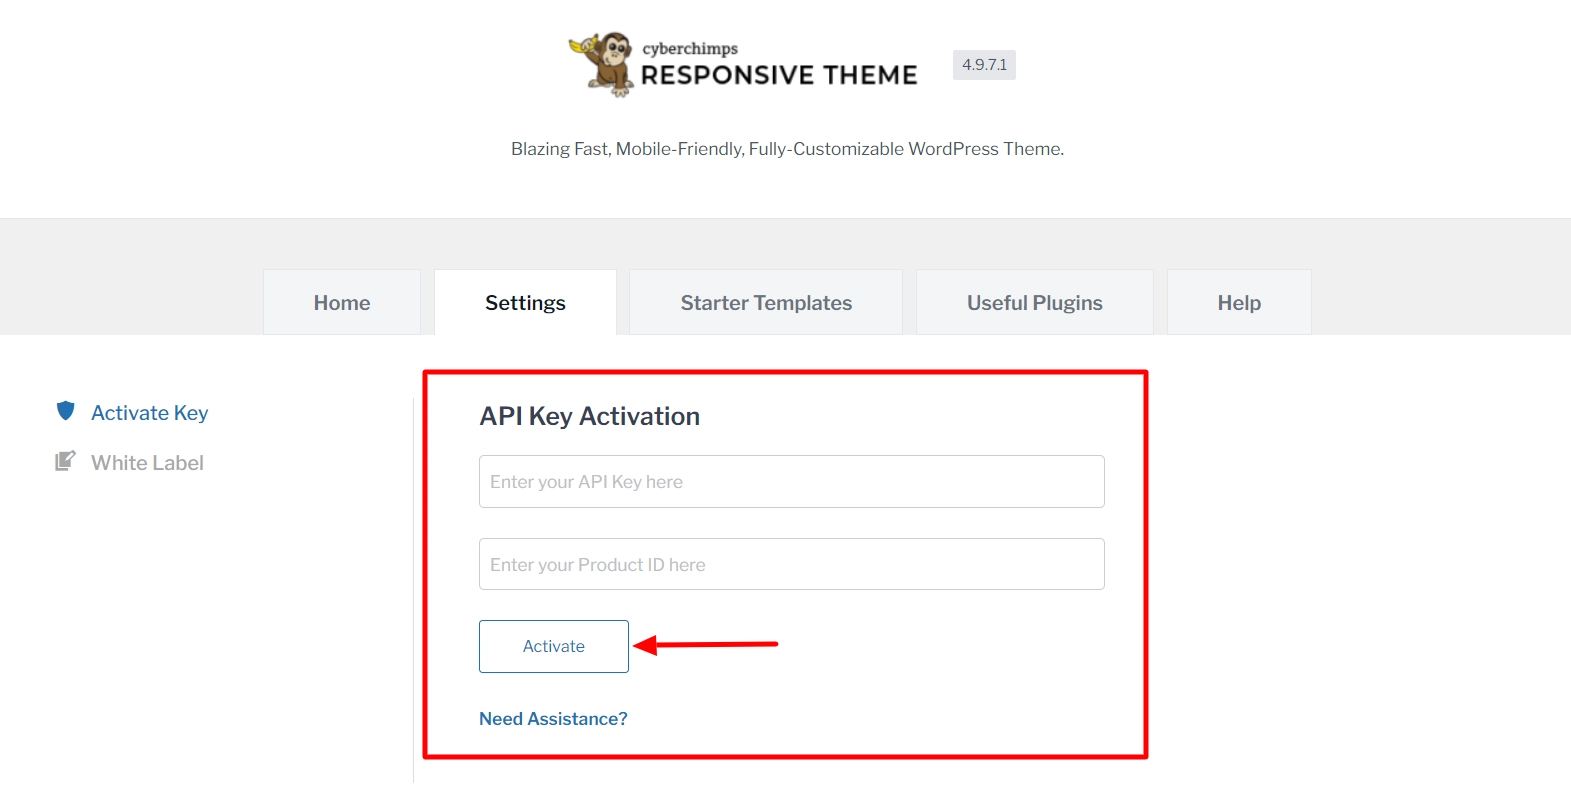
Enter the API Key and Product ID, and click Activate.
That’s it! You’ve successfully installed and activated Responsive Starter Templates plugin.
Now, that you’re set up with all the prerequisites, let’s get started on building a elementor landing page.
Step 1: Add New Page
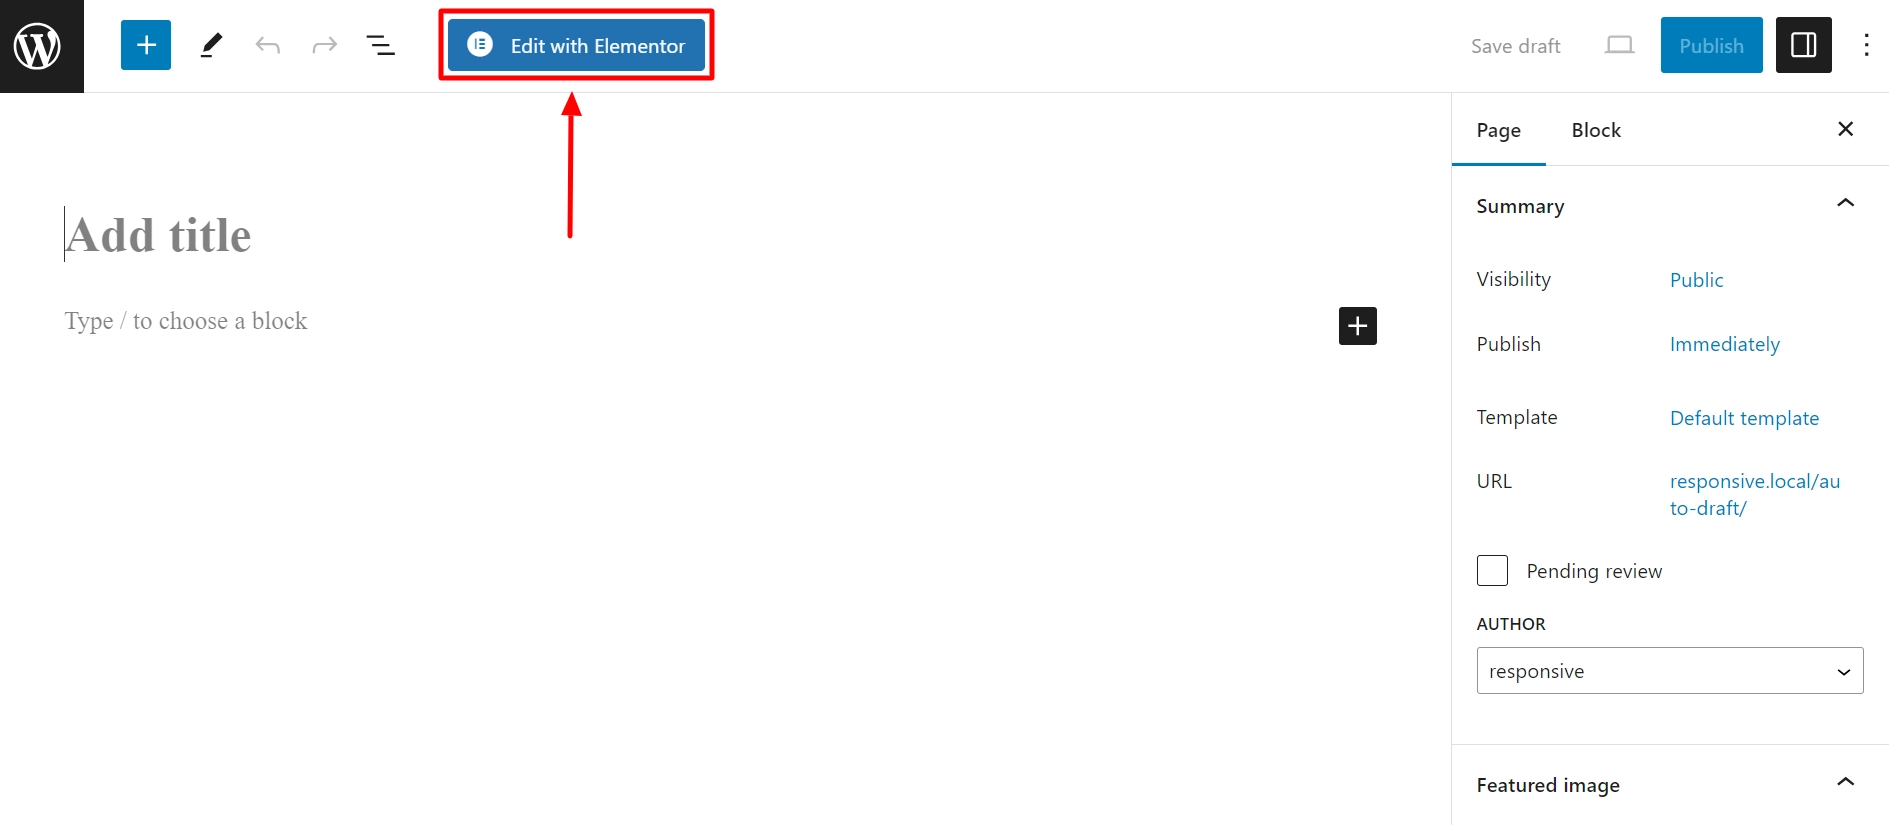
From your WordPress dashboard, go to Pages > Add New Page.

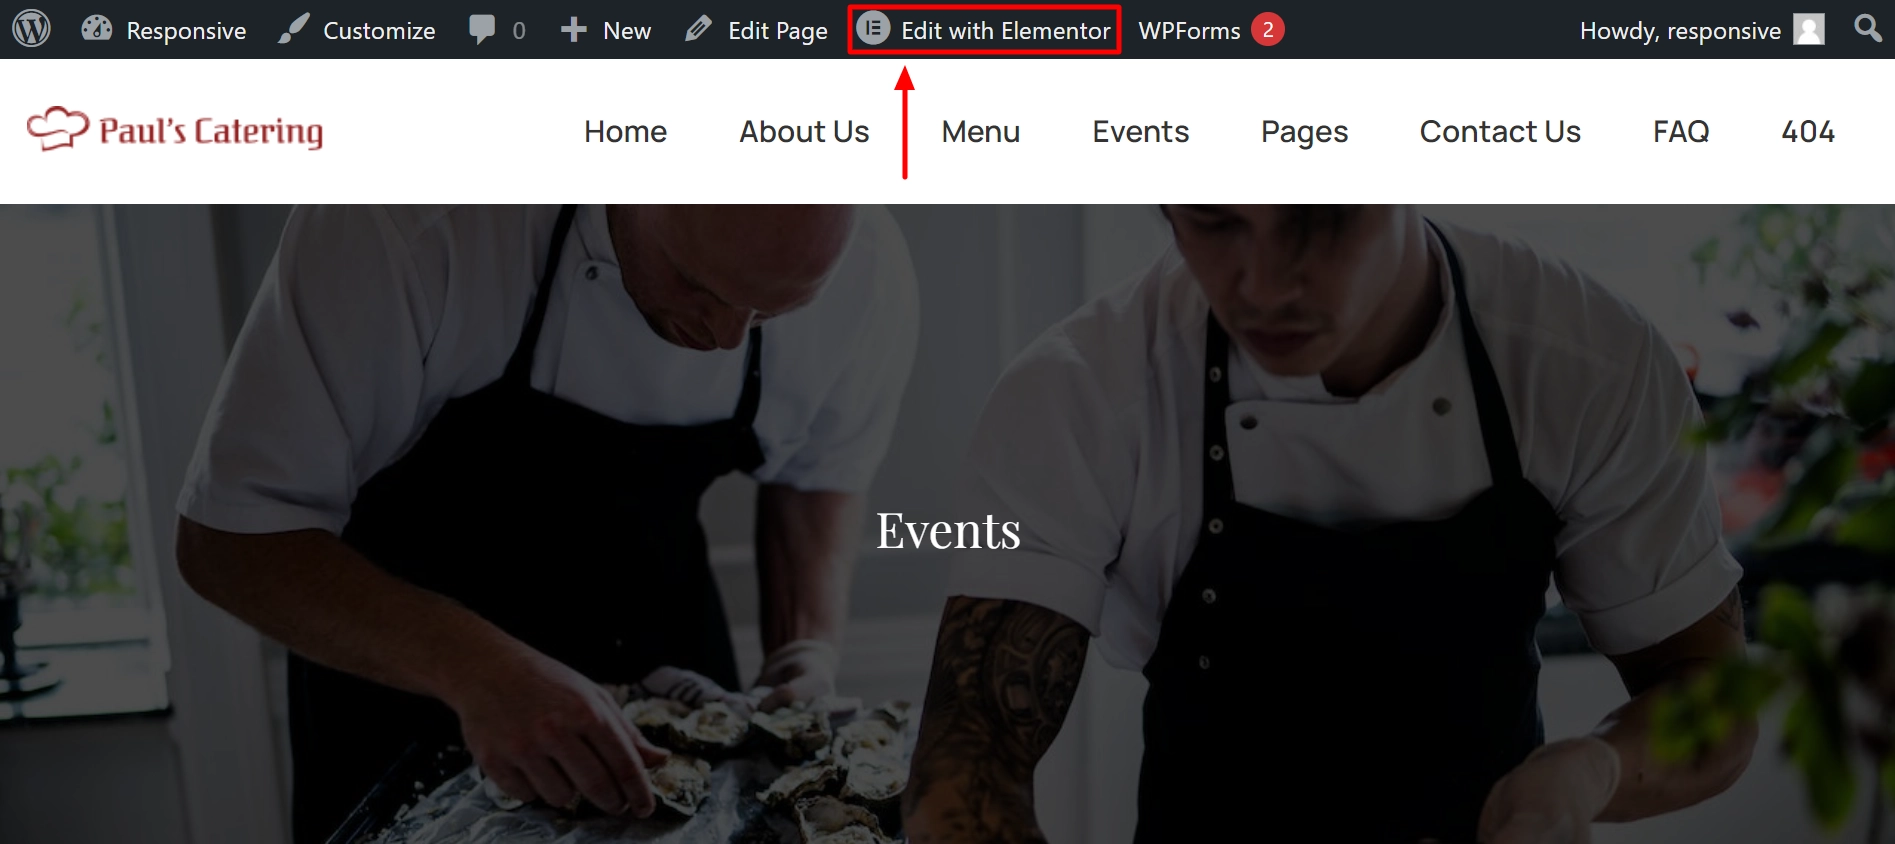
Once a new blank page opens up, click on Edit with Elementor.
Step 2: Select a Responsive Starter Template Landing Page
From the Elementor editor, select the RST icon to preview all templates.
You can preview and search among 150+ starter templates that best match your landing page.
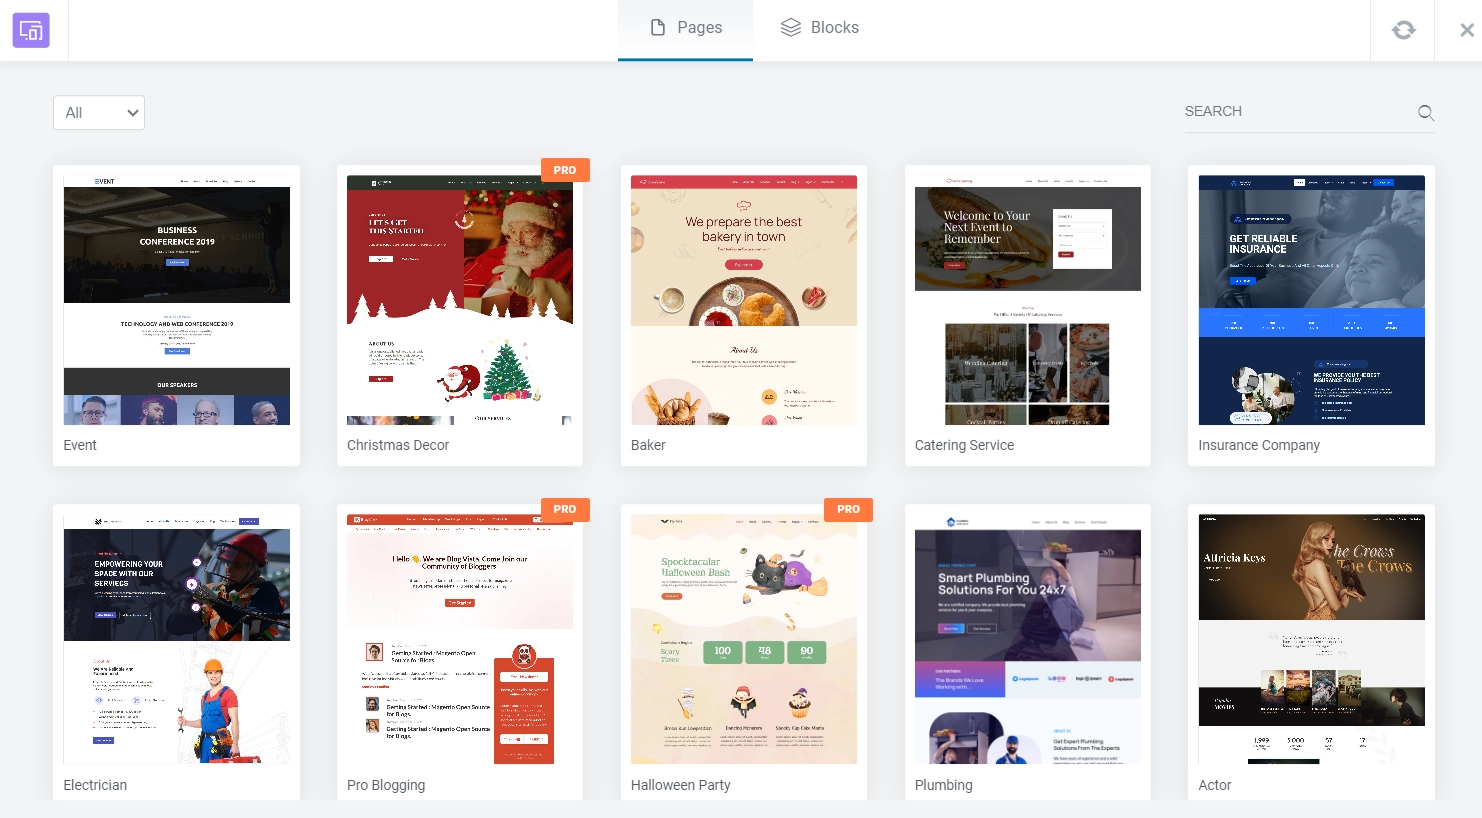
Select your preferred template, preview it, and click on Import Template. For tutorial purposes, we’re choosing the Catering template.

The Catering template has been added to your page.
Your landing page is added to your WordPress website. Now, you can launch campaigns, offer discounts, create newsletter subscriptions, and much more using your landing page.
Step 3: Customize Your Landing Page
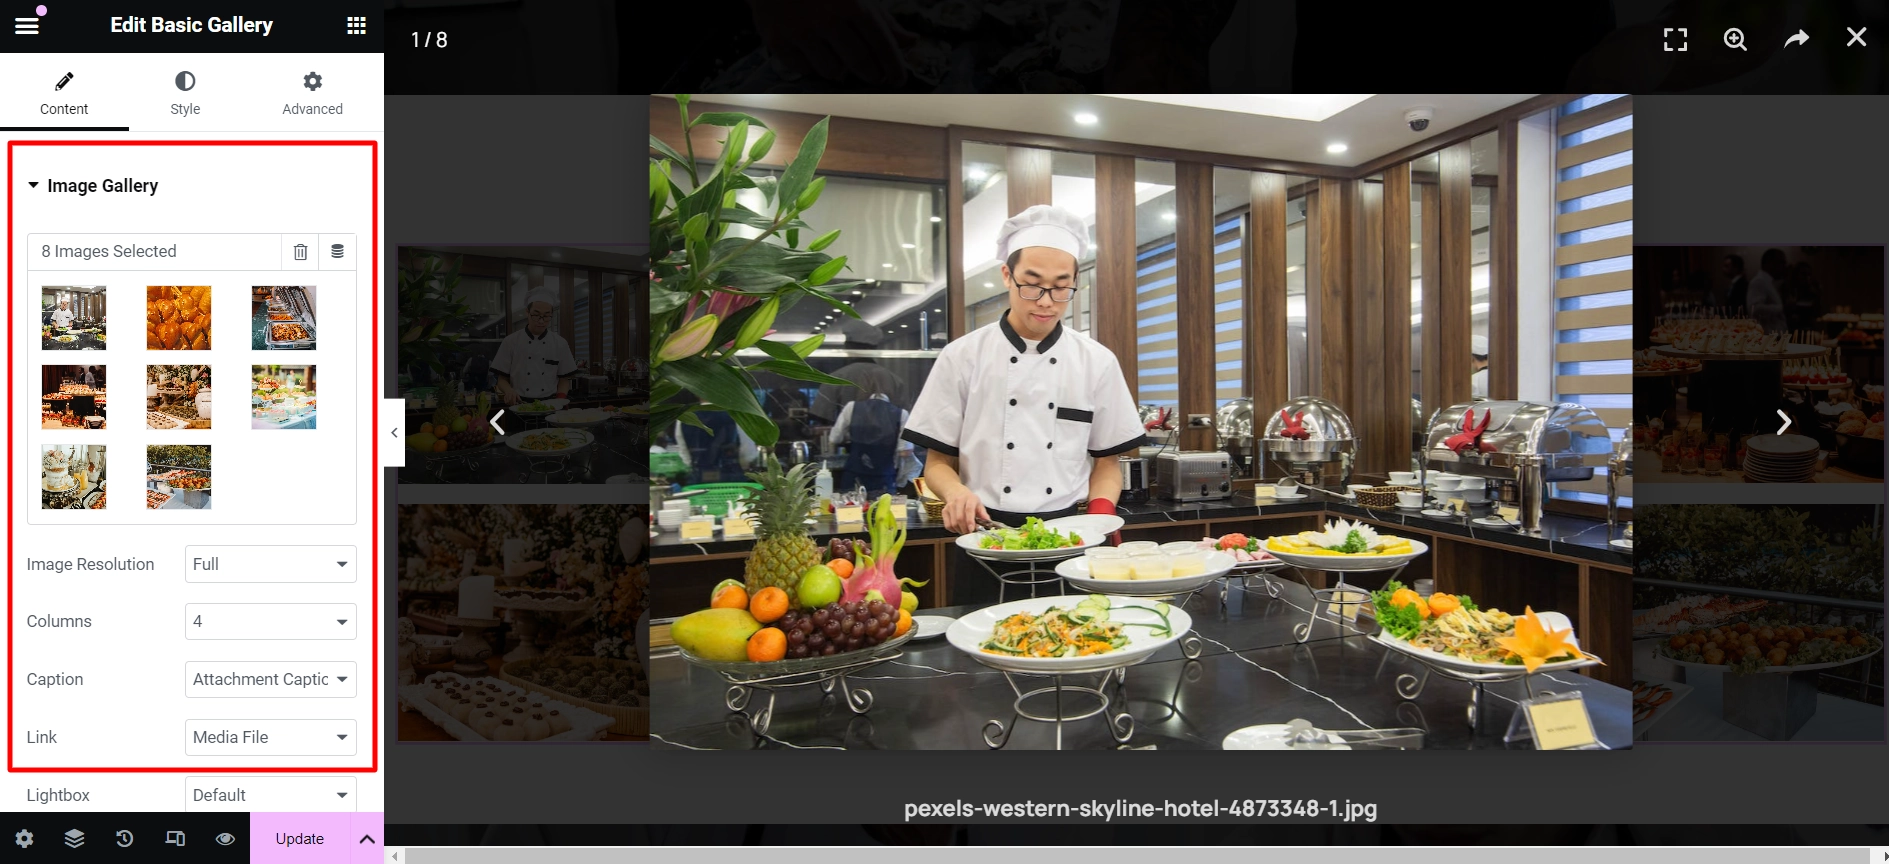
You can customize your landing page to your website’s preferences using the Elementor page builder. With this, you can modify the website elements like text, images, colors, and layouts.
You can use multiple drag-and-drop Elementor widgets to create a landing page and give it a personalized and unique look.
Click on Edit with Elementor to begin customizing your page.
Begin to customize your landing page with the Elementor page builder. You get full control to add or change any element on the site.
Once you’re done customizing, click the Update button to save your changes.
Now you can create marketing campaigns, add call-to-action buttons, and ultimately drive more engagement and traffic with your landing page.
Method 2: Adding Gutenberg Landing Pages
You can import a free Gutenberg landing page by using the Responsive Blocks plugin.
This method involves adding Gutenberg landing pages, which are part of the Gutenberg editor in WordPress.
Responsive Blocks Plugin is a comprehensive library of more than 50 fully functional blocks that can enhance the customizability of your WordPress block editor.
Using these blocks, you can easily create professional and sophisticated websites.
With the Gutenberg editor, you can easily design high-converting landing pages that include enhanced blocks provided by the Responsive Blocks plugin.
This makes the process of designing websites simpler. Now, let’s install the Responsive Blocks plugin.
Step 1: Install Responsive Blocks Plugin
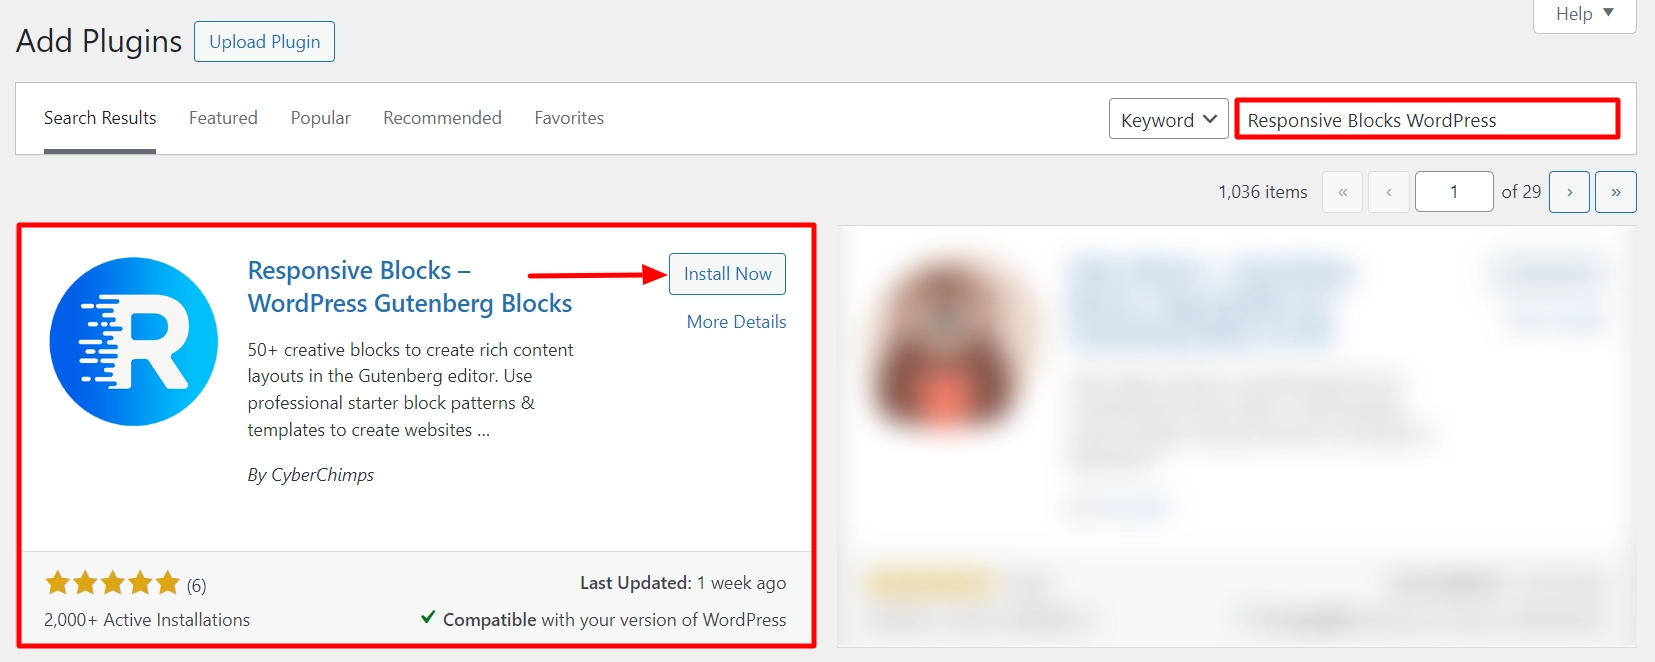
Head over to your WordPress dashboard and navigate to Plugins > Add New.

In the search bar type Responsive Blocks WordPress and click on Install Now.
Click on Activate to activate the plugin.
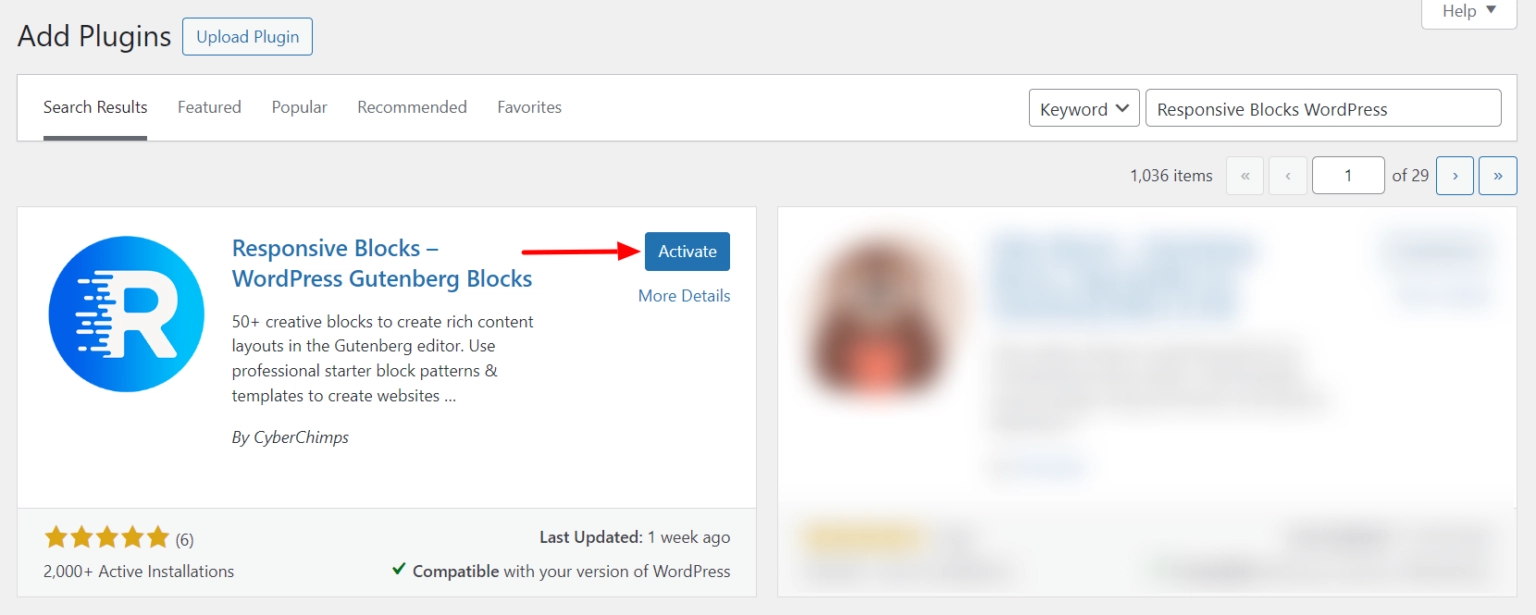
You are all set to use the plugin and create a Gutenberg landing page using Responsive Blocks plugin.
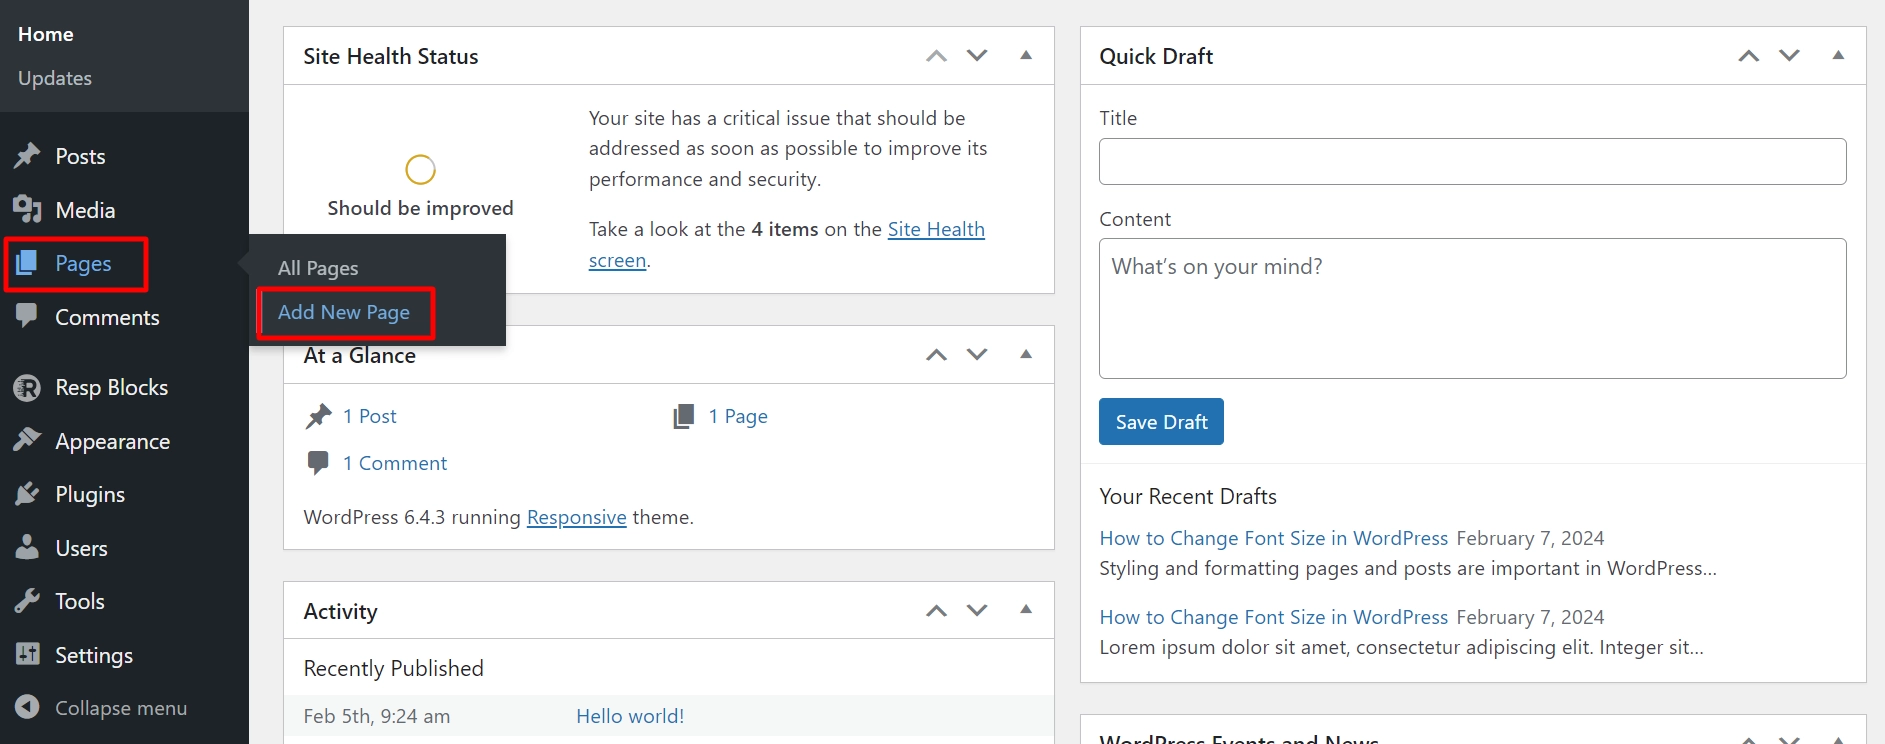
Step 2: Open a Page or a Post in WordPress
Open a new page by hovering on Pages and clicking on Add New Page menu.
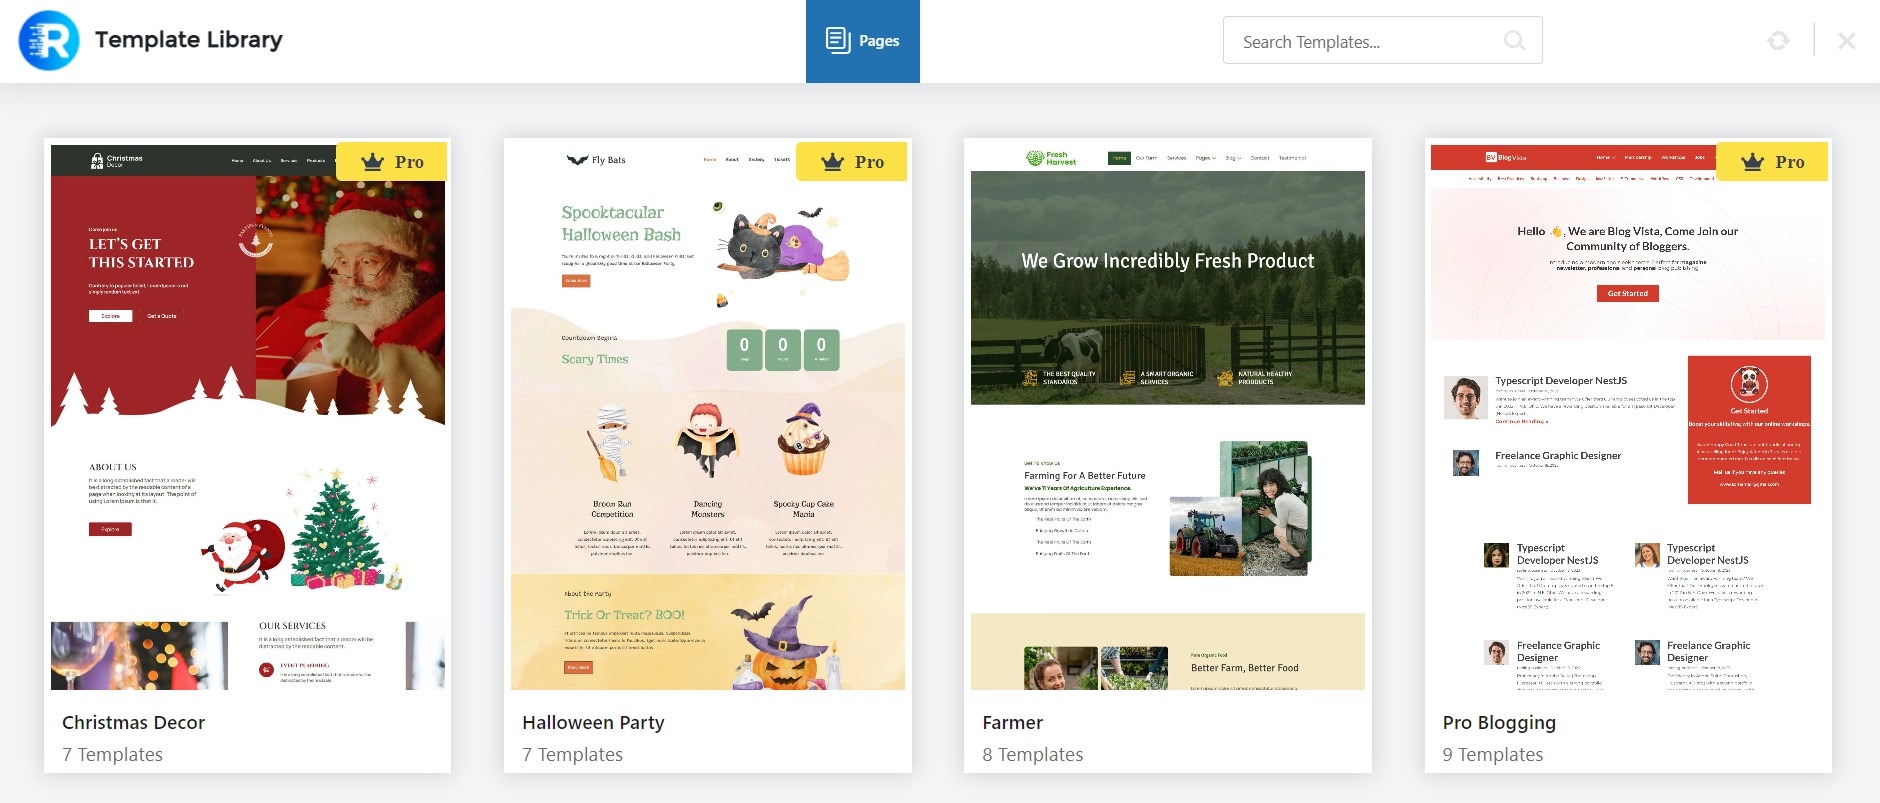
Step 3: Template Library
Click on Template Library at the top of the block editor.
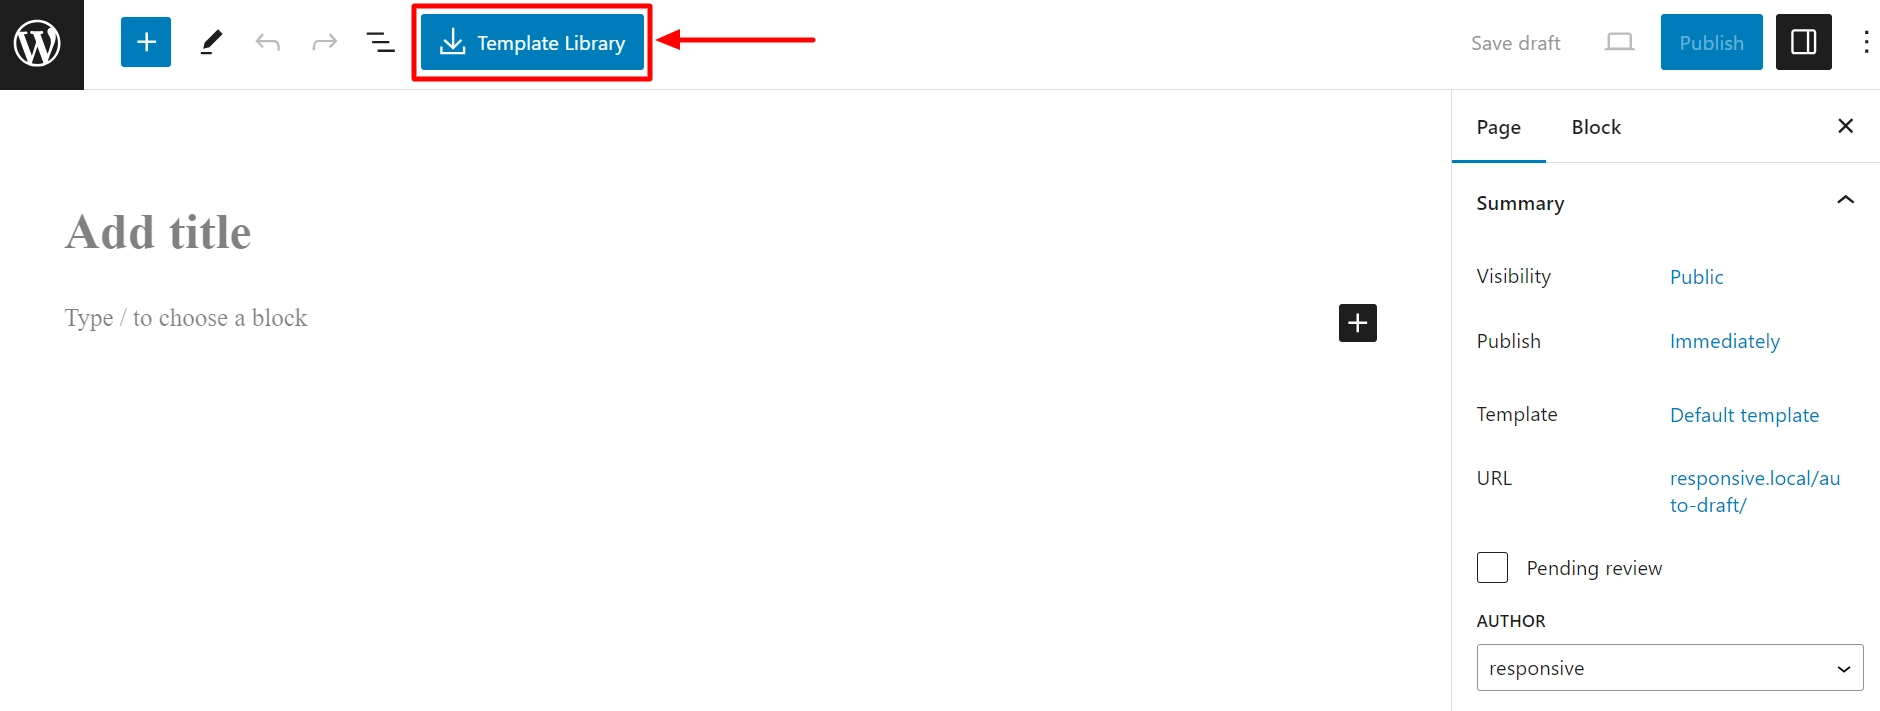
This will give you access to a library of 50+ pre-designed landing pages that you can customize to fit your needs.
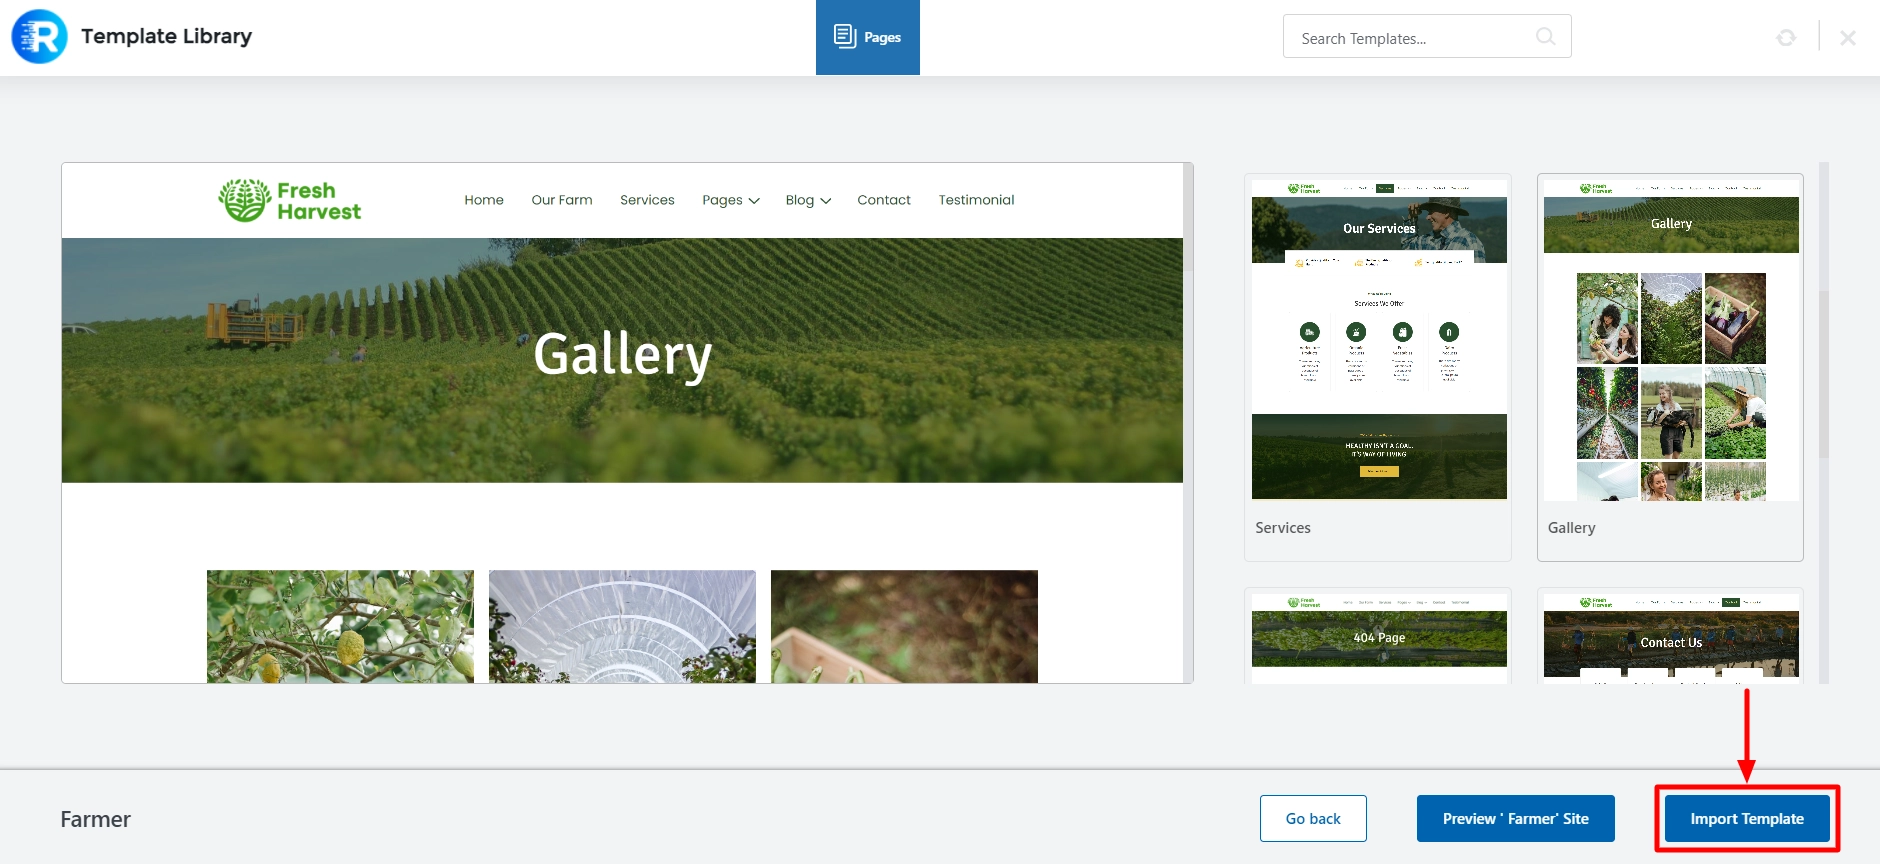
Step 4: Import the Page
Select your desired template to proceed. For tutorial purposes, we’re using the Fresh Harvest template. Click on the Import Template button.
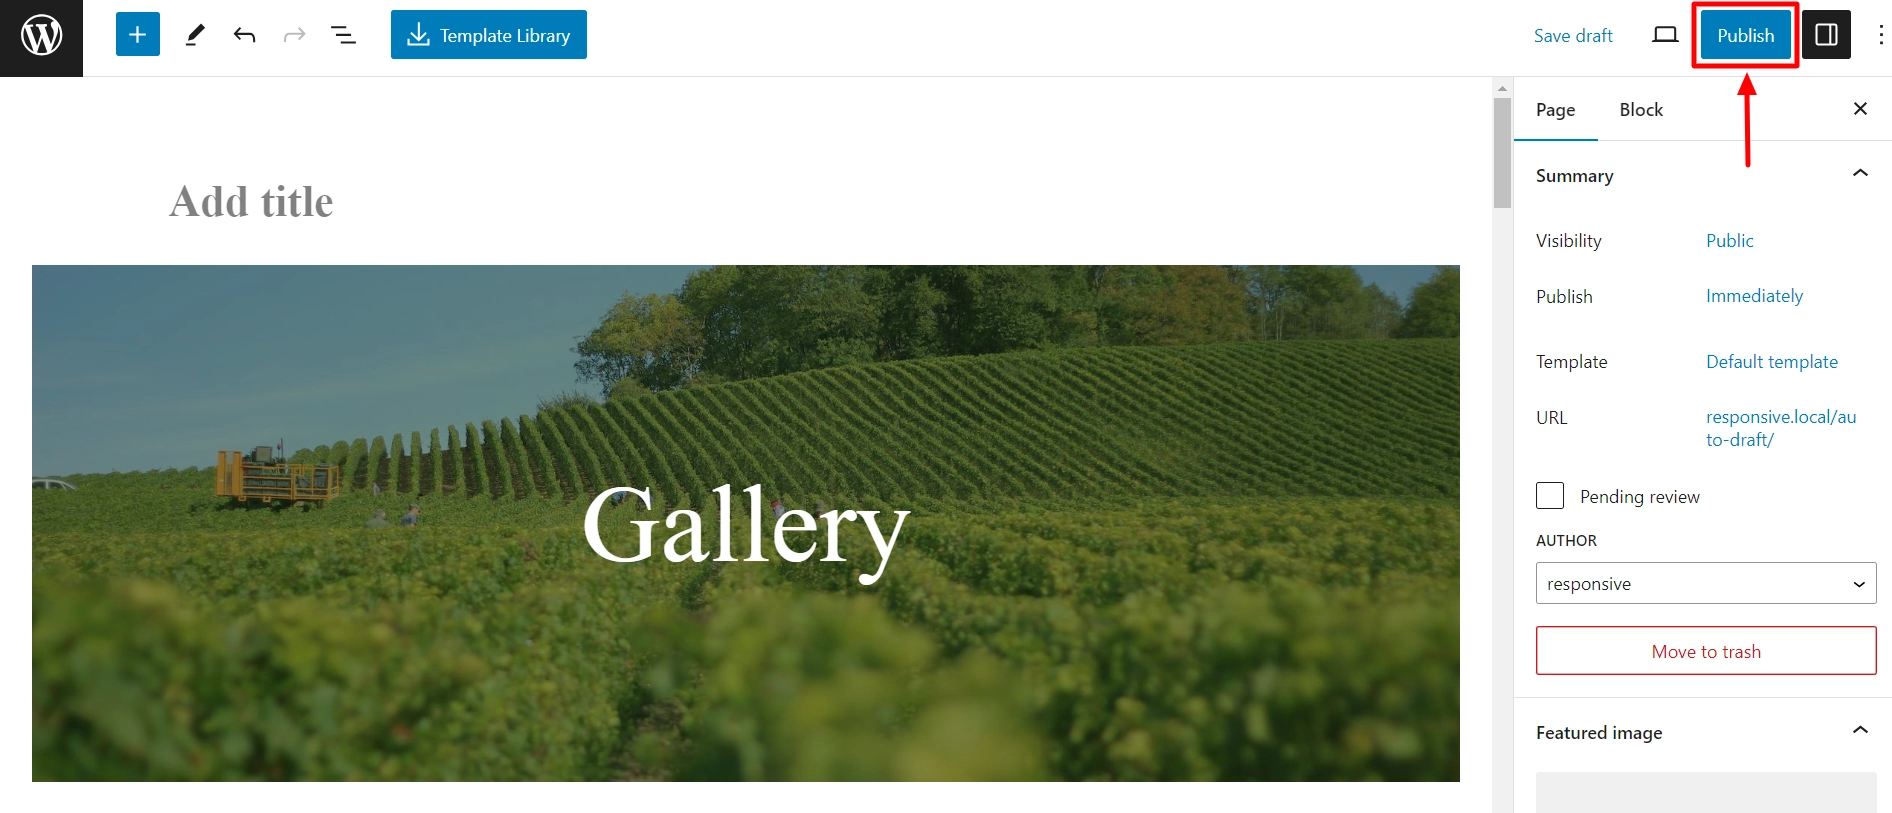
Now you’ve successfully imported the template. You can modify them using the simple interface of the Gutenberg editor, and once you’re done, click on the Publish button to make it live.
That’s it! This is how you can create a landing page for your WordPress website.
FAQ
WordPress provides several options for creating landing pages at no cost. One way is to use a free plugin like Responsive Starter Templates, which provides drag-and-drop editors and over 150 pre-designed templates for building landing pages without starting from scratch.
Elementor is a widely used website builder and landing page creator that allows users to design professional-looking web pages without needing to write code. To get started:
1. Install and activate Elementor, and then install the Responsive Starter Templates plugin.
2. Once you’ve done that, open a post or page and click the “Edit with Elementor” button at the top.
3. From there, click on the Responsive Starter Templates icon to find a wide range of templates.
4. Select the one that best suits your needs and import it. You can edit it to your liking and start using it immediately.
After installing and activating the Responsive Starter Templates plugin, navigate to a post or page and click on the Template Library option at the top. This will open a library of over 150 starter templates for you to choose from. Import and edit according to your needs, and that’s it, you’ve created a successful landing page.
Wrapping It Up!
Creating a conversion focused landing page is important to attract visitors and increase conversion rates on your WordPress website.
If you are new to WordPress, you can use plugins or themes to create a landing page.
The plugins and themes offer various features that let you customize and optimize your landing page professionally.
Regardless of the method you choose, make sure to use a catchy headline, a simple design, and a clear call to action to create a high-converting landing page.
If you liked this article, don’t forget to check these as well:
Are you looking to give your website a boost? Start by creating a landing page with Responsive theme today!