
Summary
The article explains how to create a landing page with Elementor. It defines what a landing page is and why it’s useful.
Guiding you to choose a template or start from scratch, add sections and widgets, and set headings, content, and call-to-action elements.
It also covers layout and basic style options for a professional page design.
Wondering how to create a landing page for your WordPress website?
A landing page is a page that’s specifically designed to turn your website visitors into leads and customers.
Basically, the main purpose of a landing page is to direct users to take the desired action, such as signing up for a newsletter, downloading a free e-book, starting a new trial, purchasing a product, or filling out a form.
Creating a landing page for your website is the best way to improve your marketing ROI.
In this article, we’ll see how to create a landing page with Elementor for your WordPress website.
- What is a Landing Page?
- What is Elementor?
- Benefits of Creating a Landing Page with Elementor
- Setting Up Your WordPress Website
- How to Create a Landing Page?
- Design and Style Your Landing Page with Elementor
- Conclusion
Responsive Addons for Elementor is the Best Elementor Addons plugin – Get it for free!
What is a Landing Page?
Assume you’re running a business and want to promote a specific product to your customers. One of the best ways to achieve this is by creating a dedicated landing page for the product.
But what exactly is a landing page?
In short, a landing page is a particular webpage people see after clicking a link from an email, ad, or other digital sources. Its purpose is to prompt them to do something specific, like signing up for a newsletter or purchasing a product.
Landing pages typically concentrate on one primary action to avoid overwhelming visitors and help them decide.
Consider this instance: You’re offering a product, but your landing page also encourages visitors to explore your blog, buy an ebook, and follow you on social media. This creates a sense of confusion for your users by distracting them from buying the product.
So, stick with one call to action button for your website.
What is Elementor?

Elementor is a widely used WordPress page builder that enables users to create and customize websites through an easy drag-and-drop interface.
With Elementor, users can visually design their websites quickly by adding and arranging elements such as text, images, videos, buttons, forms, and so on.
A live customizer helps to view real-time changes without switching between windows or preview modes.
With advanced features like responsive design capabilities and seamless integration with other WordPress plugins, Elementor has much to offer.
Elementor continues to build trust by providing continuous improvement, innovation, and collaboration, therefore contributing to the overall growth and development of the platform.
Benefits of Creating a Landing Page with Elementor
There are several benefits to creating a landing page with Elementor, a popular drag-and-drop page builder plugin for WordPress. Here are some key advantages:
- User-friendly interface: Elementor offers a beginner-friendly and intuitive interface that makes it easy for users with little to no coding experience to create professional-looking landing pages. Its drag-and-drop functionality allows you to add, rearrange, and customize elements on your page effortlessly.
- Customization options: With Elementor, you have complete control over the design and layout of your landing page. You can customize elements like text, images, buttons, forms, and more to match your branding and specific requirements.
- Responsive in design: In today’s mobile-centric world, having a landing page that looks great and functions properly on mobile devices is crucial. Elementor ensures that your landing page is responsive.
- Easy integration: Elementor seamlessly integrates with various third-party tools and plugins, allowing you to extend the functionality of your landing page. You can easily integrate with email marketing services, CRM systems, analytics tools, and more to enhance your lead generation and conversion tracking capabilities.
- Page loads faster: Elementor is designed to generate clean and lightweight code, resulting in faster page loading times. This is important for providing a smooth user experience and optimizing your landing page for search engine rankings.
- A/B Testing: Elementor supports A/B testing, which enables you to create multiple variations of your landing page and test them against each other to see which version performs better. This helps you identify the most effective design, copy, and call-to-action elements for maximizing conversions.
Setting Up Your WordPress Website
To get started with your website, there are five significant steps involved.
Let’s get started with the first step.
Step 1: Choose a Hosting Provider and Register a Domain Name
Before setting up your website, you must choose a hosting provider and register a domain name. A hosting provider is a company that provides space on a server where your website files are stored, while a domain name is a unique address that directs users to your website.
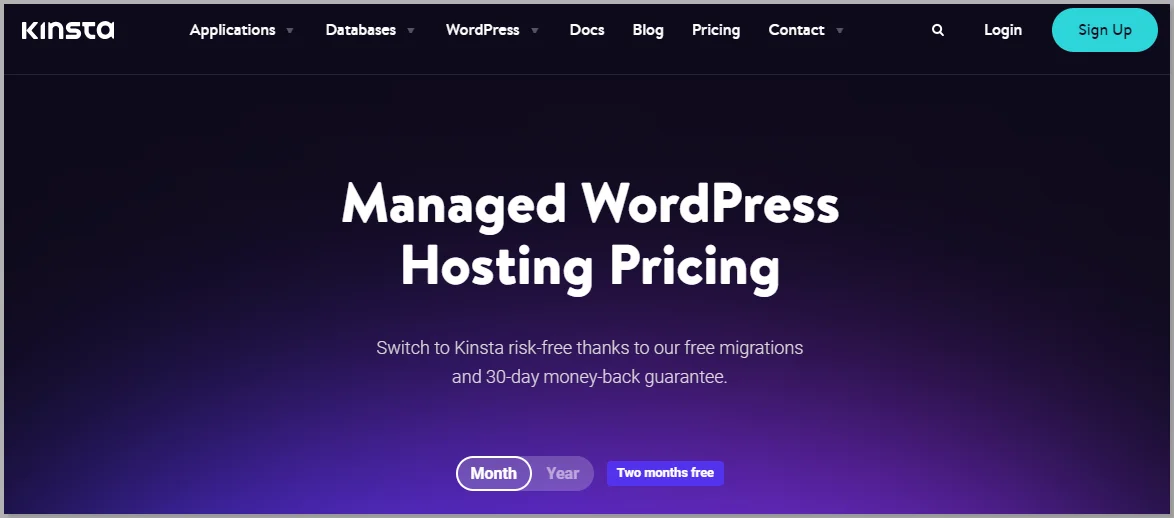
There are several hosting providers to choose from. Based on the factors such as cost, reliability, and customer support, we recommend using the Kinsta hosting provider.
Why is Kinsta a Reliable Hosting Provider?
Here are several compelling reasons to consider Kinsta:
- Firstly, Kinsta is known for its emphasis on website speed and performance. They employ advanced technology, such as Google Cloud Platform, which provides fast and stable website speeds.
- Another noteworthy aspect of Kinsta is its strong focus on website security. They provide features such as malware scanning, automatic backups, and DDoS protection.
- Kinsta offers a user-friendly interface that is easy to navigate.
- Their expert support team is available 24/7 to help with any issues, ranging from a plugin to server errors and provides an ideal solution.
- Kinsta offers flexible plans to meet diverse needs, from small to high-traffic enterprise sites.
Once you get the Kinsta hosting, you must register a domain name. This is the name that users will type into their web browser to access your website.
Choosing a domain name that is easy to pronounce and related to your business is important.
Step 2: Install WordPress
Once you have chosen a hosting provider and registered a domain name, the next step is to install WordPress.
Kinsta provides a one-click installation process that makes it easy to install WordPress. Simply log into your account and follow the instructions to install WordPress.
Step 3: Install Elementor Compatible WordPress Theme
WordPress themes are an important part of the website-building process as it allows you to shape your website how you want it to.
Choosing the right theme that’s compatible with your plugins is a never-ending process.
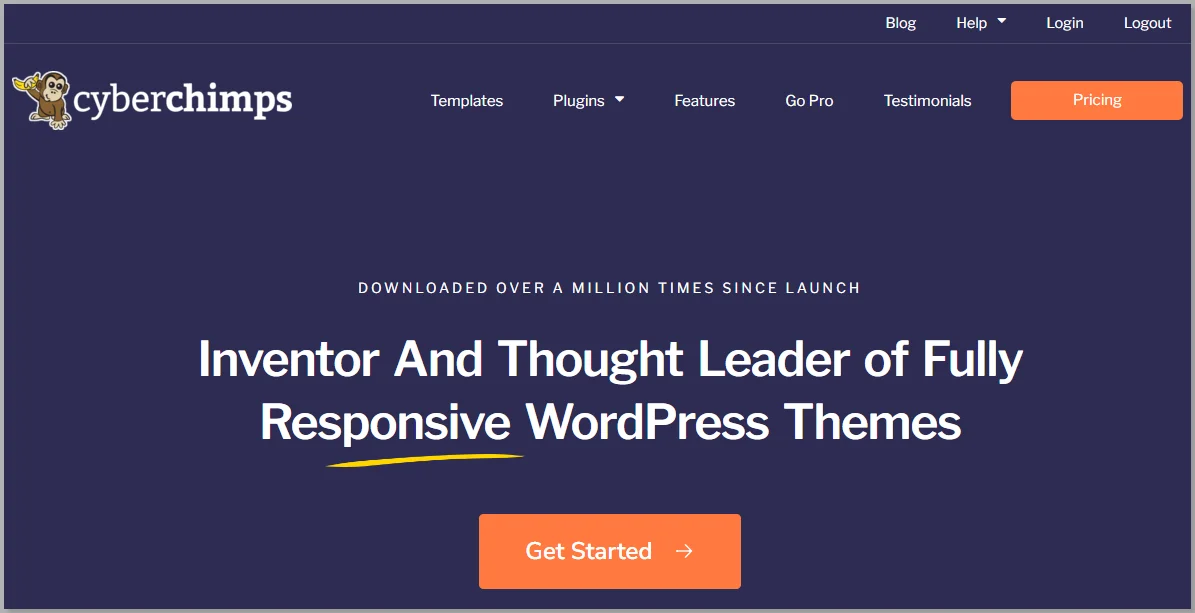
We recommend using the Responsive theme as it’s SEO-friendly and compatible with Elementor and WordPress.
How to Install Responsive Theme
Now let’s see how to install Responsive theme from WordPress.
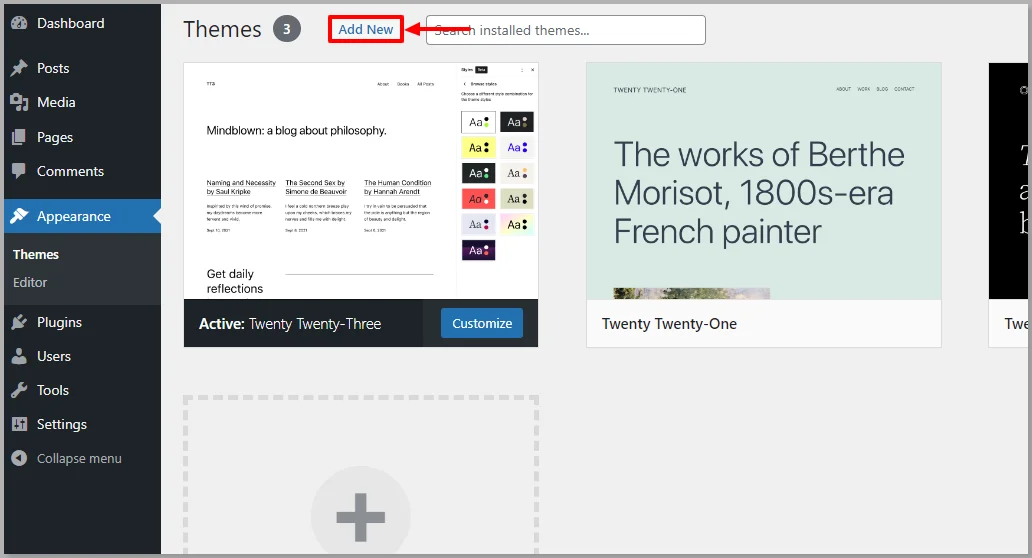
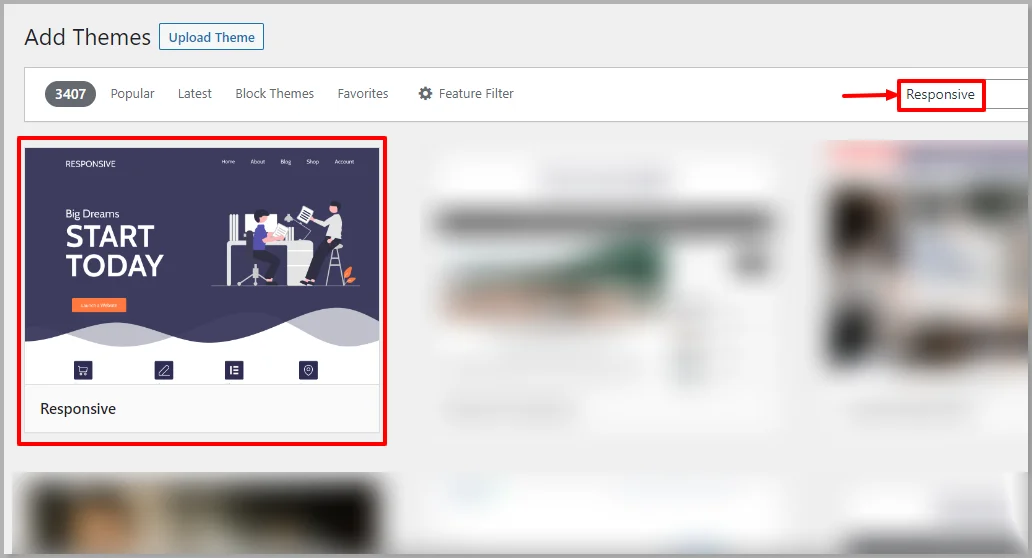
From the WordPress dashboard, select Appearance > Themes

Click on the Add New button.
Type Responsive in the search bar option given above.
Hover over the Responsive theme and click on Install button.
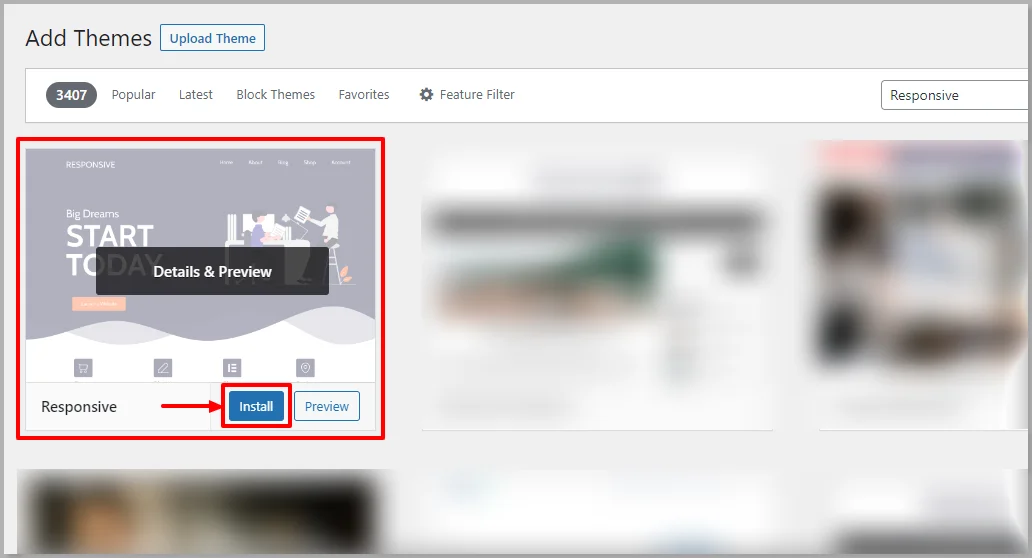
Click on the Activate button to activate the Responsive theme.

Step 4: Install Responsive Starter Templates Plugin
The next step is to install the Responsive Starter Templates plugin. This plugin provides you 100+ starter templates that you can easily import to build your landing page.
Go to your WordPress dashboard, hover over Plugins, and click on the Add New button.

In the search bar option, look for Responsive Starter Templates and click on the Install Now button.

Once you have installed the Responsive Starter Templates plugin, click on the Activate button.

Step 5: Install and Activate Elementor Plugin
The next step is to install and activate the Elementor plugin.
Elementor is a plugin that integrates easily with WordPress.
On your WordPress dashboard, hover over Plugins and click on the Add New button.

Search for Elementor in the above search bar option and click on the the Install Now button.

After installing the Elementor plugin, click on the Activate button.

That’s it. Now we’ve successfully installed Elementor.
Next, we’ll look at how to build a landing page with Elementor.
How to Create a Landing Page?
Want to build a landing page from scratch using Elementor?
Creating a landing page from a demo template page is convenient using Elementor.
Let’s look into a step-wise process of creating a landing page using Elementor.
For tutorial purposes, we’re using the Responsive theme and a template from Responsive Starter Templates plugin, as they are easy to customize with Elementor.
Here’s how you do it:
Follow these simple steps to create a page easily:
Step 1: Add a New Page
The first step is creating a new page from the WordPress dashboard byhovering on Pages and clicking on the Add New button.

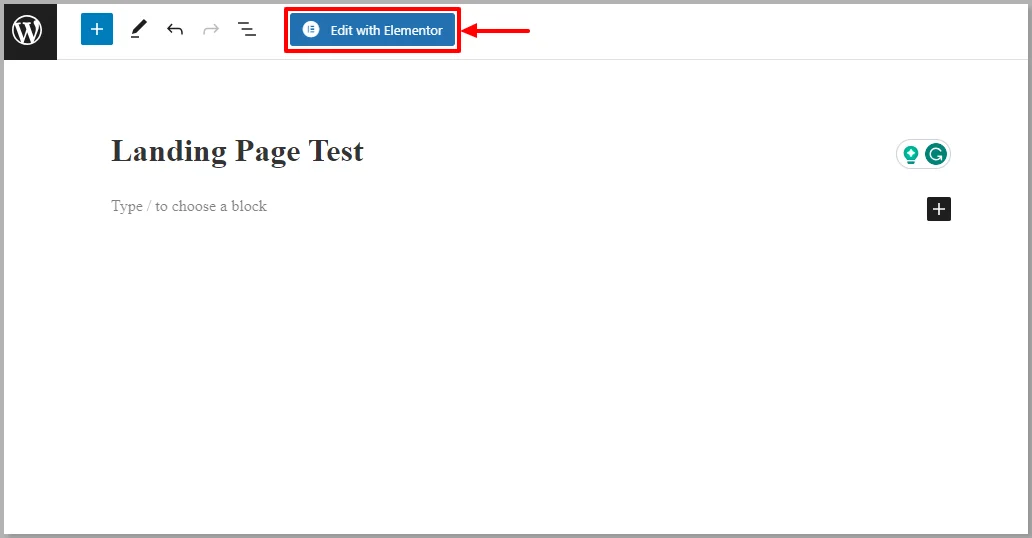
Step 2: Edit With Elementor
The next step is to give an appropriate title and click on the Edit with Elementor button.
Step 3: Open the Library of Templates
Click on the R icon. This leads you to the 100+ Responsive Starter Templates.
Step 4: Choose a Template
Choose the template you wish to create a landing page on.

Design and Style Your Landing Page with Elementor
Once you have chosen the template, you can design and customize the template as per your choice with Elementor.
Let’s look into some of the most commonly used widgets customization options in Elementor:
Step 1: Edit Text
Drag and drop the Text editor widget from the Elementor panel to the landing page. If you want to edit text, just click on the text, and you can edit the text in the sidebar.

If you want a template like this, install the Responsive Starter Templates plugin to your WordPress and choose from the 100 templates available.
Step 2: Choose Widgets
Having the Best Elementor Addons on your plate will help you to enhance widget functionality.
From the Elementor section, drag and drop the widgets into the page.
After adding the widgets, click on the section you want to customize, and you can modify it with other customizer options like Content, Style, and Advanced sections.
Step 3: Customize the Widget
To customize a widget, click on it, and this will open the widget’s settings in the sidebar with three tabs, namely Content, Style, and Advanced.

You can customize sections and columns using a similar approach. Just click on the section and adjust it according to your requirements.
Step 4: Real-Time Editing
As you change an element’s settings, you’ll see the changes instantly on the preview box. This is called real-time editing.

Customize the different sections with Elementor and create a beautiful landing page.
That’s it! This is how you can create your own landing page with Elementor and upscale your leads.
Conclusion
A Landing page is a specific page of a website that’s created with the intention of directing users to perform a specific action.
You can easily create a landing page with Elementor and the Responsive theme, as they are fully compatible. Elementor seamlessly integrates with WordPress, making it exceptional for customizing the landing page.
If you like to read more such content, don’t forget to check our other similar articles:
- What is Theme Builder? Best WordPress Theme Builders
- Best Elementor Addons to Supercharge Your Website
- Elementor Review: Is It Still The Best Page Builder
- How To Create A Christmas Landing Page On WordPress Website
Are you thrilled to create a landing page for your website? Grab the Responsive theme and Elementor page builder now!