
Are you looking to create a countdown timer on your WordPress website?
Countdown timers are powerful tools that can help create a sense of urgency and encourage website visitors to take action, thereby increasing sales.
Many marketers and website owners add countdown timers to help improve conversion rates.
With Responsive Addons for Elementor, adding a countdown timer is a breeze.
In this article, we will provide a detailed step-by-step guide on how to add a countdown timer with Elementor.
So, let’s get started!
Necessary Tools to Create a Countdown Timer
To create a countdown timer using Elementor, we will use a plugin called Responsive Addons for Elementor by Cyberchimps. It is a popular plugin that provides a wide range of features to enhance your website-building experience.
It includes 50+ Elementor widgets, 150+ ready-to-use WordPress Website Templates, and advanced features like custom breakpoints, responsive padding & margin, and more.
We recommend using Responsive Addons for Elementor’s Countdown Timer widget, as it offers additional features and functionalities. We will look into it in the further sections.
What makes the RAE Countdown Timer better than Elementor’s Countdown widget? Here are some points:
- It allows you to display months and years.
- It offers two timer types: Fixed and Evergreen.
- Supports ACF for the fixed countdown timer type.
- Provides more design and styling options for the Countdown widget.
- It offers multiple options for actions after the countdown completion.
- You can enable/disable and customize labels for seconds, minutes, hours, etc.
Please note that we can only use the Elementor Countdown timer widget if your website is built using the Elementor page builder.
Creating a Countdown Timer for Your Website
To create a countdown timer on your WordPress website, you need to install and activate the Responsive Addons for Elementor plugin. To do so, follow these steps:
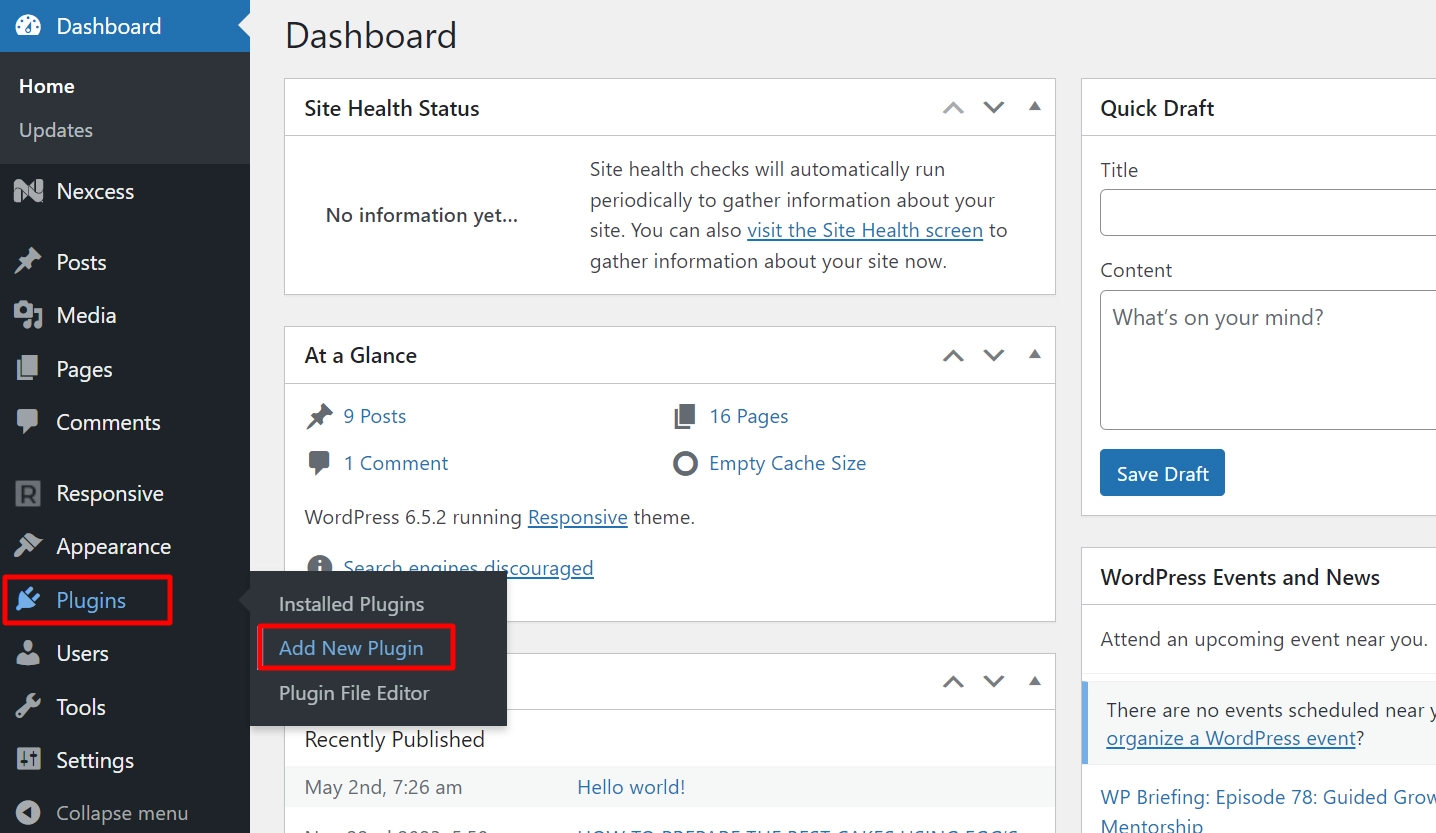
Go to the WordPress dashboard and click Plugin > Add New Plugin.
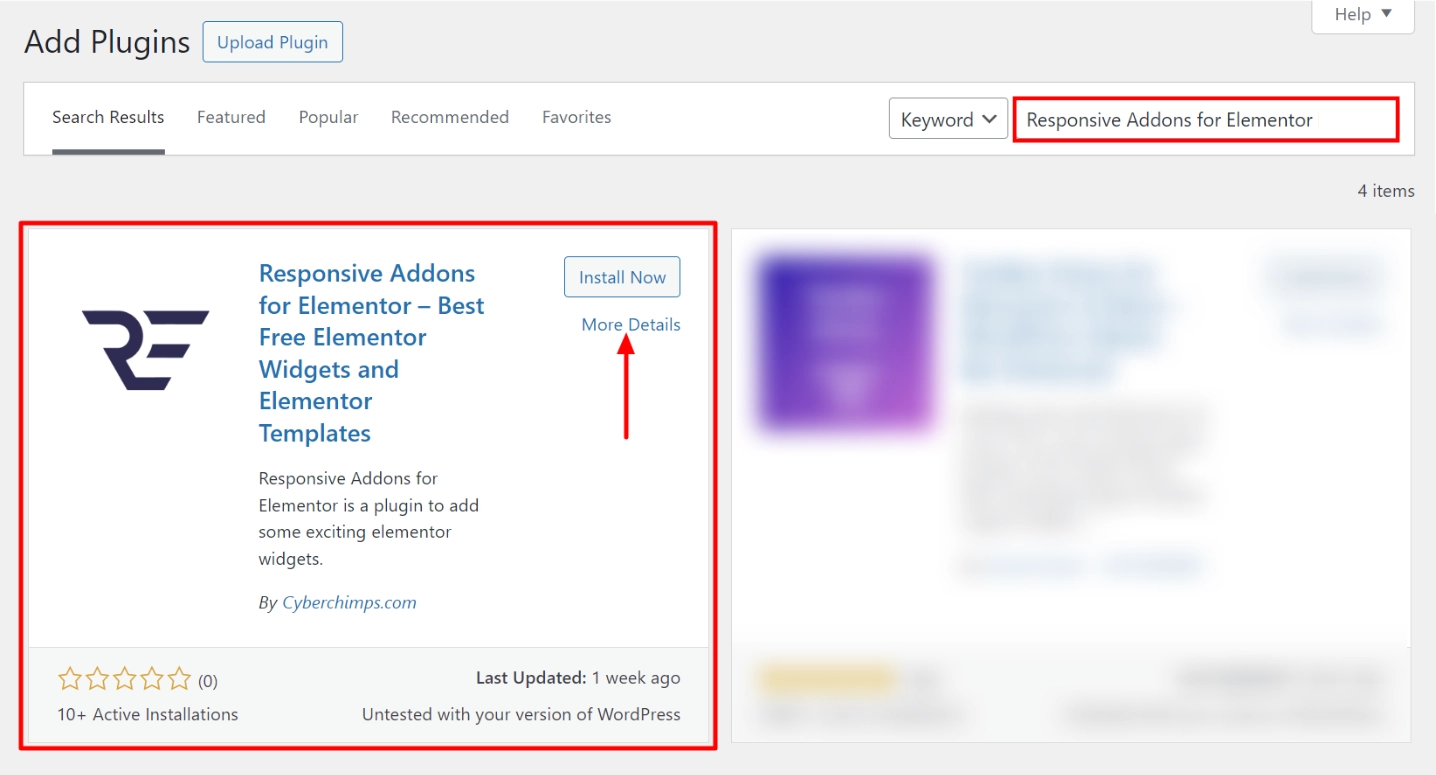
Search for Responsive Addons for Elementor in the search bar and click Install Now.
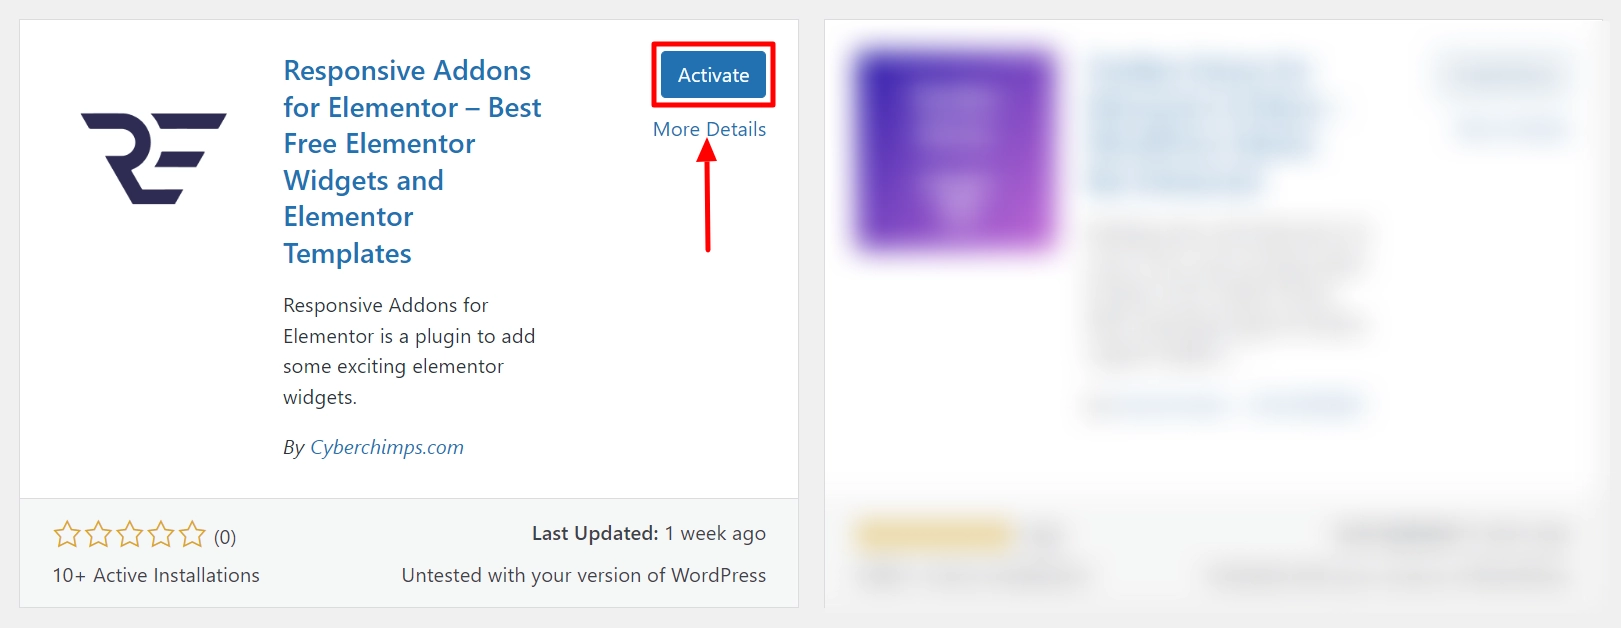
After the installation is complete, click Activate to activate the plugin.
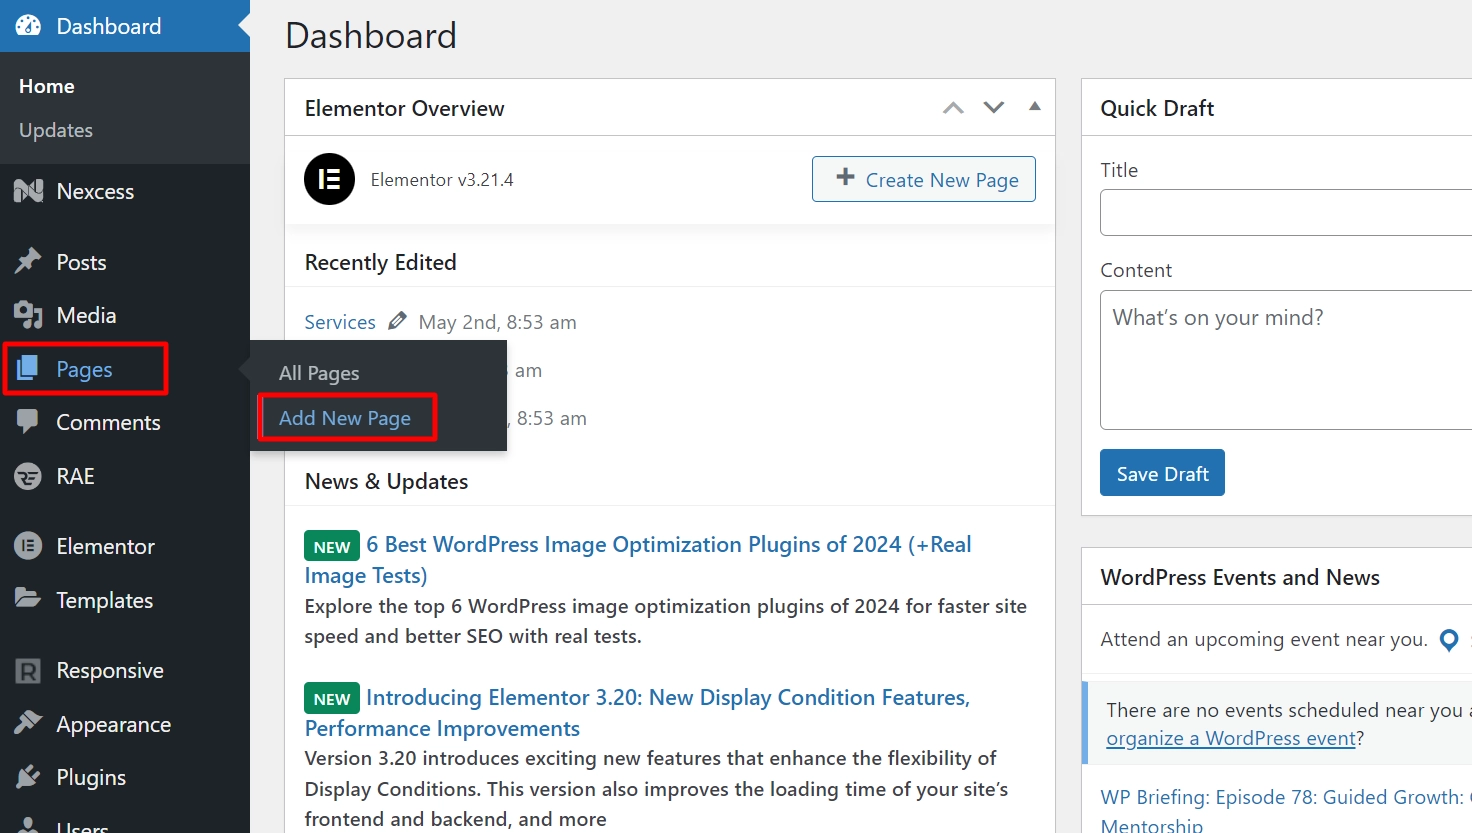
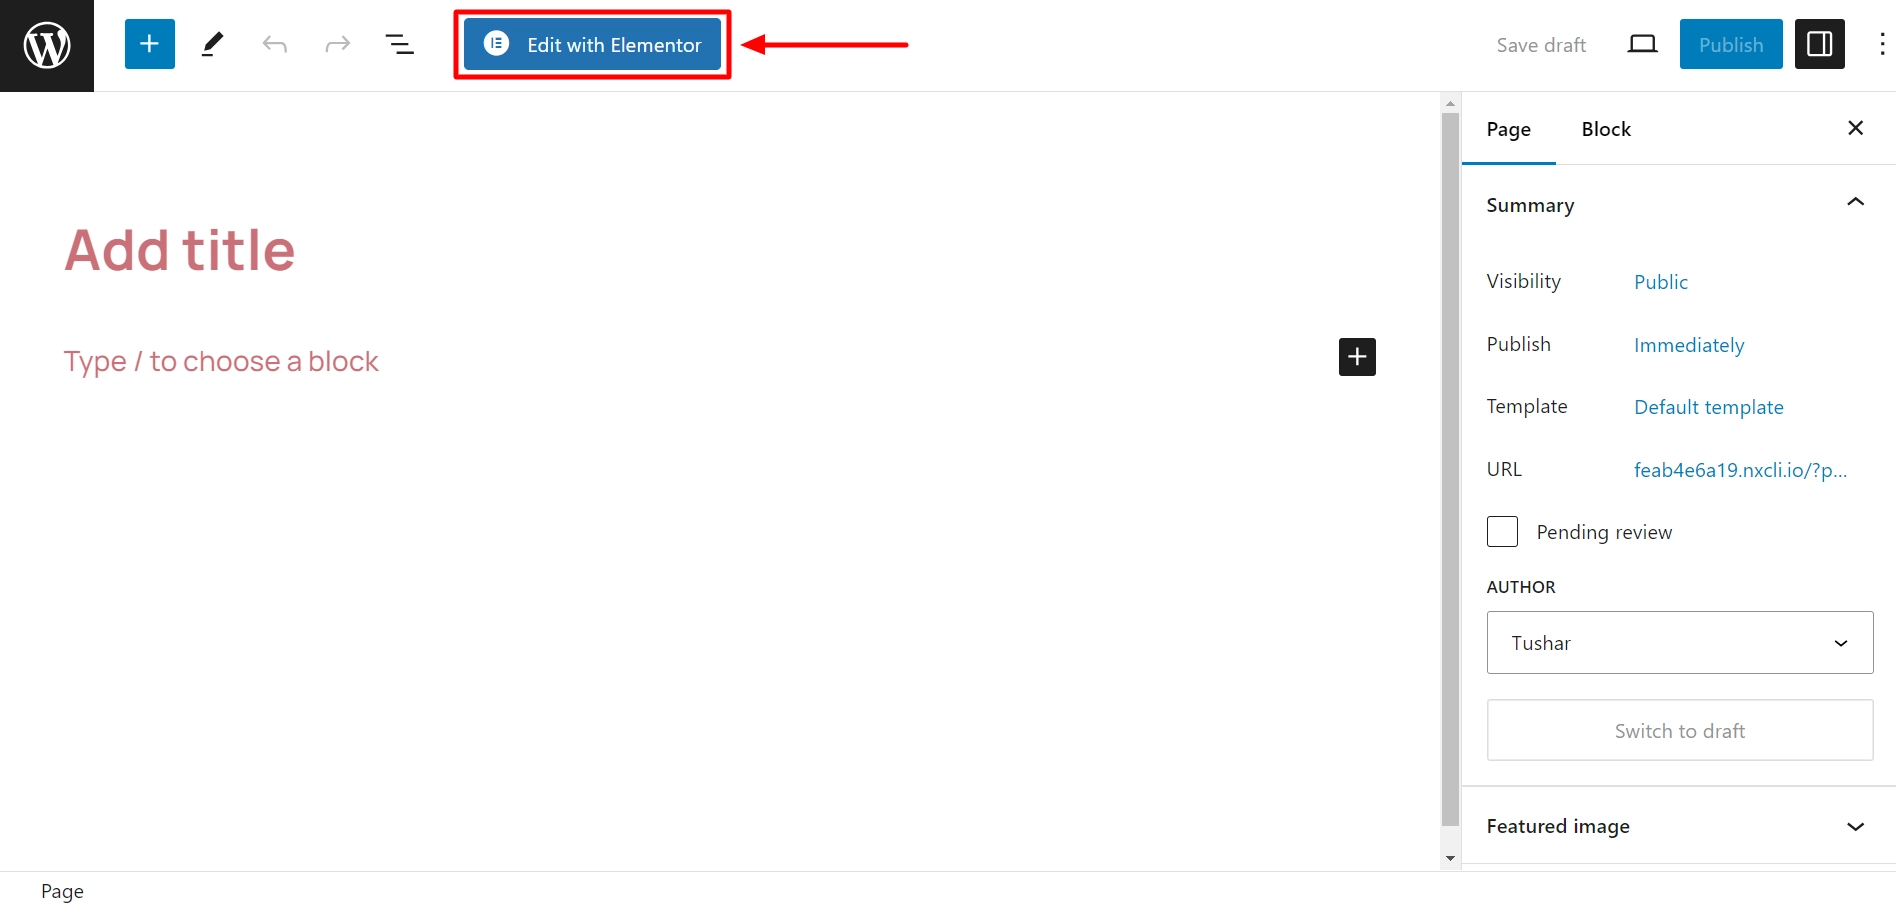
Next, open the page/post where you want to add a countdown timer. To do that, go to Pages > Add New Page.
Click on Edit with Elementor button at the top.
Search for the RAE Countdown timer widget on the left panel under the Responsive Addons for Elementor tab.
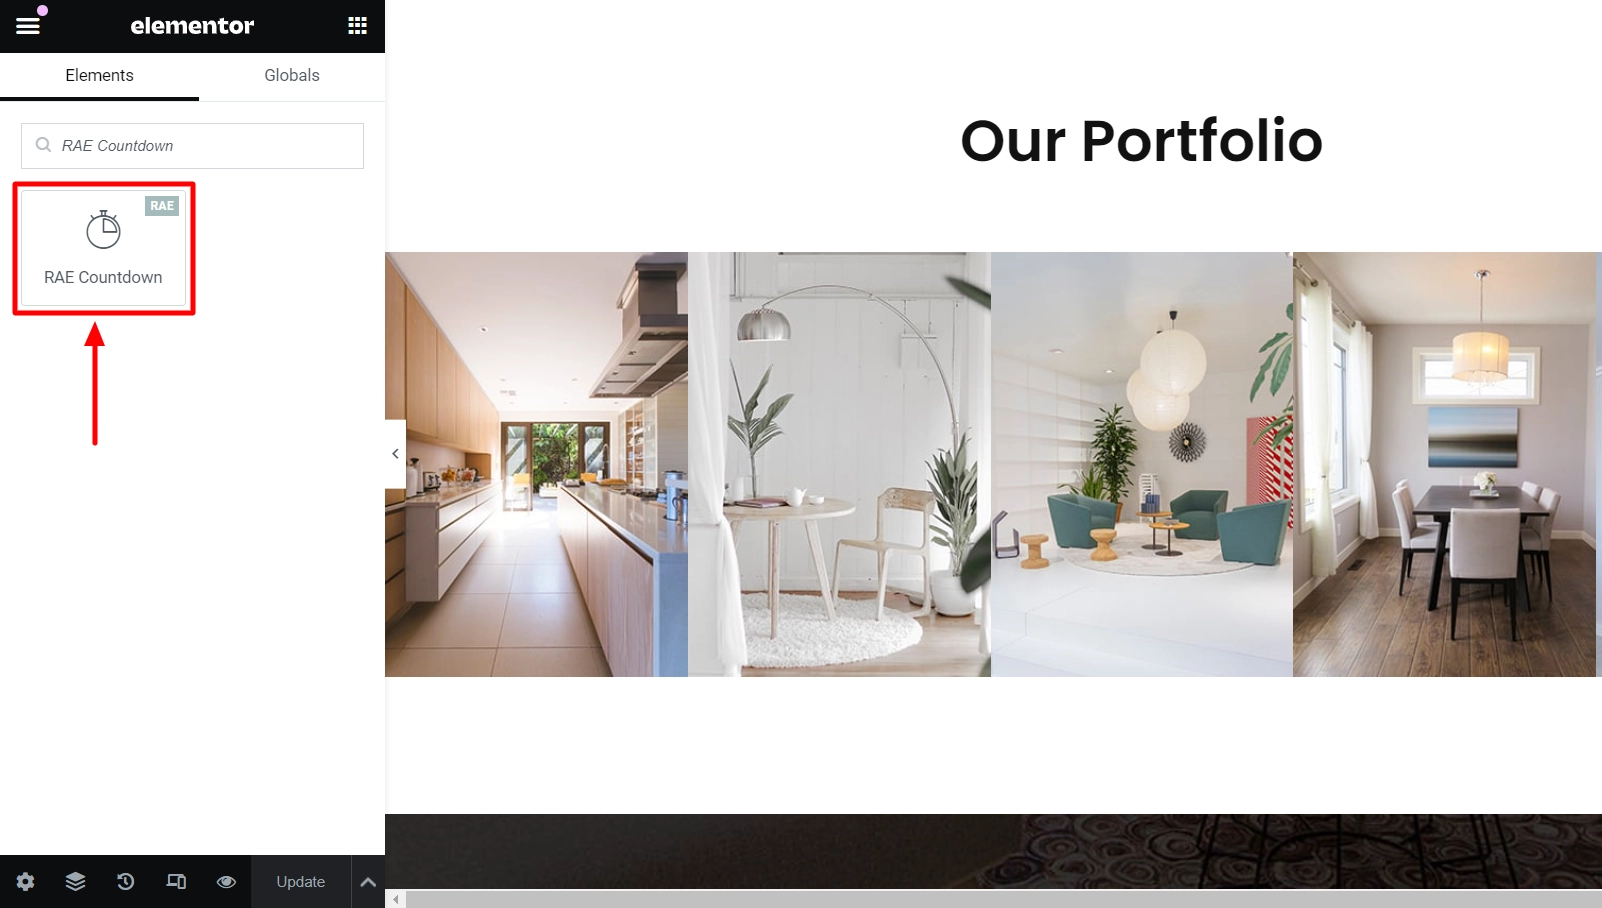
Drag the element to the right side of the screen, and you’ll instantly see what the default widget looks like.
Now that you’ve your countdown on board, let’s look at how we can customize them to make them look beautiful.
Customizing the Countdown Timer Widget
As soon as you drag and drop the widget, you will get a set of settings. You can play around with each setting and create the best timer that’ll suit your website needs.
Here are the wide range of settings available to make your countdown timer stand out:
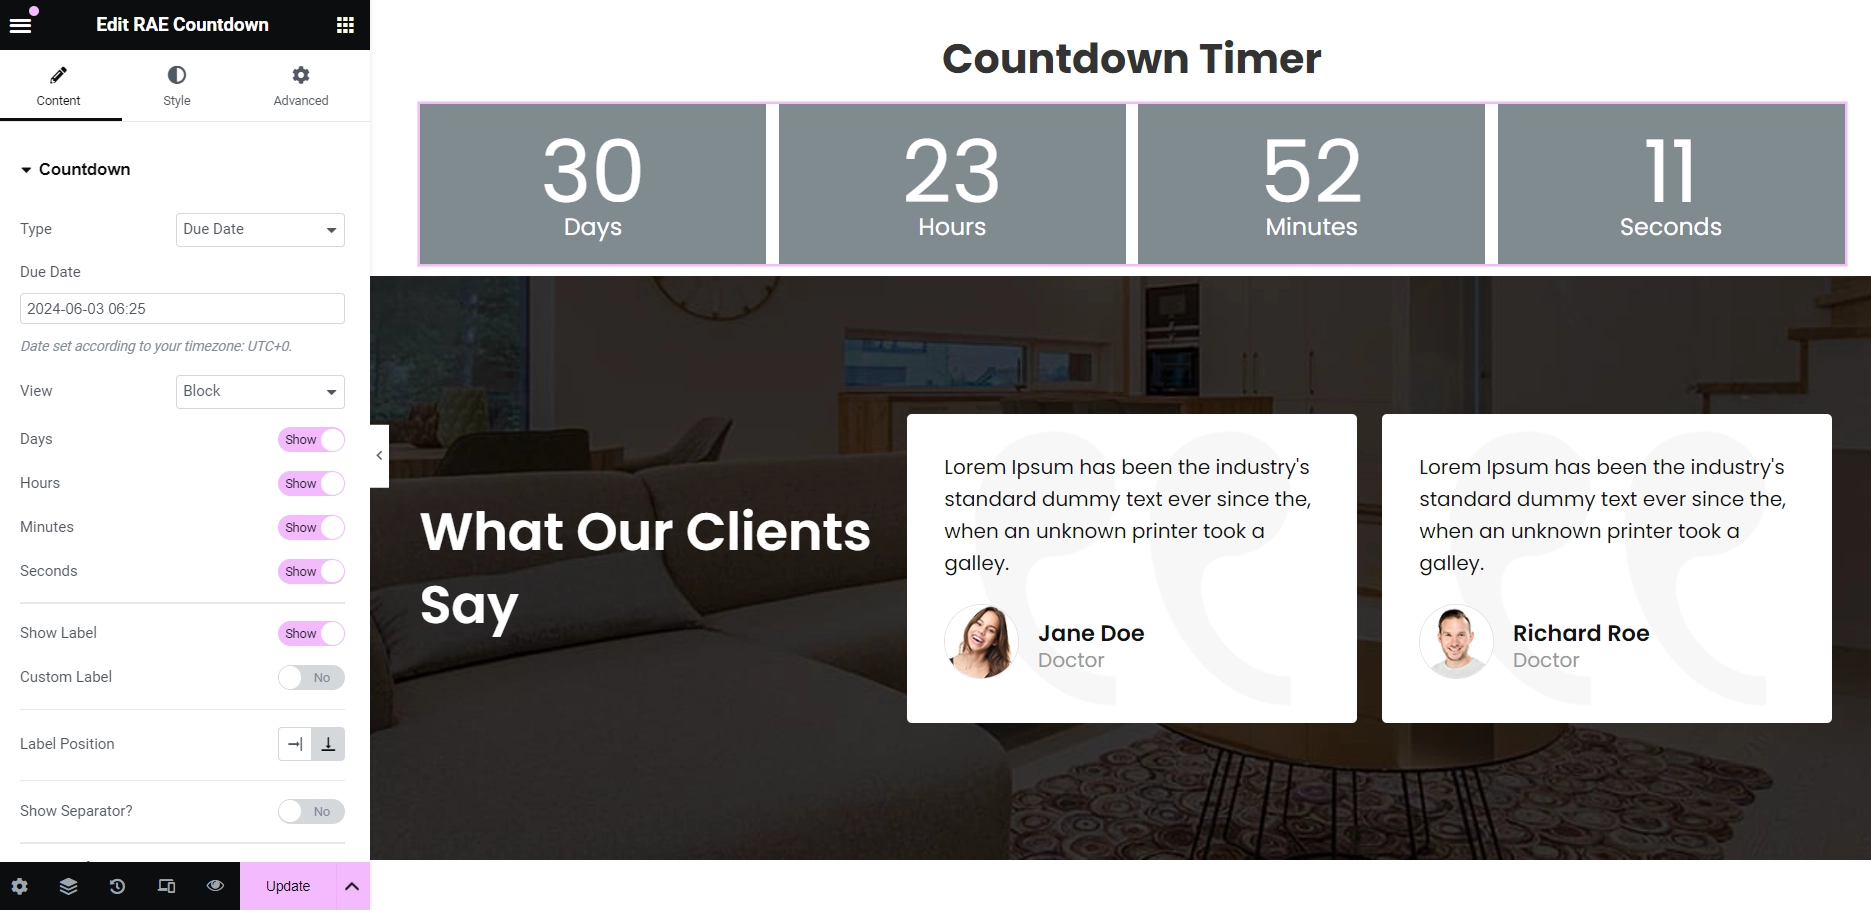
Content Tab of the Countdown Timer Widget
The Content Tab has Countdown as a subsection. In the Countdown section, you will get these options:
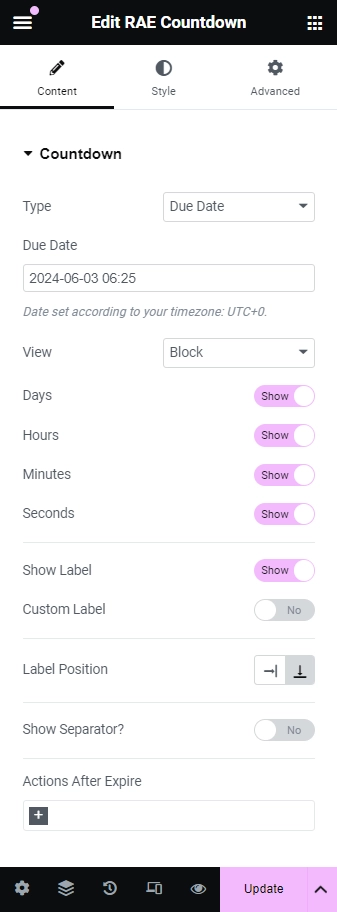
Type: Choose Due Date or Evergreen Timer. Due Date counts down to a specific time, while Evergreen Timer counts a period of time.
View: Select either Block or Inline.
Days: Show or Hide the Days display.
Hours: Show or Hide the Hours display.
Minutes: Show or Hide the Minutes display.
Seconds: Show or Hide the Seconds display.
Show Labels: Show or Hide the Labels.
Custom Labels: Custom Labels: Modify the text of the labels according to your needs.
Label Position: Choose the position of the labels. You can place them on the right or at the bottom.
Show Separator: Show or Hide the separator.
Actions After Expire: Choose one of the following actions: Redirect, Hide, or Show Message.
Style Tab of the Countdown Timer Widget
The Style tab allows you to make visual changes to the countdown timer. You can customize the text, typography, colors, borders, spacing, alignment, and positioning.
The Style Tab has two subsections: Boxes and Content. In the Boxes section, you will get these options:

Container Width: Specify the width of the Countdown container.
Background Color: Choose a background color for the boxes.
Border Type: Choose a border style from the options provided (none, solid, double, dotted, dashed, or grooved).
Border Radius: Set the border radius to control the roundness of the corners.
Space Between: Control the space between the boxes.
Padding: Set the padding within the boxes.
For the Content section under style tab, you get plenty of options like these:
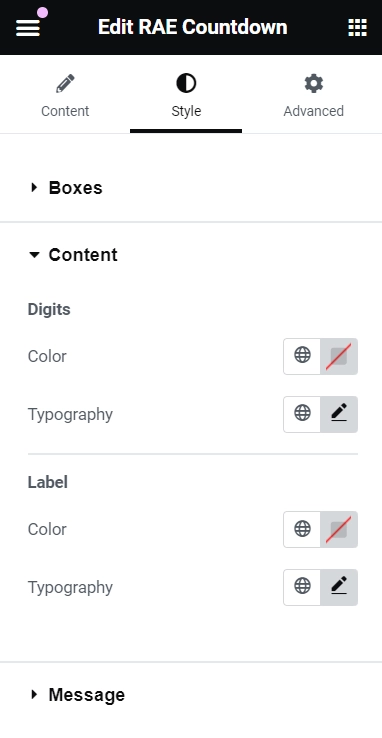
Digits:
- Color: Choose the color for numerical digits.
- Typography: Change the typography of numerical digits.
Label:
- Color: Choose the color of the label text.
- Typography: Change the typography of label text.
You can manage to style the Message tab with these following settings:
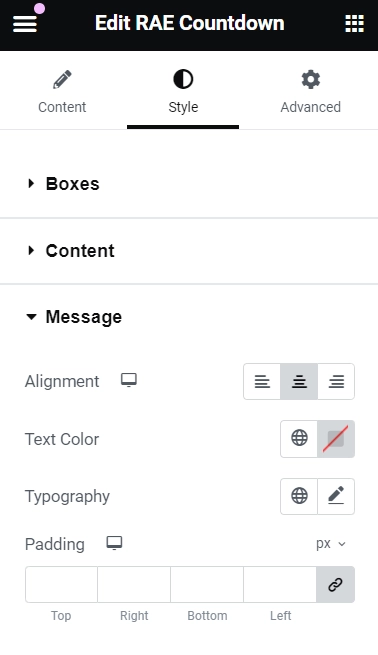
Alignment: Align the expiry message to the left, right, center, or justified.
Text Color: Choose the color of the text for the expiry message.
Typography: Change the typography options for the expiry message.
Padding: Adjust the padding of the message.
After making all those changes, here is what the final countdown timer looks like:

FAQ
You can use plugins like Responsive Addons for Elementor that offers 50+ dedicated Elementor widgets. Using this plugin, you can easily create a countdown timer by just dragging and dropping the widget to the main screen. Also, with plenty of customization settings, you’ll be able to make your timer beautiful and functional.
Install and Activate the Responsive Addons for Elementor plugin to your WordPress dashboard. Then, search for REA Countdown. Now drag and drop the Countdown Widget element onto your Elementor page. Once added, you can set the target date for the countdown in the widget settings.
Responsive Addons for Elementor plugin offers a free Countdown Timer widget for your WordPress website. You can easily install and activate the plugin and start using the widget.
Conclusion
Countdown timer widgets are a great way to create urgency on a website. You can easily add them using the Elementor builder and Responsive Addons for Elementor.
Responsive Addons for Elementor is a user-friendly plugin enabling you to add a countdown timer to your website without hassle.
This feature can be used on any website page, such as the landing page, product page, or checkout page.
RAE countdown timer offers a range of unique and stunning designs that can elevate your website’s visual appeal.
This tool presents an exciting opportunity to differentiate your website and captivate your visitors, potentially boosting your business.
If you enjoyed reading this article, go through these as well:
- Best Free WordPress Themes To Elevate Your Website
- Quick Ways To Optimize Your Elementor Page Speed
- What is Theme Builder? Best WordPress Theme Builders To Look For
Are you ready to add a countdown timer to your website? Grab the Responsive theme and Responsive Addons for Elementor now!