
The Responsive Blocks Addon offers a Form Block; a tool designed to help you create elegant and functional forms on your WordPress website, all without the need for any programming skills.
With this, you can collect information from visitors, such as their names, email addresses, and other details.
How to Use the Form Block?
Install the Responsive Blocks Addon to use the form block. In your WordPress dashboard, navigate to the page where you want to add the form.
From the Responsive Blocks library, select the Form widget to add a form to the editor.

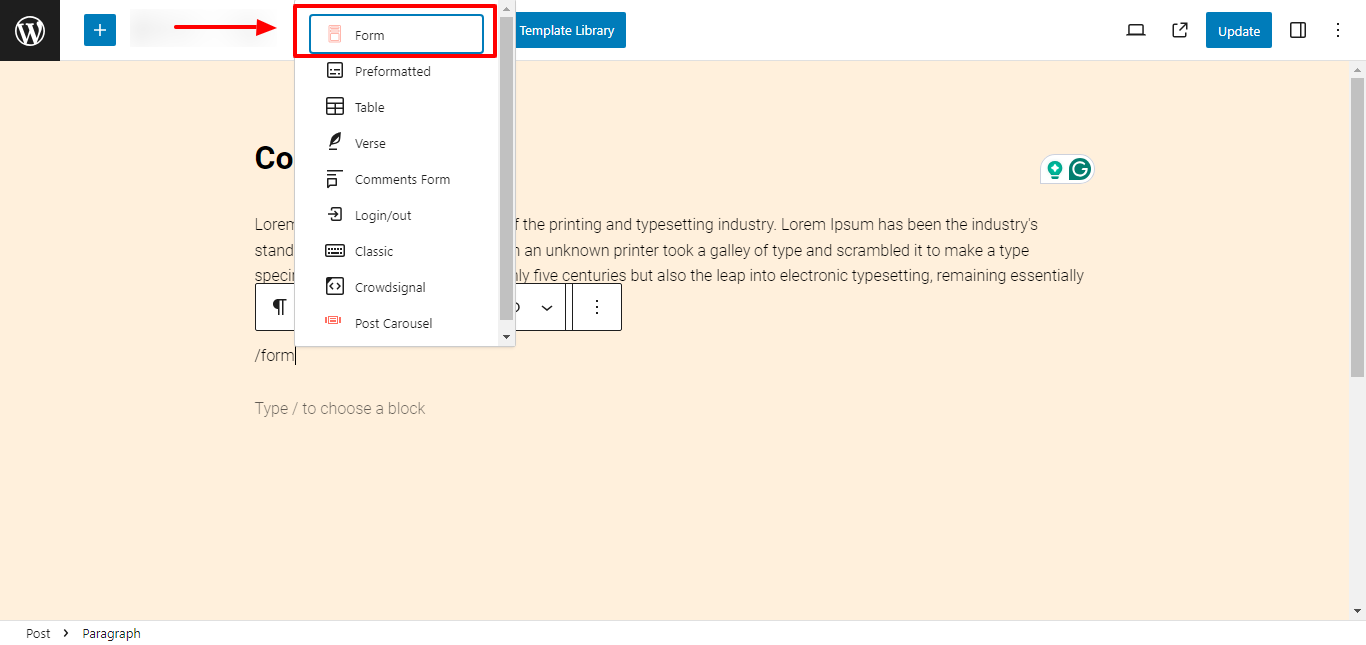
You can also add the form block by typing “/form” on the editor and selecting the Form block from the suggestions.
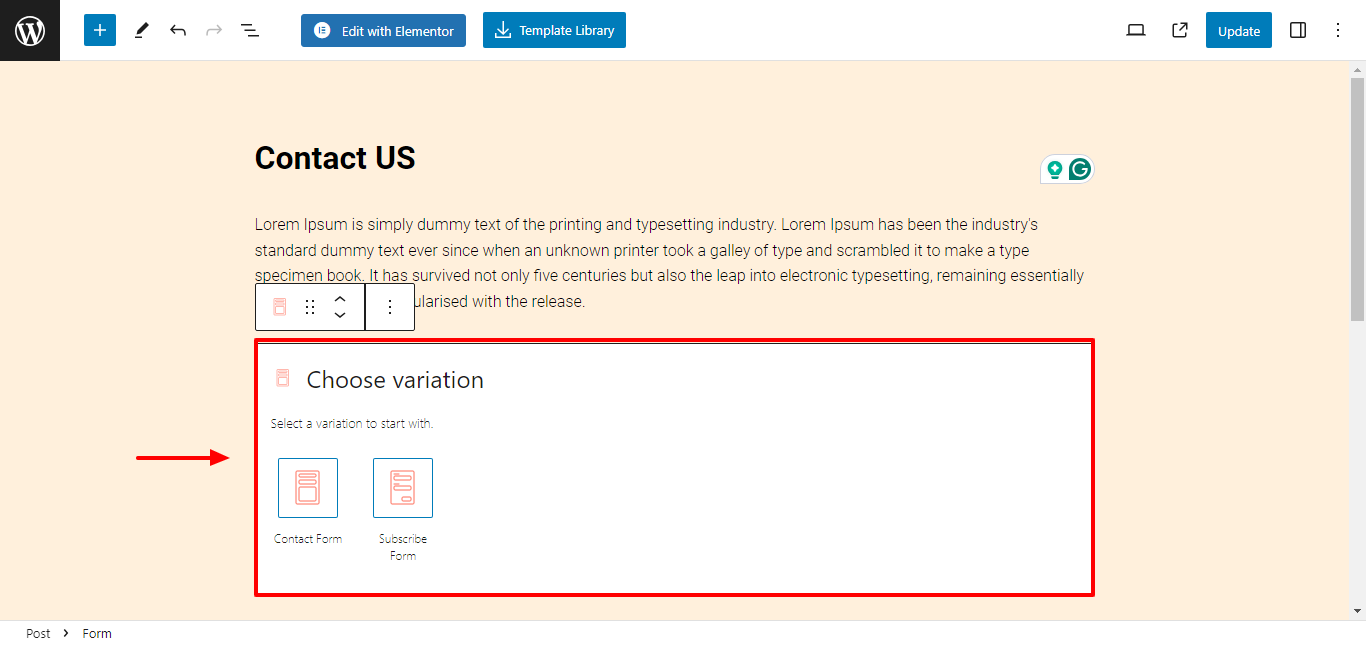
You can start by choosing a form variation from the preset options available in the form block.
- Contact Form
- Subscribe Form
Once you select the form preset, a form will be pasted on the editor.
1. Contact Form
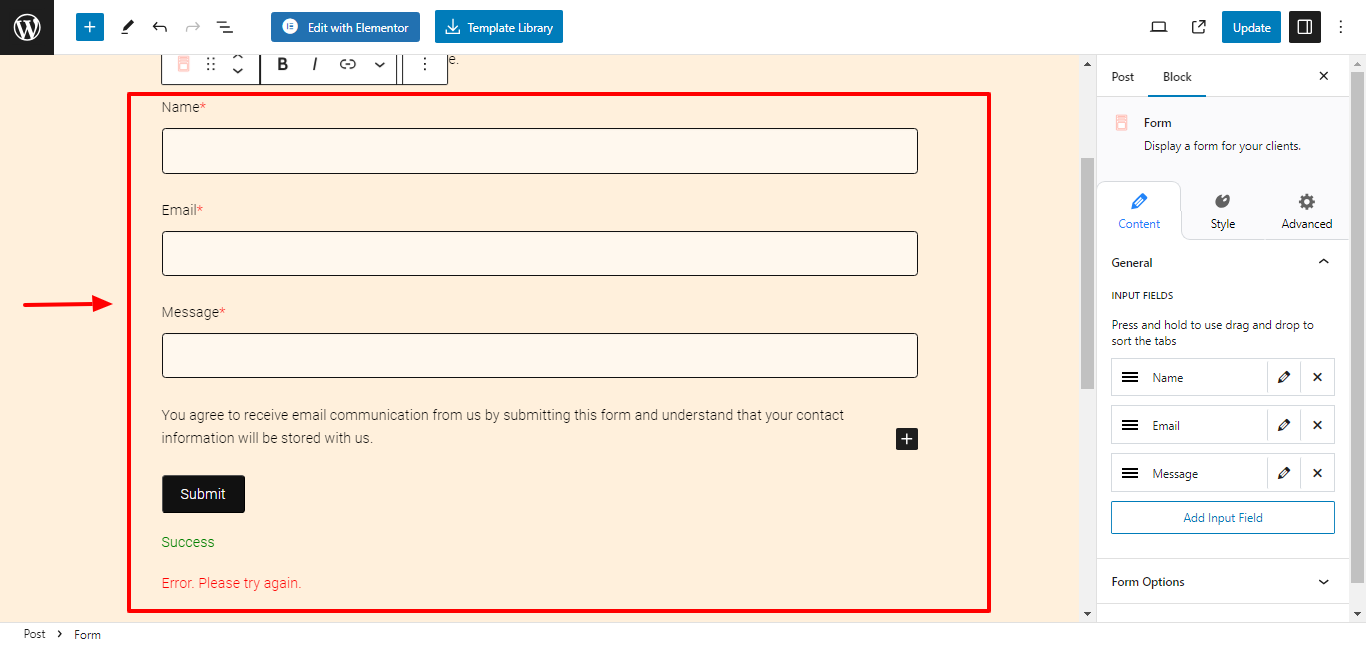
Easily add and customize a pre-built contact form for your website, allowing users to inquire about products or services, ask questions, or provide feedback.
2. Subscribe Form
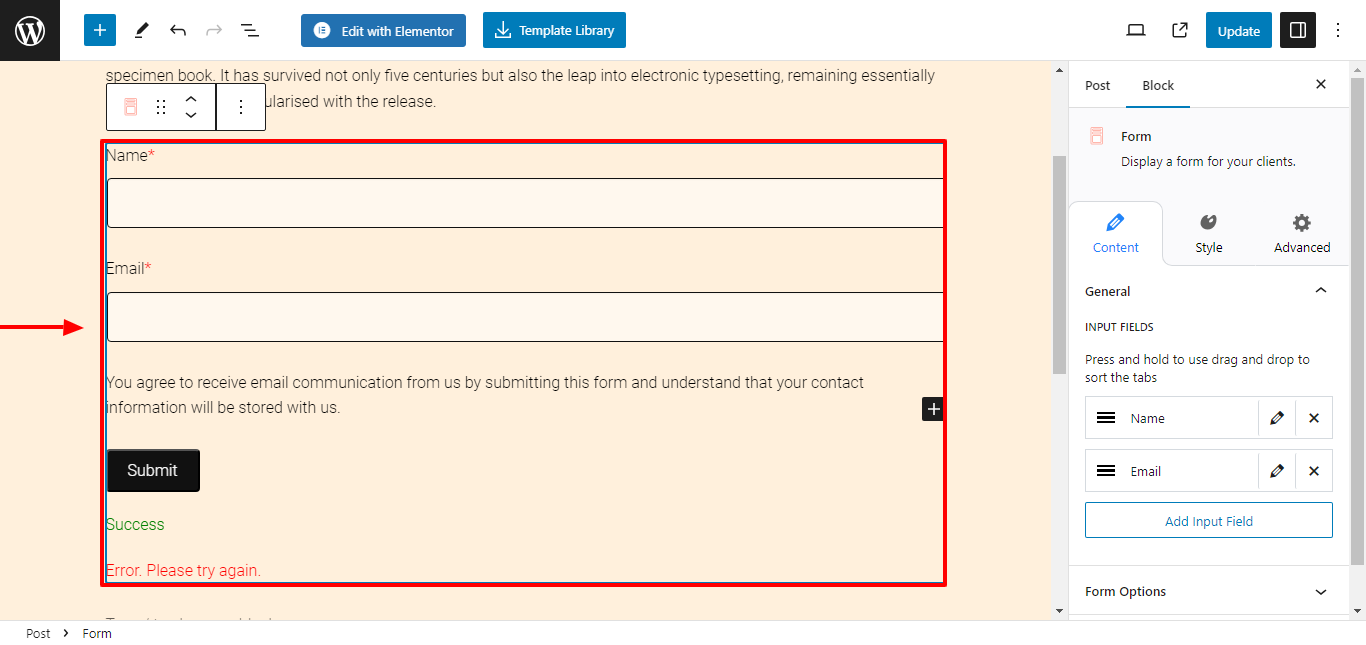
.
Get a custom subscription form for your website in one click. Use this form block to build and expand your email subscriber list for newsletters, updates, and promotional content.
Content Settings in Form Block
Responsive Blocks provides you with multiple formatting settings to easily customize the contents of your form.
1. General Settings
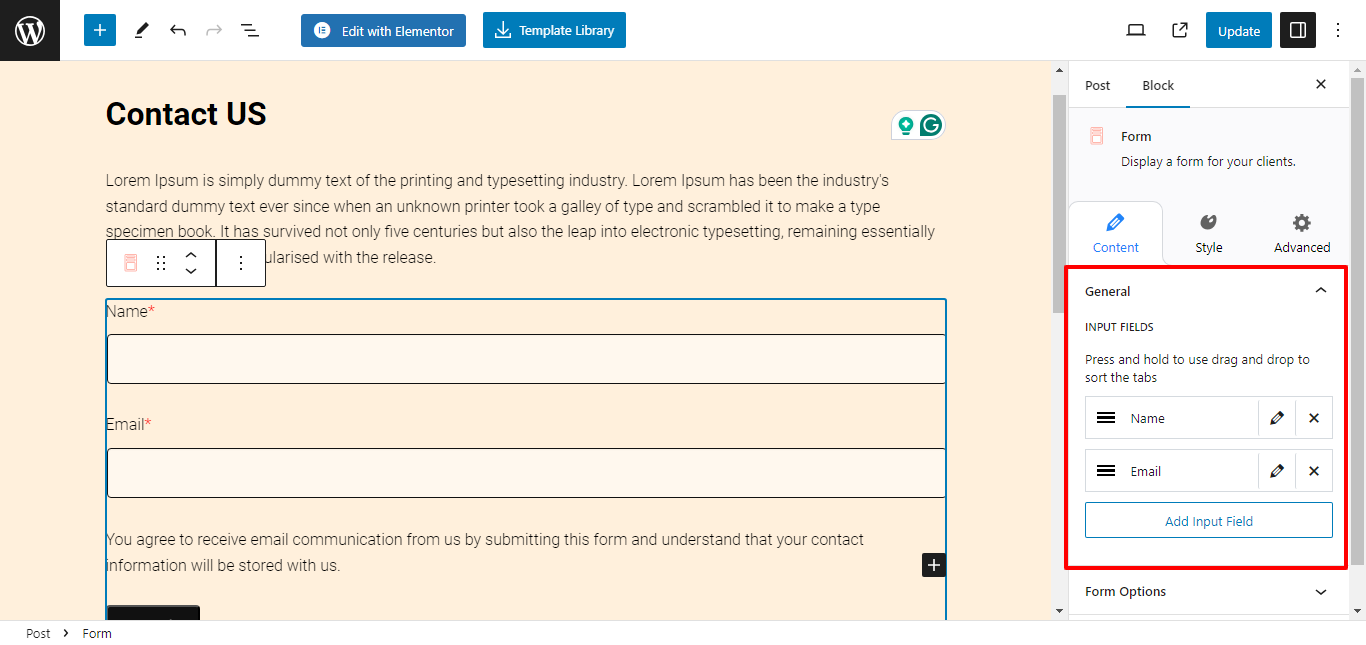
Input Fields: Add, remove, or arrange custom fields to your form. You can click on the edit button to customize the field container individually.
2. Form Options
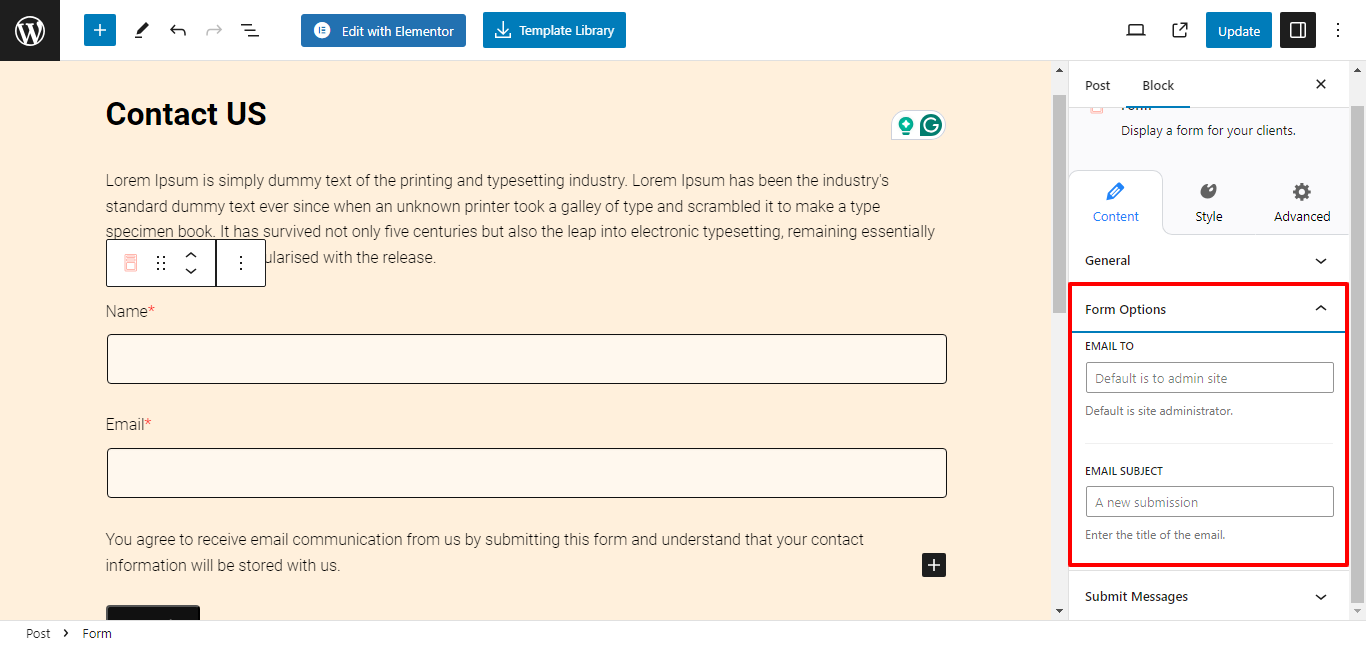
- Email to: Enter the default email address to see responses collected from the form.
- Email Subject: Enter the title of the email.
3. Submit Messages
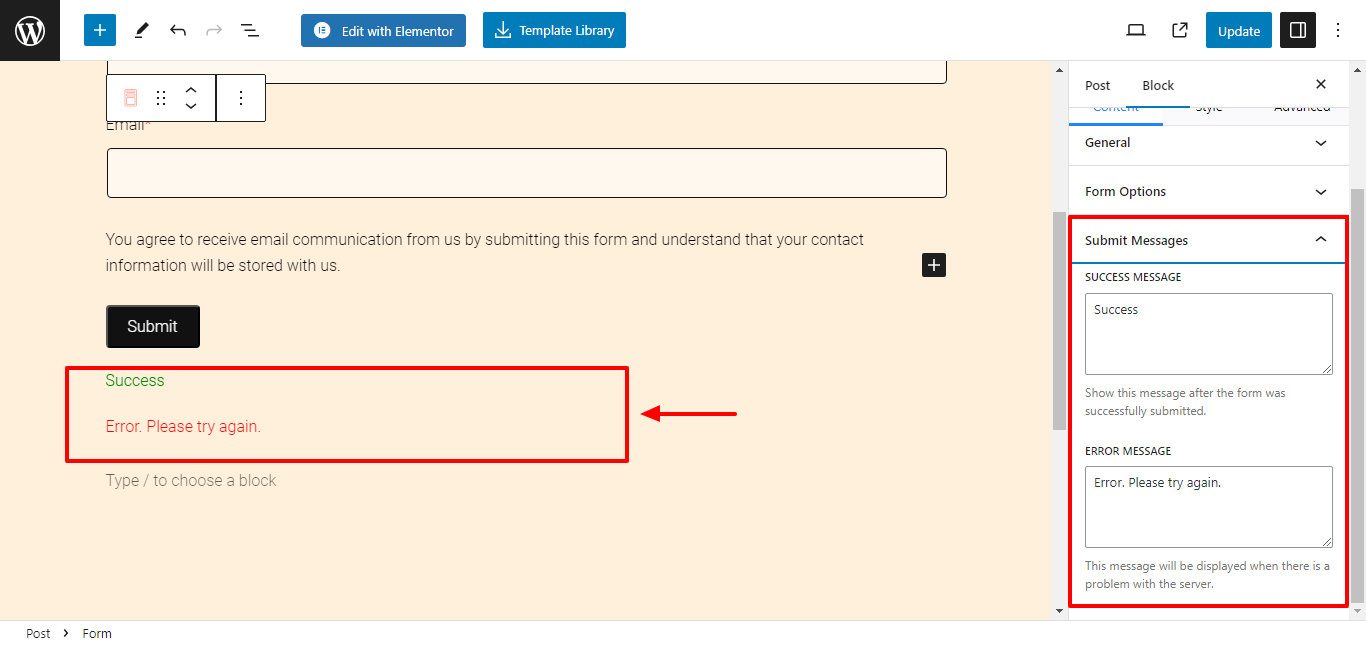
- Success Message: Enter the message to show after the form is successfully submitted.
- Error Message: Enter the message to display when there is a problem with the server.
Style Settings in Popup Block
Select the form and click on the Styles tab to begin formatting. Responsive Block Addon offers the following customization options:
1. Labels
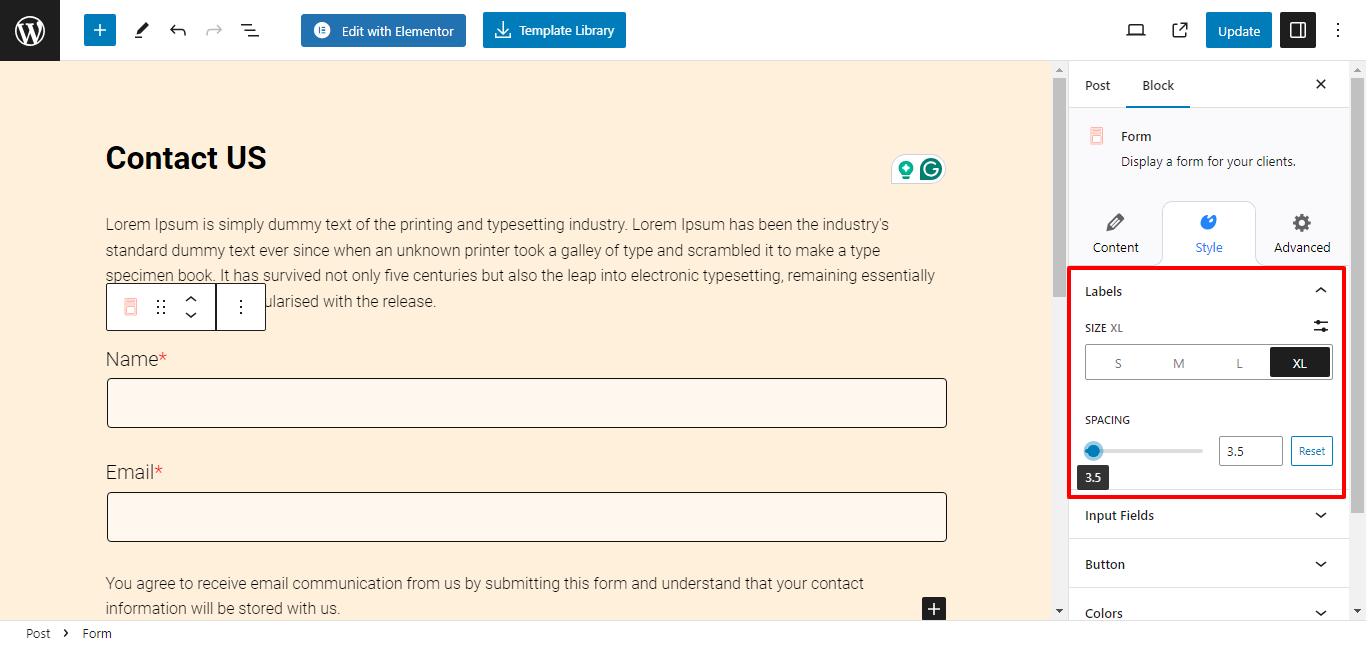
- Size: Select the size for your labels
- Spacing: Use the slider to adjust spacing.
2. Input Fields
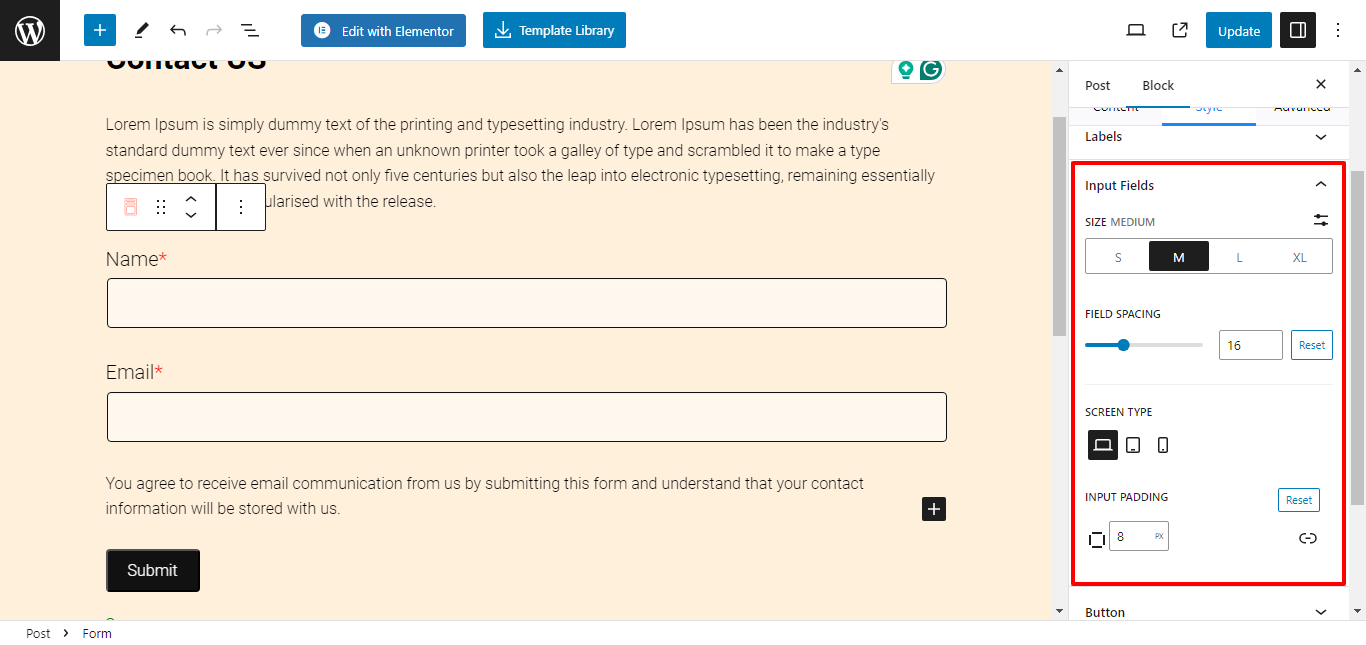
- Size: Select the size for your labels
- Spacing: Use the slider to adjust spacing.
- Screen type: Select screen type to customize responsiveness.
- Input Padding: Use the slider to add custom padding to the input field box.
3. Button
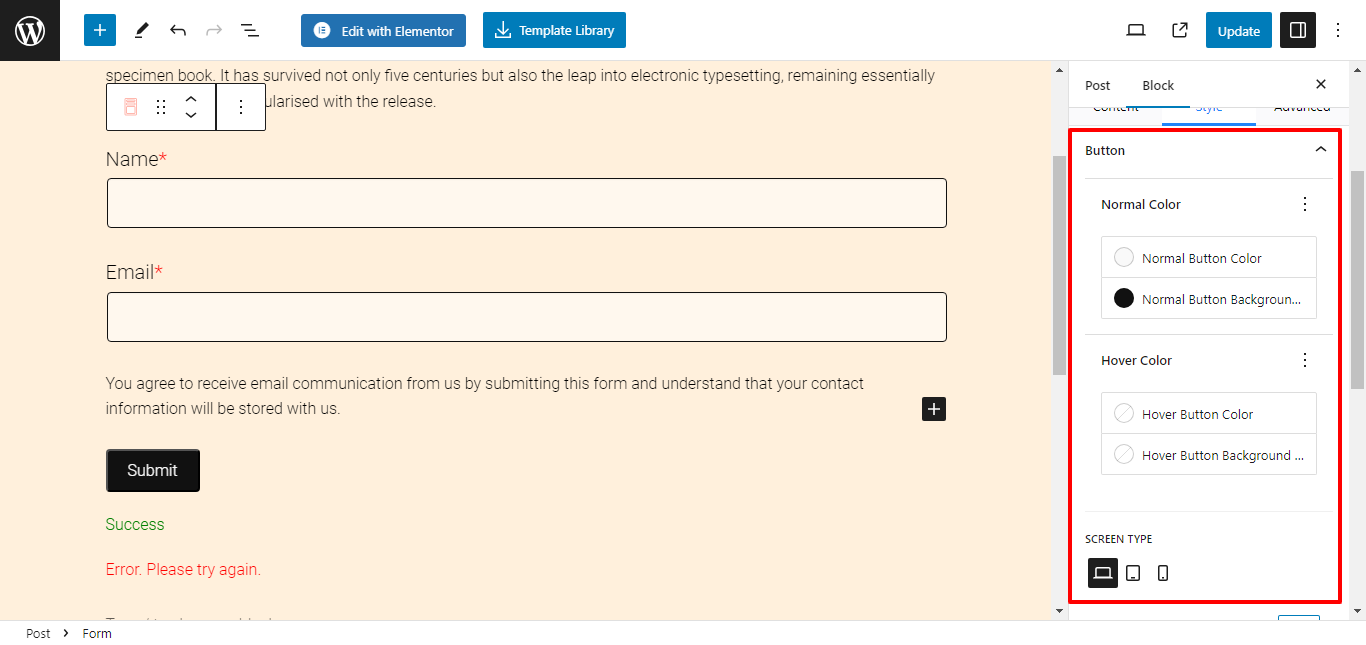
- Normal Color: Choose button color and button background color.
- Hover Color: Choose button color and button background color when hover.
- Button Padding: Adjust the padding for the button.
- Button Border Radius: Customize the button border-radius.
- Button Alignment: Select the button alignment.
4. Colors
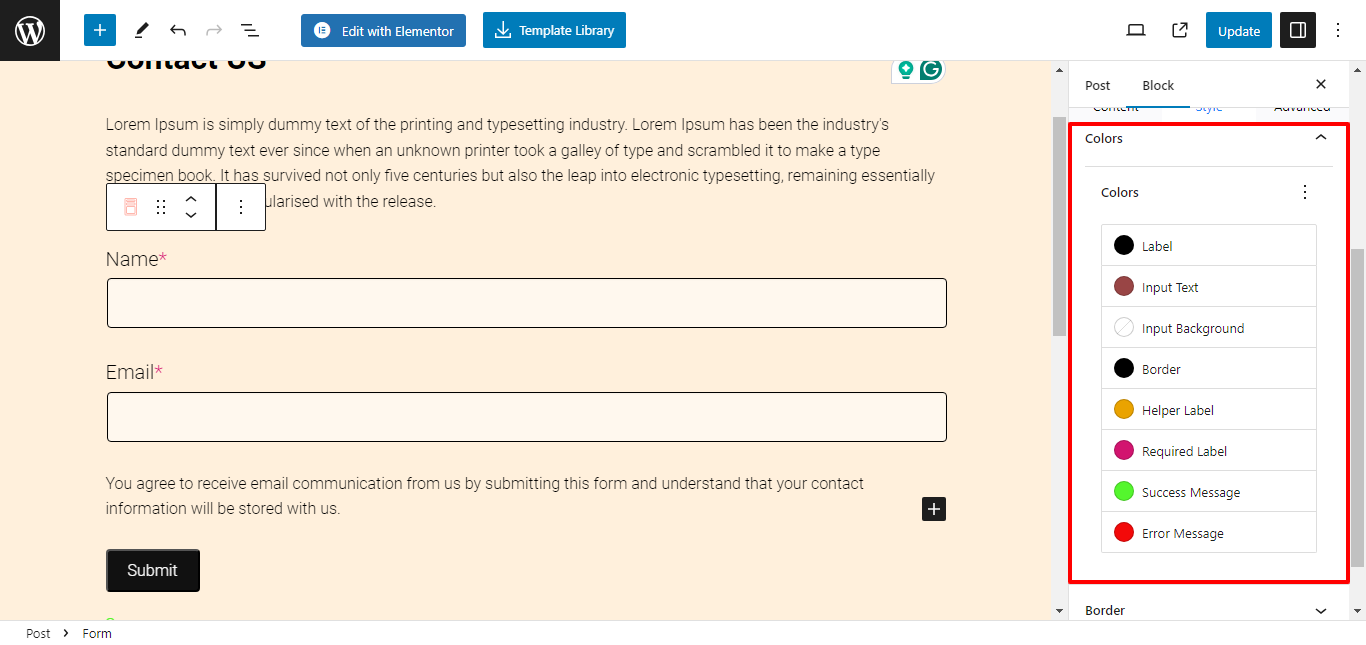
- Color: Customize color for the label, input text, input background, border, helper label, required label, success message, and error message.
5. Border
- Border Width: Use the slider to select a custom border width.
- Border Radius: Use the slider to select a custom border-radius.
6. Help and Submit Messages
- Helper Text Size: Select custom help text size.
- Success/Error Message Size: Select custom success/error text size.
Field Settings
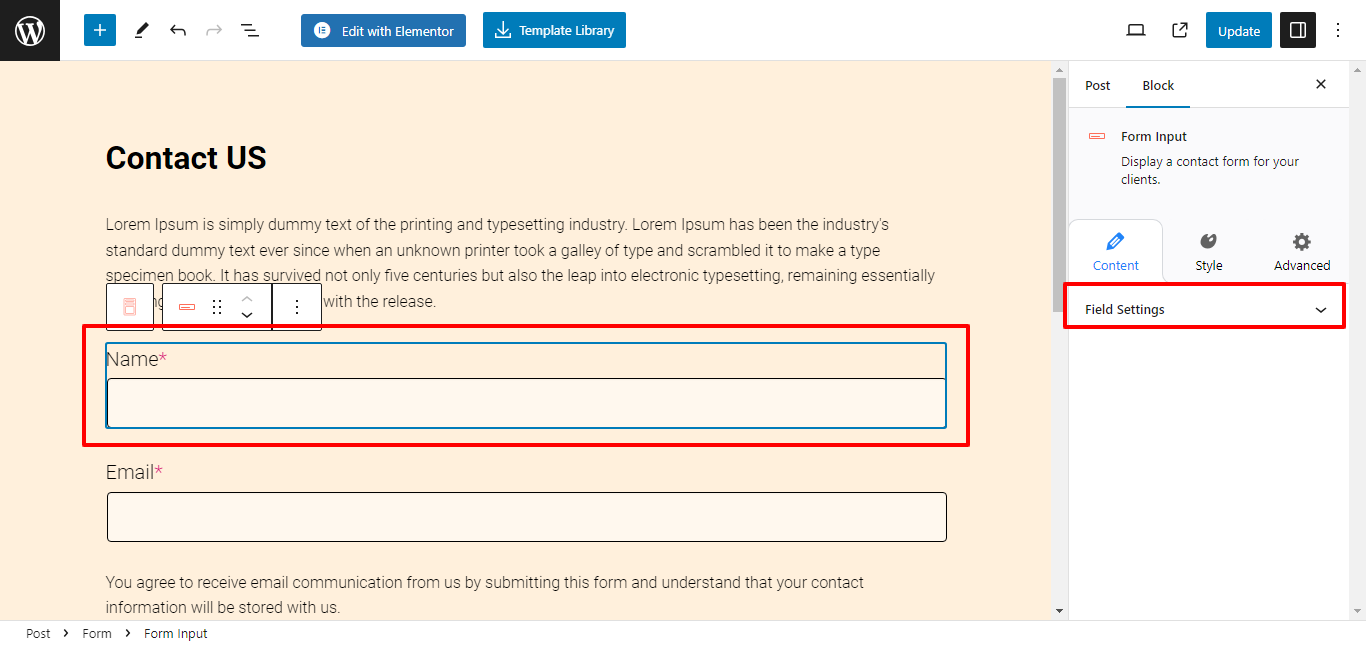
Field settings are displayed only when you select an individual field. You get complete customization options to tailor your form according to your needs.
1. Content Settings
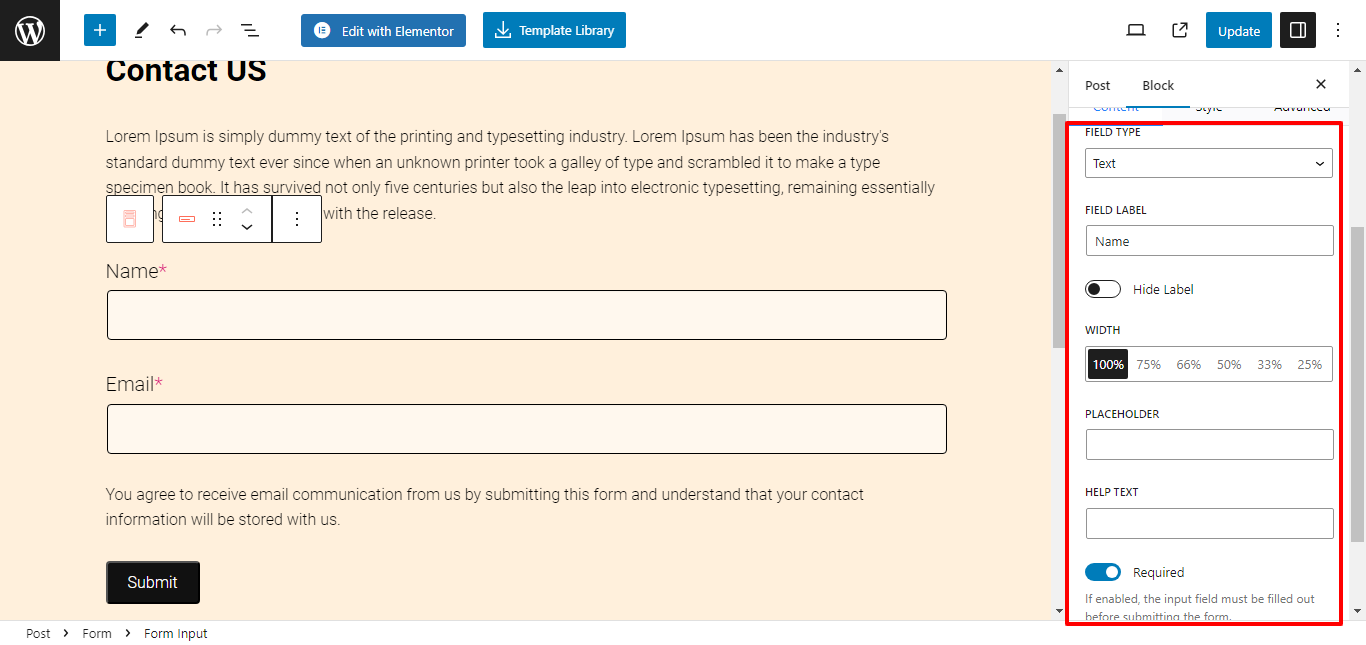
- Field Type: You can choose any field type, like text, text area, email, URL, number, date, or checkbox.
- Field Label: Enter a custom field name or use the toggle button to hide the label name.
- Placeholder: Enter placeholder text for the container.
- Help Text: Enter the text to be displayed when hovered.
- Default Value: Enter the default value for the field container.
2. Style Settings
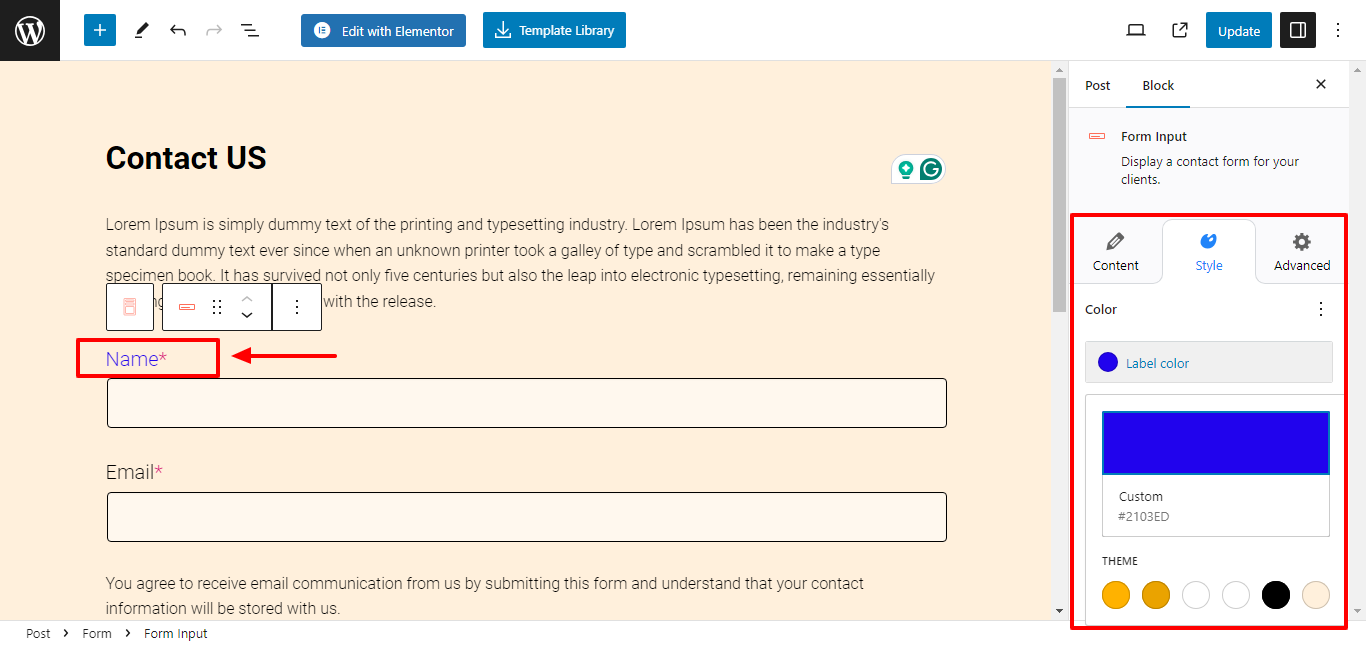
- Label Color: Select a custom color for your label name.
Your form is now formatted as per your preferences.
Forms serve as useful tools for collecting user data, lead generation, customer feedback, or subscription sign-ups. Use the Form block and effortlessly create and customize forms as per your preferences.


