
Summary
We transformed our business idea into a professional WordPress website.
Using Cyberchimps Responsive Theme and starter templates, we crafted a responsive site showcasing services, products, and contact pages, helping us reach clients efficiently.
Are you looking to create a business website using WordPress?
Having a website in today’s age is crucial, regardless of the size of your business. A website makes it easy for you to connect with your prospects and customers and showcase your offerings to your target audience.
WordPress, being one of the most popular and user-friendly content management systems (CMS) available, makes it an excellent choice for businesses of all sizes.
Here, we will look at how to make a business website from scratch using WordPress.
Now let’s delve into the content!
- How to Create a Business Website with WordPress
- Step 1: Prerequisites for Developing a Website
- Step 2: Install WordPress with Bluehost
- Step 3: Install Responsive Theme
- Step 4: Install And Activate Responsive Plus – Starter Templates plugin
- Step 5: Install Business Template
- Step 6: Adding New Pages to Your Website
- Step 7: Setting Up a Navigation Menu
- Step 8: Edit Your Content with Elementor
- Step 9: Publish Your Business Website
- FAQ
- Final Thoughts
Responsive Starter Templates is the best plugin to import Website Templates – Get it for free.
How to Create a Business Website with WordPress
If you’re planning to create a business website using WordPress, follow these simple steps to build a stunning business website.
Step 1: Prerequisites for Developing a Website
Let’s look at the 2 main things we need before we get into the actual nitty-gritty of developing a website.
- A Domain Name
A domain name is the address of your website. An easy way to come up with the domain name for your site is to use the name of your business and choose .com as the extension.
Check whether the domain name is available using a website like Instant Domain Search.
If the website is available, you can go ahead with it. Otherwise, you can tweak the name a bit or choose a different extension, such as .net or a country-specific extension.
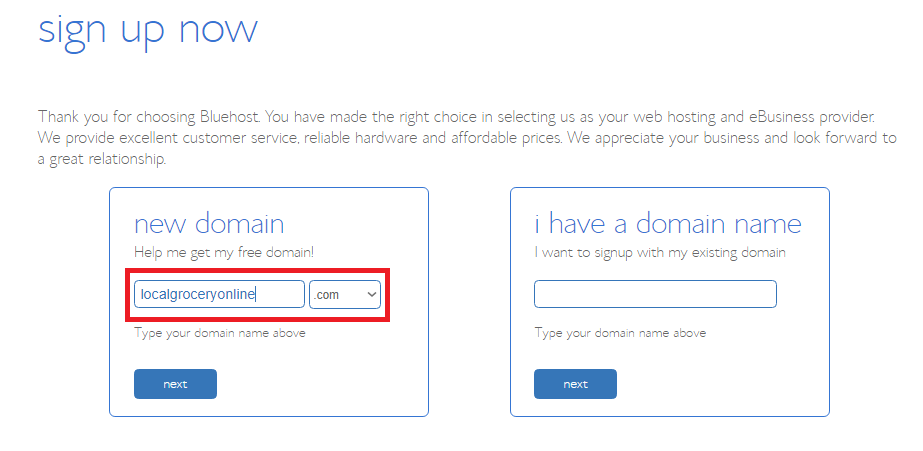
For example, if the name of your business is Local Grocery, you can choose localgrocery.com as the domain name.
If the name is not available, you can choose a domain name such as localgroceryonline.com, localgroceryonline.net, or localgrocery.ca (If your business is based in Canada).
- A Web Hosting Plan

Web hosting is the place where your website data is stored. There are multiple web hosting service providers you can choose from, but we recommend using the Bluehost hosting provider.
As you enter the Bluehost website, you will be provided with a “Get Started” button in the homepage.
Click on the “Get Started” button.

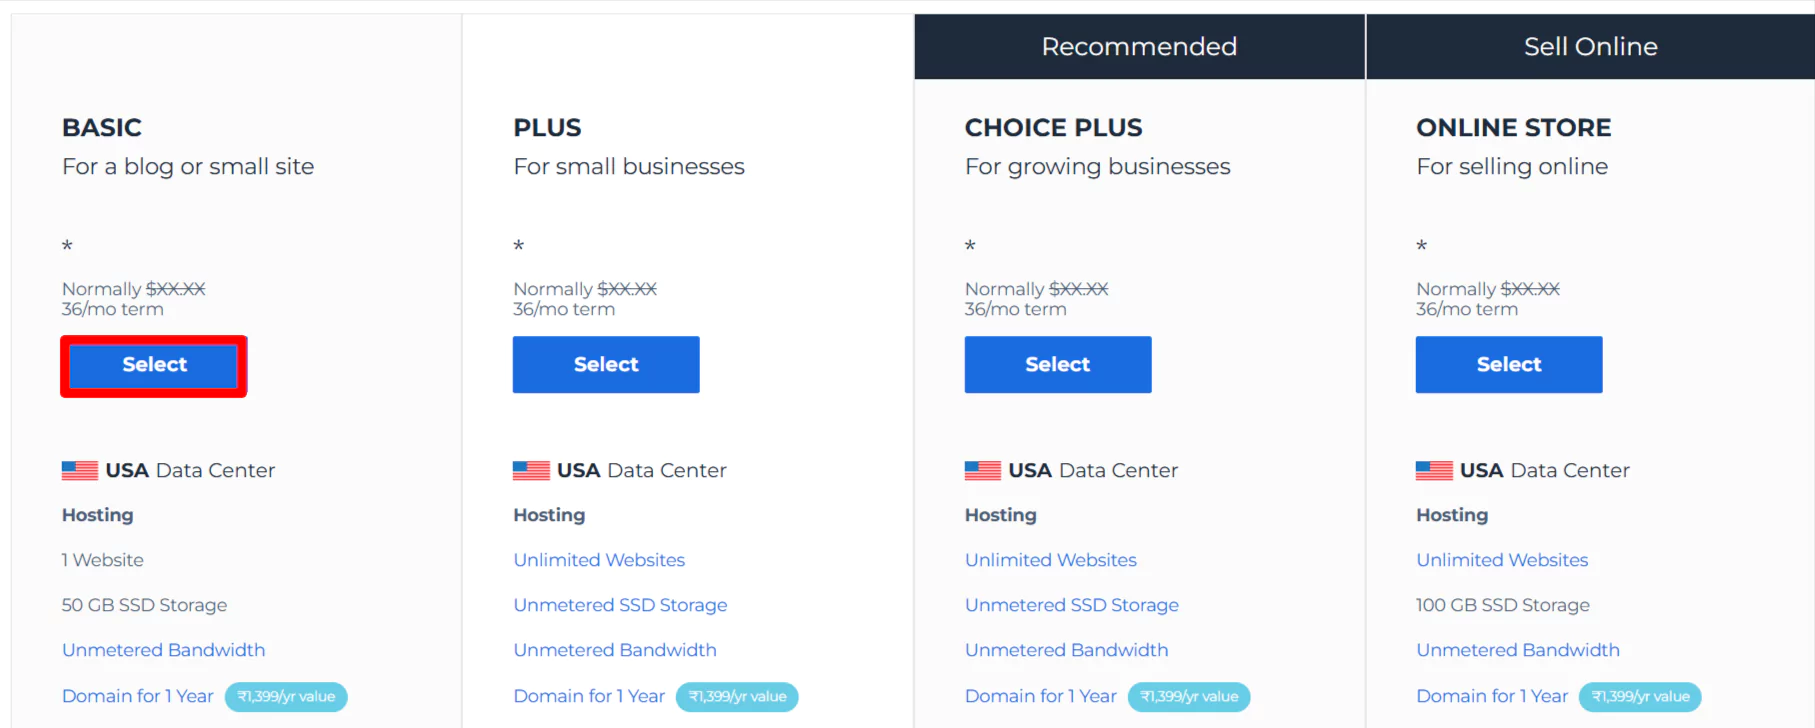
Upon clicking, you will be taken to their signup page, where you will be asked to choose a pricing plan.
If you are running a small-scale or mid-scale business, it’s wise to choose the Plus plan.
After selecting the plan, you have to enter the domain name of your website.
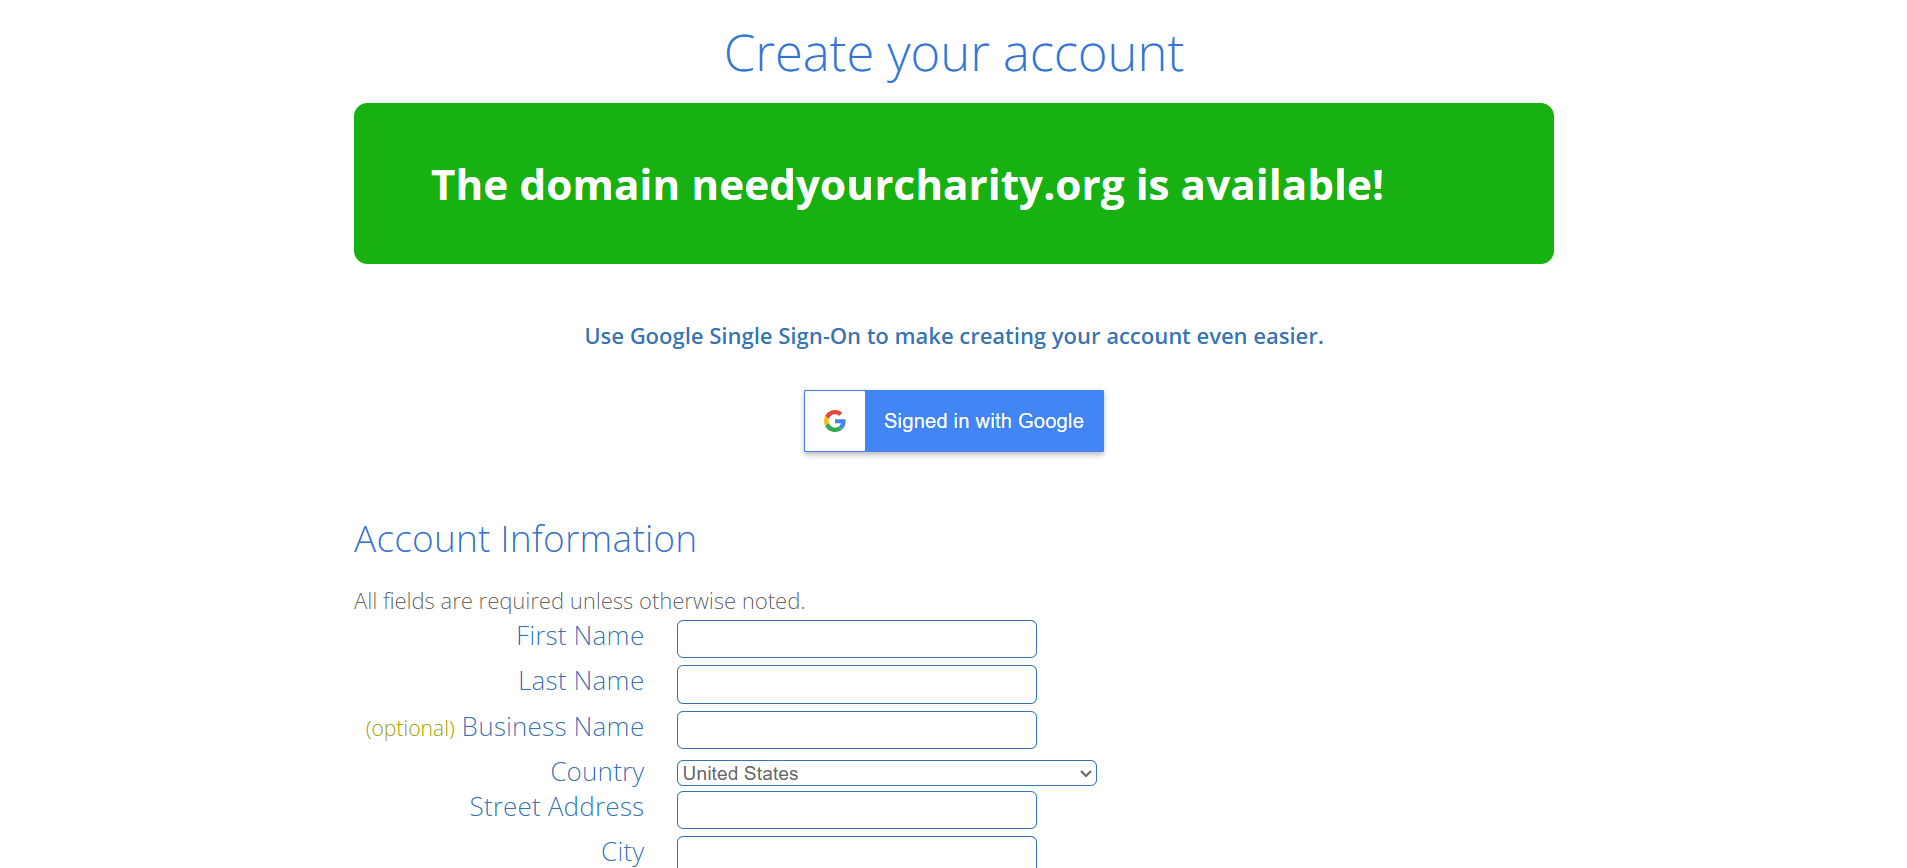
Fill in all the required fields and submit your payment.
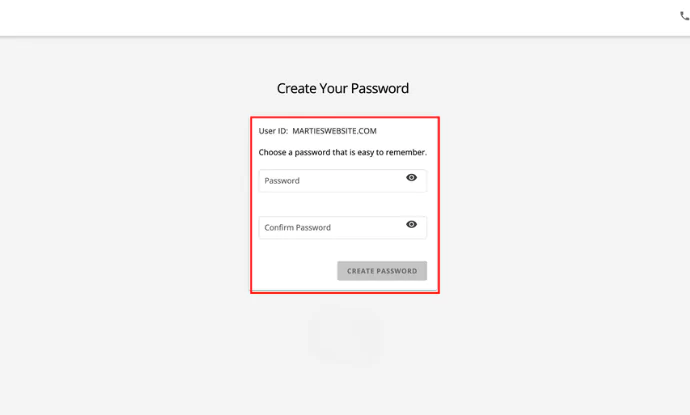
After completing the payment, you can create an account with Bluehost.
Click on Create password.
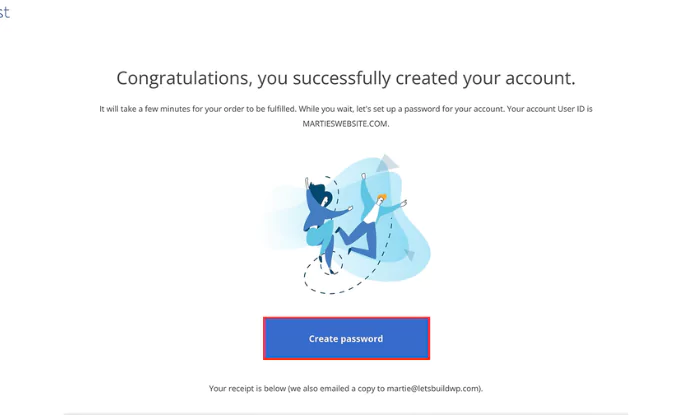
Enter your password, and you’re all done setting up Bluehost. Next, let’s look at how to download WordPress.
Once you’re registered with Bluehost, you’re good to go for the next steps.
Step 2: Install WordPress with Bluehost
Once done with web hosting and the domain name, the next step is to install WordPress.
WordPress is easy to install with web hosts like Bluehost or Kinsta. These hosts provide one-click WordPress installation, making the process effortless.
For instance, if you have Bluehost, use the following steps to install WordPress:
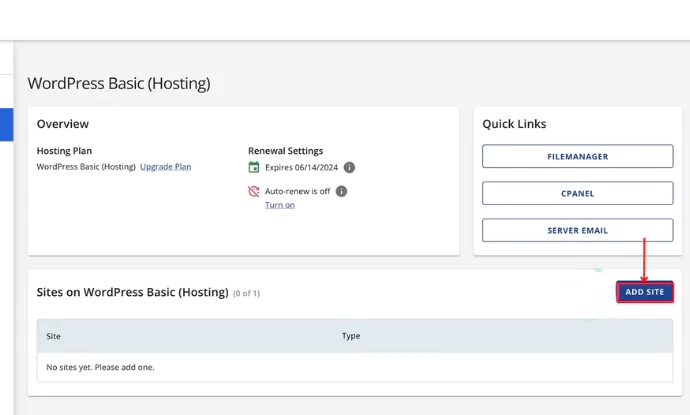
Select WordPress Hosting.
Click on Add Site.
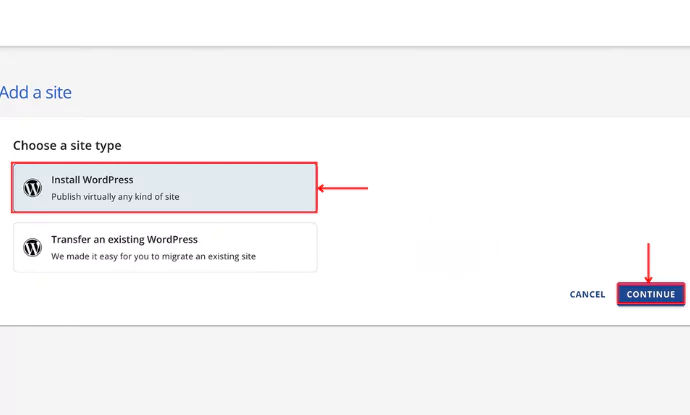
Click on Install WordPress > Continue.
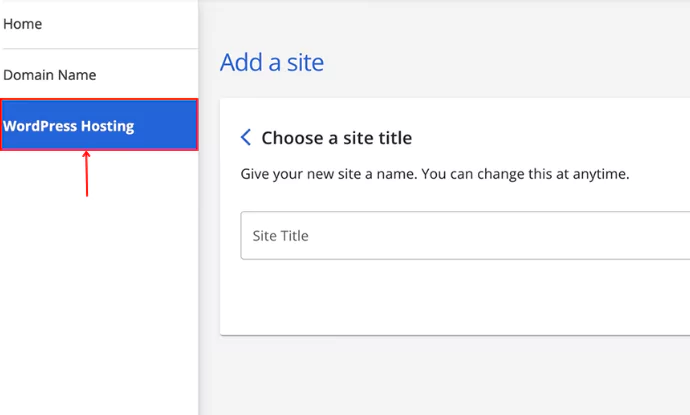
Give a name to your site by clicking on “Choose a site title“
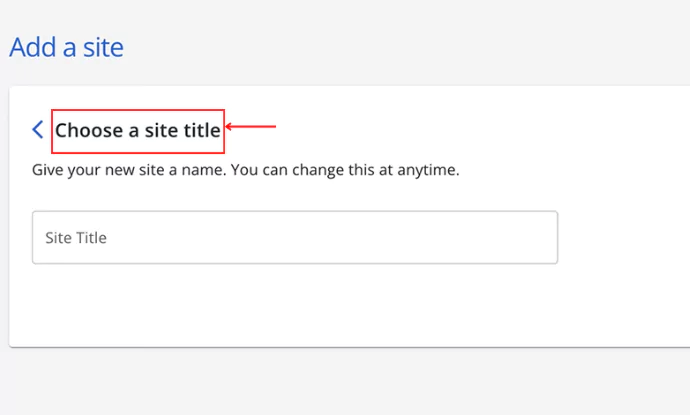
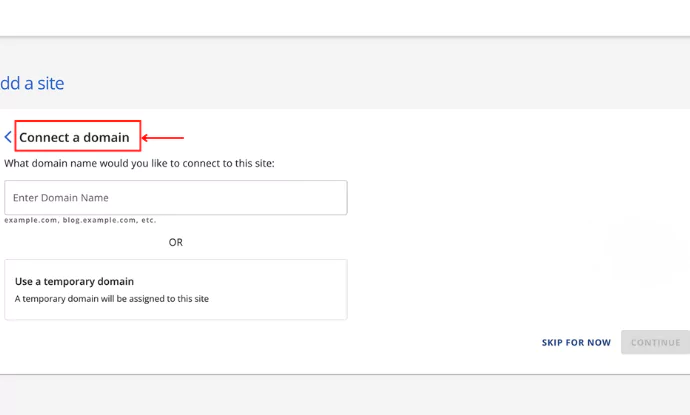
Enter the domain name that you wish to be addressed as and click Continue.
Once you click “Continue,” WordPress is installed.

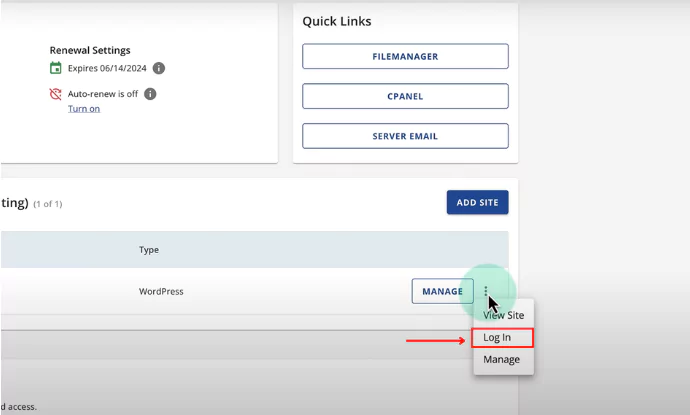
Now, Click on the menu and click on Log in.
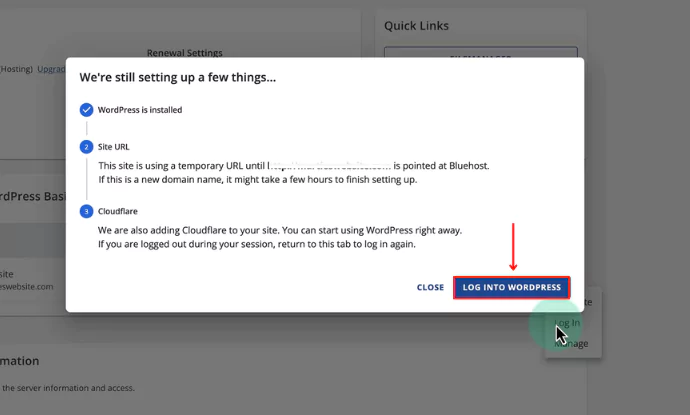
Click on “Log into WordPress.”
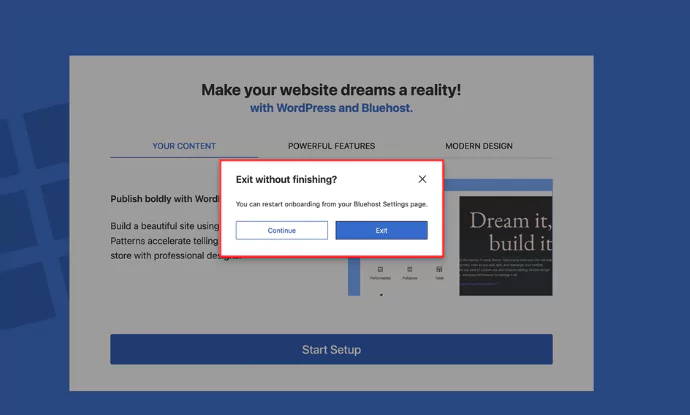
Click on Exit to WordPress.
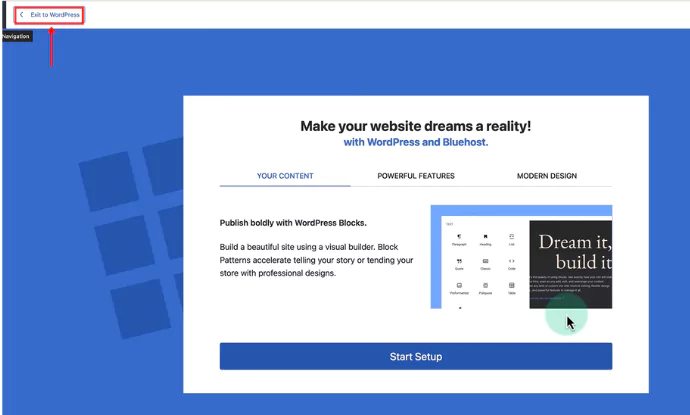
Exit, and you will be redirected to the WordPress dashboard.
Step 3: Install Responsive Theme

The WordPress theme directory is a great place to find free themes. Of the many themes available, we advise using the Responsive theme as it’s fast, SEO-friendly, and provides you with a high-quality website.
Below are the steps to install the Responsive theme from WordPress:
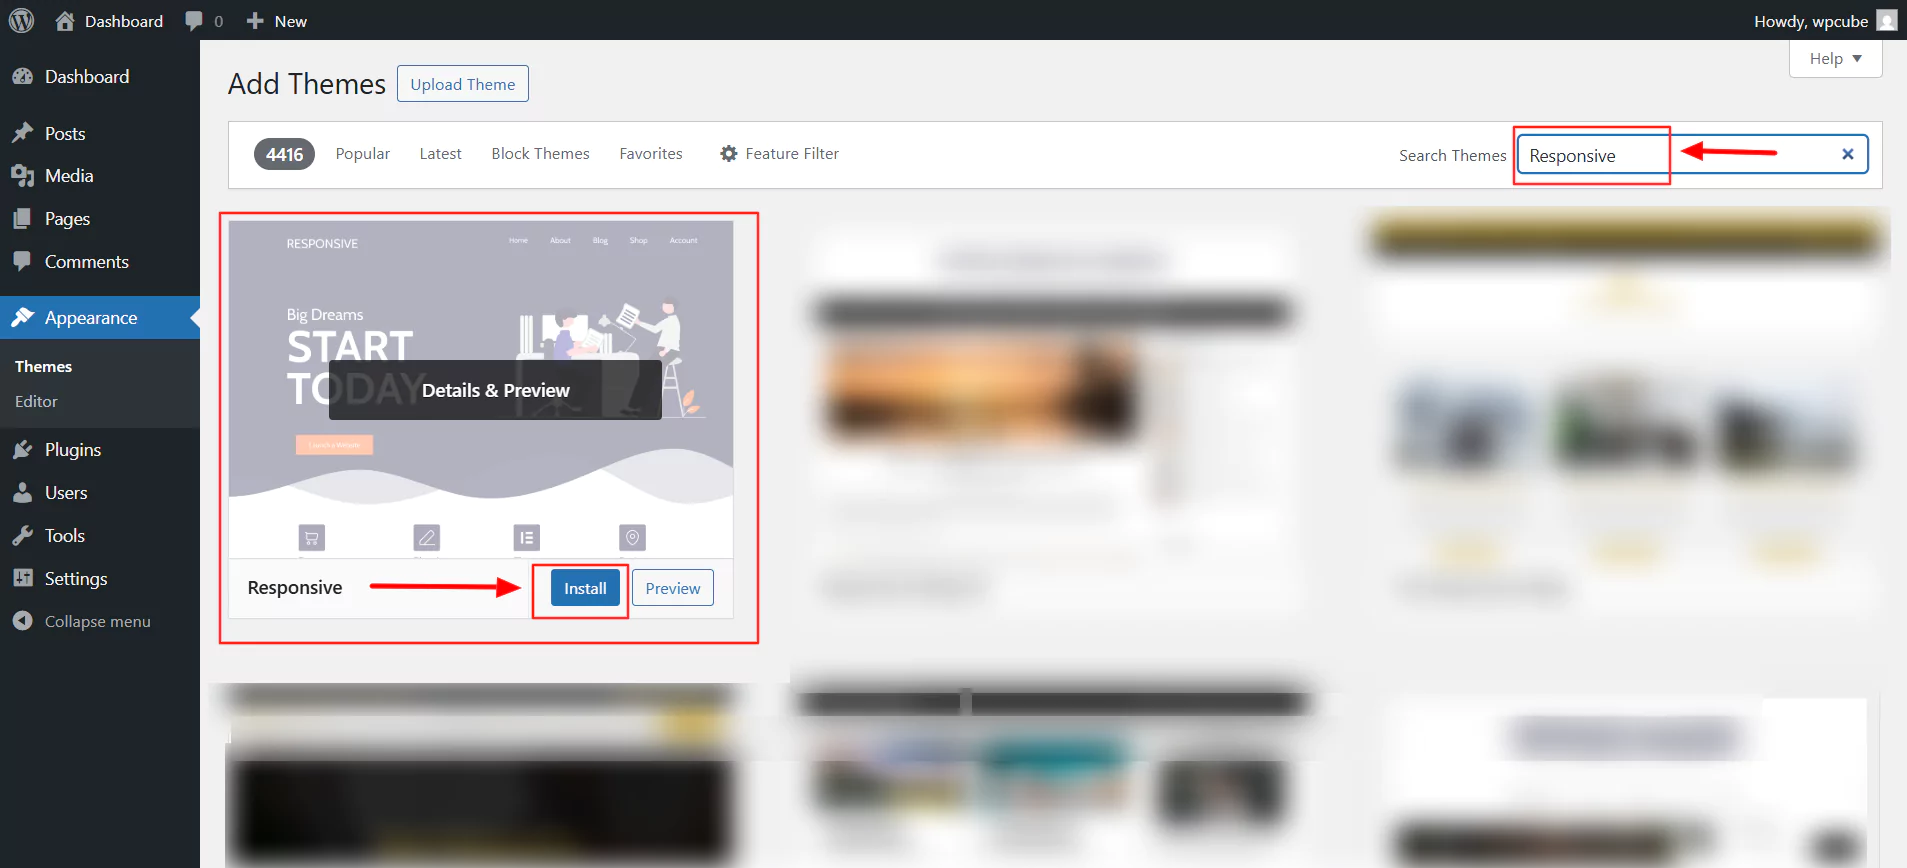
From your admin dashboard, navigate to Appearance > Themes.
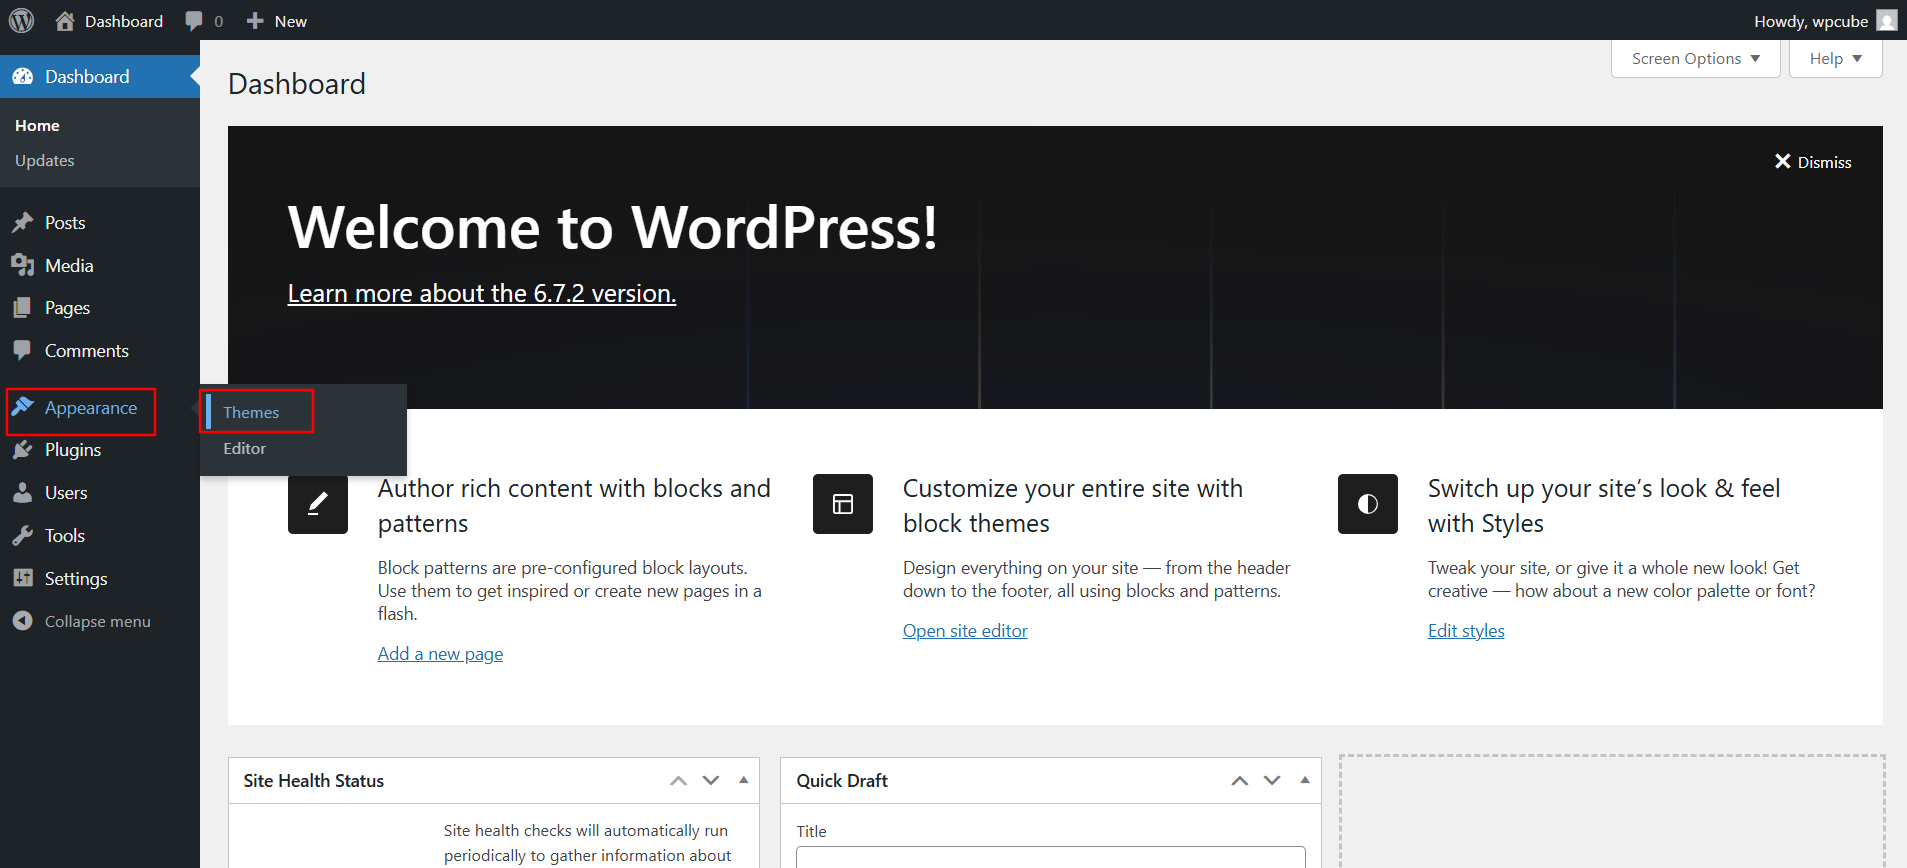
Click the Add New Theme button at the top.
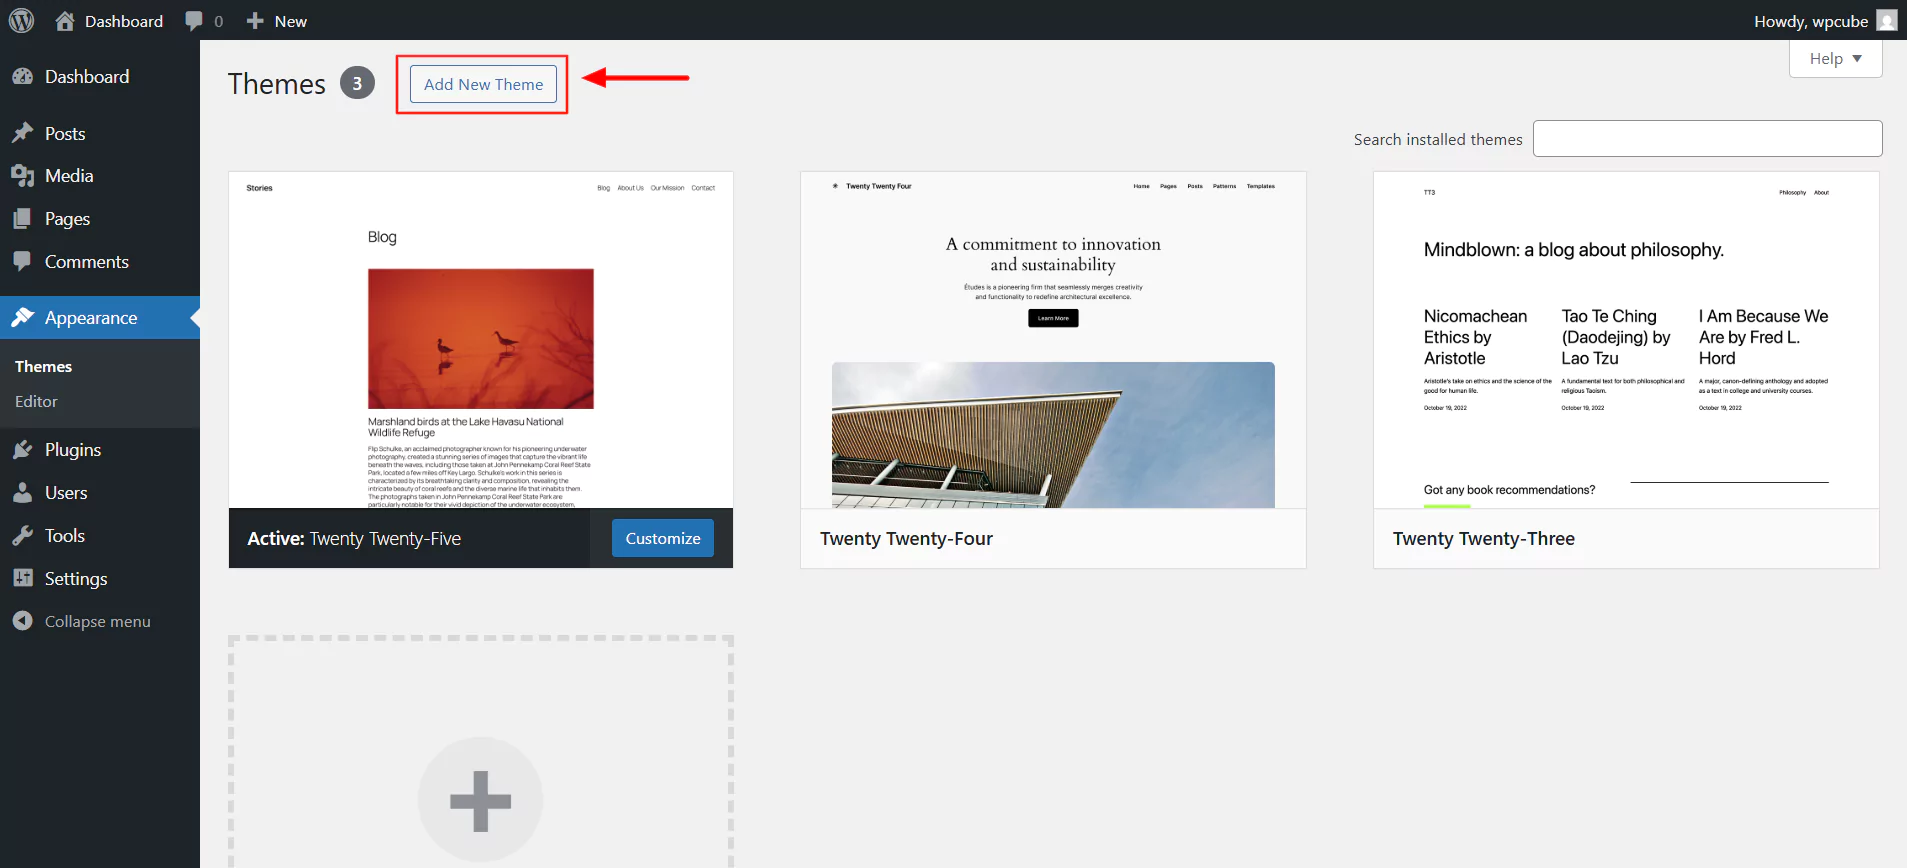
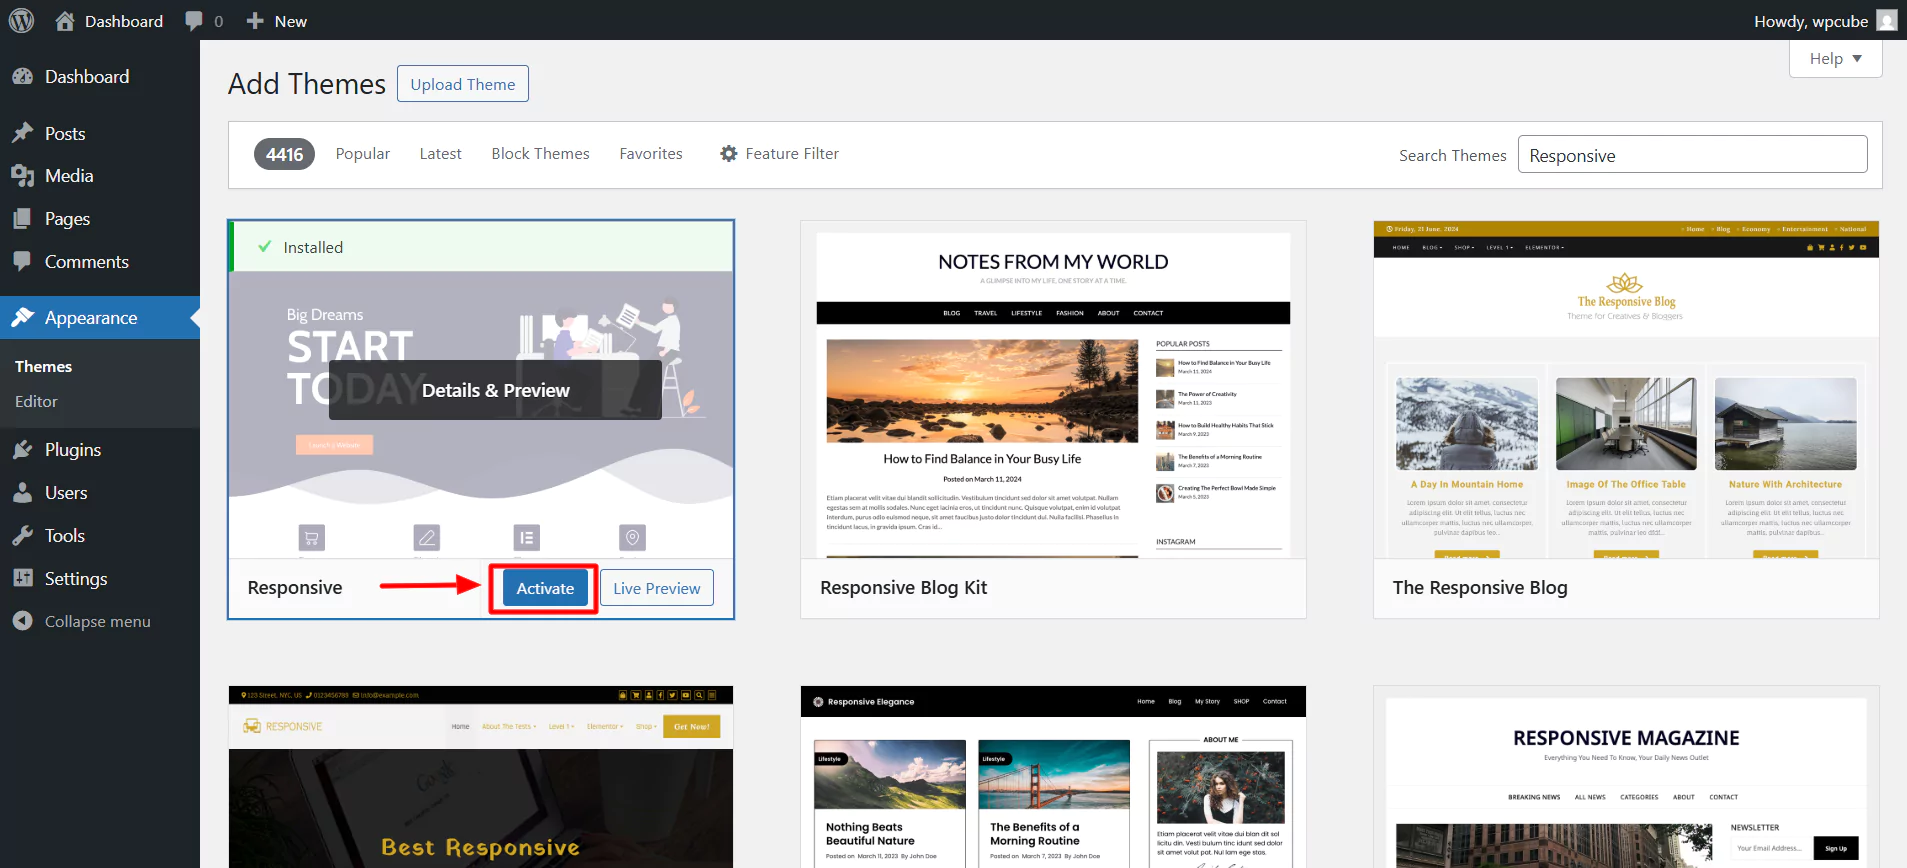
In the search bar, type Responsive and click on Install.
Next, click on Activate.
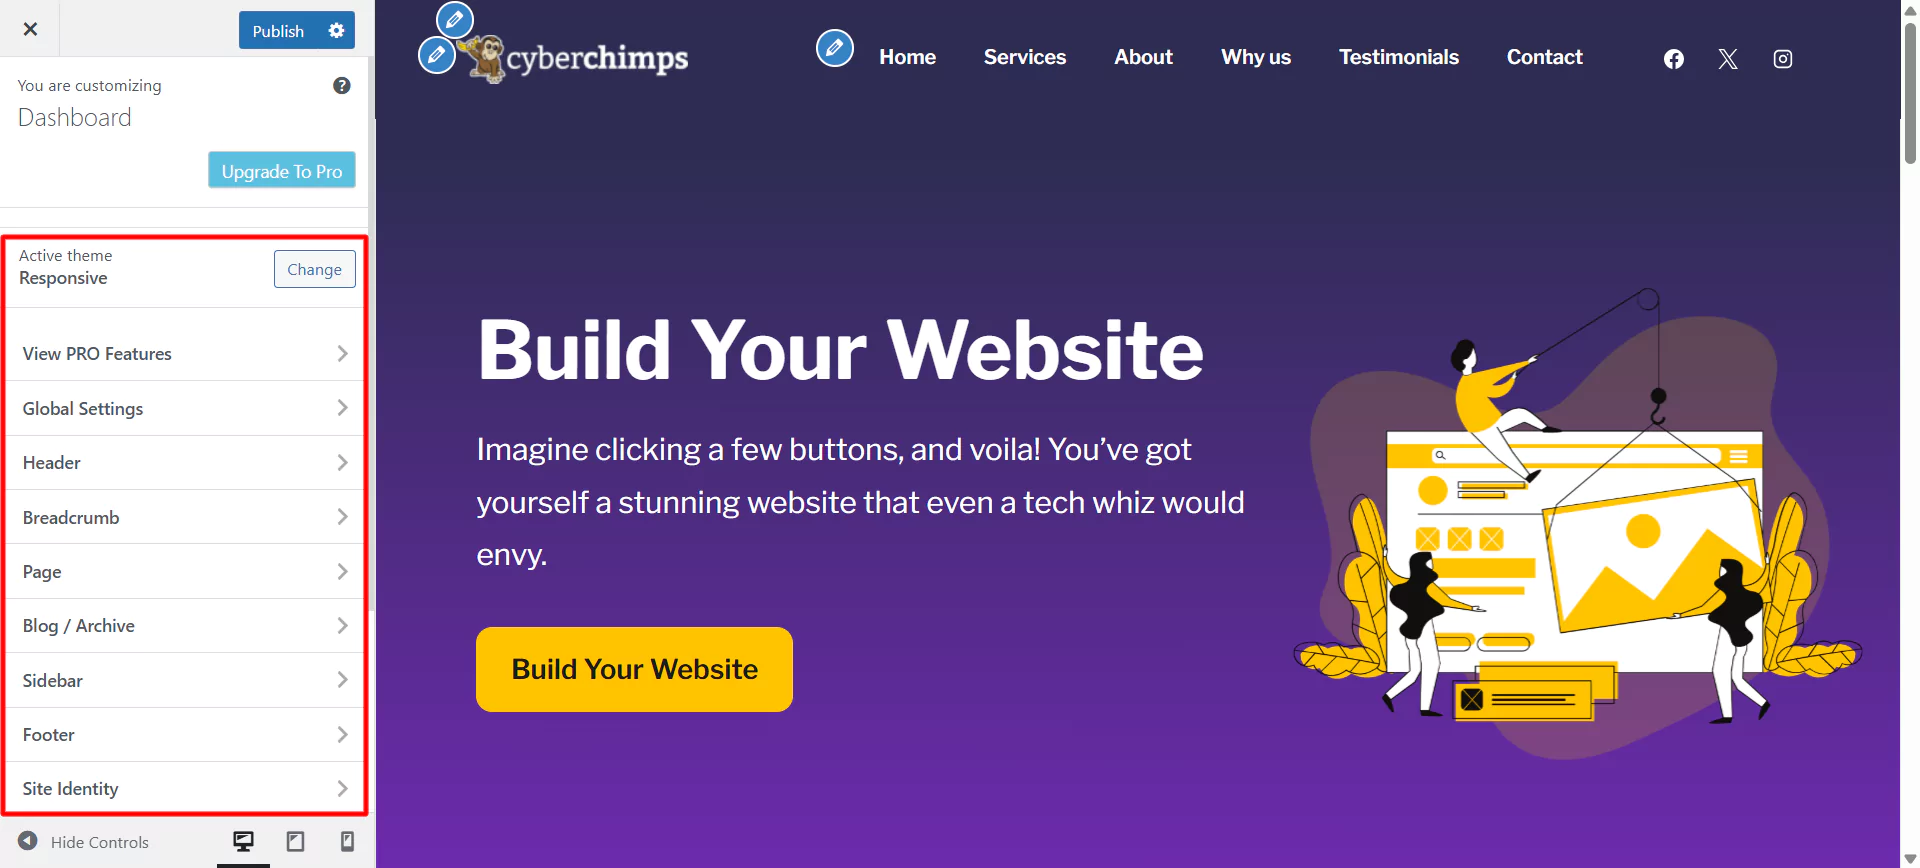
Click on Appearance > Customize.
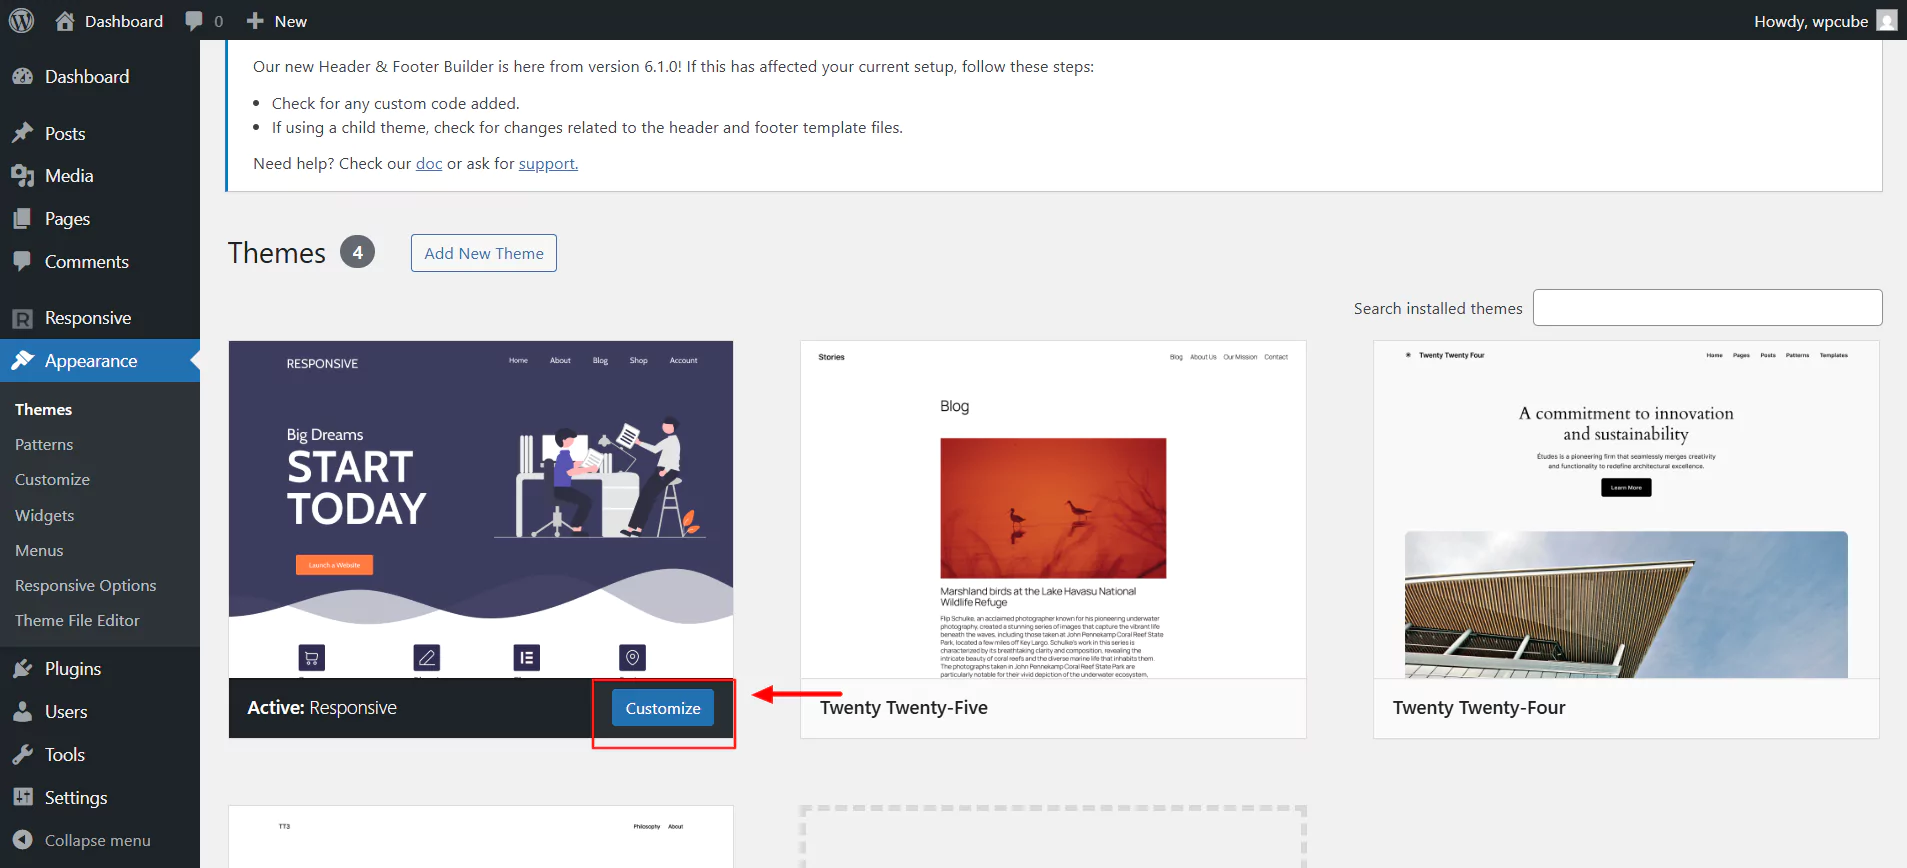
Once activated, you can now customize the website according to your needs.
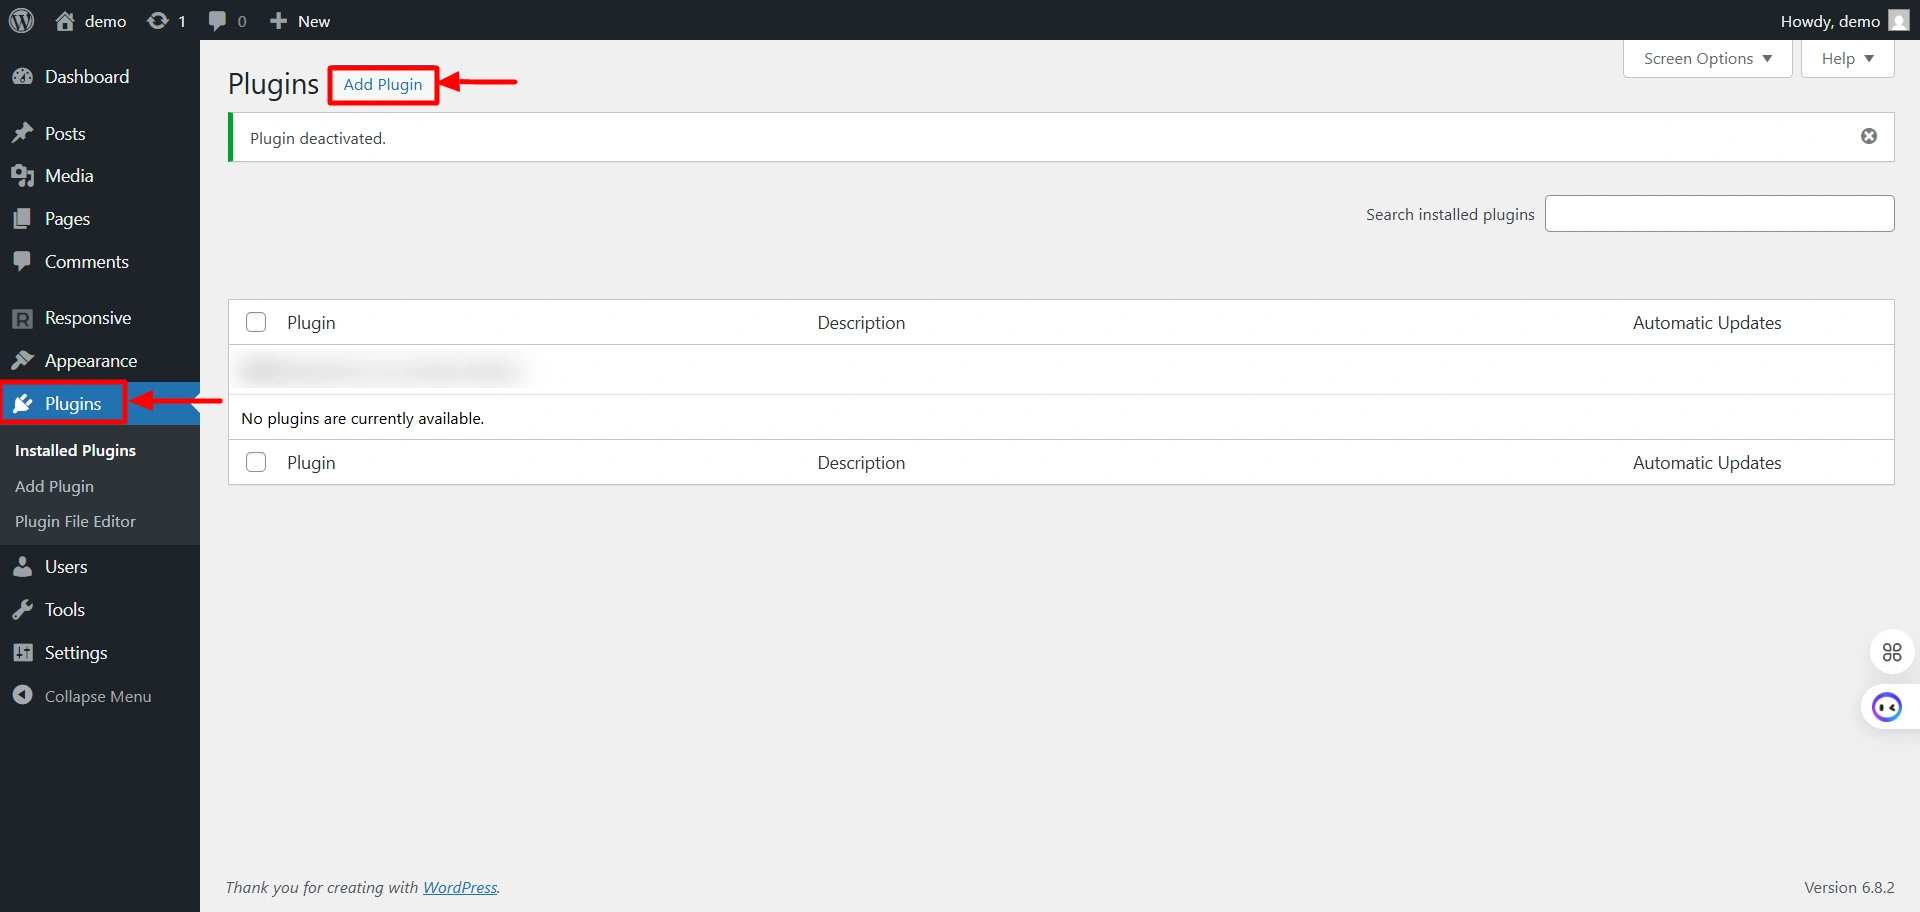
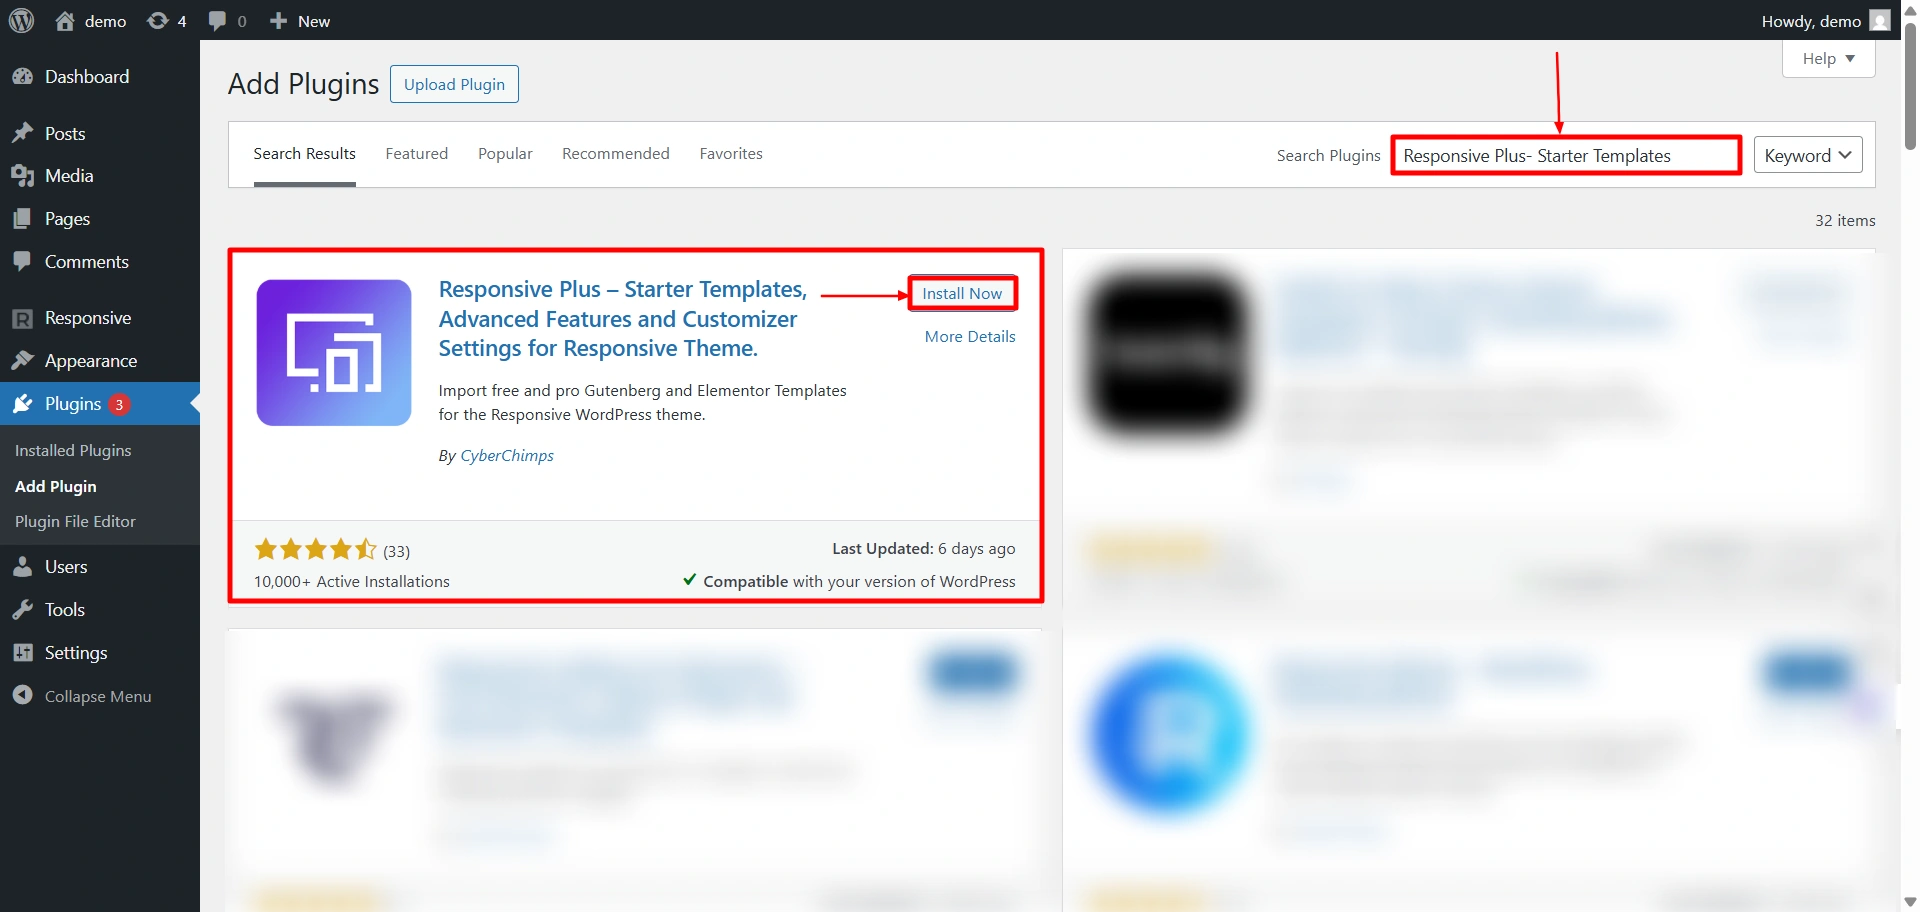
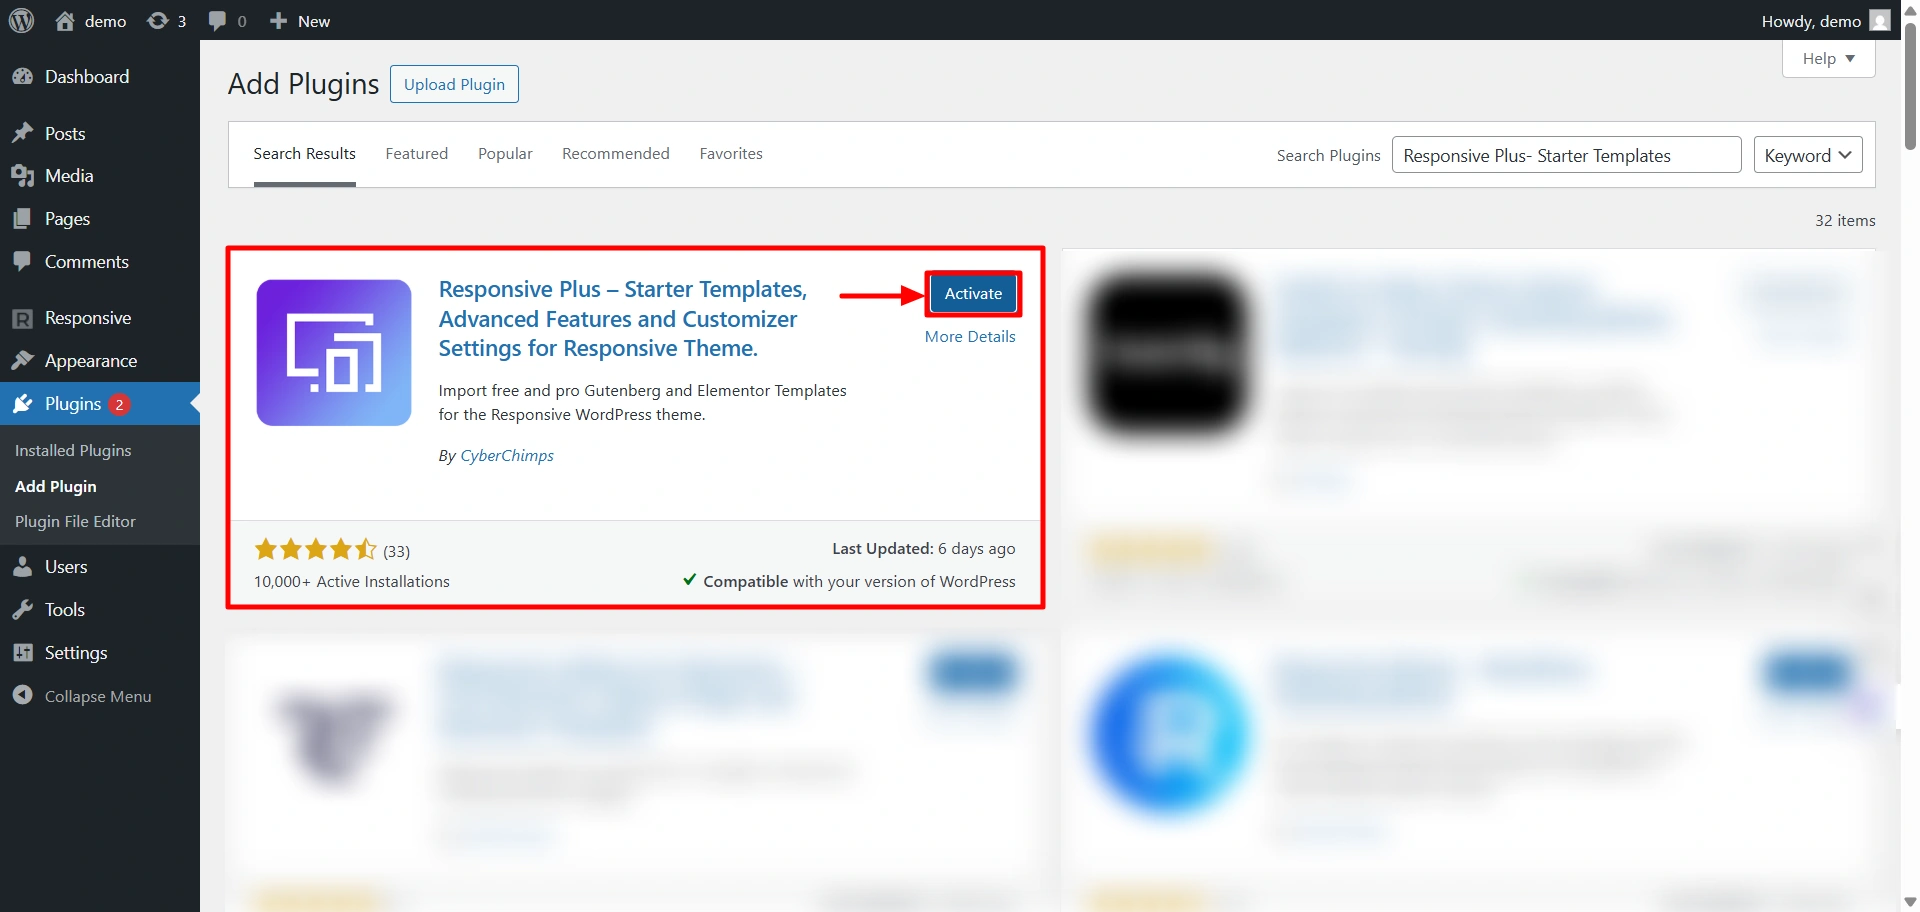
Step 4: Install And Activate Responsive Plus – Starter Templates plugin
To import a business website, all we need is a plugin called the Responsive Starter Plus- Templates plugin.
Follow these steps to install the Responsive Plus – Starter Templates plugin.
Select plugins and click on the “Add Plugin” button.
Search for “Responsive Plus – Starter Templates” in the search bar option and click on the “Install Now” button to install the plugin.
Next step is to activate the plugin. To do so, click on the “Activate” button.
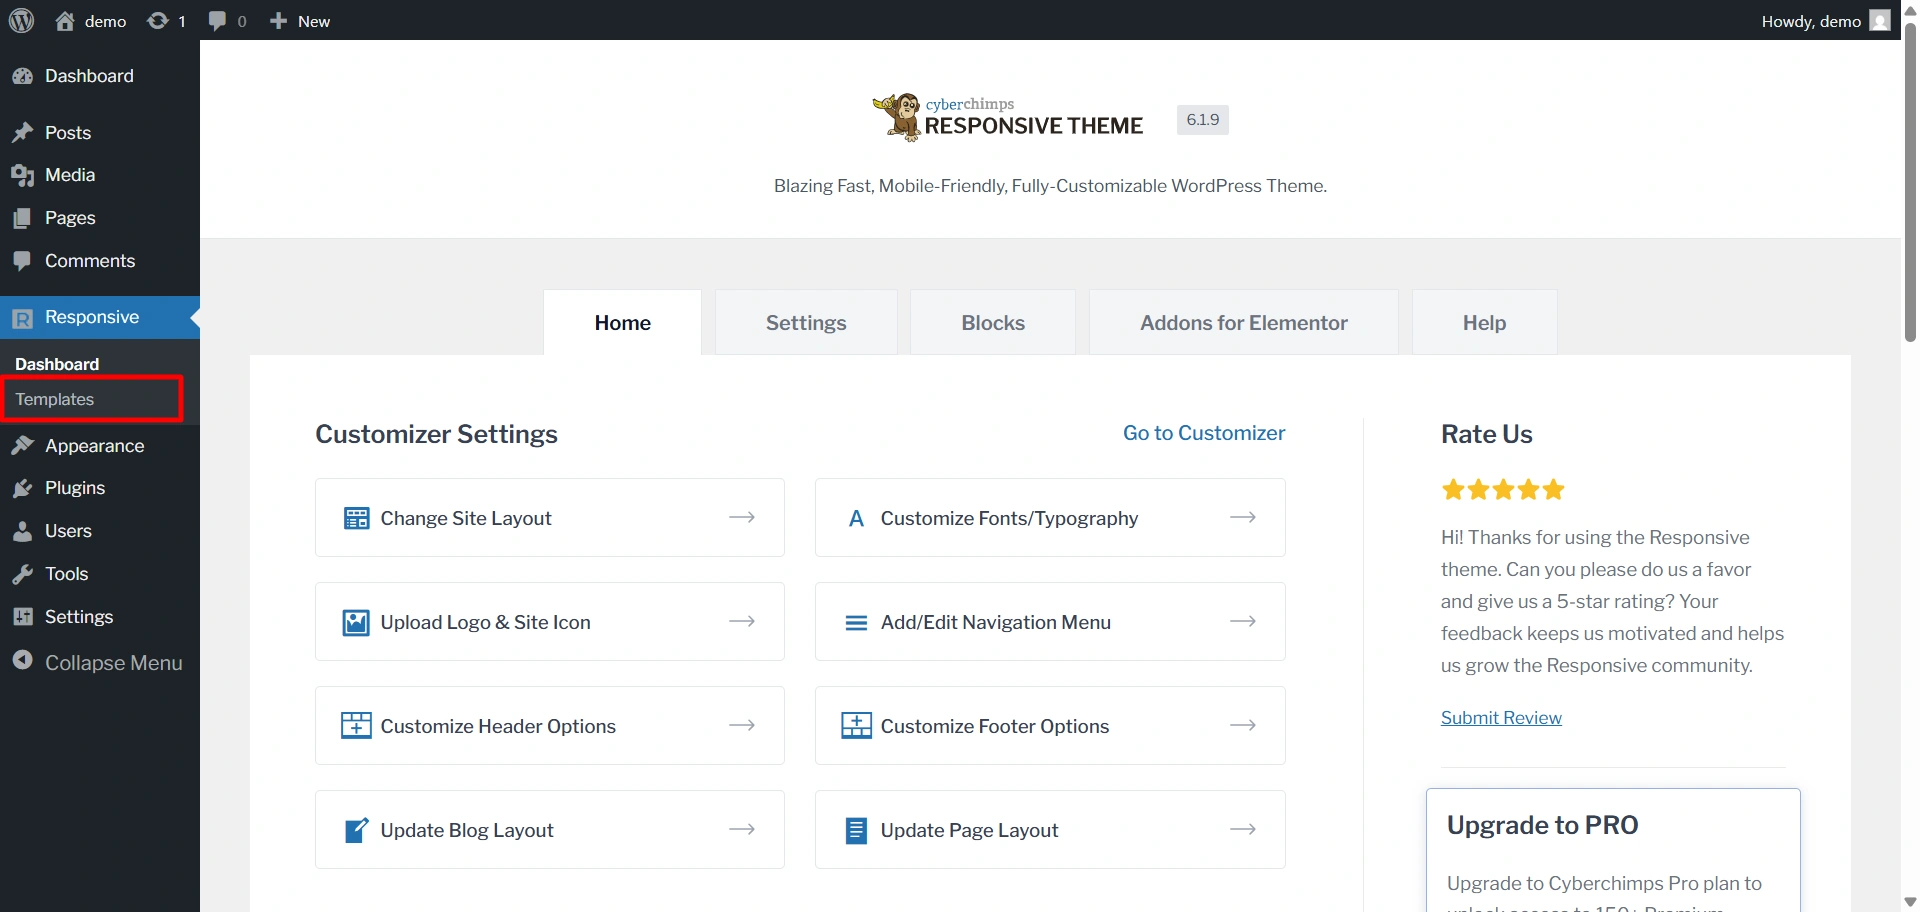
Step 5: Install Business Template
The next step in the process is to import the business template from the plugin.
Steps to follow to import the business template:
Hover on Responsive and click on the “Templates” button.
Search for “Corporate Business” in the search bar option and click on the “Corporate Business” template.
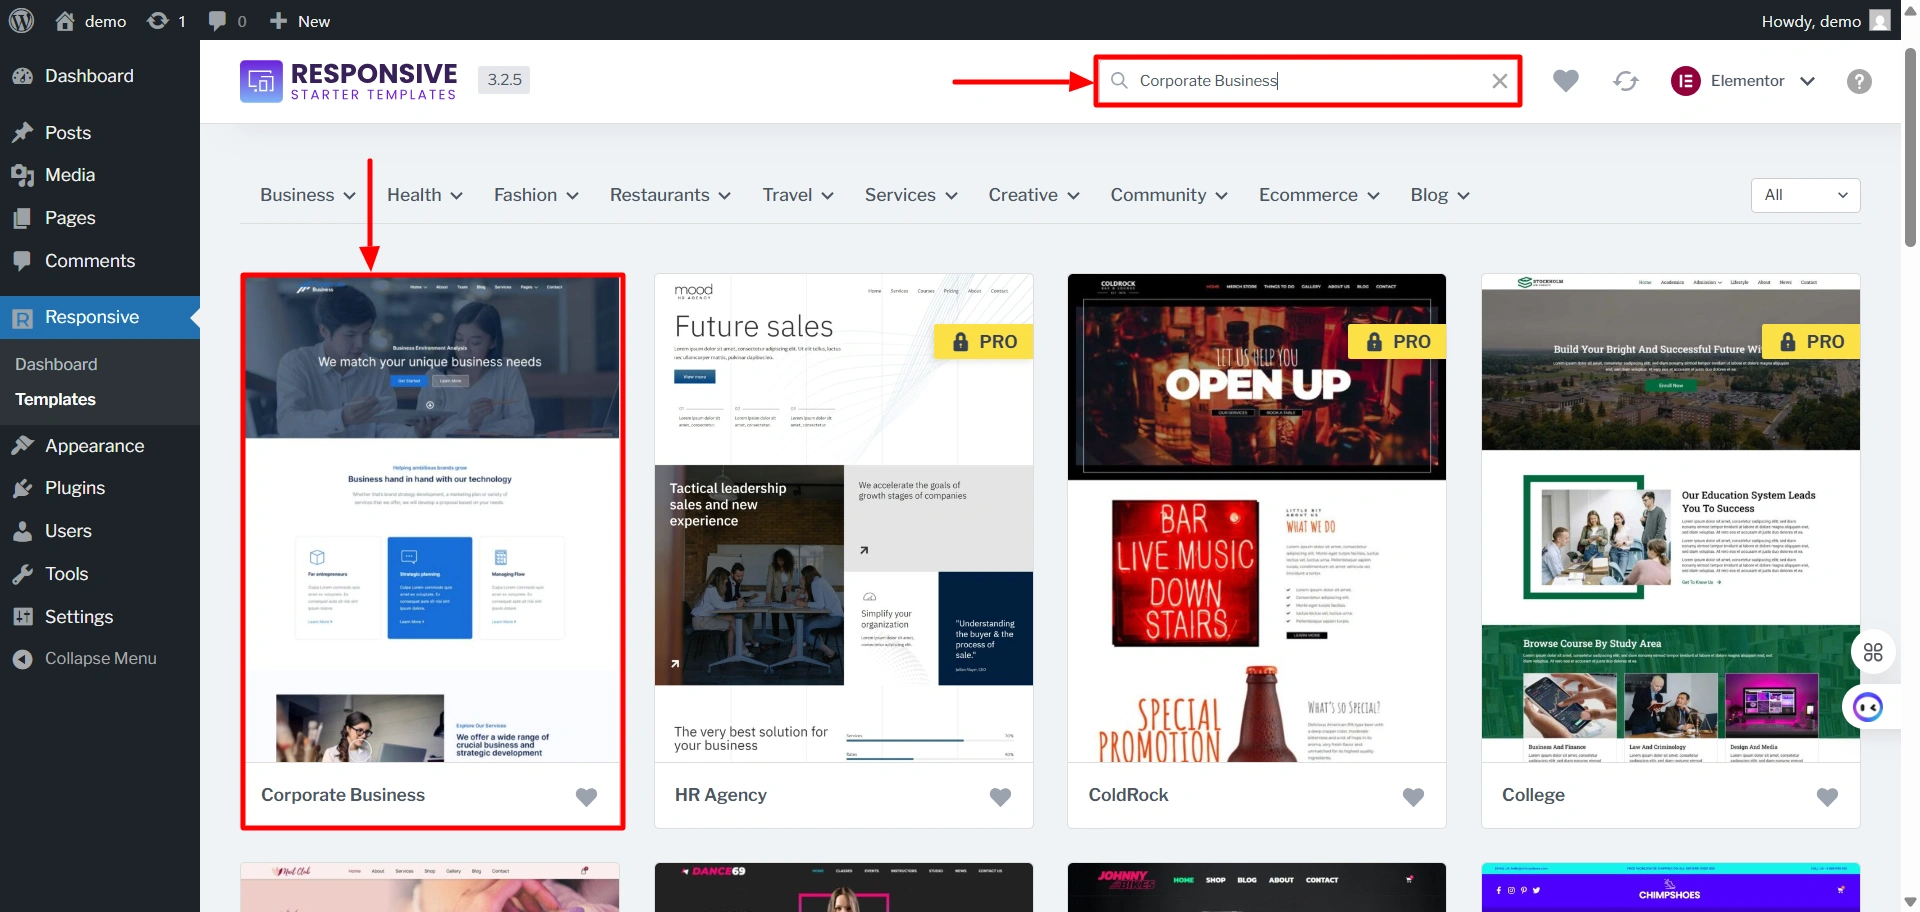
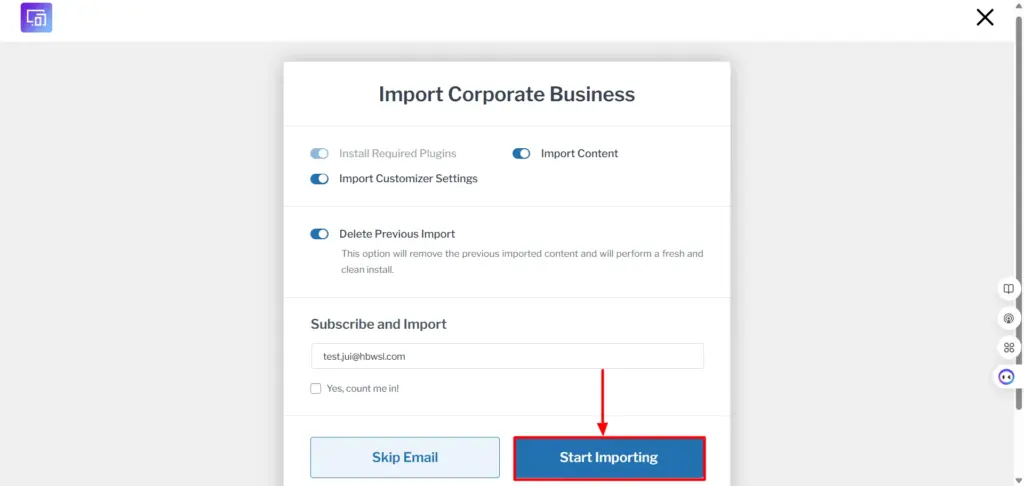
Click on the “Import Site” button.

Click on “Start Importing” and wait for a few seconds to import the template.
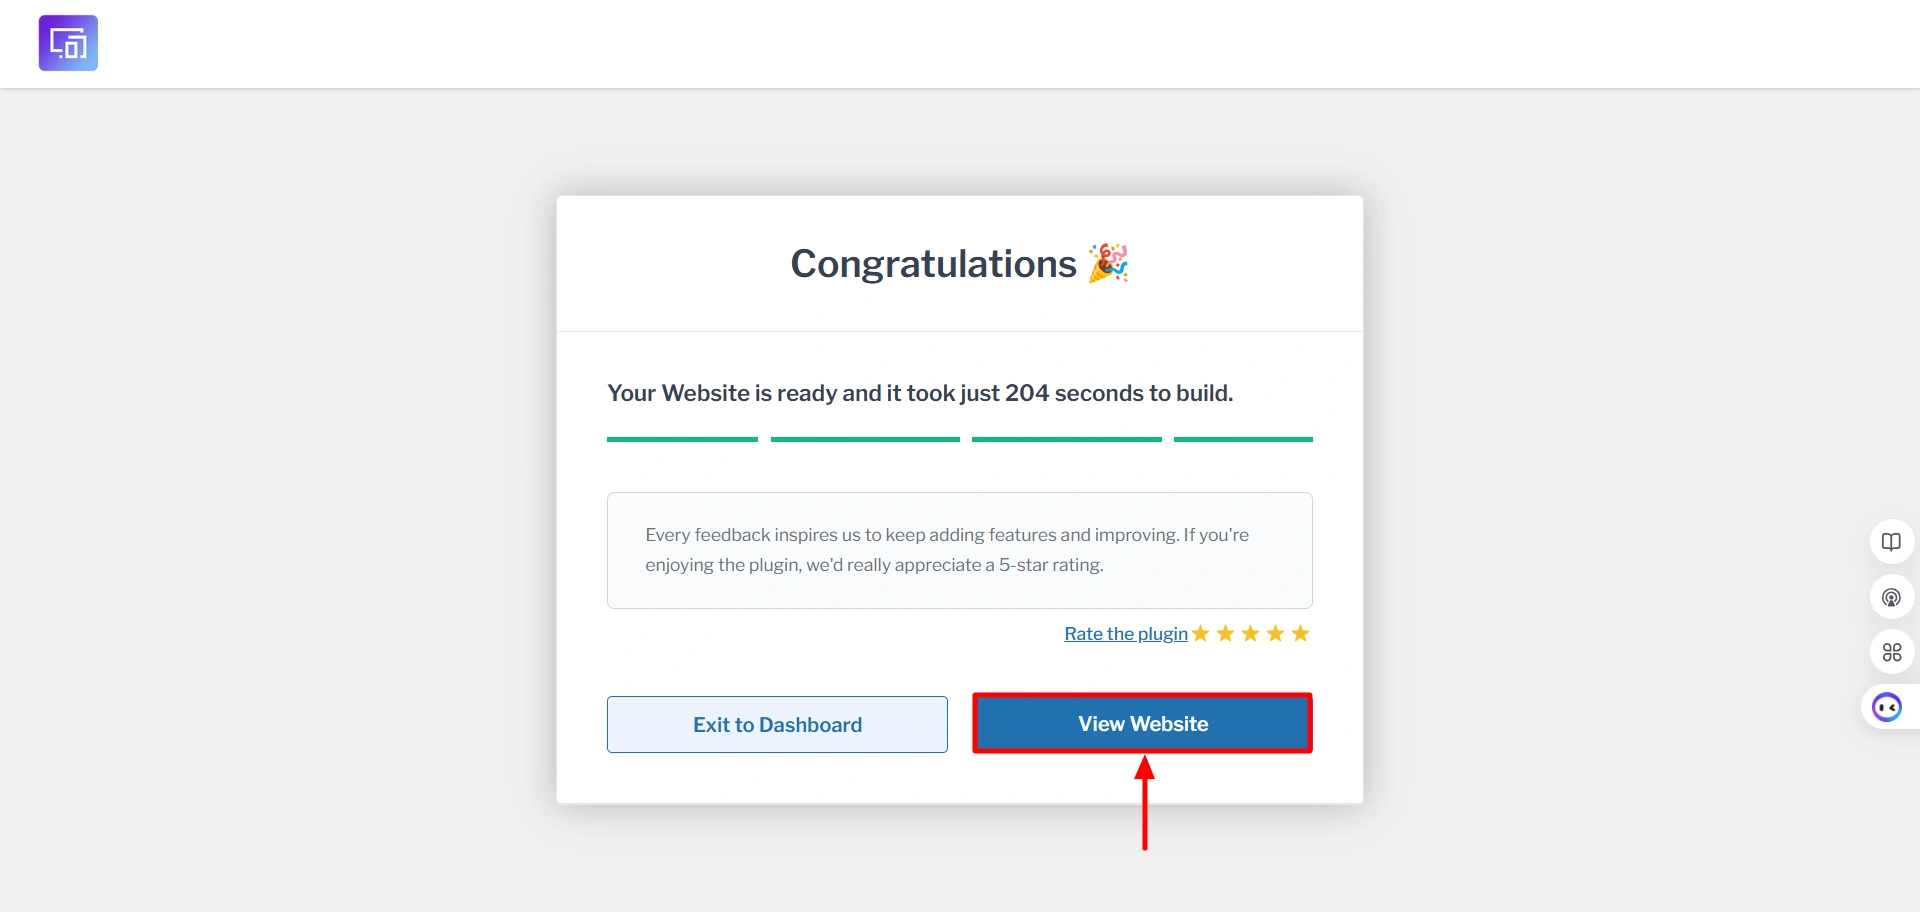
Finally, click on the “View Website” button to view your imported site.
Once you have launched, your business website will look like this and you can edit the site if you want by clicking on “Edit Page“.

Step 6: Adding New Pages to Your Website
Now that you have installed a template that represents your business, you are all set to add new content to your website.
In this section, we will look at how to add new pages and posts to your website.
Adding new pages to your WordPress site is a cakewalk. Click on Pages > Add New on the left pane of your dashboard, and you’ll see a screen like this:

(Note: Don’t worry if the text editor looks slightly different in your CMS. It will have the same functionalities as the one shown above.)
You can add content in the text editor, and your page will be live when you hit the Publish button located in the top right corner.
Now, let’s look at the 4 must-have pages on your website:
Homepage
The homepage is the first page users will see when they land on your website. So make sure you set up your homepage so that it makes a strong first impression!
Your homepage should ideally give a sneak peek of your business. Talk about what you do, your USP (Unique Selling Proposition), contact details, and your offerings briefly.
Products/Services Page(s)
This page is your sales pitch. Talk extensively about your products or services. If you sell multiple products or offer different services, create multiple pages for each product/service depending on the requirement.
At the end of each page, do not forget to add a call to action button to purchase the product or to get in touch with you to learn more details about the offerings.
About Us Page
Buyers are curious to know more about the brand they’re doing business with. Use this opportunity to tell the world about what your business stands for.
Talk about your vision, mission, values, and how dedicated you are to serving your clients.
Contact Us Page
Visitors need to know how to get in touch with you. The Contact Us page serves this purpose.
Mention your business hours, the physical address of your business, phone number, email address, and other applicable contact details.
Depending on your requirement, you can add additional pages. Also, if you are keen on starting a blog to talk about your products, business, or looking to help your customers solve their problems, you can add Posts similar to Pages.
Step 7: Setting Up a Navigation Menu
Once you have added a few pages to your website, it is necessary to make them easily discoverable for your website visitors.
Setting up a navigation menu at the top of the page helps us do that.
To set up a navigation menu, follow the steps below:
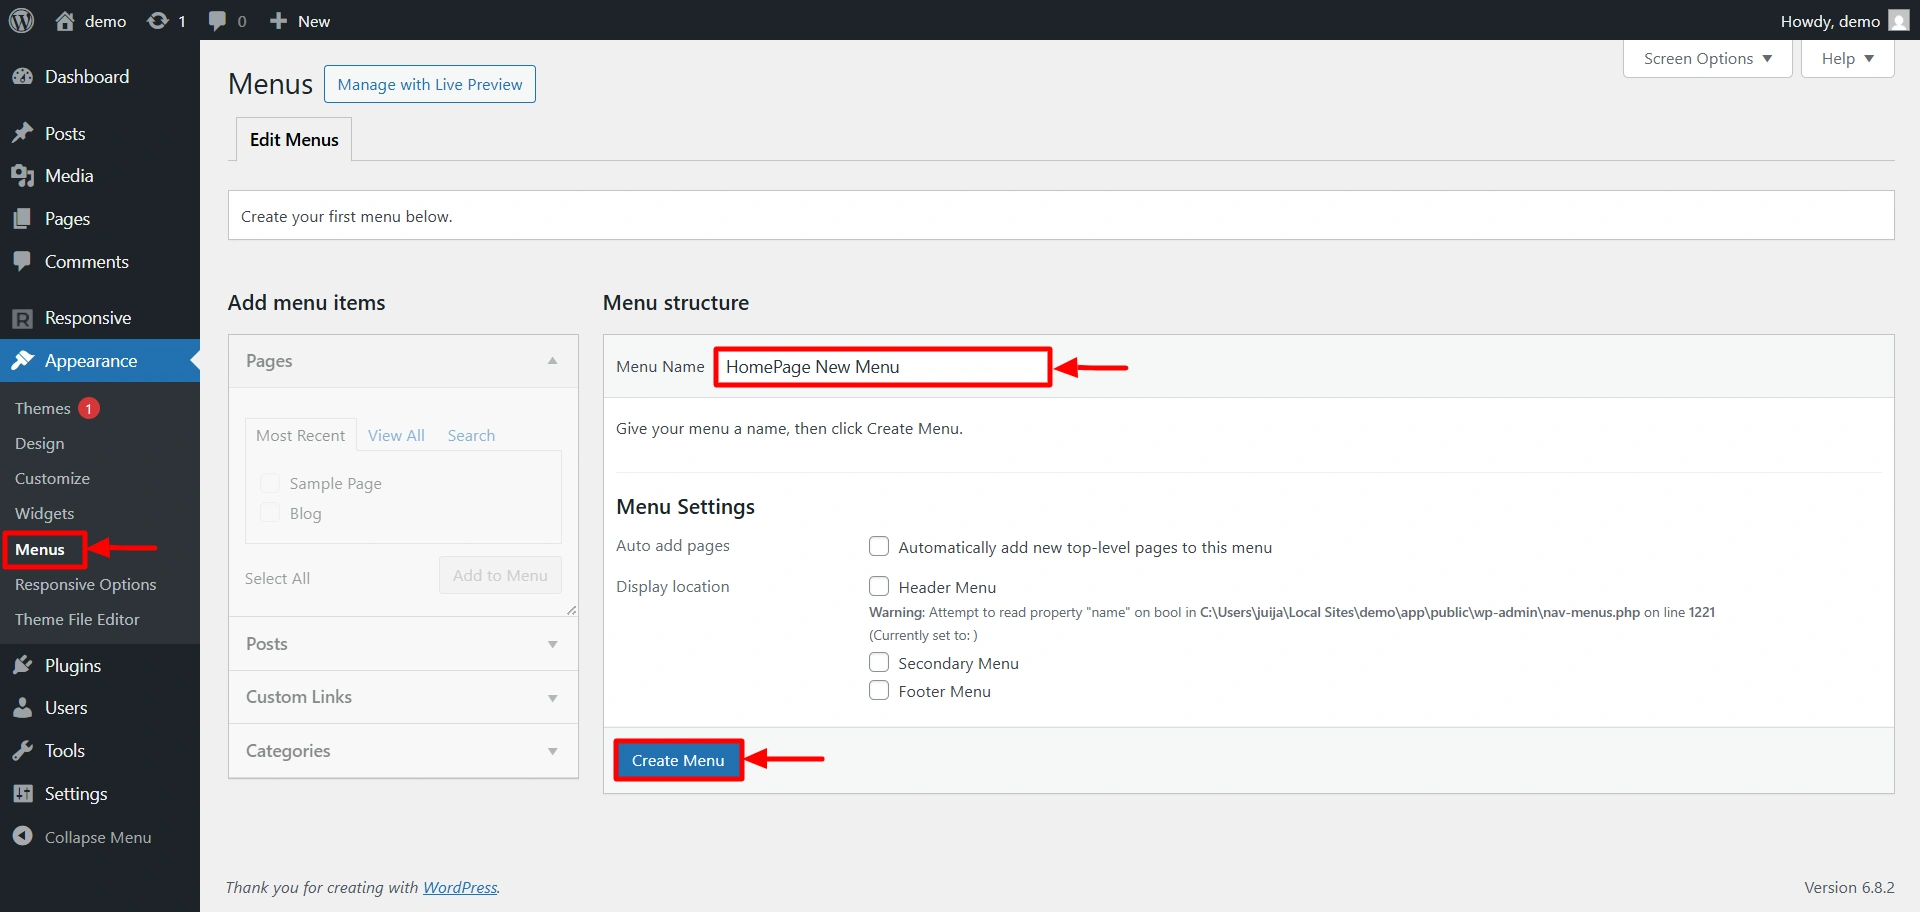
- Go to Appearances —> Menus
- Click on Create a new menu
- Type in the name of your menu in the Menu Name text box
- Click on the Create Menu button
Once you create your menu, you can add pages, categories, or external links to it as below:
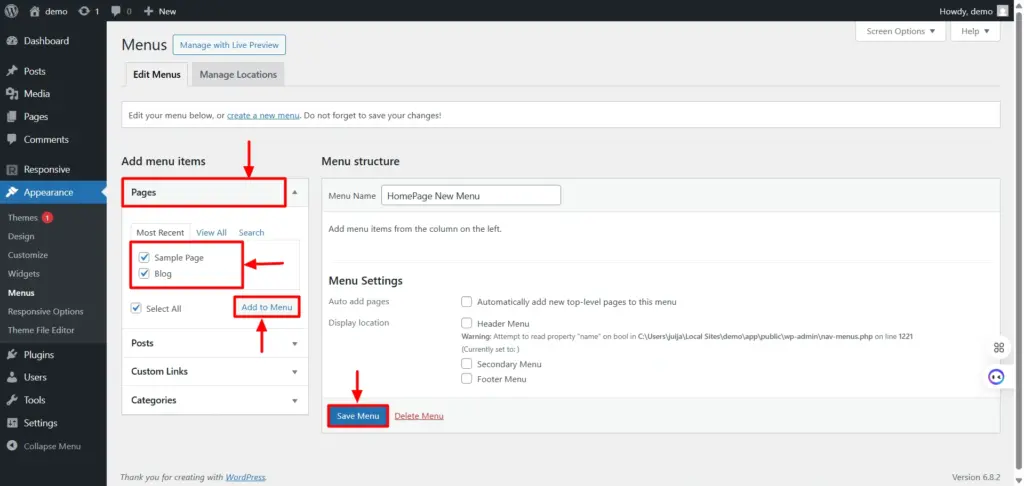
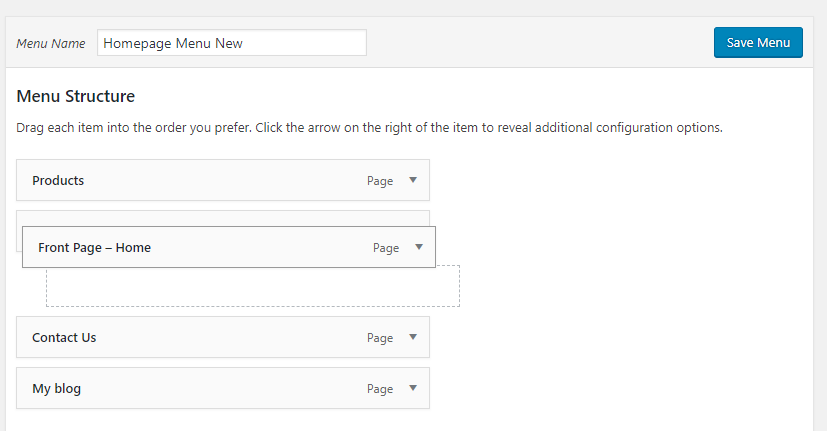
Once you add menu elements, you can drag and drop to rearrange their order. And once you’re done, hit Save Menu:
After saving the menu, perform the following steps to set it as your primary menu:
- Click on the Manage Locations tab
- From the Primary Menu drop-down, choose the menu of your choice
- Click on Save Changes
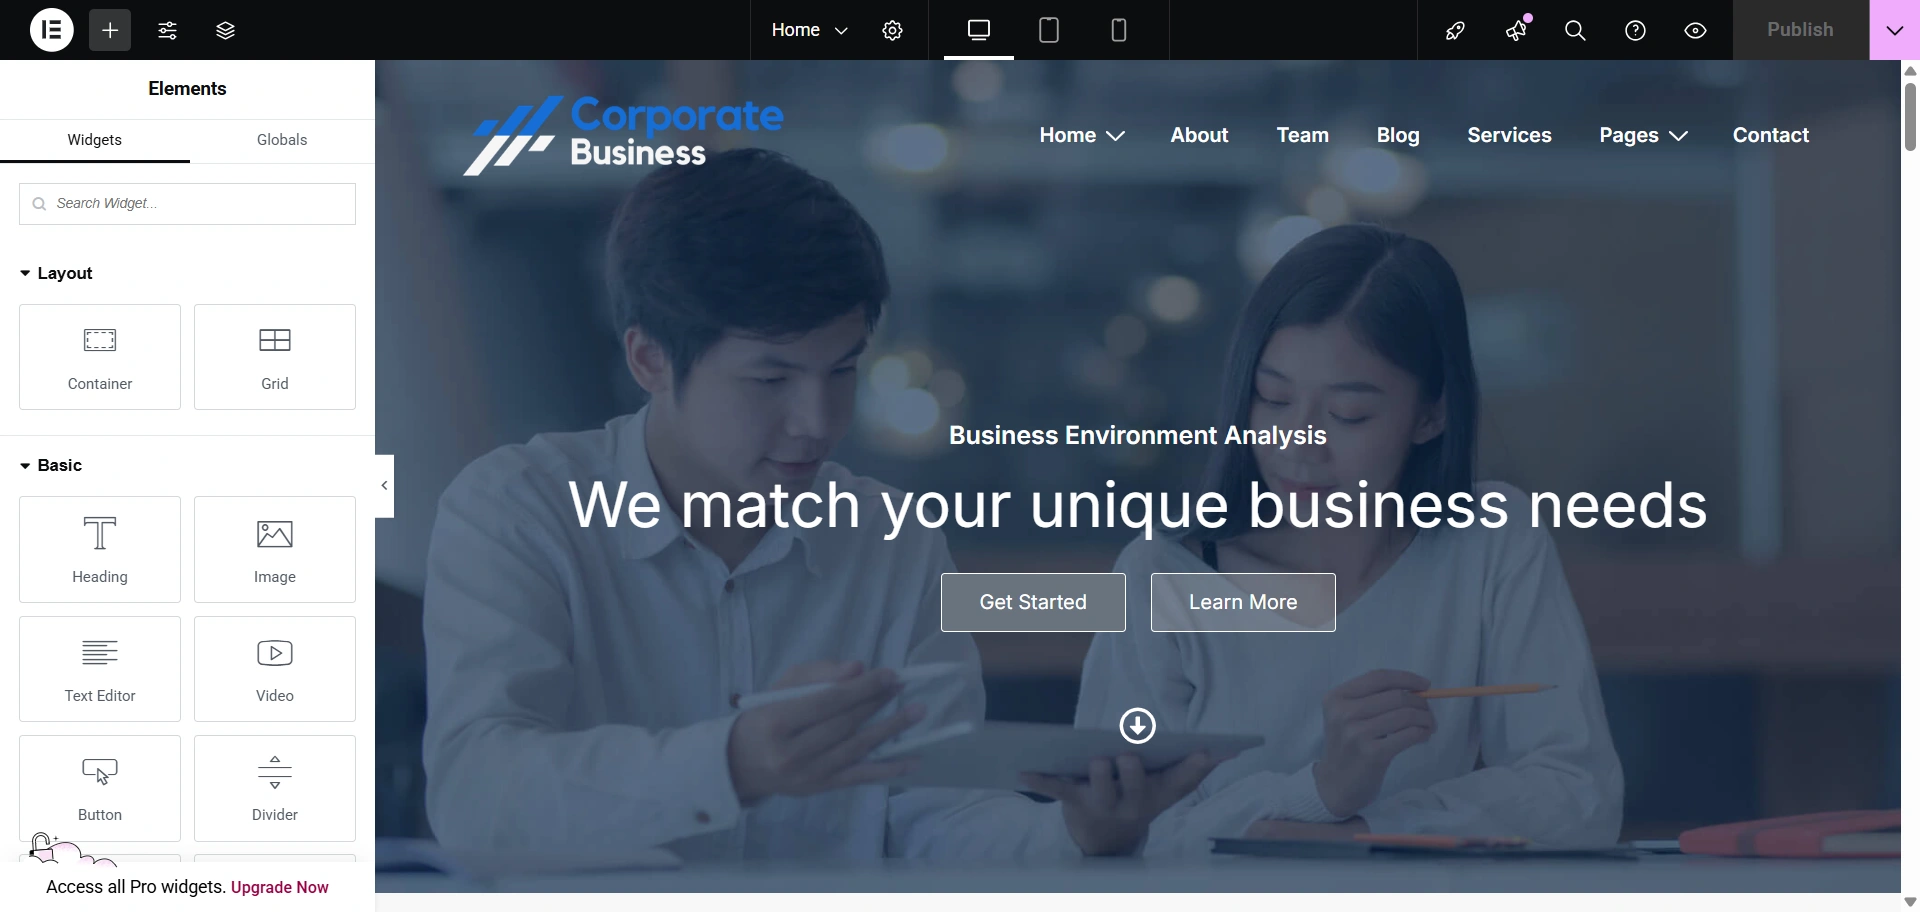
Step 8: Edit Your Content with Elementor
Once you have customized the menus, it’s time to edit the main content of your website. To do this, all you have to do is follow these steps.
- Click on “ Edit with Elementor. “
- You get plenty of customization options for your website, like the typography settings, images, videos, buttons, and much more.
Find the “Image ” widget and click on it.

Place the widget where you want.

Select an image of your choice.
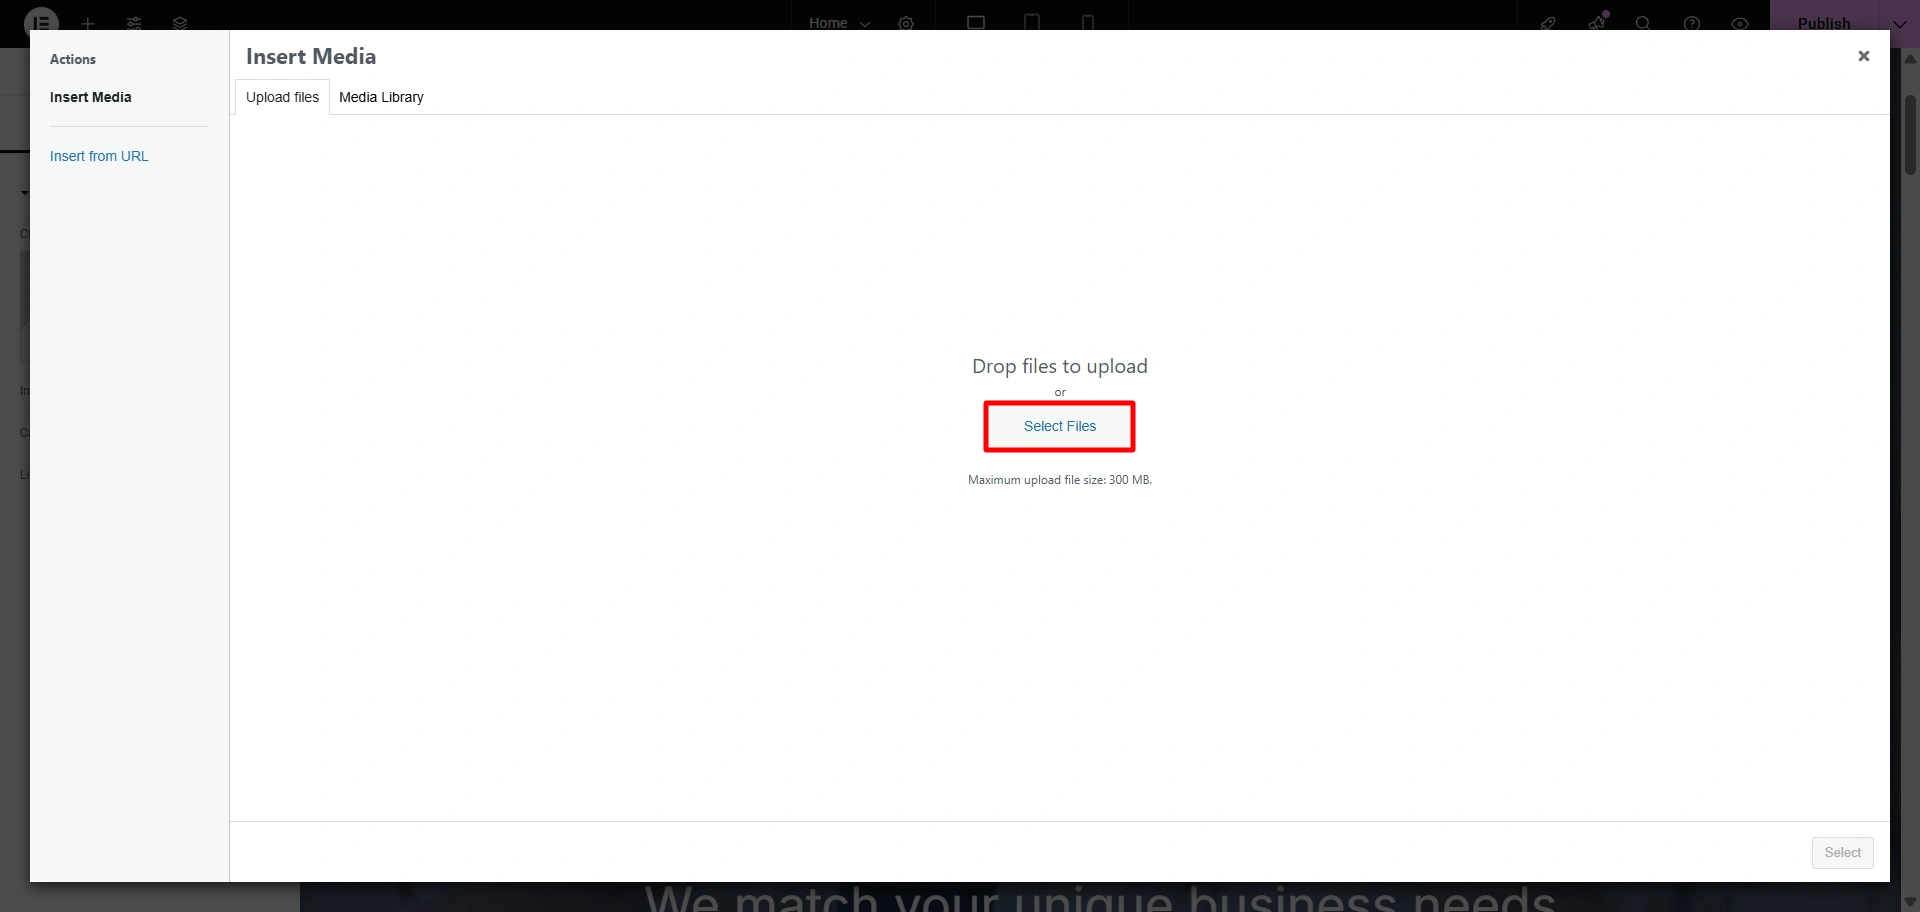
Upload the image by clicking “Select“

There you go! You have successfully added an image.

Step 9: Publish Your Business Website
Once you have customized, click on the “Update“ button. Your business is now live, and enjoy the responses.

FAQ
There are a lot of themes that help build stunning business websites. One such popular theme is the Responsive theme by Cyberchimps. It’s fast, SEO-friendly, and helps build a website in just a few clicks.
Absolutely! Most of the Cyberchimps themes are WooCommerce-ready, allowing you to set up your online store, manage inventory, and payments with just a few easy steps.
Yes, all Cyberchimps themes are fully responsive, meaning your website will look great on all devices.
Final Thoughts
Creating a business website using WordPress does not have to be overwhelming or costly. With WordPress and its user-friendly tools, you can design a responsive, fast, and feature-rich website without knowing how to code.
Taking reference from the above guide, you can choose the right theme for your niche and customise the layout by adding essential plugins. Each step takes you closer to building your website.
Moreover, businesses should prioritize creating engaging content, incorporating images, videos, and other elements to captivate visitors on their site. It’s also essential to optimize the website for search engines and mobile devices to enhance visibility and attract a broader audience.
With the Responsive theme, creating a business website becomes easy, as it provides speed, high performance, SEO optimisation, and aesthetics with just a few clicks
Hope you enjoyed reading this article. Do read our other similar articles:
Are you already planning on creating a business website? Grab Responsive now!