Summary
The article explains how to create a medical website with WordPress. It defines steps like choosing hosting and a domain, installing WordPress, and selecting a medical-focused theme.
It also highlights adding key pages like services, doctor profiles, contact forms, and customization tips. Helping readers build a professional and trustworthy online presence for a medical practice.
Are you looking to create a medical website for your healthcare services?
Research shows that patients prefer to book online appointments or even look for a doctor’s information before going for a consultation. Did you know 5% of all Google searches are health-related?
With the evolution of the internet and the entry of tech giants like Uber and Amazon,(among others!) consumers today are looking for alternatives that can complete their basic errands online. So not having an online presence for any kind of business, be it a healthcare unit is no longer an option.
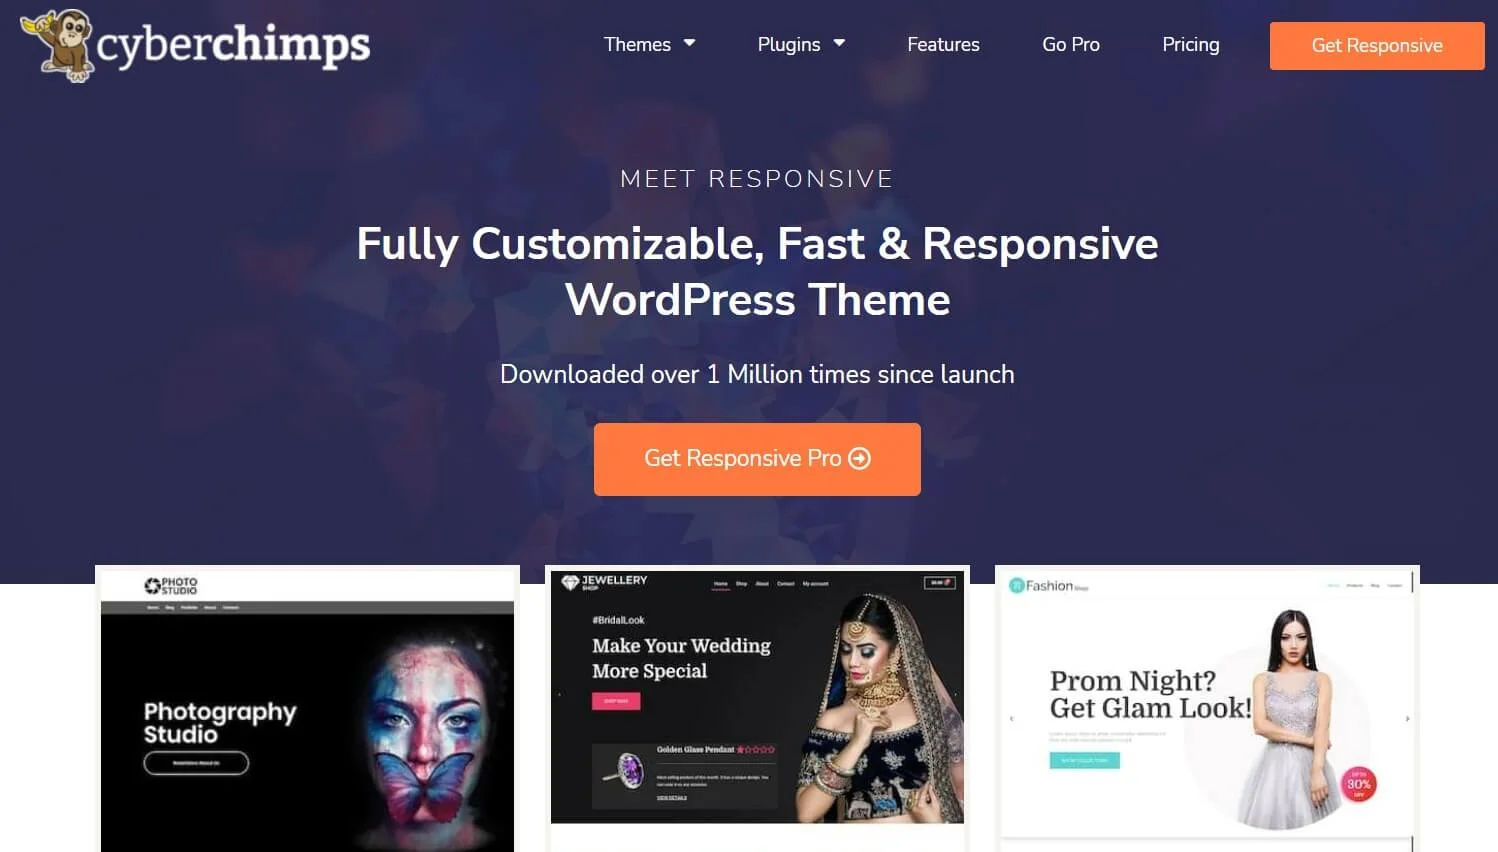
Building a website can be a bit overwhelming, but the good news is there are so many affordable, user-friendly website creation tools for you. Here’s a quick guide to launching your free medical website within minutes! For the purpose of this article, we have used the Medical WordPress theme that comes with the free responsive theme.
Read on…
- Create a Medical Website Using WordPress (Step-by-Step)
- Step 1: Choose a Hosting Provider and Domain Name
- Step 2: Install WordPress
- Step 3: Install & Activate Responsive Theme
- Step 4: Install Responsive Starter Templates Plugin
- Step 5: Import Doctor Template
- Step 6: Launch your Website
- Step 7: How to change the logo of your medical website?
- Step 8: Edit With Elementor
Responsive Starter Templates is the best plugin to import Website Templates – Get it for free.
Create a Medical Website Using WordPress (Step-by-Step)
Creating a website for your medical practice is essential in today’s digital age. It can help you reach out to potential patients, build an online presence, promote your medical services, provide information about your services, and establish your brand.
In this blog post, we will guide you through the process of creating a doctor’s website using WordPress, step by step.
Step 1: Choose a Hosting Provider and Domain Name
Choosing a hosting provider and domain name is the first step in setting up a WordPress medical website. A domain name is a name that people will use to find your website on the internet, whereas a hosting provider is a company that offers the infrastructure and tools needed to store and serve the files for your website.
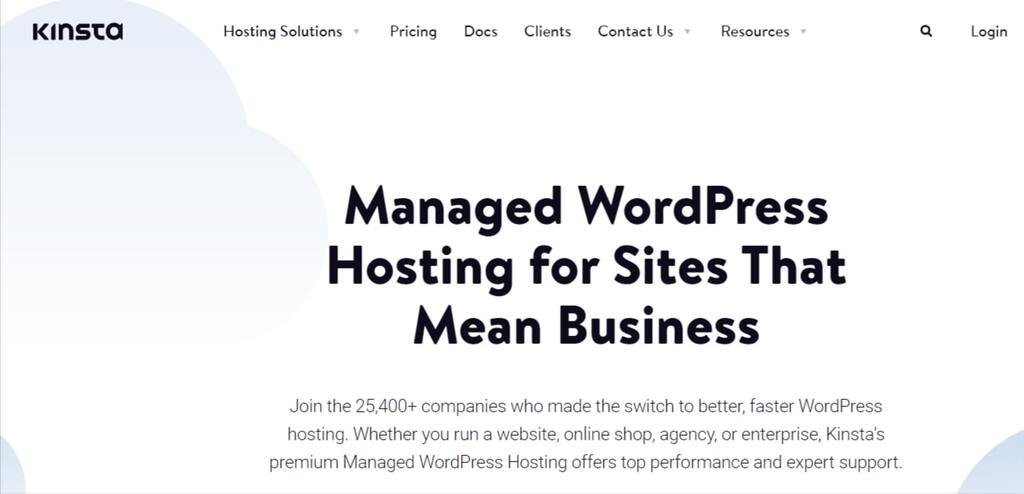
There are several hosting providers around. Based on the factors such as reliability, security, and speed we recommend using the Kinsta hosting provider.
What Makes Kinsta a Trusted Hosting Provider?
Here are several compelling reasons to consider Kinsta:
- High-performance infrastructure: Kinsta uses Google Cloud Platform, which is one of the most reliable and scalable cloud computing infrastructures available. This guarantees that even under heavy traffic, your website will load swiftly and function properly.
- Enhanced security features: Kinsta, which takes website security seriously, provides hardware firewalls, automatic backups, and DDoS protection in order to keep your website secure at all times.
- Expert support: Kinsta offers 24/7 expert support from knowledgeable WordPress developers who are on there to assist you with any problems you may run across.
- Easy to use dashboard: Kinsta’s dashboard is simple to use and browse, making it simple to manage your website and hosting options.
Overall, Kinsta’s high-performance infrastructure, advanced security features, expert support, user-friendly dashboard, and scalable plans make it a reliable hosting provider for WordPress websites.
Once you get the Kinsta hosting, you will need to register a domain name. This is the name that users will type into their web browser to access your website. It is important to choose a domain name that is easy to pronounce and is related to your business.
Step 2: Install WordPress
Once you have chosen a hosting provider and registered a domain name, the next step is to install WordPress. Kinsta provides you with a one-click installation process that makes it easy to install WordPress. Simply log into your account and follow the instructions to install WordPress.
Step 3: Install & Activate Responsive Theme
WordPress offers tens of thousands of themes, both free and premium. The layout and appearance of your website are determined by a theme, which is a pre-designed template. Choosing the right theme is crucial as it sets the tone for your website and can affect the user experience.
We’ll install Responsive theme, as it is a free modern, fully customizable, fast theme that helps you build fully functional websites with the 250+ pro and free ready-to-import demos. The theme is easy to use and customize.
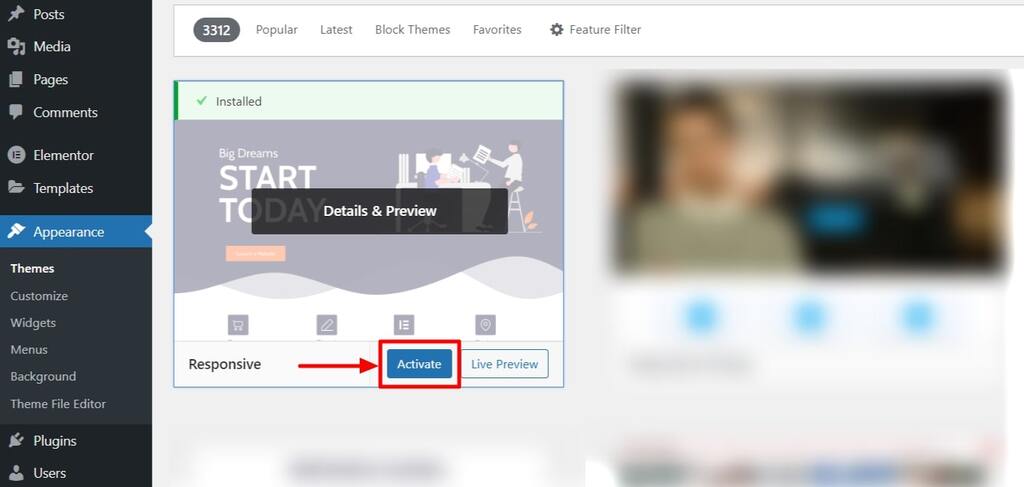
How to Install Responsive Theme
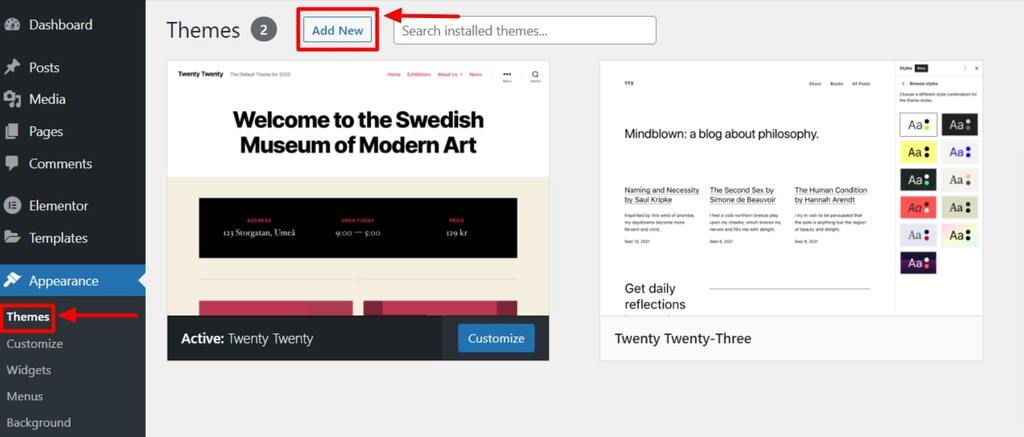
Once you have downloaded the theme, log in to your WordPress Dashboard.
Go to Appearance > Themes > Add New
Type “Responsive” in the search bar option given above.
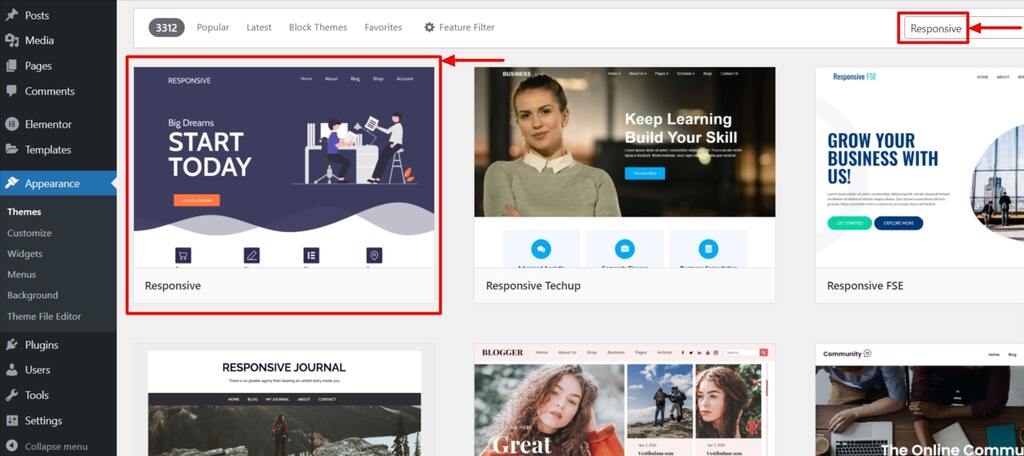
Click on “Install” to install the free Responsive theme.
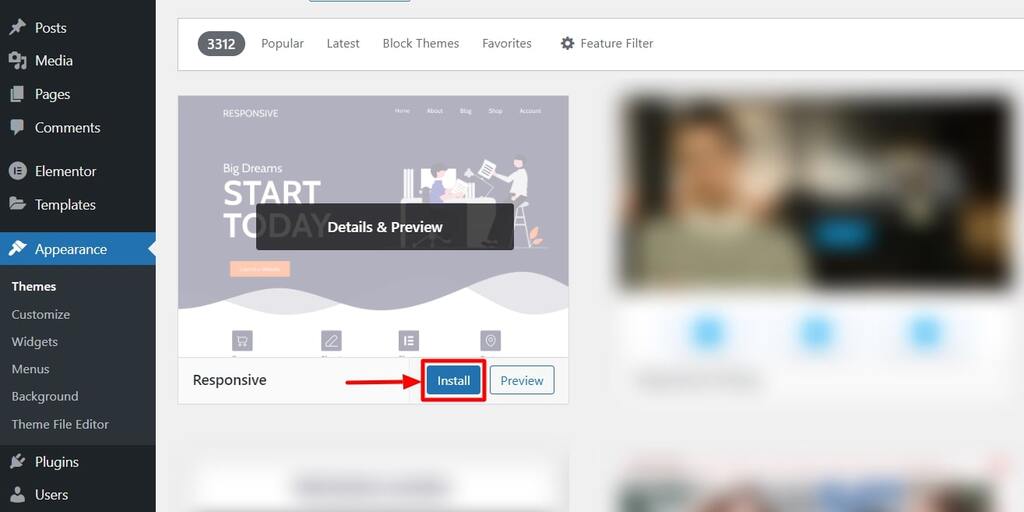
Click on the “Activate” button to activate the Responsive theme.
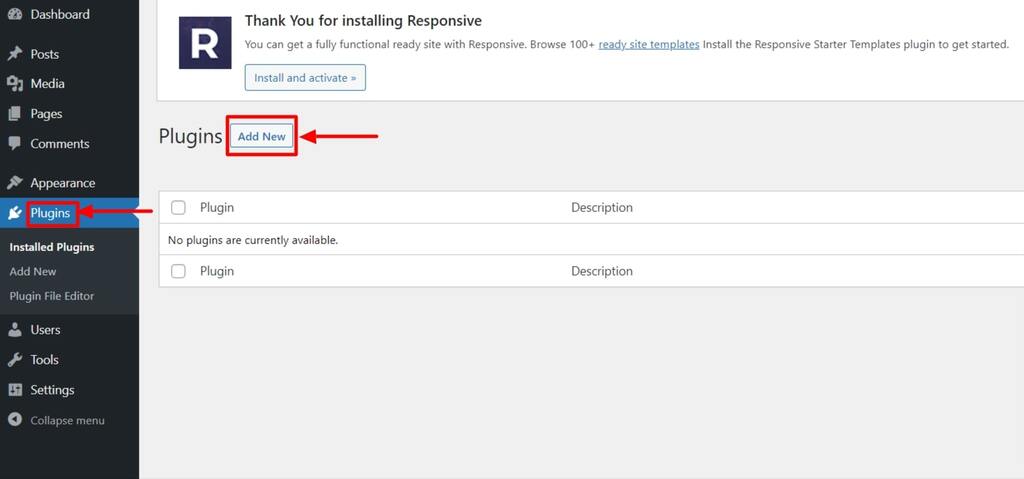
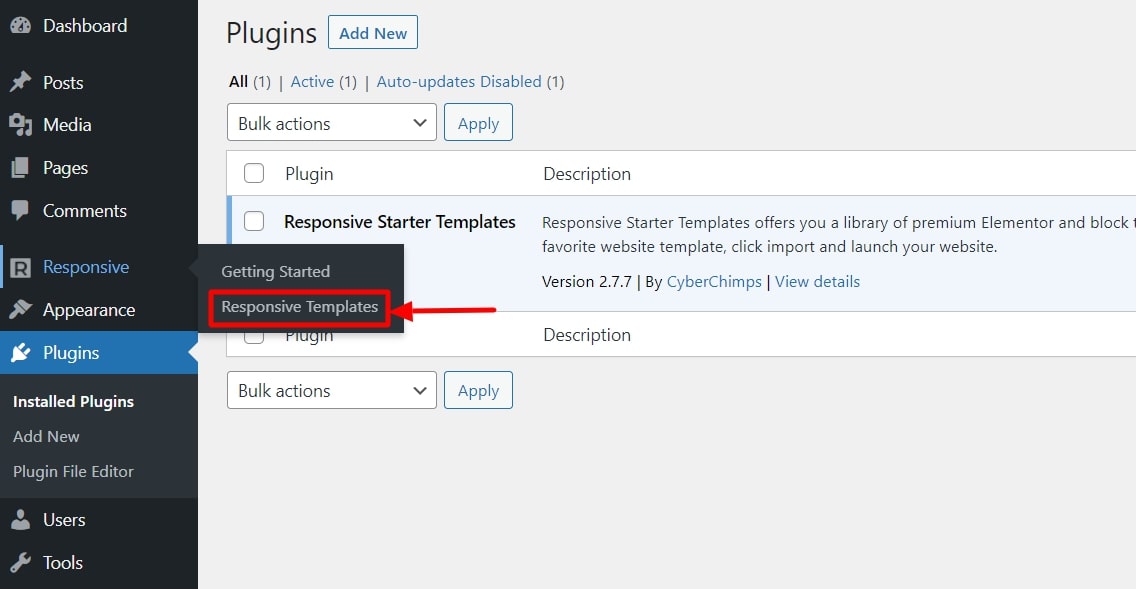
Step 4: Install Responsive Starter Templates Plugin
Responsive theme comes with 250+ pro and free templates that have been created for any kind of business niche. In order to create your free medical website, you need to import the demos with the help of a free plugin. You can find CyberChimps’ Responsive Starter Templates plugin in the WordPress repository.
After you have downloaded the plugin:
Open your WordPress Dashboard and go to Plugins > Add New
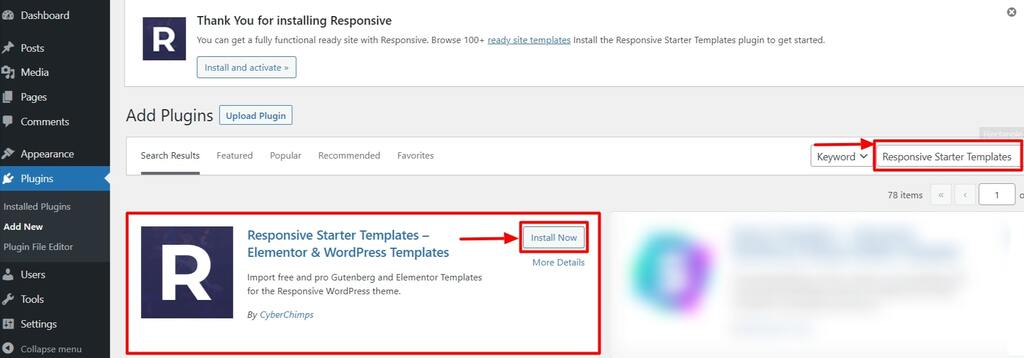
In the search bar option, look for “Responsive Starter Templates” and click on the “Install Now” button.
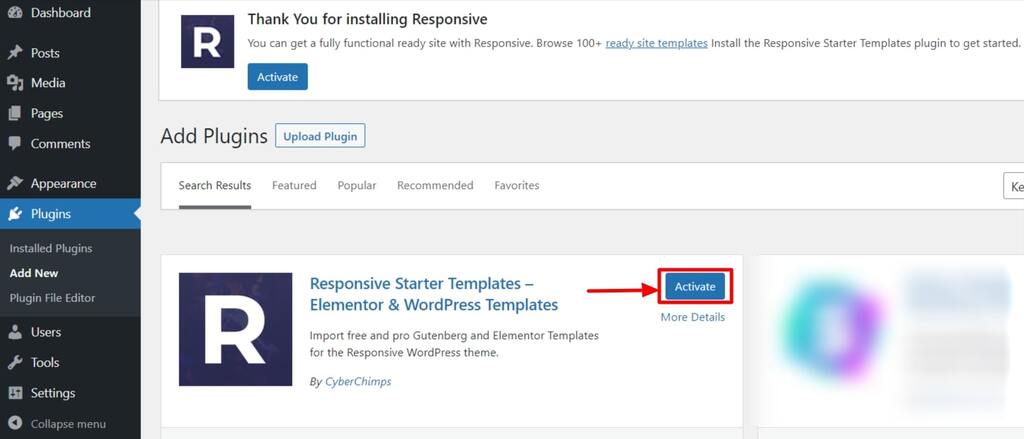
Click on the “Activate” button to activate the plugin.
Step 5: Import Doctor Template
To import the Doctor template, go to Responsive > Ready sites on your WordPress dashboard.
Search for Doctor in the search bar option, and click on the “Doctor” template. You can also choose other templates like hospital, health coach, psychologist and more.
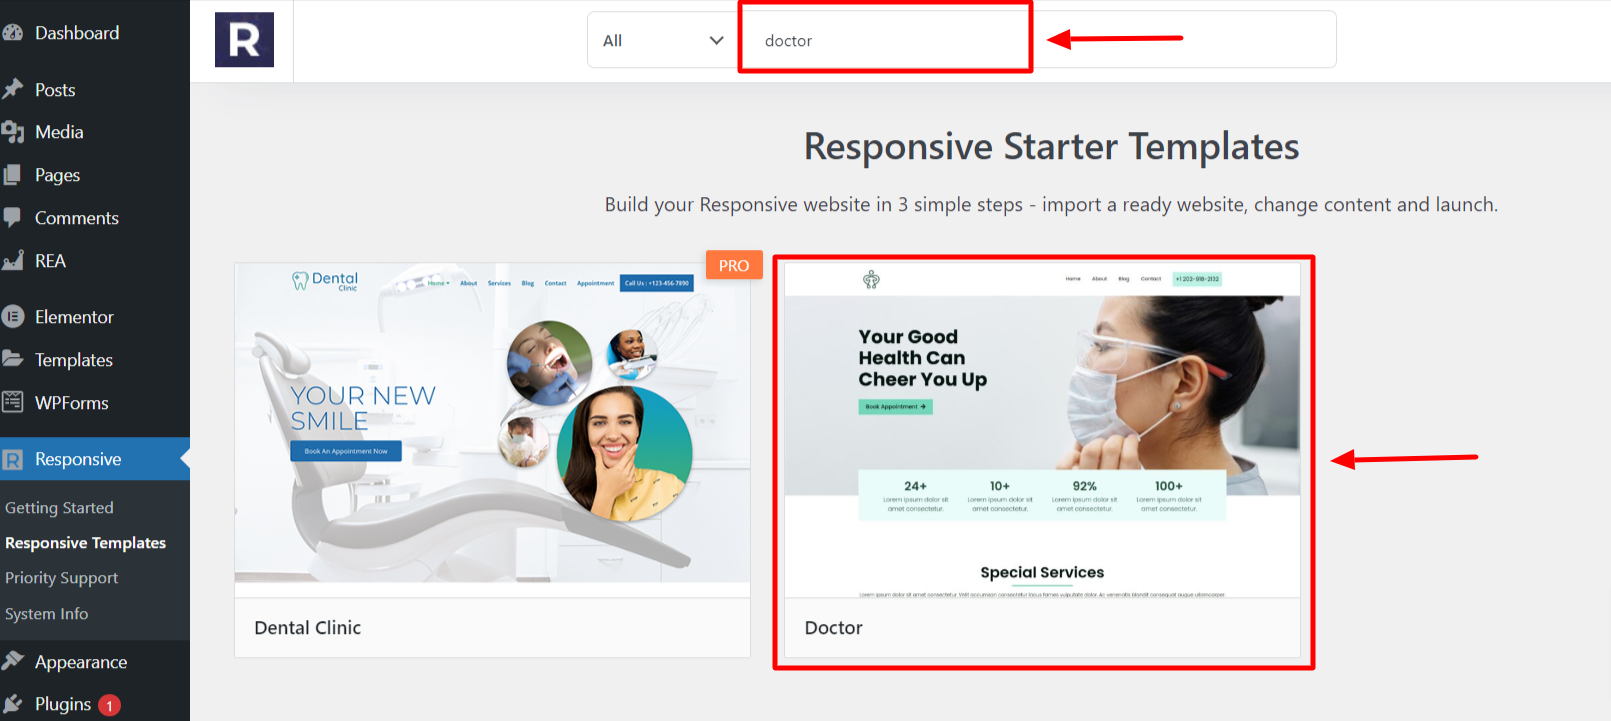
On the preview page, you’ll find two options to choose from. Whether to import a single template or import the whole site.
Responsive theme allows you to do a mix & match for your website. You can choose the ‘Home page’ of one template and the ‘About page’ of another.
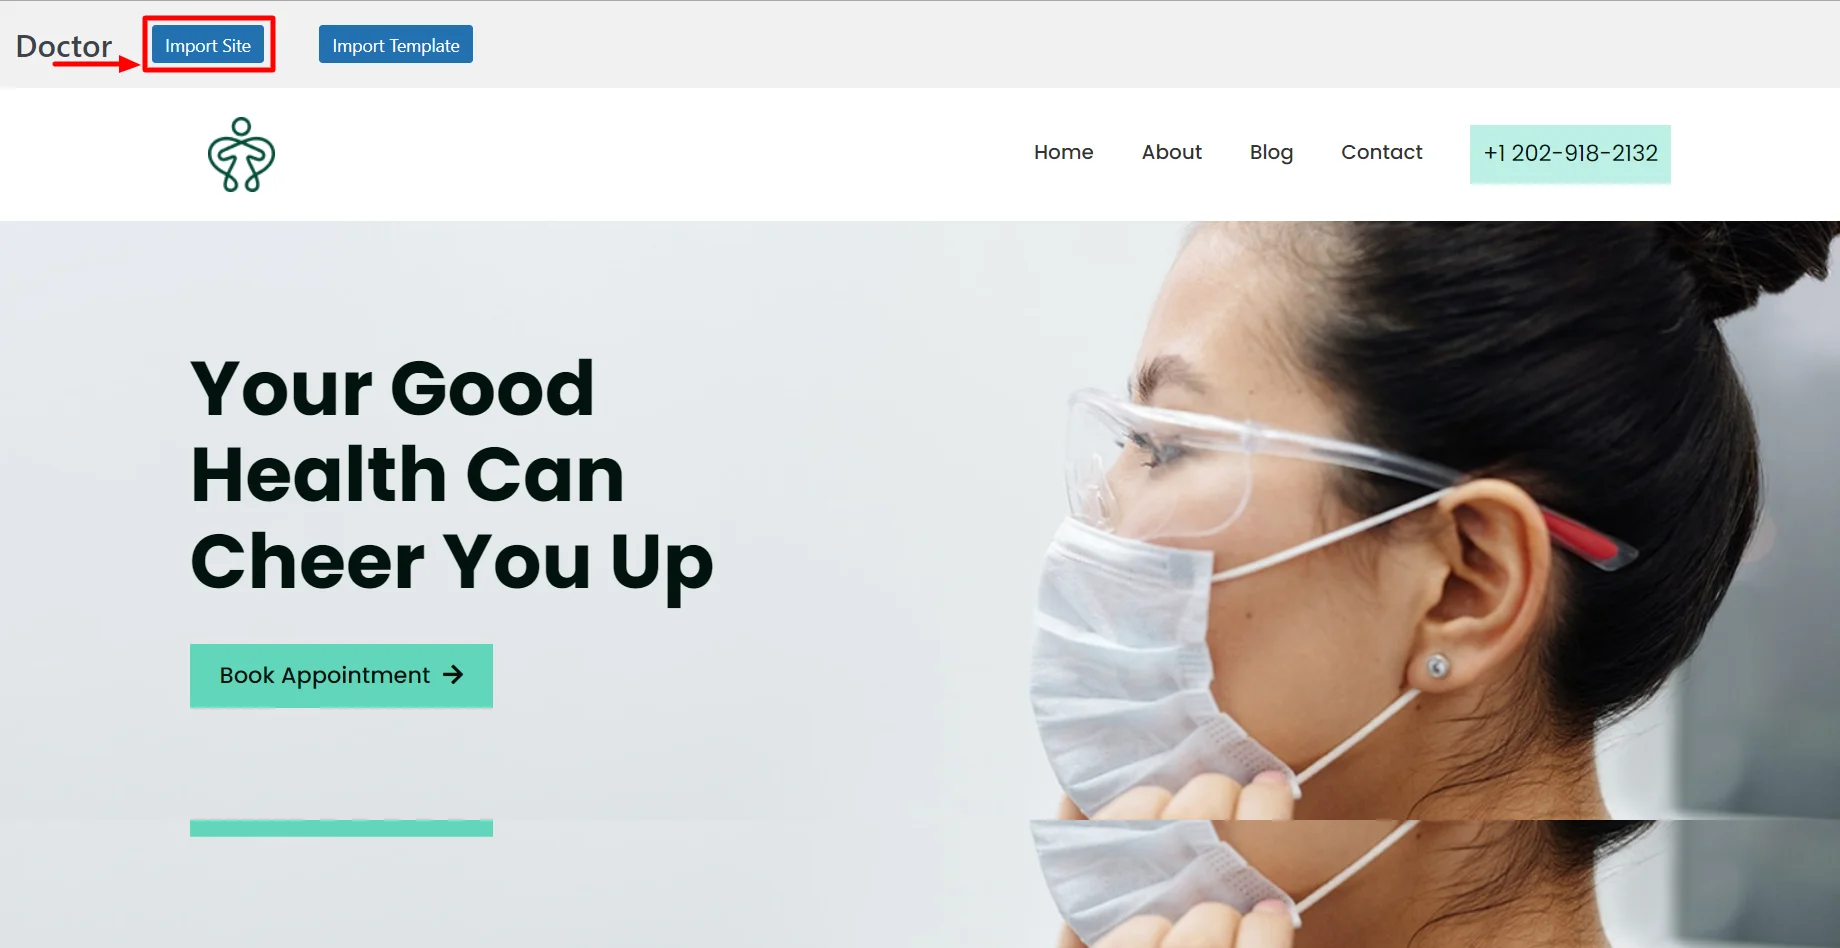
Click on “Import Site“. After which you’ll be directed to the action page to start importing the templates.
Step 6: Launch your Website
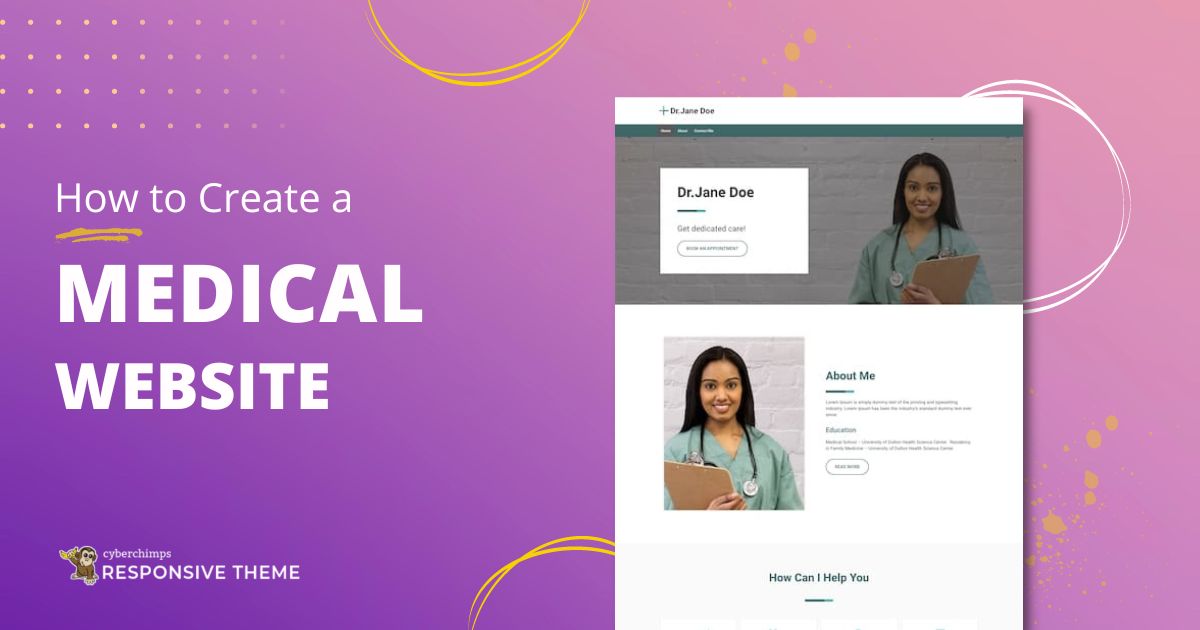
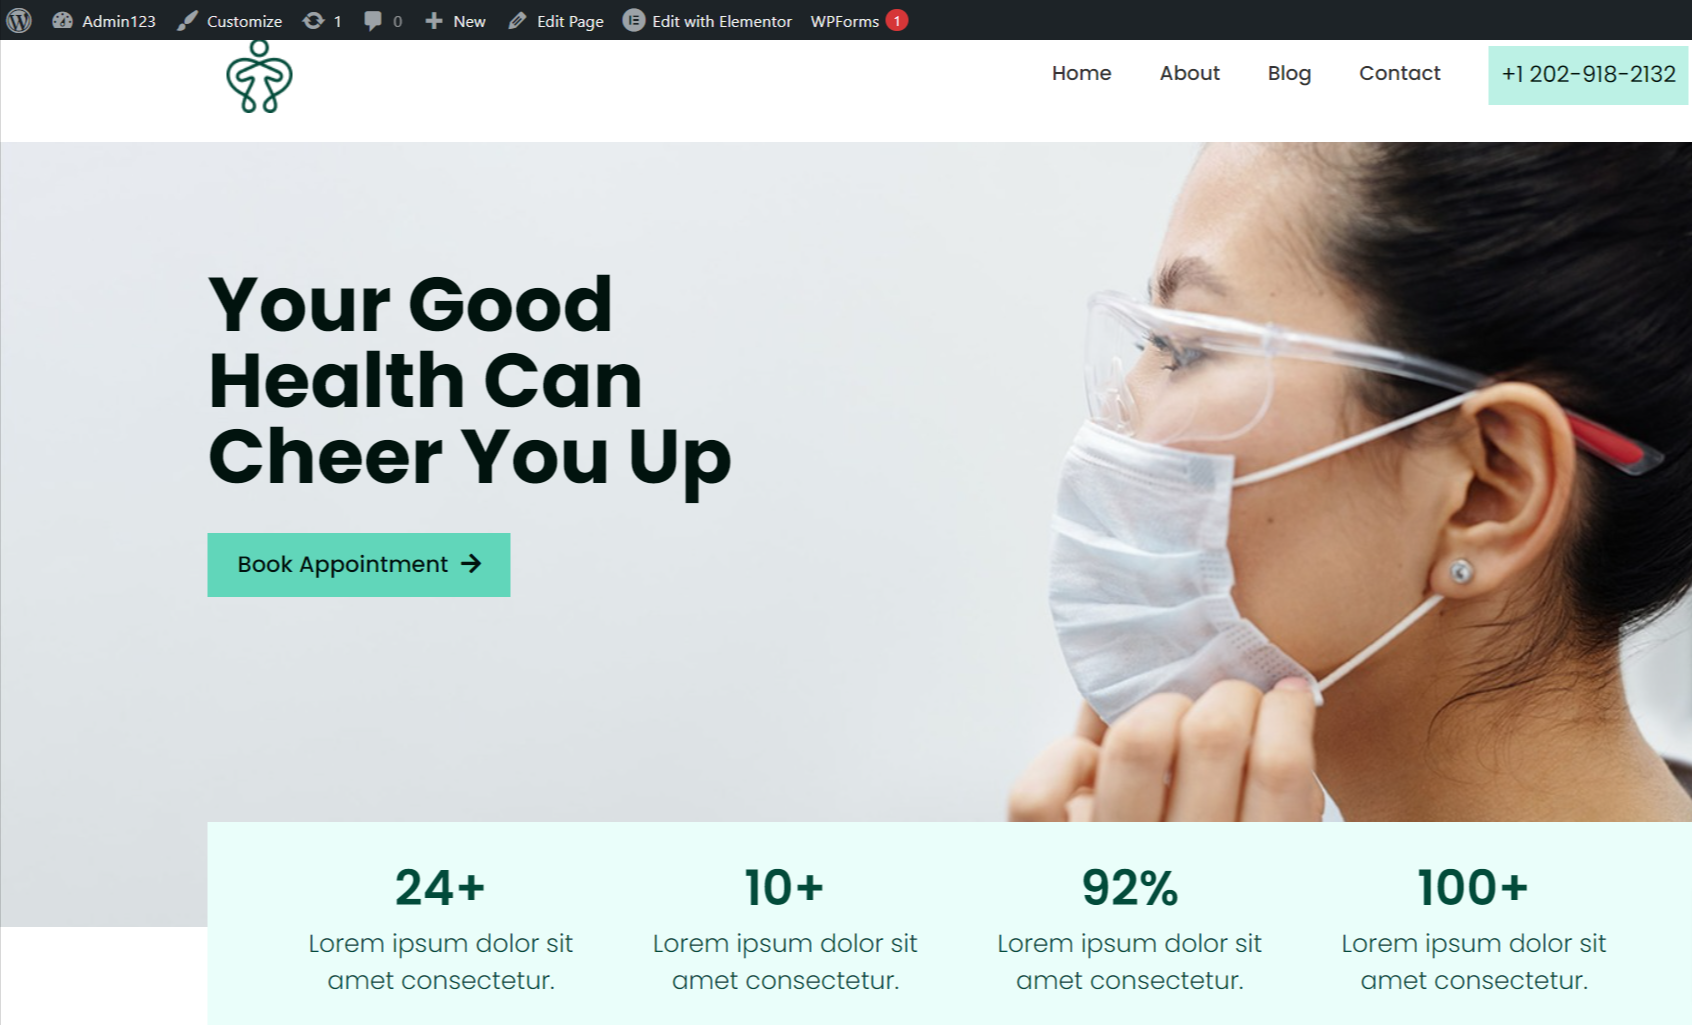
Once the importing is completed, click on the “Launch Site” button to launch the Doctor template.
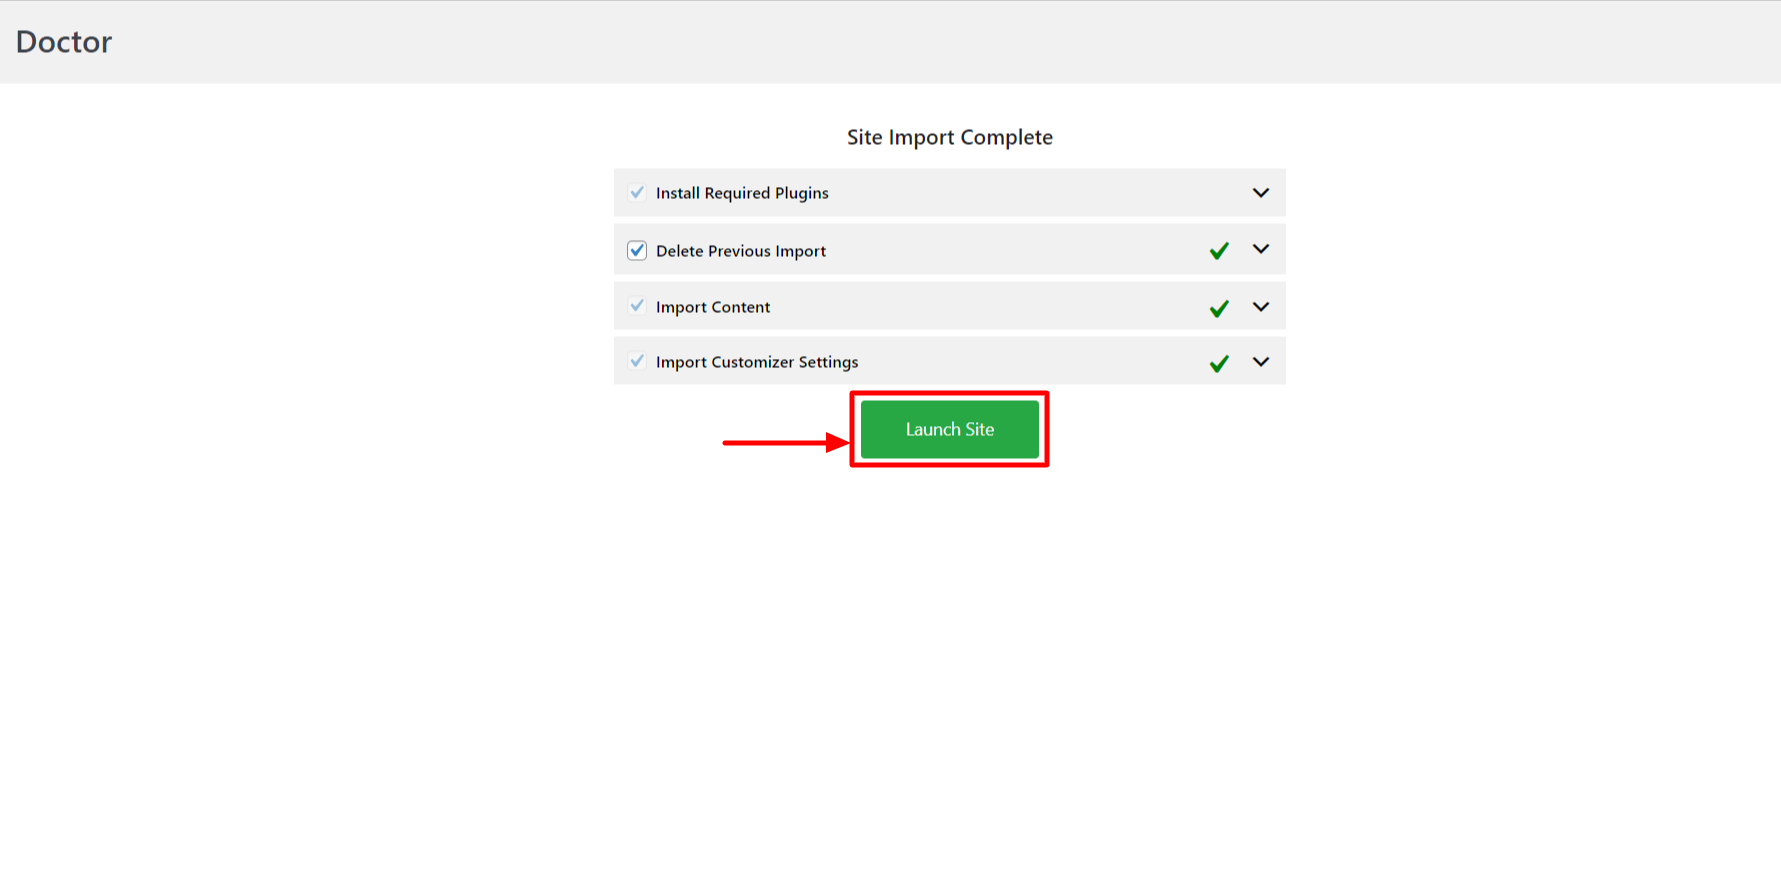
After launching the template, your Doctor Website will look like this.
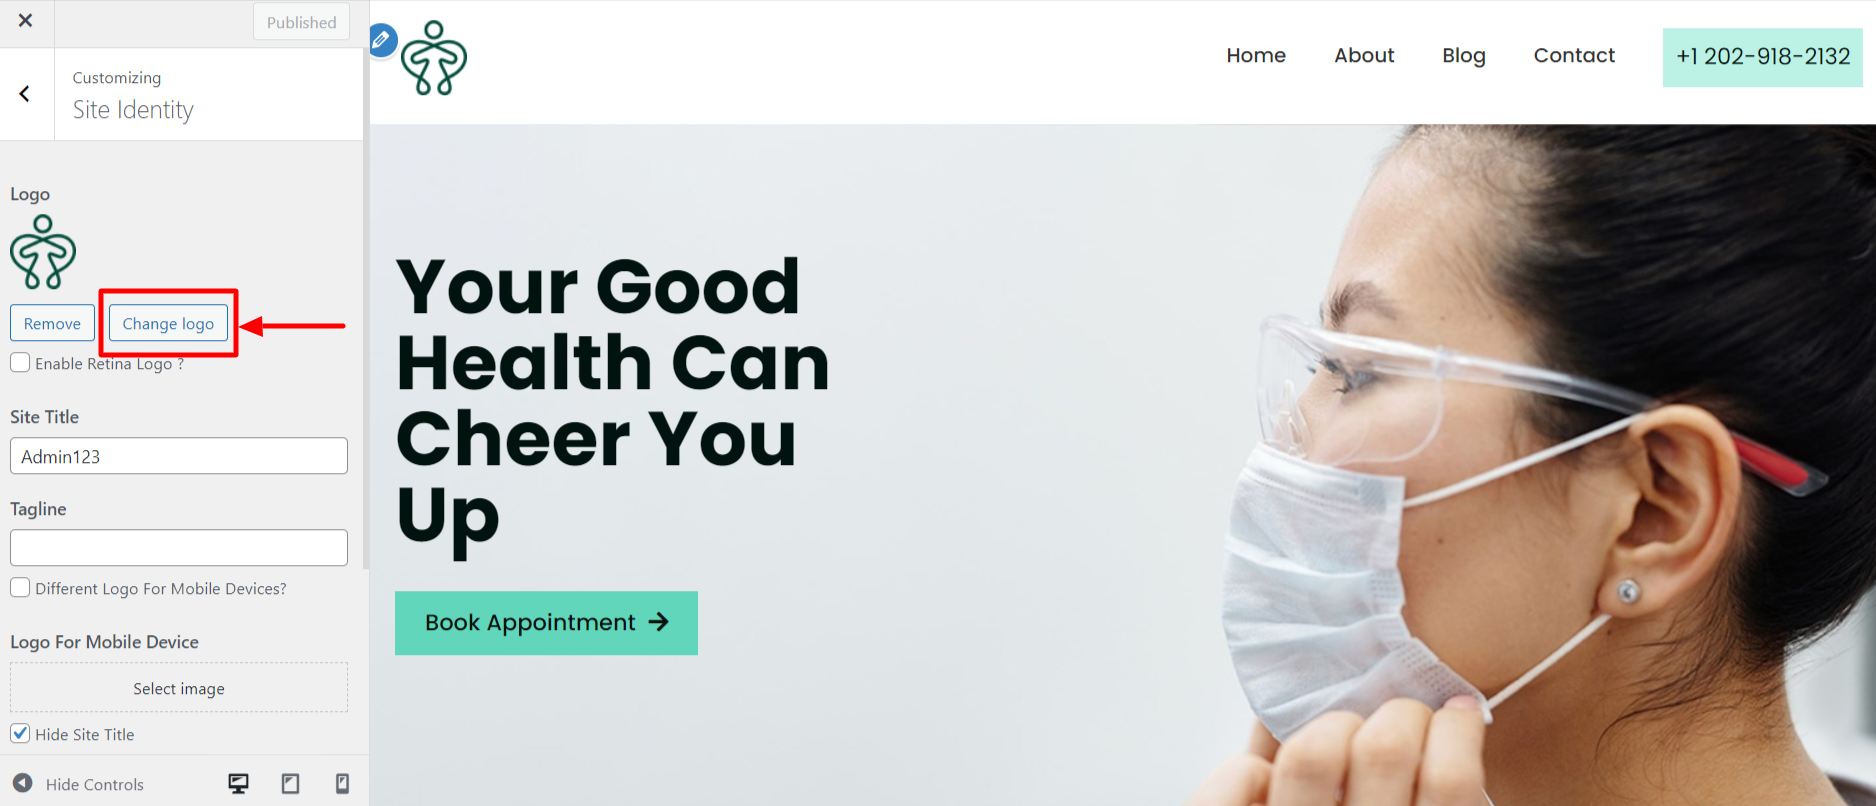
Step 7: How to change the logo of your medical website?
This section explains how you can change the logo of your medical website. Note that the maximum upload file size is 40 MB.
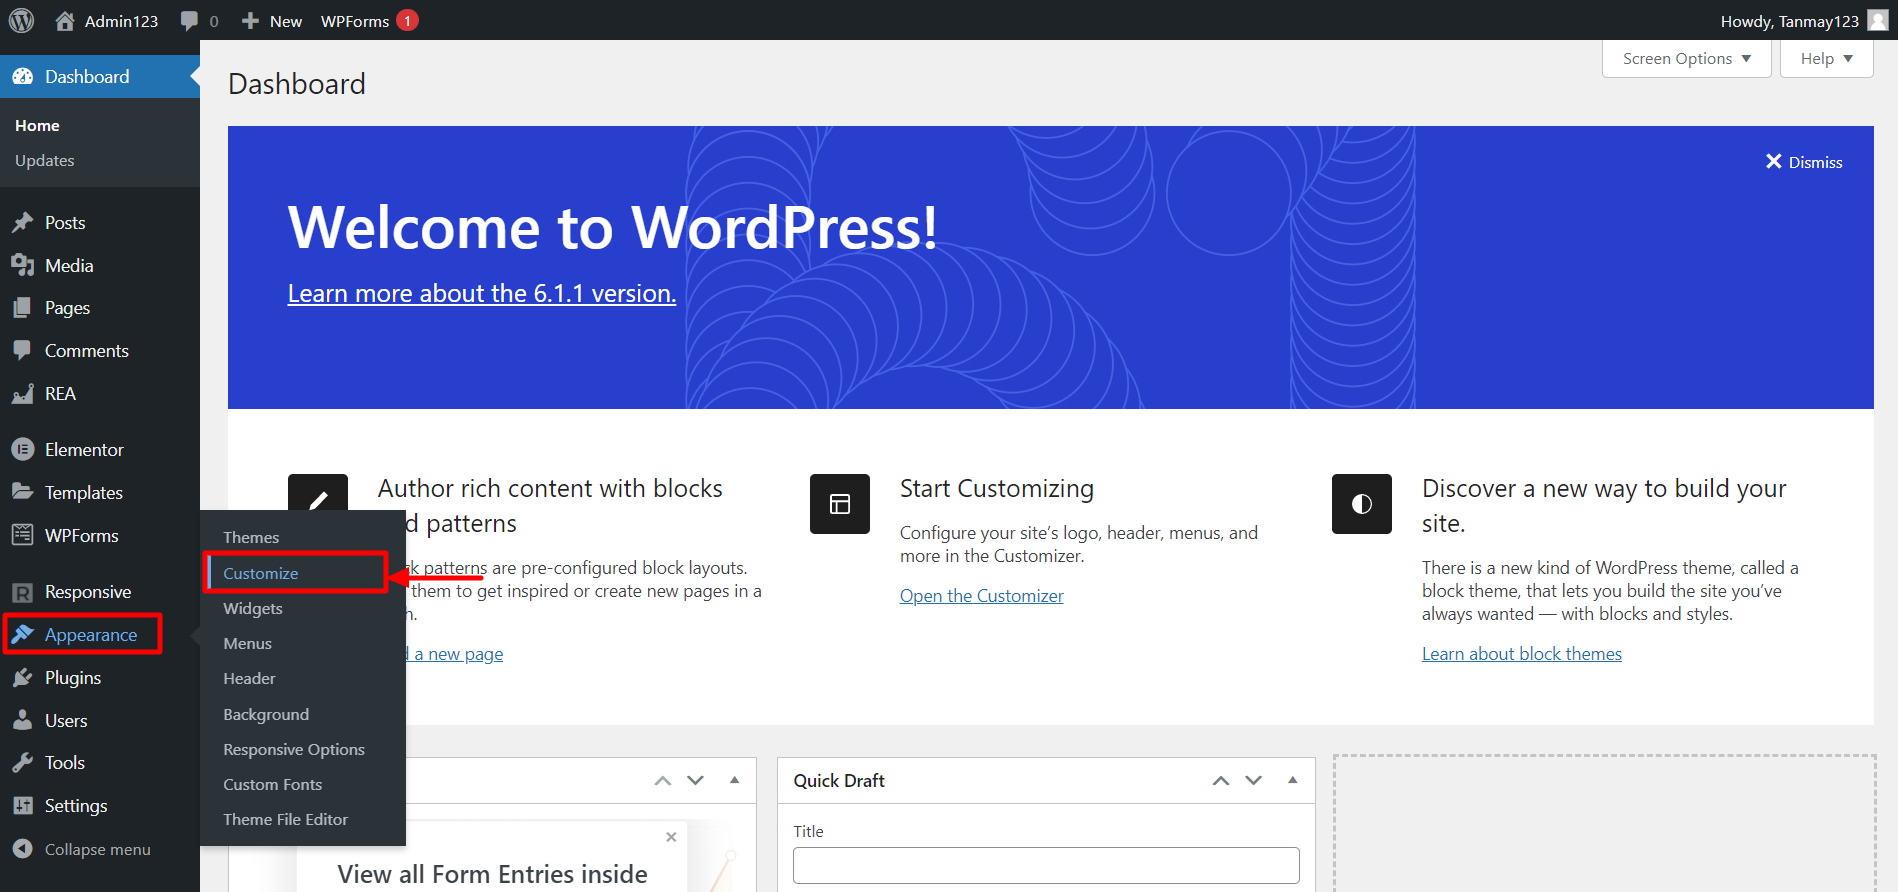
To change the logo of your website, open the WordPress dashboard and click on Appearance > Customize
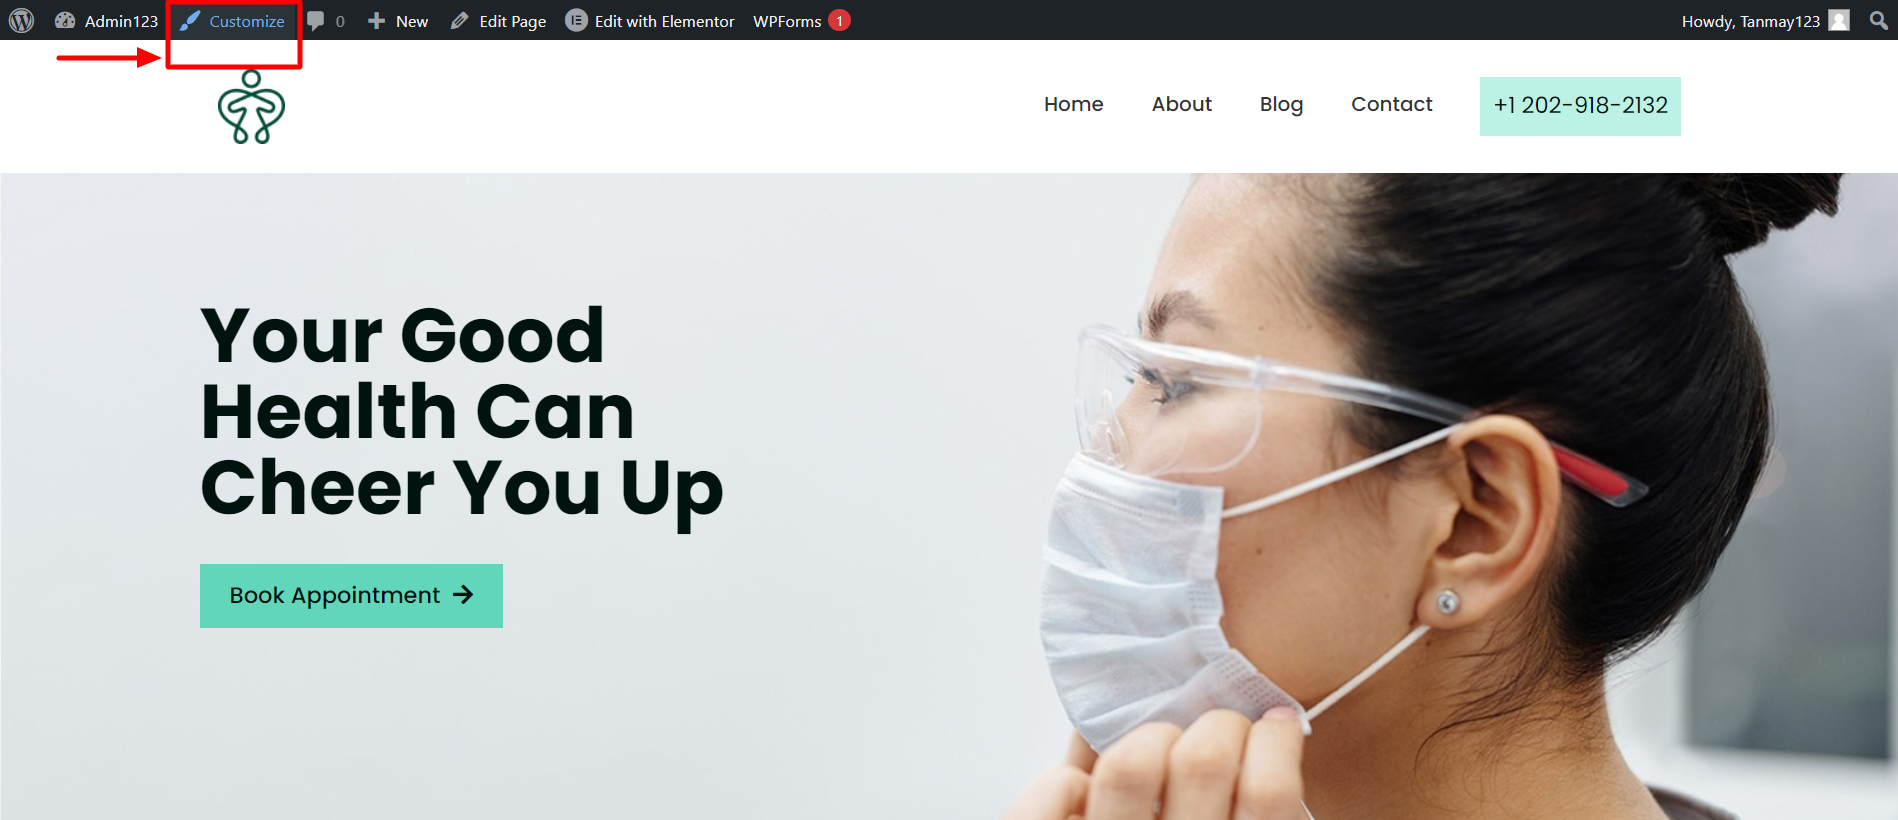
Alternatively, you can click on the Customize button at the top of your website.
Now click on “Site Identity“
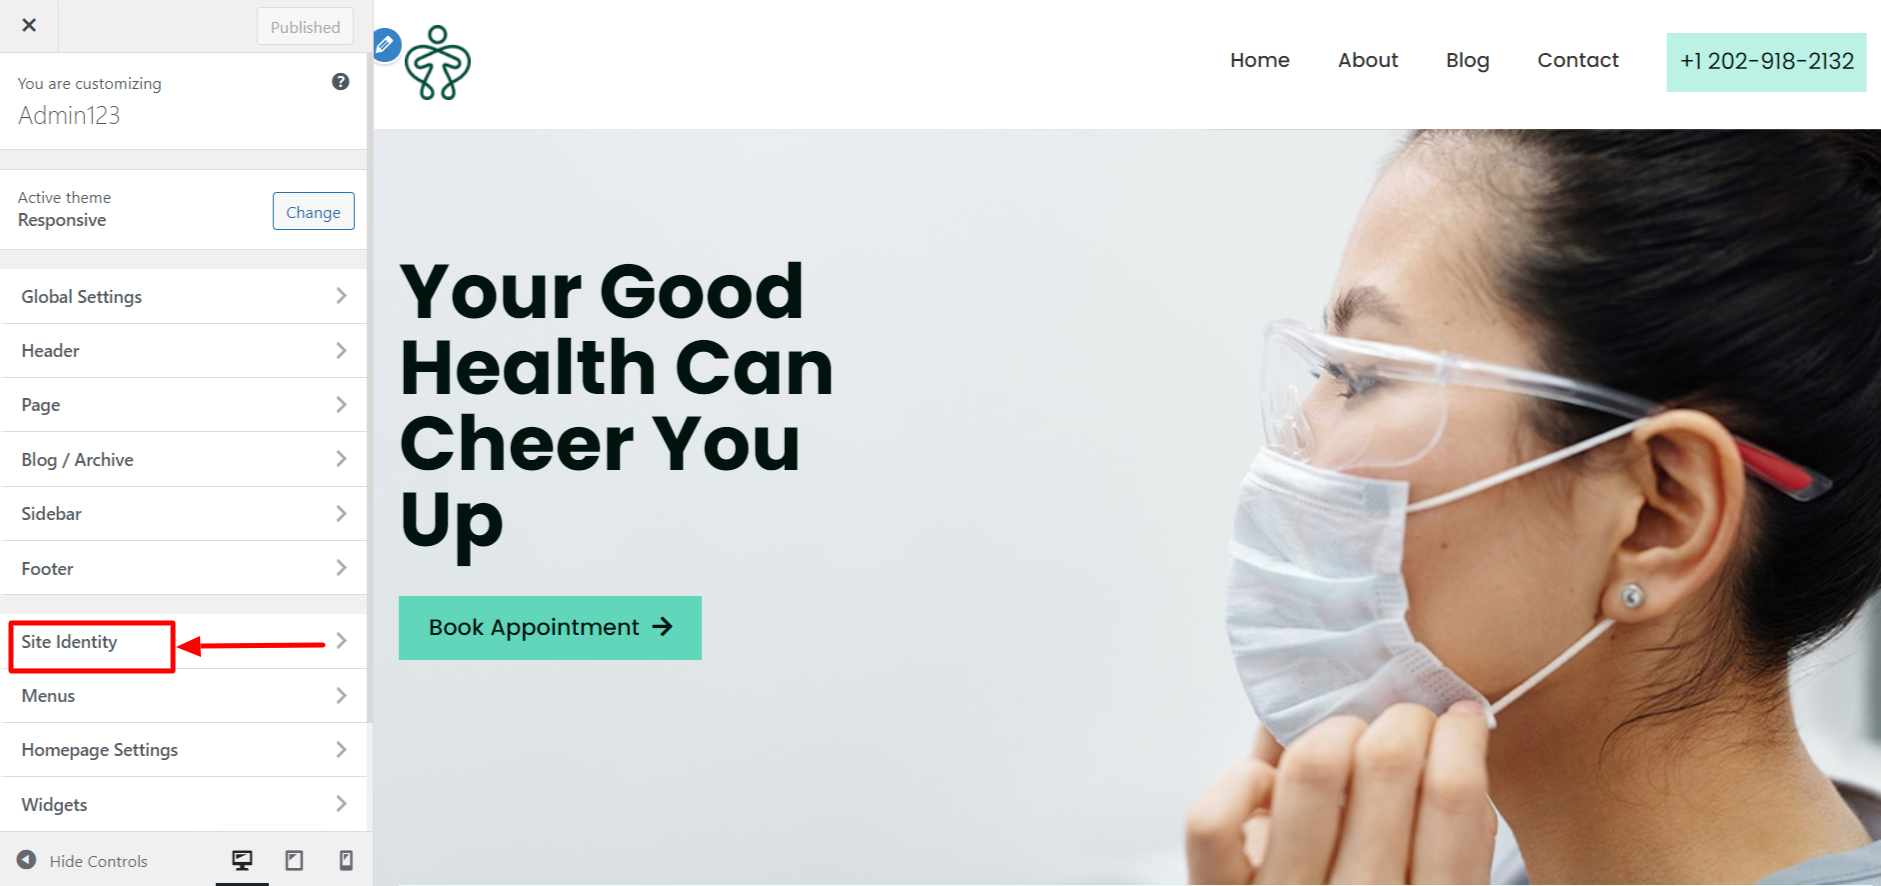
Click on the “Change logo” tab to upload the logo
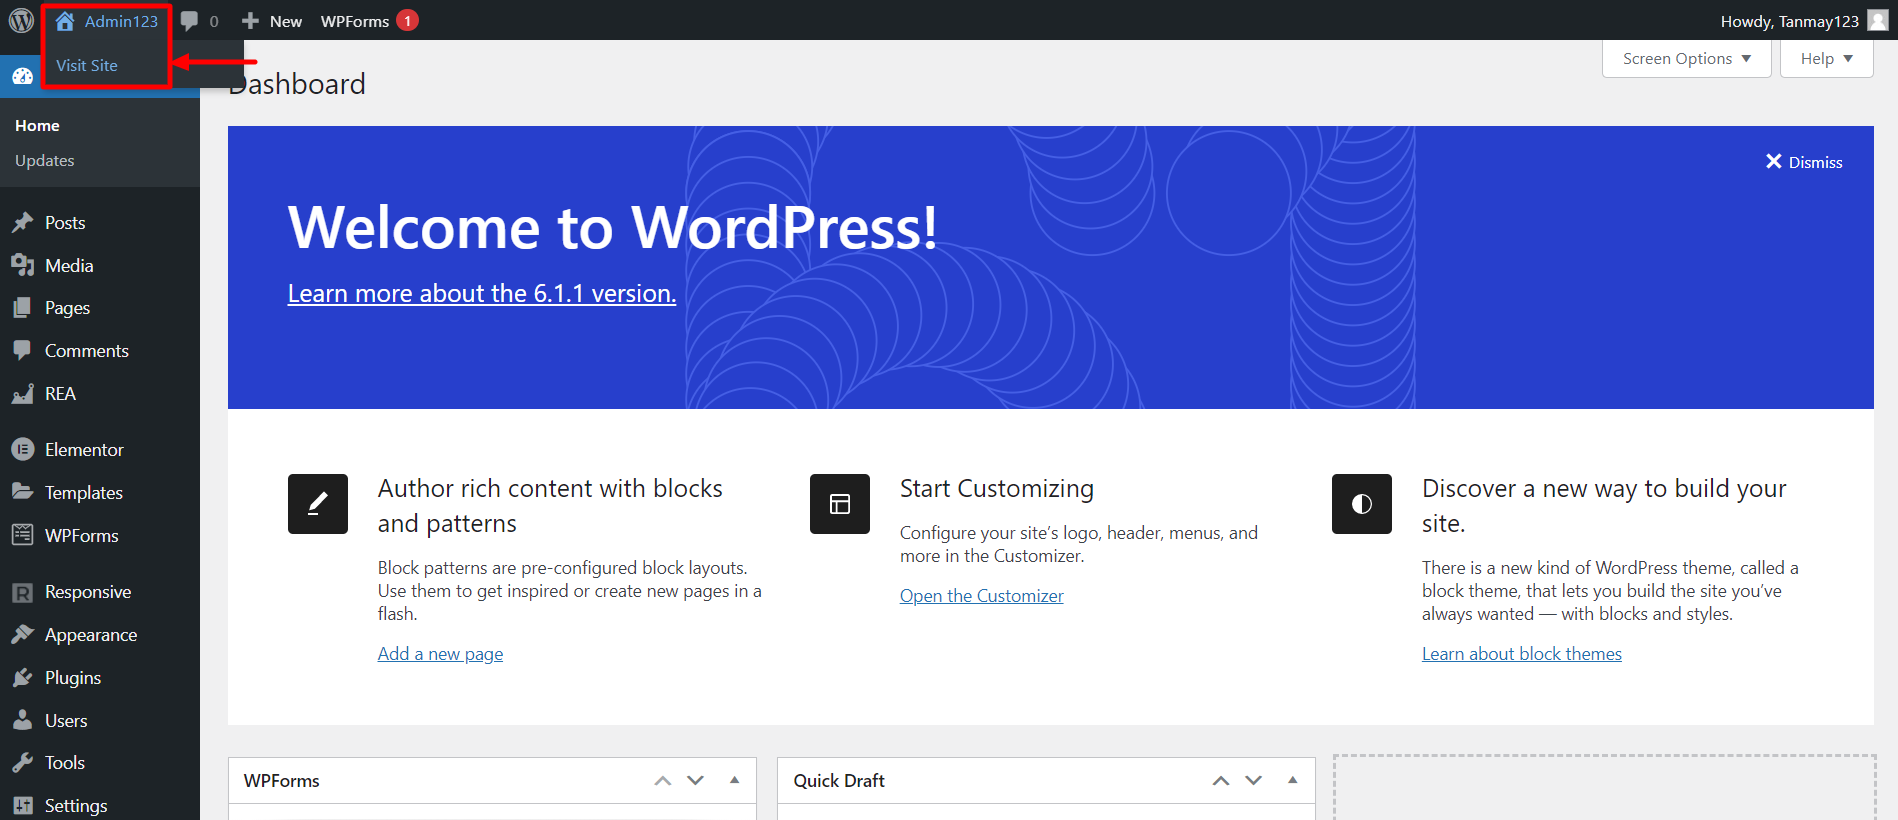
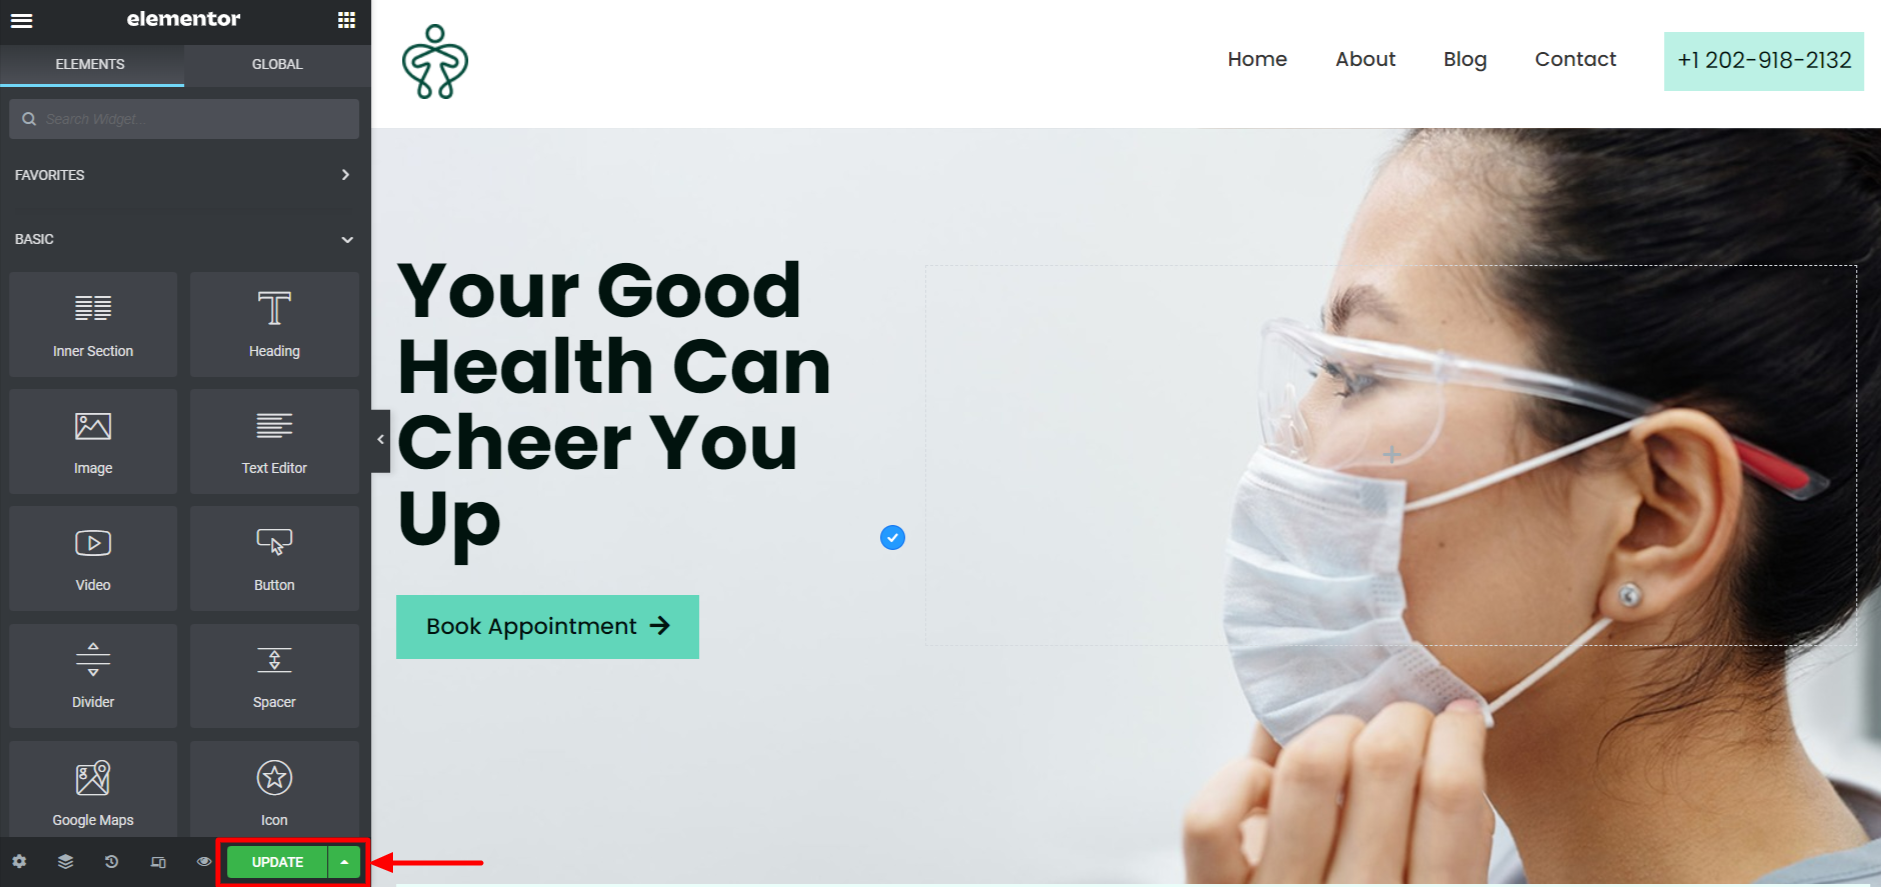
Step 8: Edit With Elementor
This medical WordPress theme is built with the Elementor page builder. So it is super easy to edit it with the drag-and-drop functionality.
On your WordPress dashboard and click on “Visit Site“
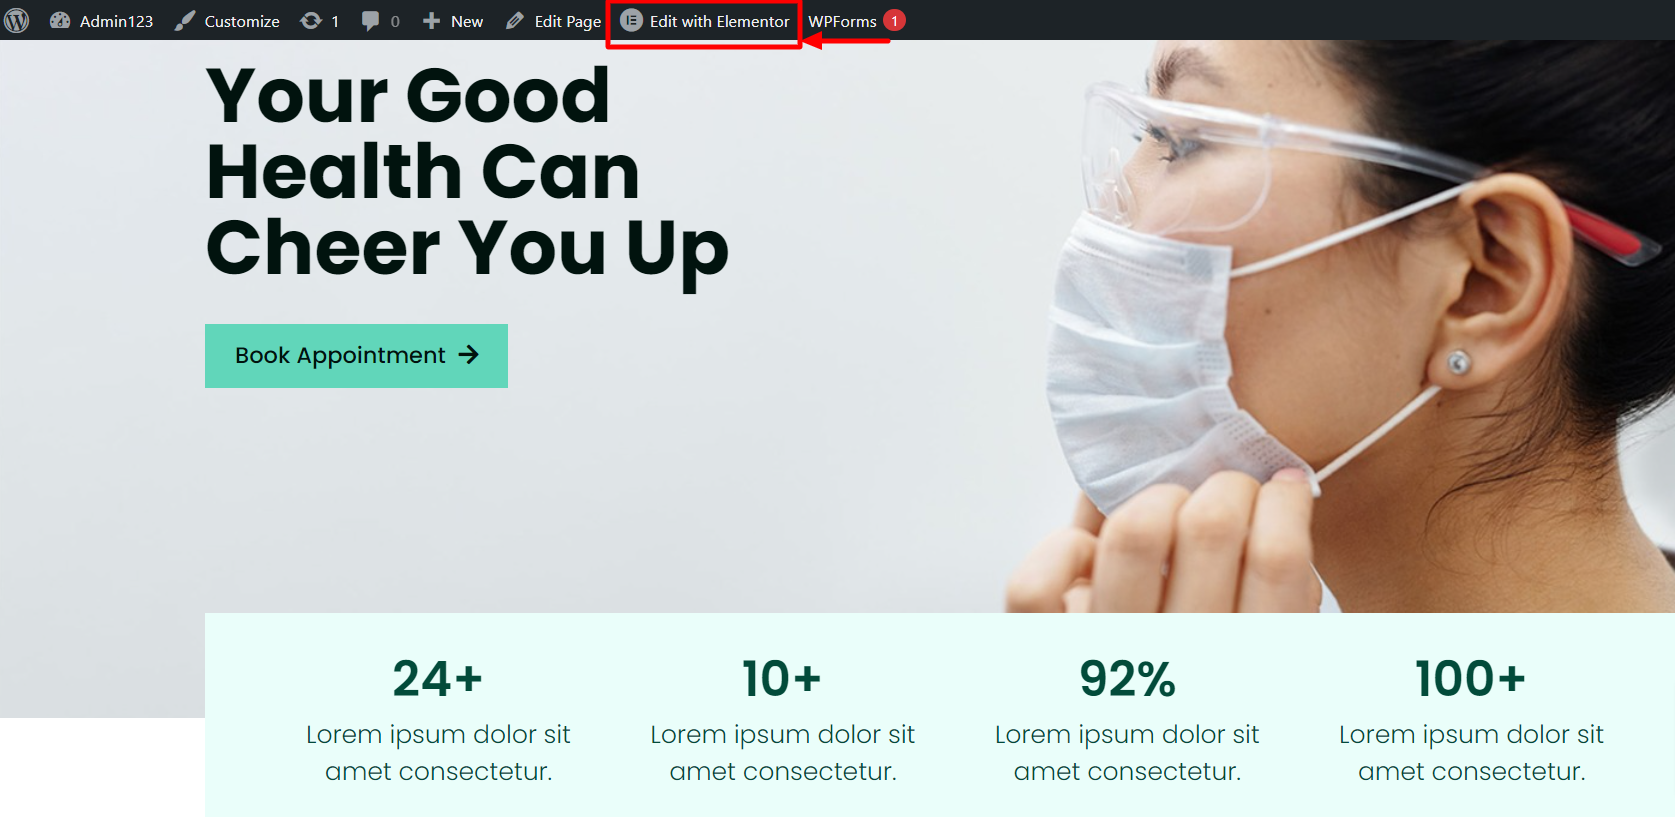
After your website opens, click on “Edit with Elementor” on the top.
Here you’ll find tons of options to change the content and style of your page. On the Elementor editor page, you’ll see two blocks reminiscent of Customizer.
On the left you can find Elements (1) and Global (2) tabs, allowing you to change global settings and choose the content modules for adding and editing.
Click on one of the content sections you want to edit. It will be encased in a thin blue frame. It means that the section is active now. Hover on each section to see the available options.
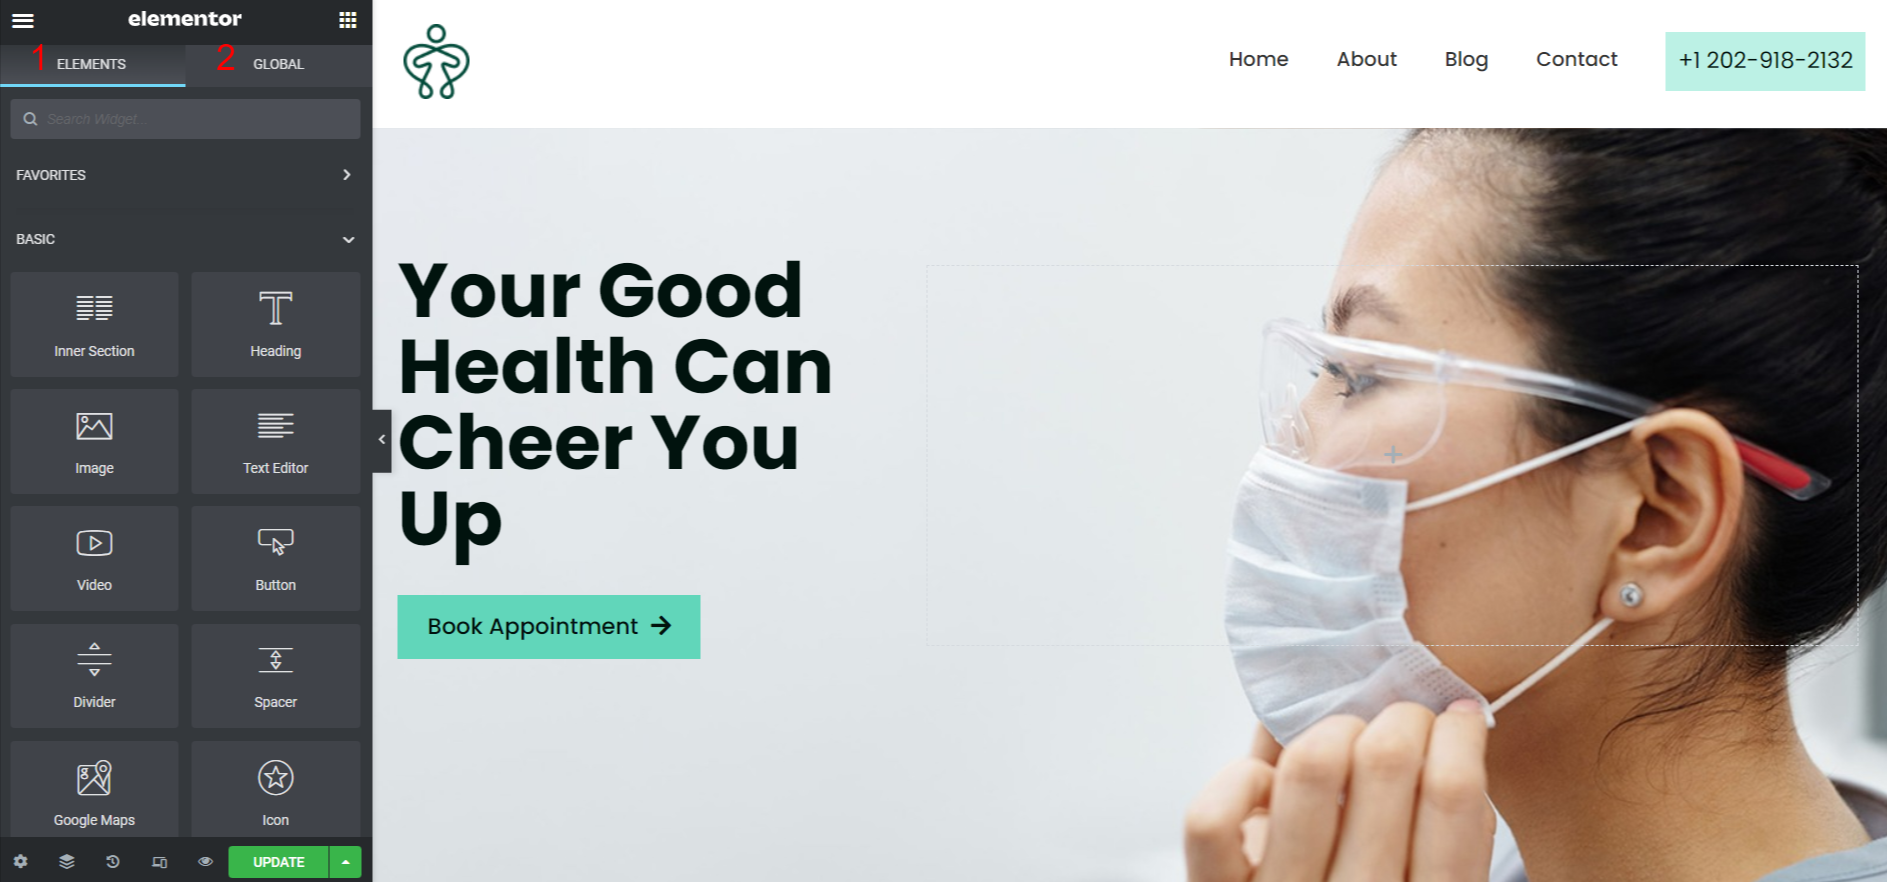
After you’re done making the changes, click on “Update“
Congratulations!
You have successfully set up your medical website on WordPress. And with that – it’s time to grab the Responsive theme and start customizing your website to grow your practice and build an online presence!
Enhance the functionality of your website using plugins such as Yoast SEO, WPForms, and Jetpack to improve your website’s SEO, add contact forms, and improve security and performance.
If you enjoyed this article, check out our other articles:
- How to Create an Entrepreneur Website with WordPress (Free)
- How to Create a Music WordPress Website (Step by Step Guide)
- Best WordPress Themes for Entrepreneurs in 2023
Ready to get started? Check out the Responsive Theme and start building your medical website today!