The Before After Slider by Cyberchimps is a widget that enables you to show a before image and a after image using a slider format. This widget is amazing for revealing a dramatic change or a before-and-after comparison.
Let’s learn the various settings of this widget.

Content Settings
These content settings let you control the text and images in this widget. Below are the settings explained in detail.
Before Image
This setting completely deals with the before image that you want to display.
- Before Image Input: A dropdown is provided where you can select how you want to upload the image. There are two options- Media and URL. If you select the URL option, you need to add the URL in the given space.
- Before Photo: Upload the before photo by hovering on it and clicking on the Choose Image option.
- Image Resolution: A dropdown of all the various resolution options is provided to you, where you can select the resolution you want for your image.
- Before Image Label: If you want to change the label on the before image, you can enter your desired name in the box provided.
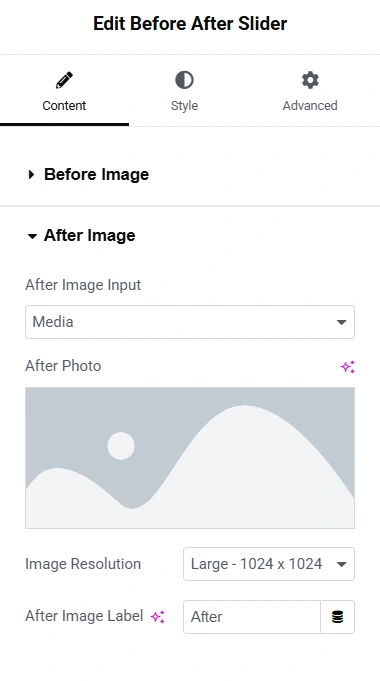
After Image
For the After Image, the settings are identical to the settings for the Before Image. You simply have to select the upload method, add an image, set the resolution, and finally label it.
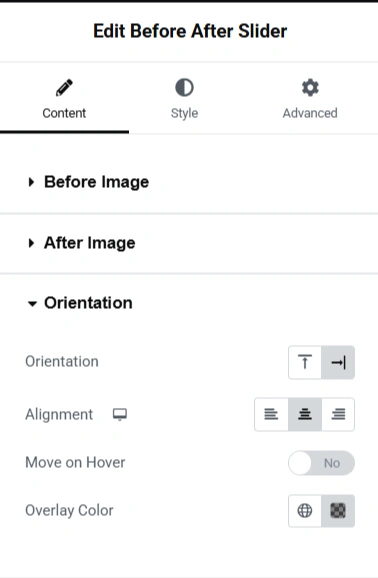
Orientation
Here, you can set the position of the Before and After Image Slider.
- Orientation: Using this option, you can choose how the slider appears. There is a vertical and a horizontal option.
- Alignment: You can choose how to align your Before and After Image Slide on the page- right, left, and centre.
- Move on Hover: If you enable the move on hover option, the slider will automatically move to the location of your cursor and move when you move the cursor on the image.
- Overlay Colour: You can add a colour overlay to your images by choosing the colour from the colour palette.
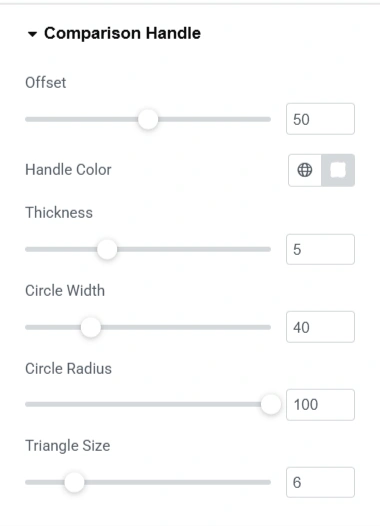
Comparison Handle
- Offset: With this setting, you can set the location you want the handle to be
- Handle Colour: You can choose the slider handle colour using the colour palette.
- Thickness: Using the slider, increase or decrease the thickness of the Image Slider.
- Circle Width: Using the slider, increase or decrease the width of the circle on the Image Slider.
- Circle Radius: Using the slider, increase or decrease the radius of the circle on the Image Slider.
- Triangle Size: You can also increase or decrease the size of the triangles on the handle of the Image Slider.
Style Settings
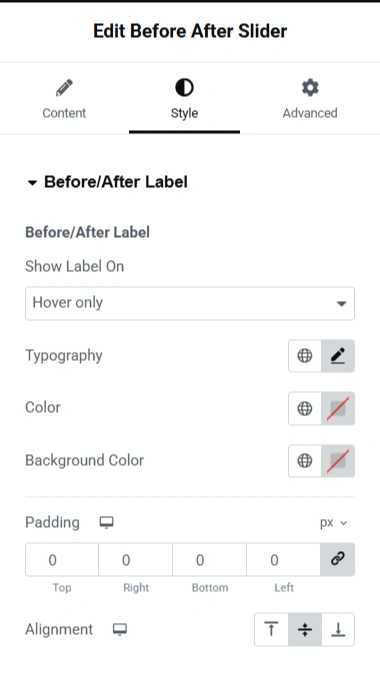
Before/After Label
- Show Label On: Using this setting, you can choose where you want to show the before/after label. You can display it on Hover only, Normal only, and Hover and Normal.
- Typography: You can choose the font family, size, weight, style, and so on in this setting
- Colour: Choose the colour you want to add to the typography using the colour palette provided.
- Background Colour: Select the colour you want for the before and after label backgrounds using the colour palette.
- Padding: You can set the padding for the before and after images. Add the values for left, right, top, and bottom. If you want to add different values, you can click on the icon on the right to unlink all the values.
- Alignment: Change the alignment of the Before and After Image Slider by choosing from the top, centre, and bottom alignment options.


