A database is a collection of organized data. That’s the technical definition. But for most WordPress users, the database is nothing but a set of tables which are used to store the details to your all your posts, website pages, themes and plugins.
There are literally hundreds of database products in the market; WordPress uses MySQL as its database system. A database system will only store these things, it will not generate an HTML page. WordPress will take help of PHP (a scripting language) to access the database and use it to generate a dynamic HTML response page.

When you access your WordPress site and everything is working fine, it uses PHP to access all the details (fonts, colors, and other stuff) from MySQL and constructs your HTML page.
When the PHP code is unable to access the database for some reason, it shows the dreaded “error establishing database connection” message.
Why does this error occur – and what to do about it
There are lots of reasons why the error occurs. There is a chance your database could be corrupted. There will be times when a single php file running internal errors can be giving way to the problem or you might be simply using the wrong credentials. Maybe you accidentally changed your database details in your wp-config.php.
Sometimes, and especially in case of shared hosting, the server cannot take the load and starts showing different errors to different users – and this database error could be one of them.
Note: Understanding how your WordPress Database functions and learning to repair connection errors associated with it will help you in the long run, especially when you are looking to speed up WordPress.
Let’s dive into the solutions for fixing the errors.
Solution 1: Attempting to repair the database
If your database is corrupted, you can attempt to repair it by setting the “WP_ALLOW_REPAIR” option in wp-config.php to “true”. This enables you (and ALL of your visitors) to access a new file called “repair.php” on your site. You can use this file to repair and/or optimize your database.
 i
i
But this is where you have to be careful. Setting this option to“true” will open the “repair.php” to file everyone and all of them can attempt to repair your database; this makes it insecure. So, as soon as you are done, make sure you undo this change and bring the wp-config.php file back to its original state.
For a detailed procedure on how to do this, follow the steps below:
- Log into your hosting account.
- Access cPanel admin from the hosting account page.
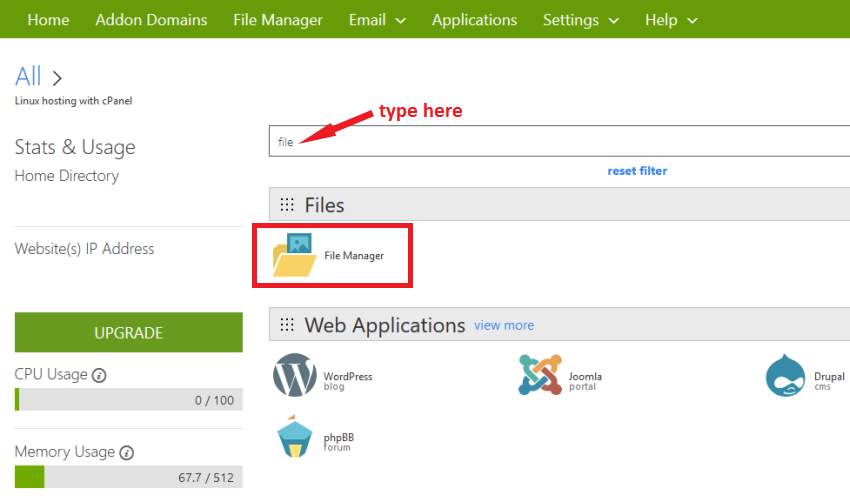
- On the cPanel home page, type “file” in the search box and click on “File Manager” icon which pops up as a search result.
- In the list of files, scroll down to see the “public_html” folder and double-click to open it.
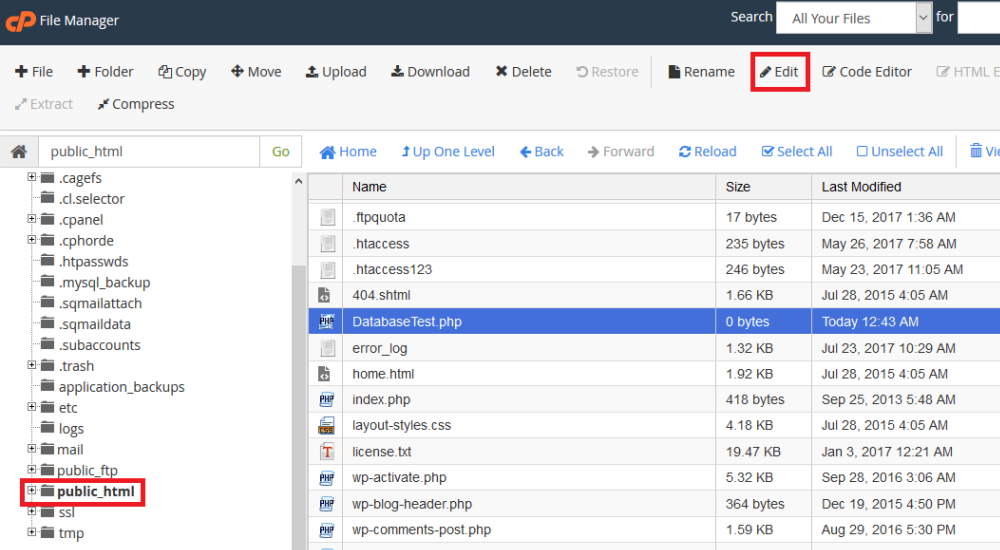
- In the “public_html” folder, scroll down to find the “wp-config.php” file. Select that file and click “Edit” on the menu bar of the File Manager. This is a sensitive file so be very careful in updating its content.
- Scroll to the bottom of the file, and press Enter and insert the following:
define('WP_ALLOW_REPAIR', true);

```/* That's all, stop editing! Happy blogging. */``` - Click “Save Changes” on the top right corner and keep the file open.
- Open a new tab of your browser and type this URL in the address bar:
http://www.yoursite.com/wp-admin/maint/repair.phpReplace “yoursite” with the name of your own website. You should see this screen below: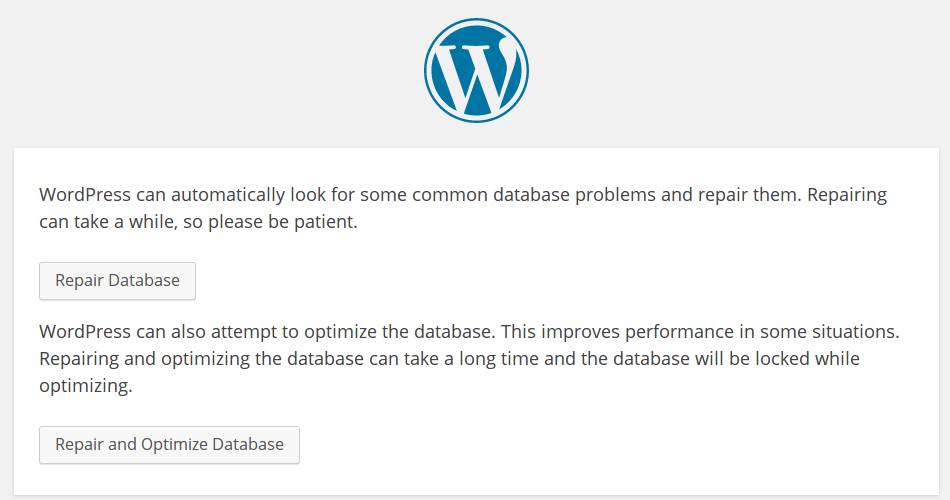
- Click on “Repair and Optimize Database”. WordPress will attempt to fix things with your corrupted database and will try to optimize it. Once you get a message indicating the operation was successful, close the tab.
- Go back to the window where you had opened “wp-config.php”. Scroll down to the end of the file and remove the last line which you had added in Step 8.
- Click “Save Changes” and close the tab.
If this does not solve the problem, then proceed to try the next solution. Note that, it is recommended to create a WordPress Backup for excessive data loss.
Solution 2: Changing the login credentials
WordPress needs to 4 different options for connect to your database. These 4 options are:
- DB_NAME: Name of the database
- DB_USER: Name of the default database user
- DB_PASSWORD: The password string given to your default database user.
- DB_HOST: Location where the database would be stored.
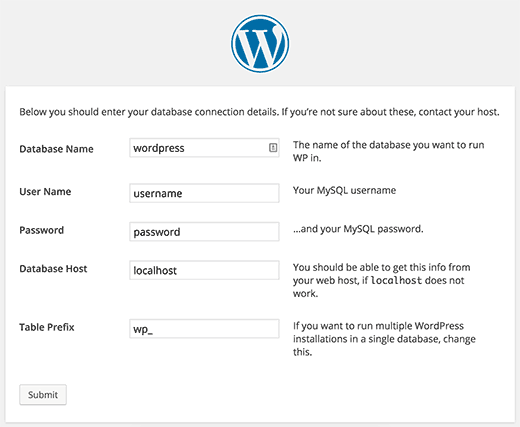
All these 4 options are configured in “wp-config.php” file. Due to some reasons like change in hosting, malicious plugin, or accidental change by you, the database details might have been changed in the file. We will attempt to test if these are correct and reset them if they are not.
To test/reset these four options, follow steps 1 to 5 from Solution 1 above to open the wp-config.php file. Scroll down until you see “define” keyword for these 4 options i.e. DB_NAME, DB_USER, DB_PASSWORD, and DB_HOST.
To test if the DB_NAME is correct, follow the steps given below:
- Login to your hosting account, open cPanel.
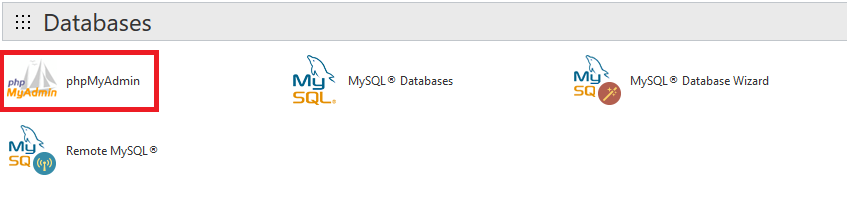
- Access “phpMyAdmin” to open the database console of your hosting account.
- On the left side, you will see databases in a tree structure. You should see a database with the same name as your DB_NAME entry in wp-config.php.
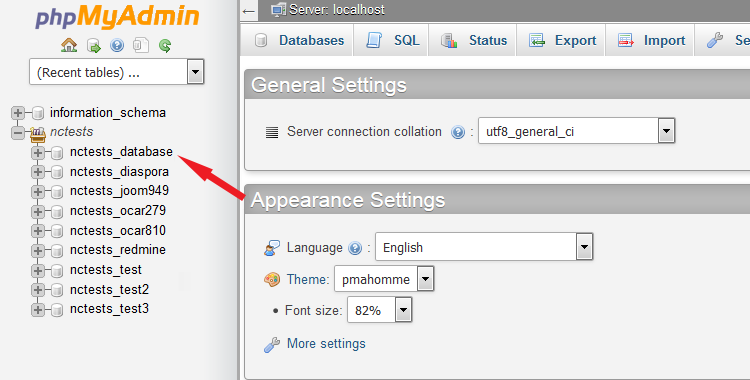
- Click on that database to list down all the table names contained in it.
- Check for a table named “wp_options”. This table stores your website’s URL and other useful settings.
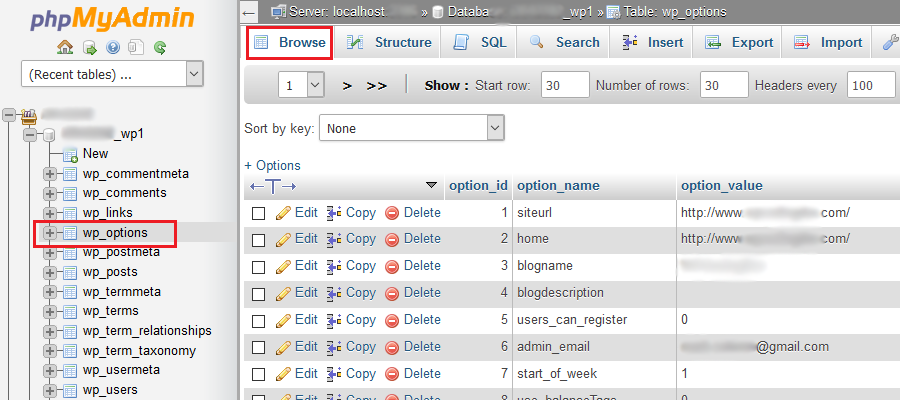
- Click its “Browse” option to verify its contents.
If all the six steps above are executed without any error, then the DB_NAME given in your wp-config.php file is correct.
Next, we will test the DB_USER and DB_PASSWORD options.To test these two options, follow the steps given below:
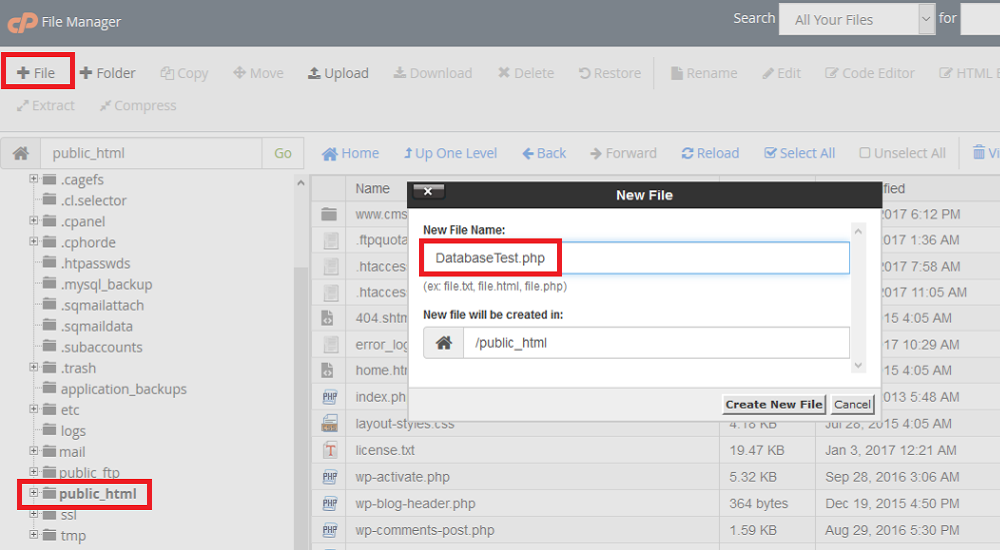
- Now, go back to your cPanel and access your File Manager.
- Go to “public_html” folder and click the “+File” button on the toolbar to create a new file. Give the file a name of your choice, like “DatabaseTest.php”. The name can be anything you want, only the “PHP” extension matters.
- Once the file is created, scroll down until you see your file. Select this new file and click “Edit” button from the toolbar.

- Add the following code after the last line in the file:
<

$link = mysql_connect('localhost', 'root', 'password');

if (!$link) {

die('Could not connect: ' . mysql_error());

}

echo 'Database test: Status ok';

mysql_close($link);

?>
This is a small PHP code which tests your database connectivity to ensure that MySQL is working fine and if the credentials mentioned in the wp-config.php are correct. - Click the “Save Changes” button at the top right of the file and close the tab.
- Open a new tab and navigate to this URLhttp://yoursite.com/DatabaseTest.phpReplace “yoursite” with the actual name of your site and replace “DatabaseTest” with the name of the file you just created in step 4.
If you see the message “Database test: Status ok”, then the database details mentioned originally in wp-config.php are correct and you can skip the next step.
If you see an error, then you need to fix your DB_USER and DB_PASSWORD parameters. We will not actually fix them, we will simply create a new user for your database and use its name and password for these two parameters.
Creating a new user in fairly easy. Follow these steps to create a new database user:
- Visit the ‘Add User to Database’ section of the interface.
- Select the user and database from the menus, the ones you want to add.
- Click Add.
- You will be prompted with the MySQL Account Maintenance interface.
- You can choose to provide certain privileges to the selected user by selecting the checkboxes.
- Click ‘Make Changes’ and then return to the main interface by clicking on ‘Go Back’.
- You can visit this tutorial for more help.
Make a note of its username and password. Now, go back to cPanel > File Manager.Locate and edit the wp-config.php file and change the DB_USER and DB_PASSWORD options to the new user’s credentials created above.
After the changes are saved, we need to verify the DB_HOST parameter value. In most cases, it will be set to “localhost”. The word “localhost” on the server resolves to a special IP called loopback address (127.0.0.1). Test your website with this value.
If the database error is fixed, it means all the 4 database parameters have been configured successfully. If it still does not work, try replacing the word “localhost” with “127.0.0.1:3306” for the DB_HOST value. Here, “3306” is the default port number for MySQL database. Test your website again and if it still doesn’t work, contact your hosting company to help you solve the error.
Solution 3: Fixing server errors
Try getting in touch with the support executives from your web hosting provider and put forward your issue in detail. They are the ones who could amply handle the situation without extending the downtime. If there is a server issue due to a traffic surge and you know this, use good WordPress caching plugins.
Solution 4: Testifying the files
One of the stealthiest reasons for a WordPress Database connection error is a corrupt file. Also, it is not an easy way around of you go looking for these files manually. Ranging from the file permissions, settings, or other variables, these corrupt sectors on the files can be diagnosed with the use of a FTP tool. You can then proceed to reset the file by following the steps:
- Download the latest version of WordPress.
- Unzip the files from the downloaded folder on your computer.
- Delete wp-config.php and wp-content.php. Doing this will portray the existing changes on your site.
- You can move ahead and over-write the existing files, implementing the previous changes.
- Additionally, try inspecting the installed plugins that might have gone bad.
Wrapping up:
Whenever a site is down because of any error, you begin to lose your traffic, and thus your potential customers. In this article, we will be looking at some of the standard solutions. Many times this error can be fixed by making the necessary changes in the wp-config.php file. Sometimes, you may need to log into your cPanel backend to fix this. If nothing works, you might have to call your host to fix this database error.