If you are new to WordPress, you might want to know how to install WordPress on Xampp localhost. You can create fully functional WordPress sites on your computer and test out the site that has no Internet connection. OR you could get it done through your resident WordPress maintenance service provider.
There are many advantages and ways of setting up a local server, also known as localhost, and installing WordPress. If you are a theme or plugin developer, or you need to test different themes and plugins on a regular basis, then installing WordPress on localhost is a great and effective solution.
The WordPress site that you create on a local host will automatically load instantly.
As the site is not heavily connected to the Internet, you can stay rest assured about the security. Some WordPress developers are likely to develop the site on a local host first and then move it onto a live server.
Here is a simple and easy way how to install WordPress on localhost wamp.
WHAT IS XAMPP?
To understand how to create a website using Xampp and WordPress, we must first understand the meaning of XAMPP. It is a free and open source cross-platform web server solution stack, which is developed by Apache Friends. It is used in Apache, MySQL, PHP, and Perl. It is a simple and convenient solution and easily creates a local web server on your computer. It works exceptionally well on Windows, Linux, and Mac.
It contains two components that are vital for installation of WordPress – Apache and MySQL. It is used to create a local server and MySQL allows you to create the database for your WordPress site.
HOW TO INSTALL WORDPRESS ON XAMPP LOCALHOST?
If you want to install XAMPP on a local host, you have to download it from Apache Friends Website. There are available on separate download links for Linux, Windows, Linux, and OS X. There is no 64-bit version for Windows, but the 32-bit version also works perfectly fine.

Download the installer filer, and once the download is finished, you can click the download file. Depending on the operating system, you can allow the downloading of the software.
While you have to be careful about installing unknown applications, you can safely install XAMPP without any worries about virus-infected files. After you click on the file for installation, you can click on the “Next” button.
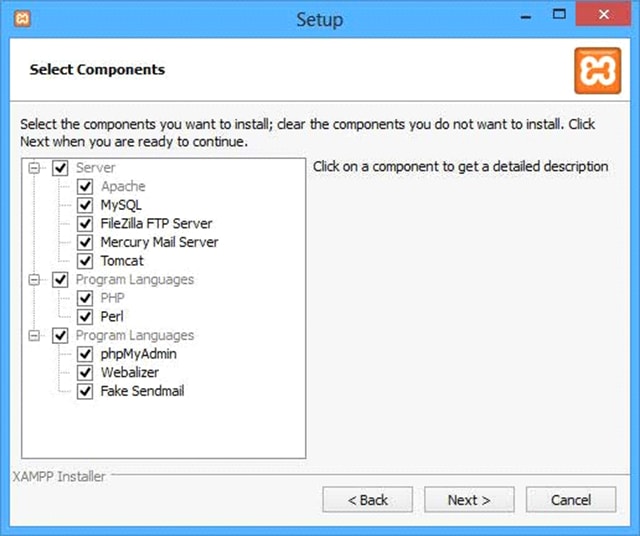
On the next window, you can customize the components that you want to install. Apache and PHP have different options available. You can deselect or select the ones that you want – you can also check for other options. To install WordPress, you will get necessary components like Apache, PHP, and MySQL, and phpMyAdmin. Once you have selected these, you can click “Next”.
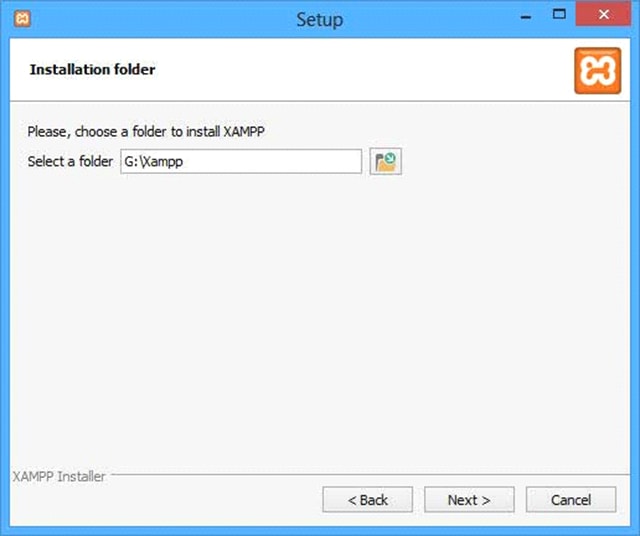
On the next page, you will be asked to select the folder, and install XAMPP. Click the icon with a folder and you will see the file browser, to select a custom folder. After making the choice, you can click “next”.
On the next screen, you can be asked to install Bitnami for XAMPP. It makes the things simpler to install by the third-party CMS like Joomla, Drupal, and WordPress in XAMPP.
Since you are wondering about installing WordPress manually, you won’t need this option. You can simply uncheck the box and click “next”.
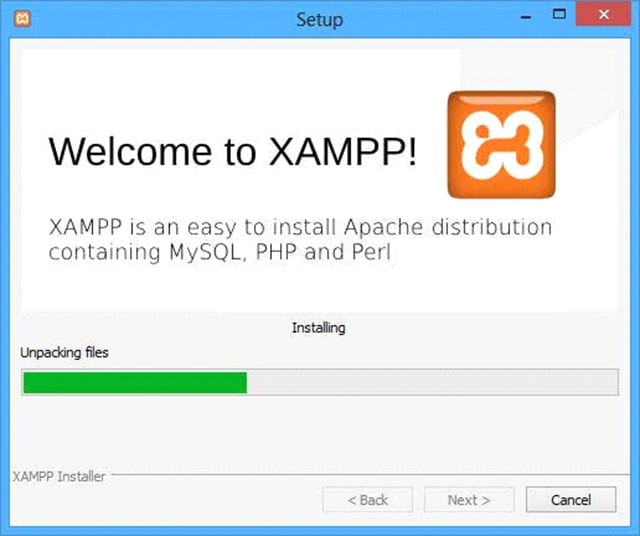
Now your XAMPP is ready to be installed. Click “next” to start the installation process, which will take some time to finish.
While the XAMPP installation, your computer will display the security note that will contain information to check the public network. This will create a rule for XAMPP in your security system.
In the final stage of installation, you will see a checkbox that will start the XAMPP control panel. It will leave it checked and click the “Finish”.
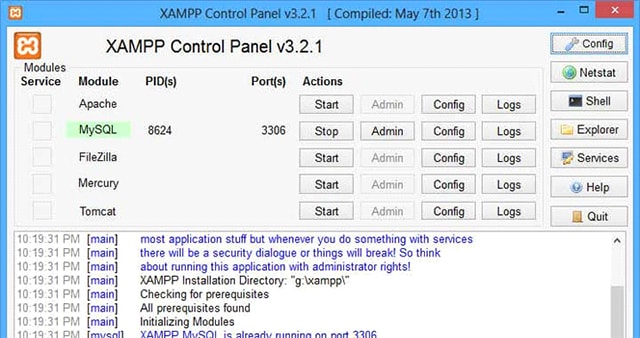
At this moment, the control panel will get started. You can also control panel from other programs or get it started from the directory where you installed it! In the end, the control panel will look like this –
Before you start using XAMPP, simply make sure that you don’t have any other application running on the system that is using the same ports. Skype is a very common example of this prospect. You can quit the applications that are running and restart the XAMPP.
Now take a look at the XAMPP control panel, you will find various components that are listed – Apache, FileZilla, MySQL, Mercury, and Tomcat. Every component will have a separate start/stop, configuration, admin, and logs button. Start up Apache and MySQL by clicking on the respective Start buttons. If they start successfully, you will notice a green light in the background, just behind the component names.
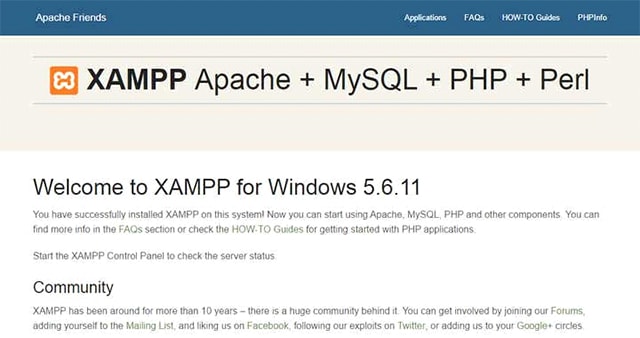
If both MySQL and Apache are running successfully, you can congratulate yourself. You have installed XAMPP successfully in your computer. To test the local server, open your favorite browser and enter the URL – http://localhost/
The page should look something like this:
DATABASE CREATION
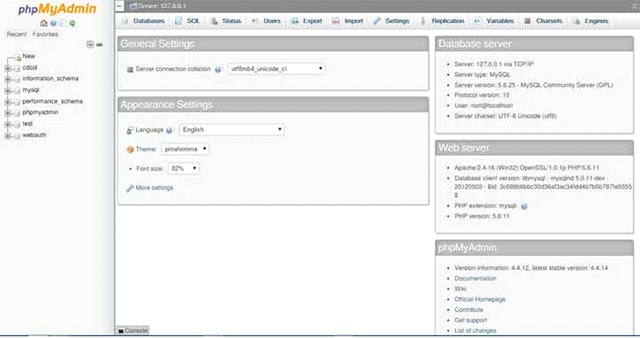
Now you can install XAMPP. It is time to learn how to install WordPress. The first step of installing WordPress is to create a database. To do that, you have to get back to the XAMPP control panel. Click on the ‘Admin’ link in the MySQL section.
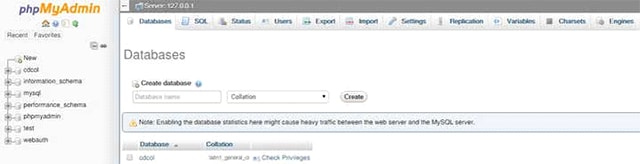
You will find a menu on the top of the page. Click “Databases” link and you will find a section named as “Create Database.” Write a database name and click “Create.” This will create a database for you!
HOW TO SETUP WORDPRESS ON XAMPP
Simply install WordPress on XAMPP, download the latest version of WordPress from the official site. From the zipped archive, extract the files to your desktop. Open the folder that you have installed XAMPP on and locate the folder named, “htdoc.” Now, copy the extracted WordPress folder into this htdocs folder. If you have not changed the default installation settings, then htdocs folder would be located at the following address.
C:/Program File/XAMPP/htdocs
Open the URL – http://localhost/wordpress/
When this screen will open, you will be asked to select the language. Choose your preferred language and then click on continue.
On the next screen, you will see some information that is needed to properly install the WordPress. Here are things that you will need:
- Database Name
- Database Password
- Database Username
- Database Host

You might not know all the information at this point. Don’t worry about this aspect – here is all the information that you can add:
- Database Name – Write the name of database you want to create.
- Database Password – clear any default text in this field and don’t write anything.
- Database Username – root
- Database Host – localhost
Once you are provided will all the necessary information, you can click “submit.” In the next page, you can click the “run the install” button. You will be taken to a page like the following –
In the “Site Title” field, you can get the title of the test site. Then the “username” and “password” fields will allow you to set up your admin account. This is the information you will require to successfully login to your website.
Check out your “e-mail field” and enter an email address. Lastly, the privacy could be used to completely hide the site from any search engine. If everything remains okay, you can provide a success page. Click on the login button at the bottom and enter the backend of the website.
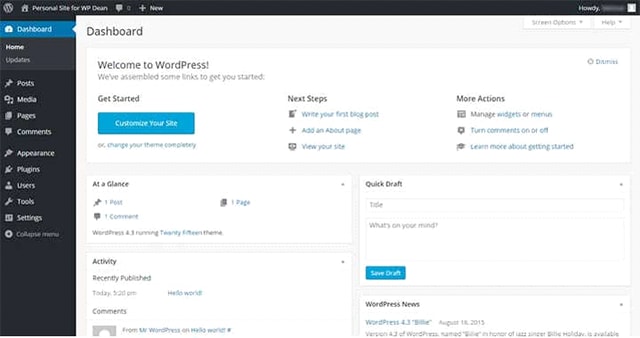
This will take you to the login page of your website. Here you can add username and password, and then click “log in.” If they are correct, you will then take the admin to the dashboard of your WordPress site.
Now you can view your dashboard, which indicates that WordPress is successfully installed.
EXPLORE AVAILABLE OPTIONS
Now that you have successfully installed WordPress on localhost XAMPP, you can start exploring new and available options. You can now install new themes, publish posts, pages, and plugin.
A WordPress site in localhost and on a live server are the same thing, apart from the difference in their locations. It is possible to create a functional website on your localhost, and then move the site to your hosting.
INSTALL WP BLOGS USING XAMPP
If you want to create multiple blog installations on WordPress on your computer, then there are two ways to accomplish that:
– Using WordPress multisite.
– By installing Wordpress in different folders.
In the end, softwares like XAMPP provide a simple and easy way to set up local servers on your computer; to test various applications in it with ease. You can use XAMPP to install WordPress on your computer, which saves a lot of time in the entire development process.
This is a very simple and easy process that will help you make the right choices in respect with your website.
If you liked this article, you might also consider reading:
1 Comment on “How To Install WordPress In Xampp Locally”
This was extremely useful and easy to understand, thanks!